Remote Start Installation
#1
 07-07-2008, 06:41 AM


DIY Done by Kevin (90Civtegra)
Install of a Python 1400 Remote Start with keyless entry on a 2007 Honda Civic Si with manual transmission
If you are the person you are doing the install for is in the habit of parking their car in gear I do not recommend install a remote start on your/their vehicle. Serious injury and/or damage can result from a vehicle being left in gear and then remote started.

First things first, get your wiring schematics! Best place online I've found to get your schematics is www.the12volt.com
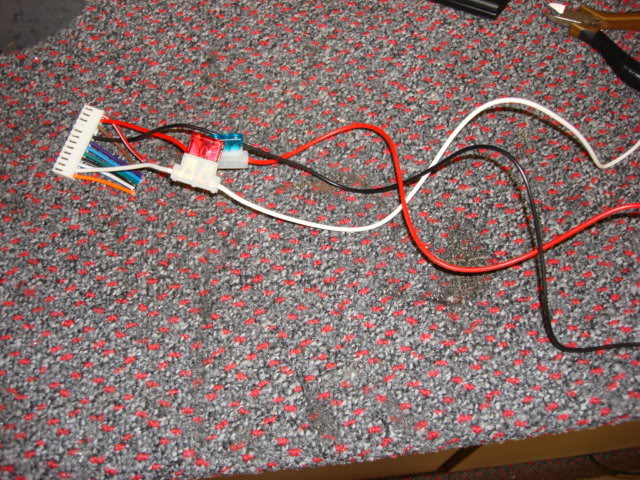
Now start by prepping your remote start module.
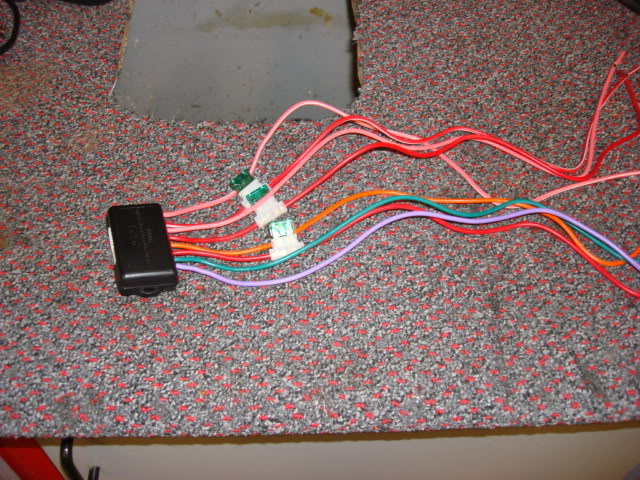
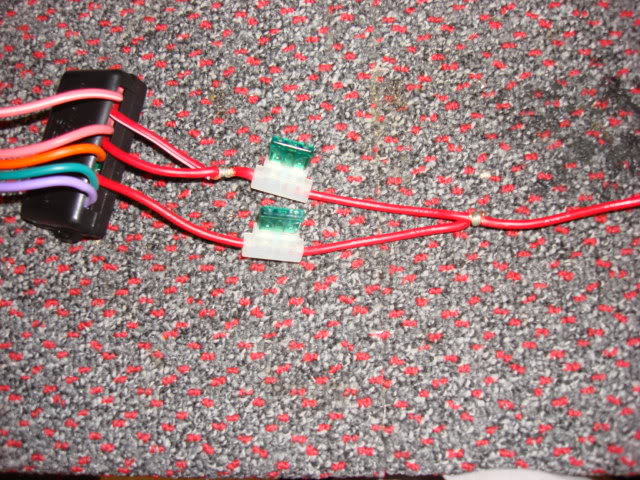
Take all three constant 12 volt wires (the 2 red wires and the red/white wire) and splice and solder them together. I keep 2 out of the 3 fuse holders and put the wire without the fuse holder behind the fuse holder of one of the other 12 volt wires. This way all three wires remain fused but don't take up as much space.
Now prep your main harness (H1 harness). Since DEI (Directed Electronics Inc.) uses the same harness for majority of their alarms and remote starts, you will not need any of these wires except for 3 of them. The rest of the wires are for alarm systems.
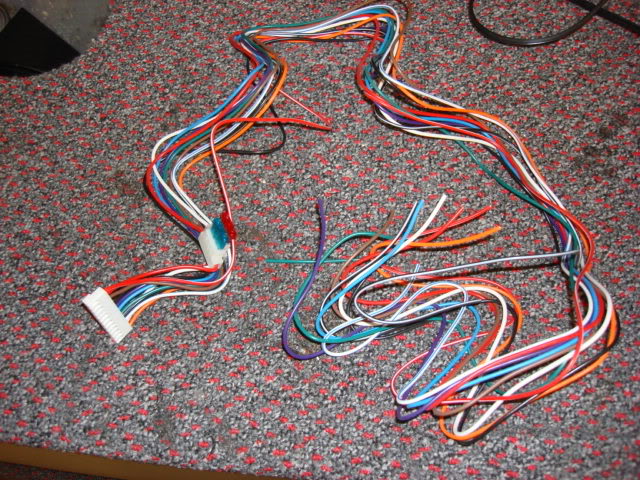
You will only need the red wire (another constant 12 volt wire), the black wire (ground), and the white wire (parking lights).
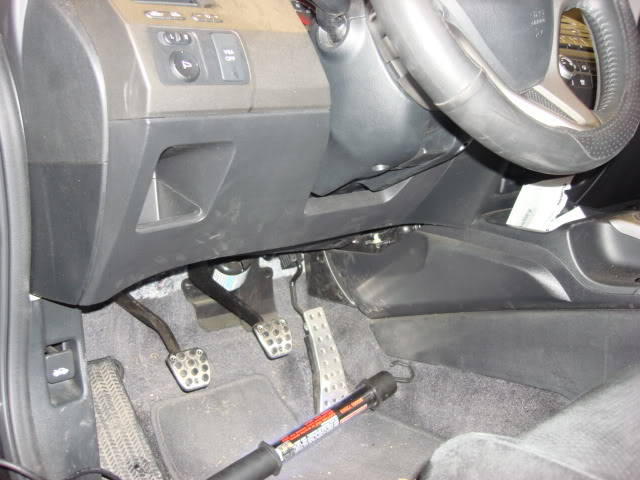
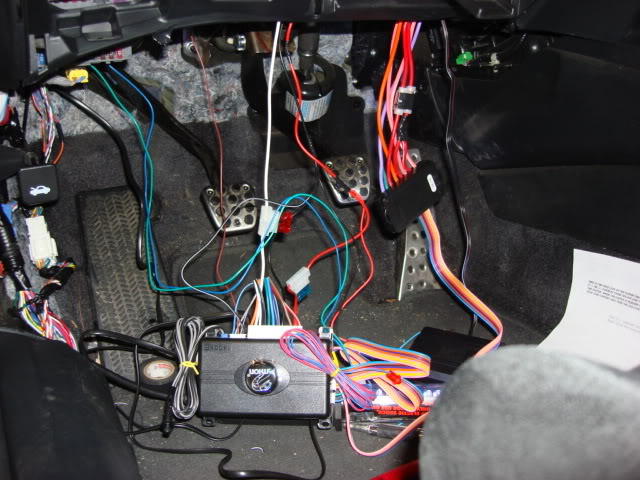
OK now we go to the vehicle. First start by taking off your knee bolster panel, the plastic panel above the pedals, and the steering column shrouds.
Since this vehicle is equipped with a manual transmission, first you will have to bypass the clutch switch so the clutch pedal does not have to be pressed for the vehicle to start.
Again do not do this install if you are in the habit of leaving your vehicle in gear!!! I don't want to hear about your car crashing into your parents garage door, running over your neighbors cat, or something even worse!!!
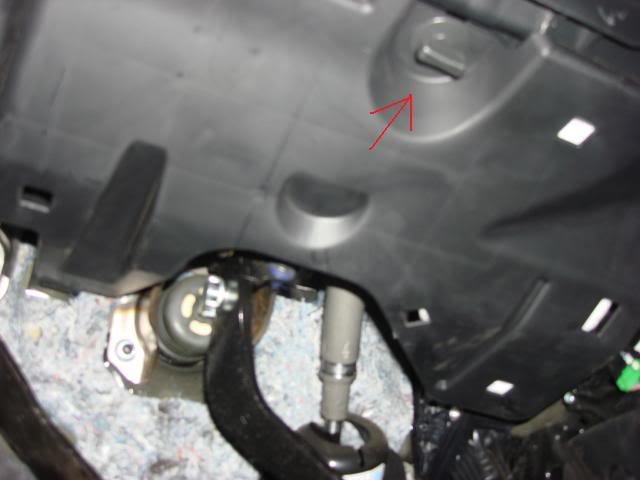
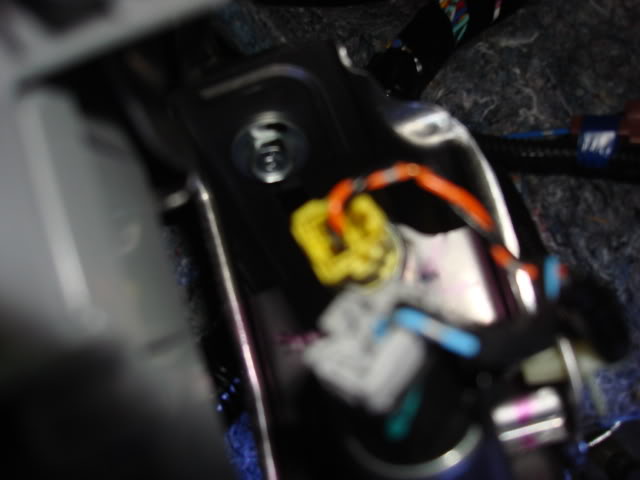
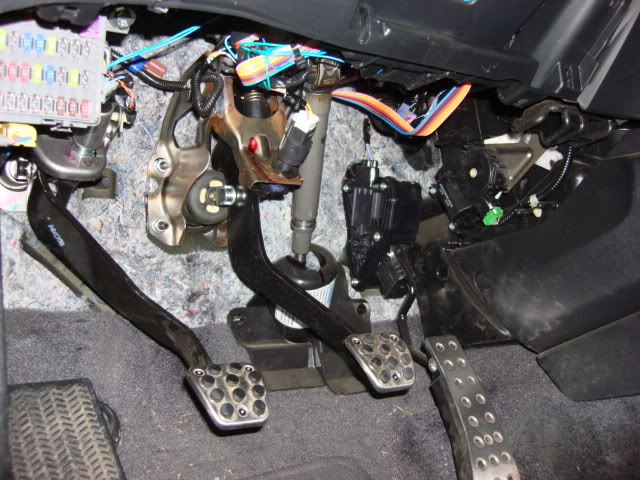
Here is the clutch switches. Notice that there are two of them. One is for starting the vehicle, the other is for cruise control. The only one you need to worry about the top one with the yellow connector.
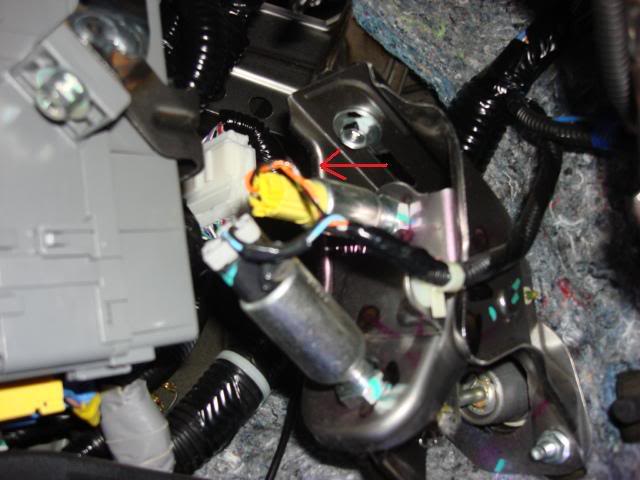
Since these are negative wires all that you need to do to bypass the switch is side strip both wires coming out of the connector and twist the two wires together. This gives the computer the signal that the clutch pedal is pushed in and allows the vehicle to start.
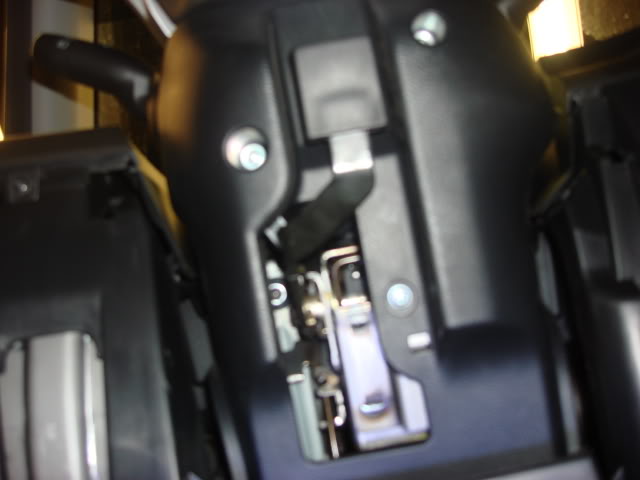
Now time to install the remote start module. If you look below the ignition cylinder you will see a connector with 6 heavy gauge wires. These are your ignition wires. Now is time to get yourself the multimeter out.
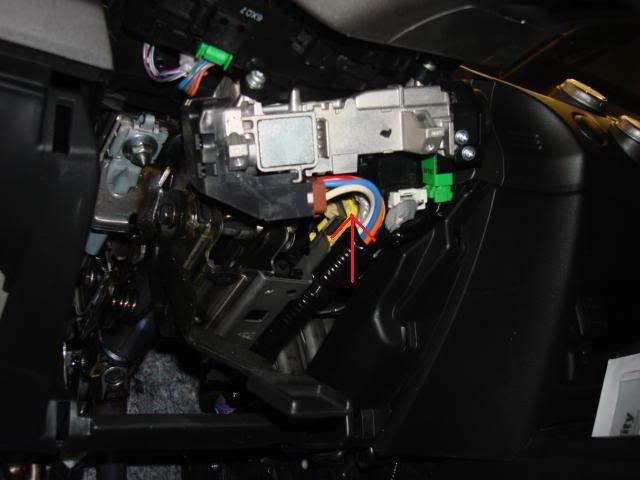
Never trust your schematics, always test your wires before making connections. use your schematics as a reference only!
Here's how your wires will test:
12Volt - Constant 12volts with the key off and out of the ignition cylinder.
Accessory - 12volts with the key on and drops to 0 volts during crank.
Ignition - 12 volts with the key on and holds 10 - 12 volts during crank.
Starter - Only sees 12 volts during crank
Now that you have tested and determined which ignition wires are which. Make your connections to your remote start module.
Red - 12 volts
Pink - Ignition
Pink/White - Ignition 2 (can also be programmed for Accessory 2)
Orange - Accessory
Green - Starter (key side)*
Purple - Starter (motor side)
* - You do not have to use the green wire if you are not comfortable cutting your starter wire. Although if you do not cut your starter wire and use the green wire the anti-grind feature will not function. The vehicle will still remote start by just side stripping your starter wire and connecting the purple wire. (This also applies to alarm systems with starter kill feature)
Now its time to install your H1 harness.
Connect your red wire to the same ignition wire you connected the red wire on the remote start module.
Find a good ground source to connect your black wire to.
Above the fuse panel in the MICU (Multiplex Integrated Control Unit) is a red wire which is your positive parking light wire. This is where you connect the white wire of your H1 harness.
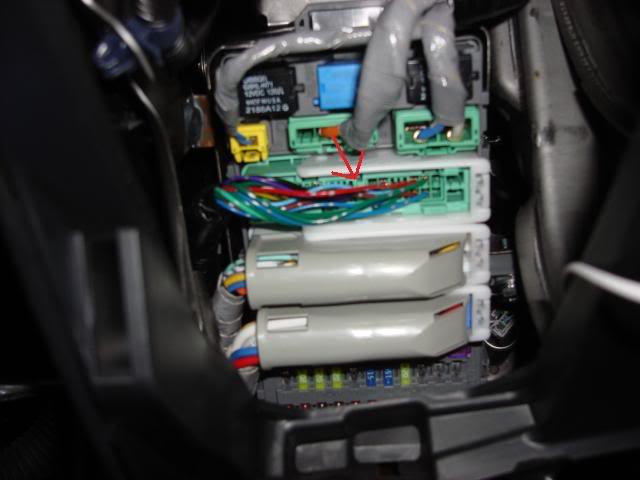
No time to do power locks. You can find these wires behind the fuse box coming out of the MICU. For DEI alarms/remote starts you will use the 2 wire green and blue harness for locks. If they are negative locks like the civic then green is lock and blue is unlock. If the locks are positive then blue is lock and green is unlock.
Connect your lock and unlock wires here:
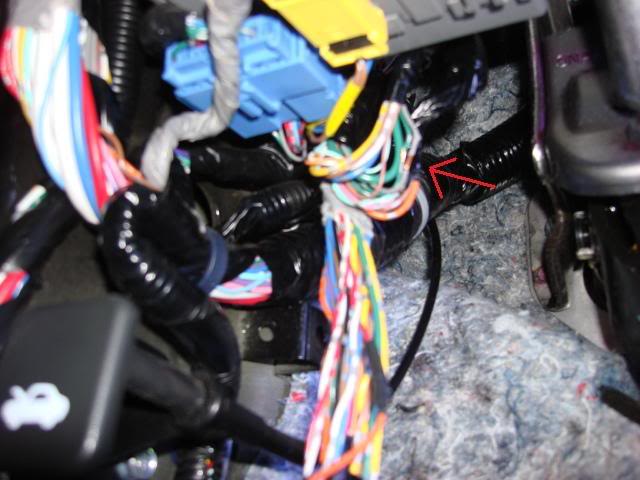
When testing a wire that is a negative signal the wire will show voltage while at rest and drop voltage when activated. So when testing your lock wires your meter should drop voltage while holding either lock or unlock. The wires can rest at as little as 1 - 5 volts and only show as little as a .4 - 1 volt drop. A good way to test your lock/unlock wire when you think you found them since they are negative is to ground the wire with a piece of solder and if it is a lock wire then the locks will either lock or unlock when you ground it out depending which wire you are grounding.
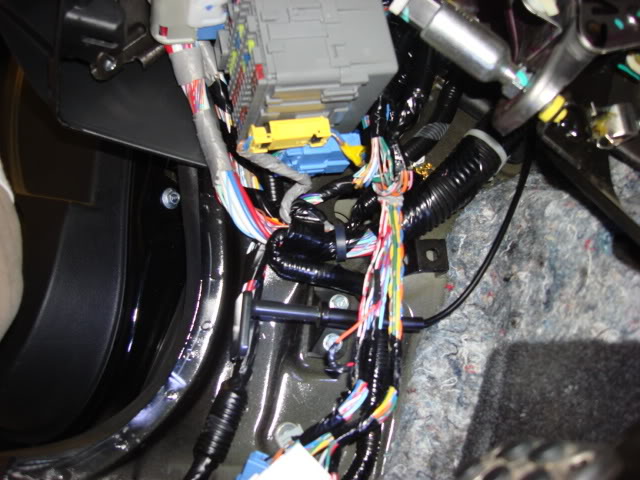
Now time for the remote start harness. (Sorry I forgot a picture of this harness) It is 5 pin harness. (Blue, Gray, Brown, Black/White, and Purple)
Blue wire - Connect this wire to your bypass (if needed)
This vehicle is equipped with a transponder key so I had to install a DEI transponder key bypass to allow the vehicle to be remote started. PM me if you need help installing a bypass to your remote start.
Gray wire - Hood pin wire. This is optional. I do not use this wire
Black/White - Neutral Safety Switch. Simply ground this wire with your black H1 harness wire.
Brown - Brake switch wire. Connect this wire to the wire at your brake light switch that sees 12 volts only while the brake pedal is pushed in.
Purple wire - Tachometer signal. This is optional. I usually do not use this wire unless its an older vehicle that may have problems starting. If you do use it, connect it to your RPM (tachometer) wire which is an AC wire not a DC wire. If you do not use this wire, program the remote start after completing install to engine check off.
This particular vehicle has a factory alarm which will go off if not disarmed before remote starting. Two ways of accomplishing this:
1: Use the factory key FOB to unlock the doors, then remote start it, then re lock doors.
2: Hook up the factory disarm wire to the remote start brain. This is on the aux harness (sorry again I didn't get pics). You will find the factory disarm wire in the driver kick panel behind the MICU. The wire rest at voltage and drops voltage when turning the key to unlock in the driver side door key cylinder.
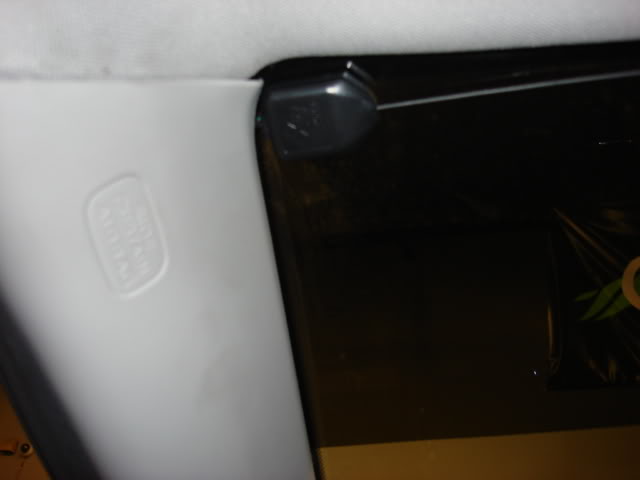
Now run your antenna. I usually mount the antenna in the top left side of the windshield for best range.
Now just run your ribbon harness from the remote start module to the brain and everything is hooked up and looking like a mess lol.
Read your remote start installation manual for programming.
(Remember if you did not use a tach wire you need to program the remote start engine check to OFF!)
Now test everything make sure everything works and then trying zip tie and hide everything as neatly as possible to behind the knee bolster. Then put all your panels back on and your done with a remote start install.
PM me with any questions~!
Install of a Python 1400 Remote Start with keyless entry on a 2007 Honda Civic Si with manual transmission
If you are the person you are doing the install for is in the habit of parking their car in gear I do not recommend install a remote start on your/their vehicle. Serious injury and/or damage can result from a vehicle being left in gear and then remote started.
First things first, get your wiring schematics! Best place online I've found to get your schematics is www.the12volt.com
Now start by prepping your remote start module.
Take all three constant 12 volt wires (the 2 red wires and the red/white wire) and splice and solder them together. I keep 2 out of the 3 fuse holders and put the wire without the fuse holder behind the fuse holder of one of the other 12 volt wires. This way all three wires remain fused but don't take up as much space.
Now prep your main harness (H1 harness). Since DEI (Directed Electronics Inc.) uses the same harness for majority of their alarms and remote starts, you will not need any of these wires except for 3 of them. The rest of the wires are for alarm systems.
You will only need the red wire (another constant 12 volt wire), the black wire (ground), and the white wire (parking lights).
OK now we go to the vehicle. First start by taking off your knee bolster panel, the plastic panel above the pedals, and the steering column shrouds.
Since this vehicle is equipped with a manual transmission, first you will have to bypass the clutch switch so the clutch pedal does not have to be pressed for the vehicle to start.
Again do not do this install if you are in the habit of leaving your vehicle in gear!!! I don't want to hear about your car crashing into your parents garage door, running over your neighbors cat, or something even worse!!!
Here is the clutch switches. Notice that there are two of them. One is for starting the vehicle, the other is for cruise control. The only one you need to worry about the top one with the yellow connector.
Since these are negative wires all that you need to do to bypass the switch is side strip both wires coming out of the connector and twist the two wires together. This gives the computer the signal that the clutch pedal is pushed in and allows the vehicle to start.
Now time to install the remote start module. If you look below the ignition cylinder you will see a connector with 6 heavy gauge wires. These are your ignition wires. Now is time to get yourself the multimeter out.
Never trust your schematics, always test your wires before making connections. use your schematics as a reference only!
Here's how your wires will test:
12Volt - Constant 12volts with the key off and out of the ignition cylinder.
Accessory - 12volts with the key on and drops to 0 volts during crank.
Ignition - 12 volts with the key on and holds 10 - 12 volts during crank.
Starter - Only sees 12 volts during crank
Now that you have tested and determined which ignition wires are which. Make your connections to your remote start module.
Red - 12 volts
Pink - Ignition
Pink/White - Ignition 2 (can also be programmed for Accessory 2)
Orange - Accessory
Green - Starter (key side)*
Purple - Starter (motor side)
* - You do not have to use the green wire if you are not comfortable cutting your starter wire. Although if you do not cut your starter wire and use the green wire the anti-grind feature will not function. The vehicle will still remote start by just side stripping your starter wire and connecting the purple wire. (This also applies to alarm systems with starter kill feature)
Now its time to install your H1 harness.
Connect your red wire to the same ignition wire you connected the red wire on the remote start module.
Find a good ground source to connect your black wire to.
Above the fuse panel in the MICU (Multiplex Integrated Control Unit) is a red wire which is your positive parking light wire. This is where you connect the white wire of your H1 harness.
No time to do power locks. You can find these wires behind the fuse box coming out of the MICU. For DEI alarms/remote starts you will use the 2 wire green and blue harness for locks. If they are negative locks like the civic then green is lock and blue is unlock. If the locks are positive then blue is lock and green is unlock.
Connect your lock and unlock wires here:
When testing a wire that is a negative signal the wire will show voltage while at rest and drop voltage when activated. So when testing your lock wires your meter should drop voltage while holding either lock or unlock. The wires can rest at as little as 1 - 5 volts and only show as little as a .4 - 1 volt drop. A good way to test your lock/unlock wire when you think you found them since they are negative is to ground the wire with a piece of solder and if it is a lock wire then the locks will either lock or unlock when you ground it out depending which wire you are grounding.
Now time for the remote start harness. (Sorry I forgot a picture of this harness) It is 5 pin harness. (Blue, Gray, Brown, Black/White, and Purple)
Blue wire - Connect this wire to your bypass (if needed)
This vehicle is equipped with a transponder key so I had to install a DEI transponder key bypass to allow the vehicle to be remote started. PM me if you need help installing a bypass to your remote start.
Gray wire - Hood pin wire. This is optional. I do not use this wire
Black/White - Neutral Safety Switch. Simply ground this wire with your black H1 harness wire.
Brown - Brake switch wire. Connect this wire to the wire at your brake light switch that sees 12 volts only while the brake pedal is pushed in.
Purple wire - Tachometer signal. This is optional. I usually do not use this wire unless its an older vehicle that may have problems starting. If you do use it, connect it to your RPM (tachometer) wire which is an AC wire not a DC wire. If you do not use this wire, program the remote start after completing install to engine check off.
This particular vehicle has a factory alarm which will go off if not disarmed before remote starting. Two ways of accomplishing this:
1: Use the factory key FOB to unlock the doors, then remote start it, then re lock doors.
2: Hook up the factory disarm wire to the remote start brain. This is on the aux harness (sorry again I didn't get pics). You will find the factory disarm wire in the driver kick panel behind the MICU. The wire rest at voltage and drops voltage when turning the key to unlock in the driver side door key cylinder.
Now run your antenna. I usually mount the antenna in the top left side of the windshield for best range.
Now just run your ribbon harness from the remote start module to the brain and everything is hooked up and looking like a mess lol.
Read your remote start installation manual for programming.
(Remember if you did not use a tach wire you need to program the remote start engine check to OFF!)
Now test everything make sure everything works and then trying zip tie and hide everything as neatly as possible to behind the knee bolster. Then put all your panels back on and your done with a remote start install.
PM me with any questions~!

Thread
Thread Starter
Forum
Replies
Last Post
zerojett
Mechanical Problems & Technical Chat
1
09-24-2012 12:55 AM
dwalsh77
Mechanical Problems & Technical Chat
3
10-11-2011 07:00 AM
HMBMOTORING
PRIVATE For Sale / Trade Classifieds
0
10-13-2005 12:47 PM