Header Installation
#1
 10-05-2007, 03:10 PM


Megan Racing 4-2-1 Header Install by asdfbrendan
I performed this header swap on a '98 Civic HX (D16Y5), but the basic premise should be the same for any model. Aside from my SRI (short ram intake), this was my first real "under the car with a wrench" modification. It's written from a n00b's perspective (since I am one) and I hope all you first timers find it helpful.
First, let's go down the checklist of items/tools you are going to need for this project.
A repair manual of some sort (Hayne's, Chilton, etc). This is going to tell you what size all the nuts/bolts are, where they are, if they should be replaced, etc. Having a reference diagram makes this process a whole lot easier.
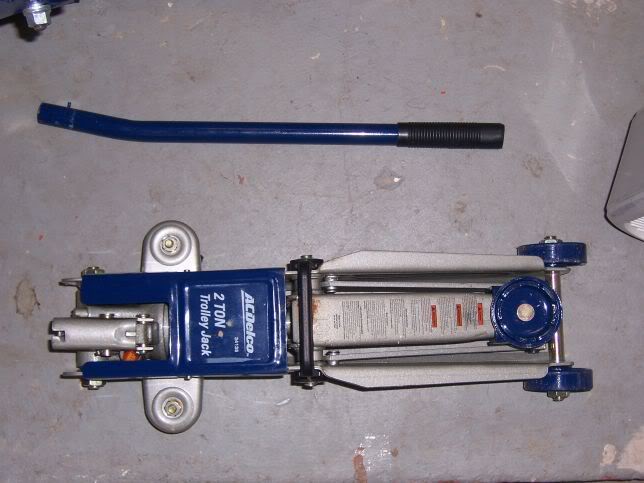
A reliable floor jack. I got an AC-Delco 2-ton floor jack from O'Reilly auto parts for about $30 bucks. Using a scissor-jack is NOT recommended. They are cheap, and designed for emergency tire changing situations. I've heard they can slip out from under your car, so why risk it?
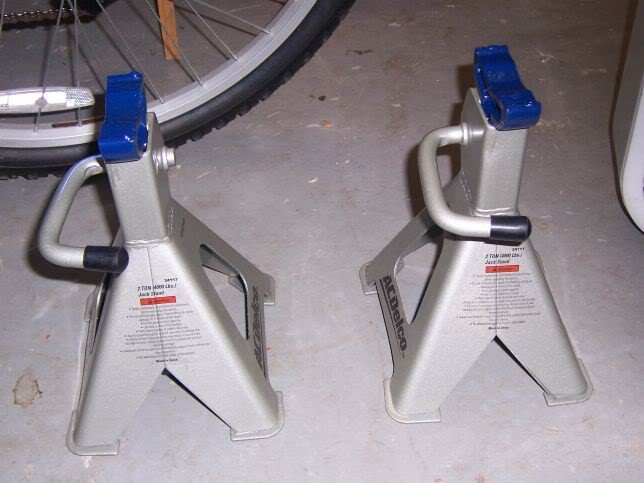
Reliable jack stands. Again, I went to O'Reilly and got a pair of 2-ton AC-Delco jack stands for $30. I wouldn't try and save money when it comes to the jack stands. These things are going to be supporting the weight of a car (with you under it), so don't get something cheap. The AC-Delco's were heavy and felt very well made. Make sure you check the stands for cracks and defects before you put any weight on them.
Penetrating oil. Again, went to O'Reilly to see what they had on the shelf. There were a few different brands, but the guy at the store recommended PB. Seems to be the one everyone else recommends, too. A can costs a few bucks and will last through many projects.
Wheel chocks. These will keep whichever set of wheels is still on the ground from rolling. Some people might think this is overkill, but I don't feel that way when I've got 2 tons of steel over my head. These don't need to be over-engineered, just something to keep the tires from slipping. I built some using some spare wood, but you can also purchase them.

Various tools. This is going to vary based on your model of Civic, but this should give you a pretty good idea of what you'll need. Socket wrench (both short and long-handled will help), torque wrench (to tighten bolts to spec), cheater bar (long piece of metal that fits over wrench handle to give you more leverage and break stuck bolts free), open ended wrench(s), flashlight/shop light, gloves (mechanic, bicycling, or batting, these will really save your hands...I got a nice big nasty cut on my hand on the very first bolt I took off), and something to rest your head on under the car. I got a headache pretty quick when I was resting my head directly on the garage floor.
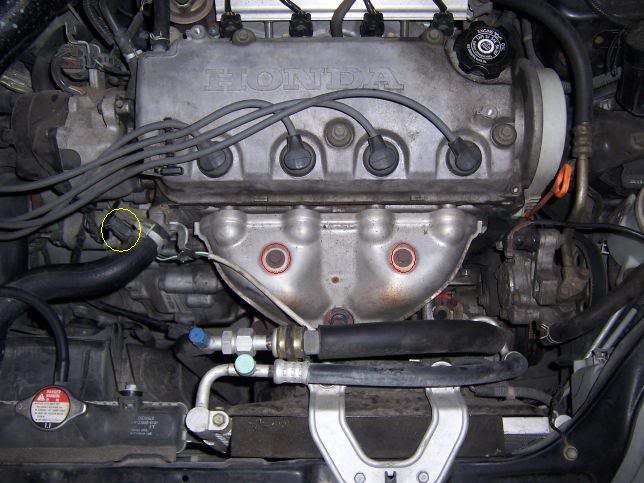
The next thing we'll do is remove everything that doesn't require getting under the car. This will consist of the heat shield and the bolts (red) connecting the header to the engine block. Go ahead and spray any rusted bolts with PB and let them soak for a few minutes. Unhook the O2 sensor harness (yellow) from the O2 sensor. This will allow you to remove the heat shield without removing the O2 sensor (which we will do later). After unhooking the harness, remove the 2 bolts on the heat shield and slide it over the O2 senor/wiring.
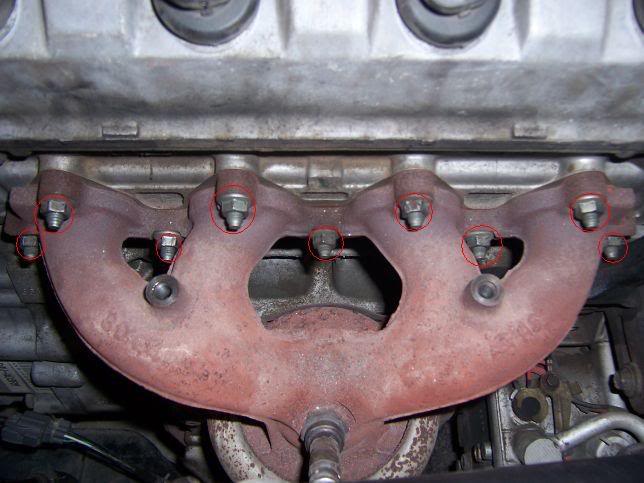
Now that we've removed the heat shield, we can remove the 9 main header bolts. This will probably require your cheater bar and both large and small socket wrench (some of the bolts are kind of hard to get to). There are still 4 bolts on the lower portion of the header, so don't worry about it falling off.
The next step is to jack the car up. Make sure the car is in park, you have the parking break on, and your wheel chocks are in place. Now use the floor jack to raise the front end of the car. Consult your manual for the proper jacking point. On my car, there was a little metal billet just off center to the right, near the front end. Make sure you are jacking up your car on a LEVEL surface!
Once your car is at the desired height, you can place the jack stands under the car. Once again, consult your manual for the correct placement of jack stands. On my car, there were metal "fins" just to the rear of the front wheels. This is where I placed my jack stands. Make sure your jack stands are on a LEVEL surface! With your jack stands in place, slowly release the pressure on the floor jack.With the weight of the car resting on the stands, go ahead and give the car a good shake to make sure it's stable. My car was a solid as a rock, so if you do it correctly, there shouldn't be any movement. Slide under and enjoy!
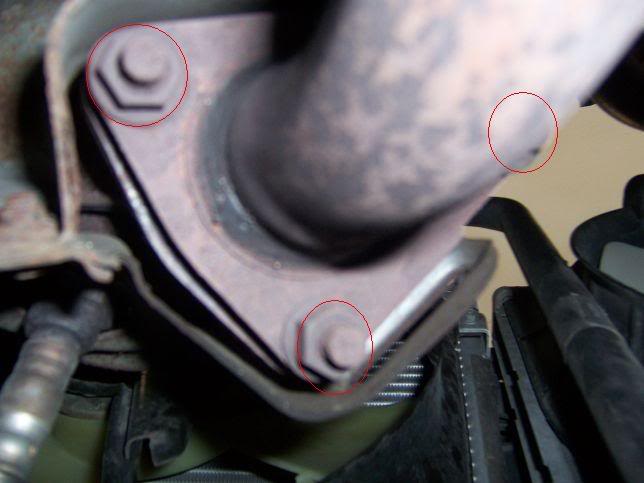
The first piece we will be removing is the downpipe. This is the piece that connects the header to the rest of the exhaust system. The design of this piece will vary based on the model of your Civic. In my case, my cat (catalytic converter) is built into the header itself. So my downpipe is just a tube, no cat. The downpipe is connected to the header with 3 bolts, a mounting bracket with 2 bolts, and the rest of the exhaust with 2 spring bolts. (NOTE: There is also a bolt securing the header to the engine itself. We will remove this later.) Now, remove the 3 bolts on the downpipe closest to the engine (Don't forget about your PB).
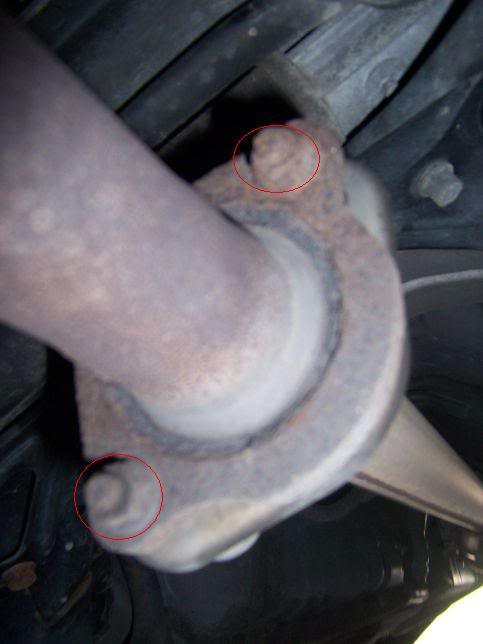
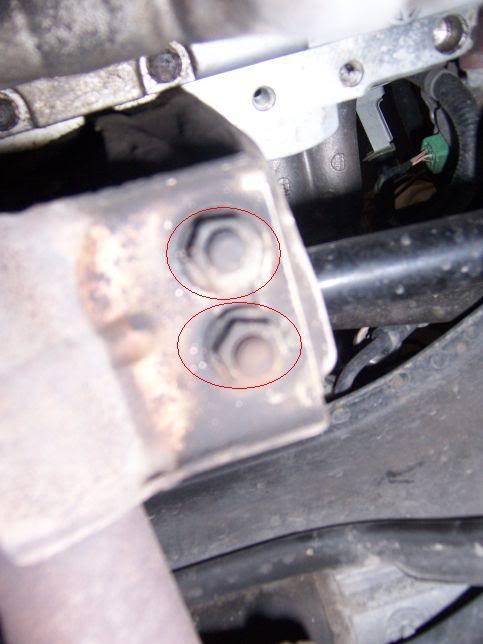
Now we'll remove the 2 spring bolts. These things were particularly hard to get off and I had to hose them down with PB several times. The secret to getting these 2 bolts off is having 2 socket wrenches, and twisting in opposite directions (one on the bolt, and one on the nut). This will cause you to remove the bolt and the nut at the same time. Oh, and be prepared to REALLY twist these mothers, cause they could be rusty as hell. Once you've removed the 2 spring bolts, remove the two bolts on the mounting bracket near the middle of the downpipe. Now that you've removed all 7 bolts, take out the downpipe.
Now that the downpipe is out of the way, we can remove the last bolt securing the header to the engine. I don't have a picture, but its right by the group of 3 bolts that connected the downpipe to the header. Also, don't forget to unhook the second O2 sensor harness located towards the bottom of the header. Once you've removed the bolt, you can lift the header up and out of the engine compartment.
[IMG]http://i208.photobucket.com/albums/bb25/asdfbrendan/block-n.jpg
I performed this header swap on a '98 Civic HX (D16Y5), but the basic premise should be the same for any model. Aside from my SRI (short ram intake), this was my first real "under the car with a wrench" modification. It's written from a n00b's perspective (since I am one) and I hope all you first timers find it helpful.
First, let's go down the checklist of items/tools you are going to need for this project.
A repair manual of some sort (Hayne's, Chilton, etc). This is going to tell you what size all the nuts/bolts are, where they are, if they should be replaced, etc. Having a reference diagram makes this process a whole lot easier.
A reliable floor jack. I got an AC-Delco 2-ton floor jack from O'Reilly auto parts for about $30 bucks. Using a scissor-jack is NOT recommended. They are cheap, and designed for emergency tire changing situations. I've heard they can slip out from under your car, so why risk it?
Reliable jack stands. Again, I went to O'Reilly and got a pair of 2-ton AC-Delco jack stands for $30. I wouldn't try and save money when it comes to the jack stands. These things are going to be supporting the weight of a car (with you under it), so don't get something cheap. The AC-Delco's were heavy and felt very well made. Make sure you check the stands for cracks and defects before you put any weight on them.
Penetrating oil. Again, went to O'Reilly to see what they had on the shelf. There were a few different brands, but the guy at the store recommended PB. Seems to be the one everyone else recommends, too. A can costs a few bucks and will last through many projects.
Wheel chocks. These will keep whichever set of wheels is still on the ground from rolling. Some people might think this is overkill, but I don't feel that way when I've got 2 tons of steel over my head. These don't need to be over-engineered, just something to keep the tires from slipping. I built some using some spare wood, but you can also purchase them.
Various tools. This is going to vary based on your model of Civic, but this should give you a pretty good idea of what you'll need. Socket wrench (both short and long-handled will help), torque wrench (to tighten bolts to spec), cheater bar (long piece of metal that fits over wrench handle to give you more leverage and break stuck bolts free), open ended wrench(s), flashlight/shop light, gloves (mechanic, bicycling, or batting, these will really save your hands...I got a nice big nasty cut on my hand on the very first bolt I took off), and something to rest your head on under the car. I got a headache pretty quick when I was resting my head directly on the garage floor.
The next thing we'll do is remove everything that doesn't require getting under the car. This will consist of the heat shield and the bolts (red) connecting the header to the engine block. Go ahead and spray any rusted bolts with PB and let them soak for a few minutes. Unhook the O2 sensor harness (yellow) from the O2 sensor. This will allow you to remove the heat shield without removing the O2 sensor (which we will do later). After unhooking the harness, remove the 2 bolts on the heat shield and slide it over the O2 senor/wiring.
Now that we've removed the heat shield, we can remove the 9 main header bolts. This will probably require your cheater bar and both large and small socket wrench (some of the bolts are kind of hard to get to). There are still 4 bolts on the lower portion of the header, so don't worry about it falling off.
The next step is to jack the car up. Make sure the car is in park, you have the parking break on, and your wheel chocks are in place. Now use the floor jack to raise the front end of the car. Consult your manual for the proper jacking point. On my car, there was a little metal billet just off center to the right, near the front end. Make sure you are jacking up your car on a LEVEL surface!
Once your car is at the desired height, you can place the jack stands under the car. Once again, consult your manual for the correct placement of jack stands. On my car, there were metal "fins" just to the rear of the front wheels. This is where I placed my jack stands. Make sure your jack stands are on a LEVEL surface! With your jack stands in place, slowly release the pressure on the floor jack.With the weight of the car resting on the stands, go ahead and give the car a good shake to make sure it's stable. My car was a solid as a rock, so if you do it correctly, there shouldn't be any movement. Slide under and enjoy!
The first piece we will be removing is the downpipe. This is the piece that connects the header to the rest of the exhaust system. The design of this piece will vary based on the model of your Civic. In my case, my cat (catalytic converter) is built into the header itself. So my downpipe is just a tube, no cat. The downpipe is connected to the header with 3 bolts, a mounting bracket with 2 bolts, and the rest of the exhaust with 2 spring bolts. (NOTE: There is also a bolt securing the header to the engine itself. We will remove this later.) Now, remove the 3 bolts on the downpipe closest to the engine (Don't forget about your PB).
Now we'll remove the 2 spring bolts. These things were particularly hard to get off and I had to hose them down with PB several times. The secret to getting these 2 bolts off is having 2 socket wrenches, and twisting in opposite directions (one on the bolt, and one on the nut). This will cause you to remove the bolt and the nut at the same time. Oh, and be prepared to REALLY twist these mothers, cause they could be rusty as hell. Once you've removed the 2 spring bolts, remove the two bolts on the mounting bracket near the middle of the downpipe. Now that you've removed all 7 bolts, take out the downpipe.
Now that the downpipe is out of the way, we can remove the last bolt securing the header to the engine. I don't have a picture, but its right by the group of 3 bolts that connected the downpipe to the header. Also, don't forget to unhook the second O2 sensor harness located towards the bottom of the header. Once you've removed the bolt, you can lift the header up and out of the engine compartment.
[IMG]http://i208.photobucket.com/albums/bb25/asdfbrendan/block-n.jpg
Last edited by WellFedHobo; 02-19-2010 at 08:20 AM. Reason: Started to fix then realized half is gone

Thread
Thread Starter
Forum
Replies
Last Post
curlybandit
Header, Intake, & Exhaust
1
07-18-2007 01:25 PM
Jimmywah
Header, Intake, & Exhaust
2
07-10-2006 02:35 AM