Solid Torque Mounts
#1
 01-24-2010, 08:50 AM


1. Why would you want to do this?
Less engine movement when taking off from a dig/shifting = smoother/etc. Also, you won't have to worry about the mounts having to be replaced for a loooong time as they would now be solid polyurethane.
2. How long does this take?
Actual working time = about 60 minutes
Waiting for stuff to dry time = about 4-5 days
3. Precautions?
Wear rubber gloves (see bottom). Don't beat on your car like crazy when the torque mounts are out.
4. What's needed?
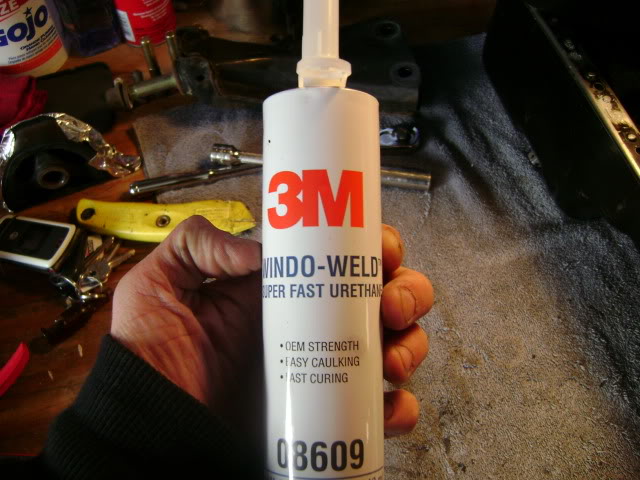
Assorted sizes sockets (12mm, 14mm, and 17mm...if I remember correctly); socket wrench; socket wrench extensions; 3M Window Weld; some sort of thick tape for the window weld to create a flat surface against...see below
Step 1 - Jack up the car and remove the stock mounts
Always use jack stands! Never trust the jack itself to hold the car up while you're under it!
Passenger Side
Starting with the passenger side, remove the three bolts holding the tranny torque mount.
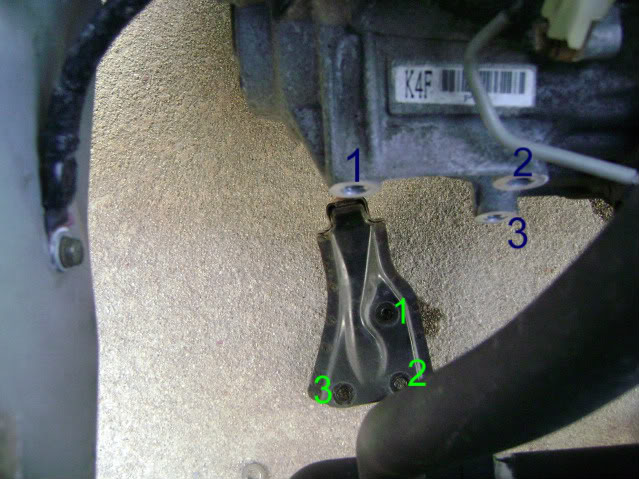
Now unbolt the torque mount.
Remove the nut holding the torque mount from the tranny mount. No pics, but it should be obvious.
Driver's Side
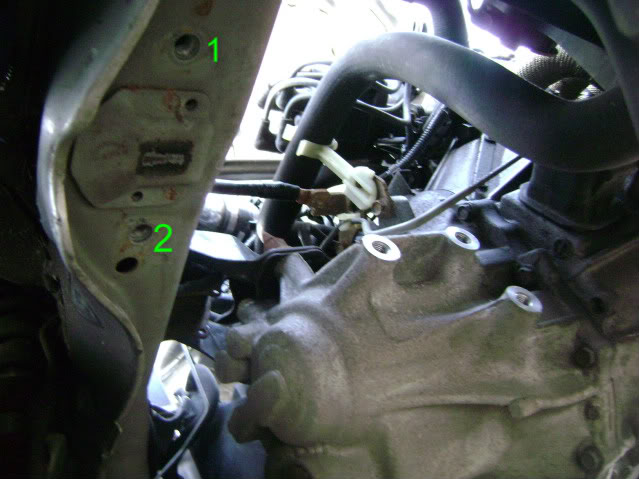
Similar to the passenger side, but easier IMO. Get under the car where the AC set-up is an look for a similar looking mount that you removed from the passenger side.
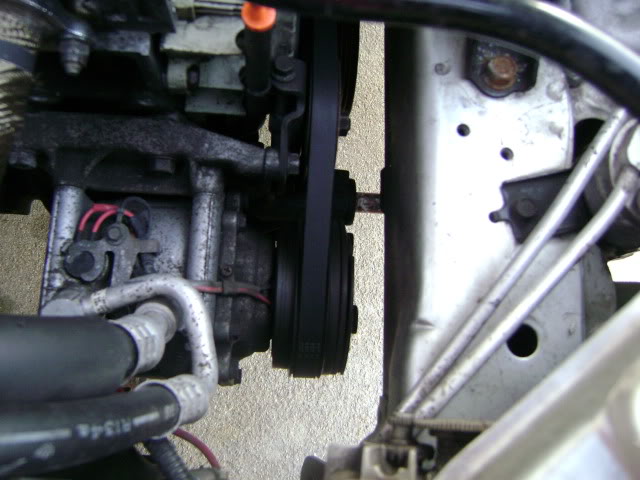
It should be right in front of the wheel. Remove the nut holding the mount onto the AC stuff, and then the two bolts holding the mount to the chassis of the car.

Step 2 - Cleaning and Prep.
Now that the mounts are out, shave off the little extra pieces of the mounts to make it "smoother"
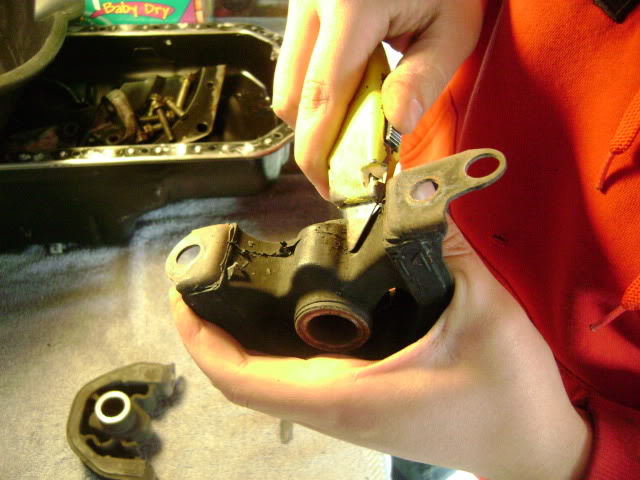
I'm glad I did this as my driver's side mount was 3/4 way to dead.
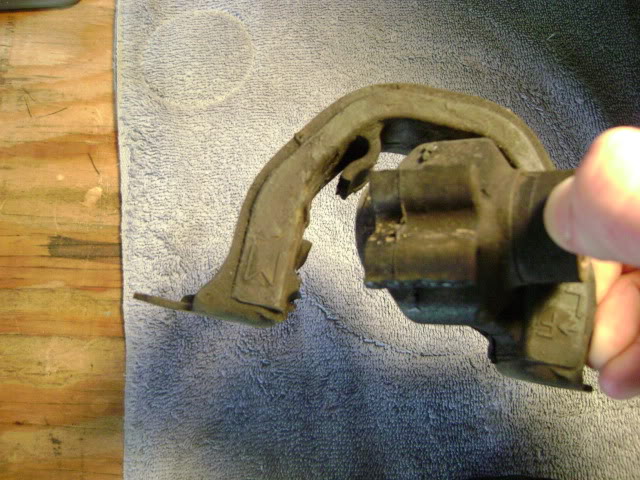
Luckily, I'll be able to salvage the mount. Just in time before I would have had to replace it entirely.
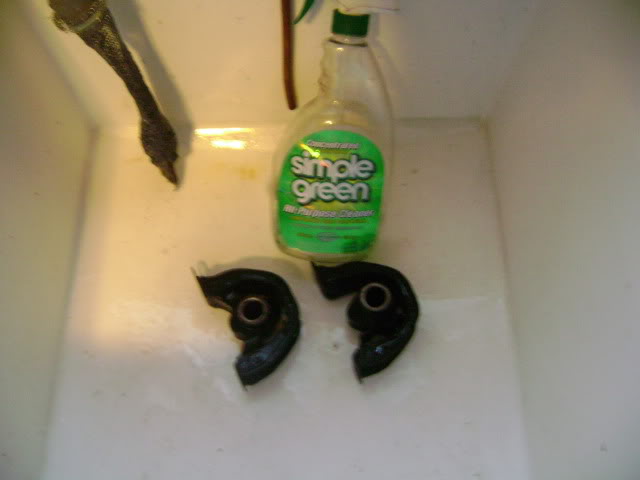
Now, wipe the mounts down to get all the salt/dirt/oil/grime out. Simple Green FTW!
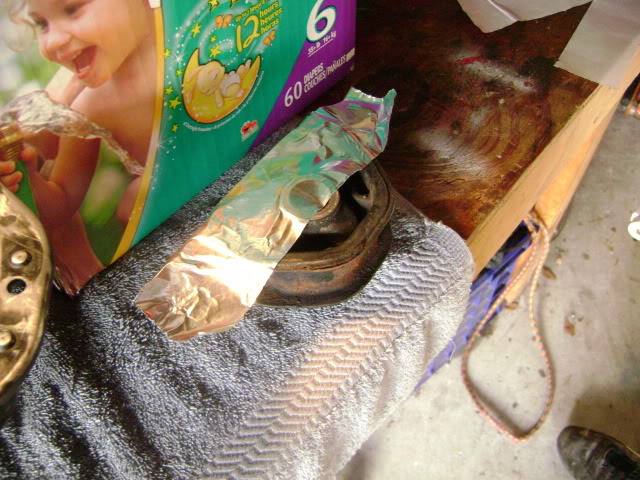
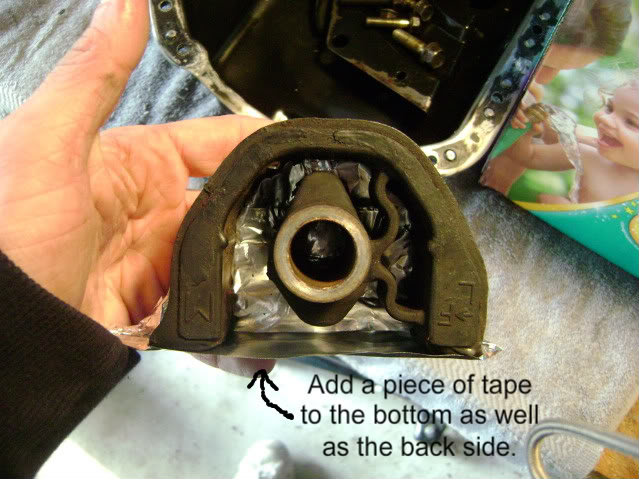
Get some duct tape/adhesive tin foil stuff and apply it to one side of the mounts. This will allow the polyurethane to form and retain it's shape while drying.


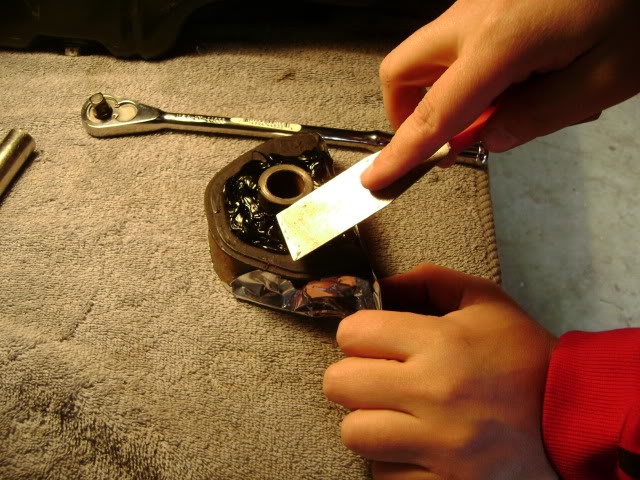
Step 3 - Filling the mounts
This is what I used. It is equivalent to 60A.
Begin filling the mounts, trying to eliminate any pockets of air from developing.
This is what is should look like:

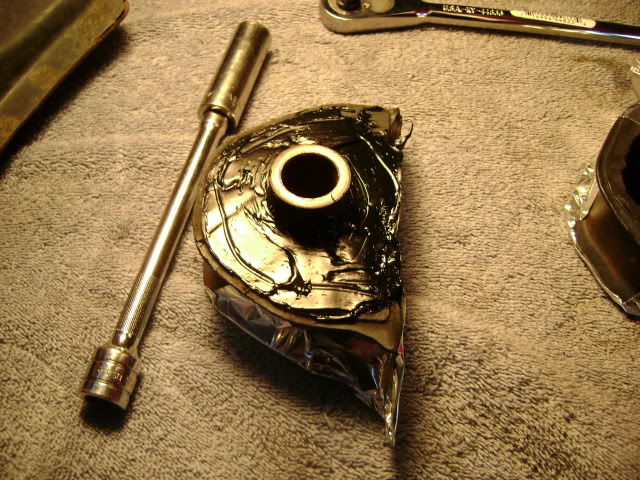
Now, get something that will make everything smooth and flatten out the polyurethane.
It should look something like this when you're finished.
Step 4 - Let dry and Re-install
Read the directions on the tube of polyurethane you used for specific drying directions. Mine said to allow for 36 hours for full curing, but I let them dry for 48 hours. After the 48 hours, I remove the tape on the backs and allow the other side (which wasn't exposed to air) to dry for 48 hours.
Re-Installation.......
- My passenger side slipped right on and I put all the bolts back where they were originally.
- For the driver side, I had to loosen the 2 bolts basically holding the engine to the motor mount on the driver side to allow the motor to "sag" down. Once it is down a little bit, slip the mount on the A/C bracket (where it was removed from), hand tighten the nut on the end, then tighten the engine mount bolts, raising the motor back up to it's proper position.
- Now, you have solid torque mounts for better/smoother shifting/less engine movement within the bay. Additionally, you won't have to worry about them cracking and having to replace them for a loooong time!
Remember to wear gloves! I usually don't think about stuff like this until it's too late. This is after scrubbing my hands with Gojo, Goop, and dish soap.

Hope this helps you guys!
Less engine movement when taking off from a dig/shifting = smoother/etc. Also, you won't have to worry about the mounts having to be replaced for a loooong time as they would now be solid polyurethane.
2. How long does this take?
Actual working time = about 60 minutes
Waiting for stuff to dry time = about 4-5 days
3. Precautions?
Wear rubber gloves (see bottom). Don't beat on your car like crazy when the torque mounts are out.
4. What's needed?
Assorted sizes sockets (12mm, 14mm, and 17mm...if I remember correctly); socket wrench; socket wrench extensions; 3M Window Weld; some sort of thick tape for the window weld to create a flat surface against...see below
Step 1 - Jack up the car and remove the stock mounts
Always use jack stands! Never trust the jack itself to hold the car up while you're under it!
Passenger Side
Starting with the passenger side, remove the three bolts holding the tranny torque mount.
Now unbolt the torque mount.
Remove the nut holding the torque mount from the tranny mount. No pics, but it should be obvious.
Driver's Side
Similar to the passenger side, but easier IMO. Get under the car where the AC set-up is an look for a similar looking mount that you removed from the passenger side.
It should be right in front of the wheel. Remove the nut holding the mount onto the AC stuff, and then the two bolts holding the mount to the chassis of the car.
Step 2 - Cleaning and Prep.
Now that the mounts are out, shave off the little extra pieces of the mounts to make it "smoother"
I'm glad I did this as my driver's side mount was 3/4 way to dead.
Luckily, I'll be able to salvage the mount. Just in time before I would have had to replace it entirely.
Now, wipe the mounts down to get all the salt/dirt/oil/grime out. Simple Green FTW!
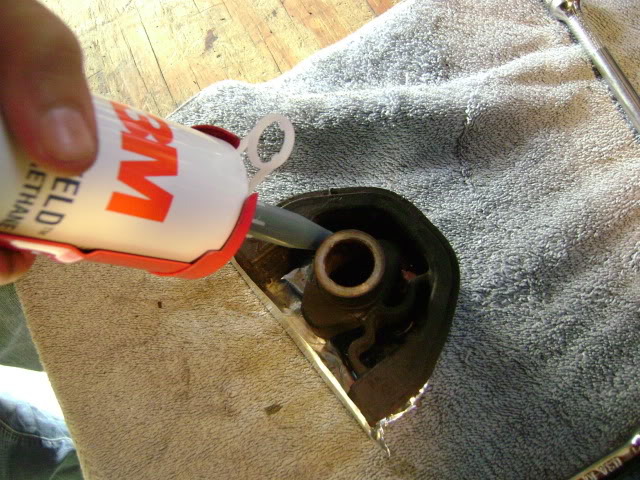
Get some duct tape/adhesive tin foil stuff and apply it to one side of the mounts. This will allow the polyurethane to form and retain it's shape while drying.
Step 3 - Filling the mounts
This is what I used. It is equivalent to 60A.
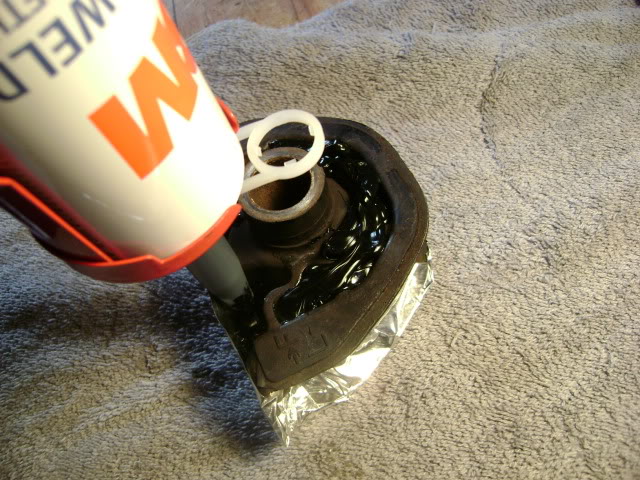
Begin filling the mounts, trying to eliminate any pockets of air from developing.
This is what is should look like:
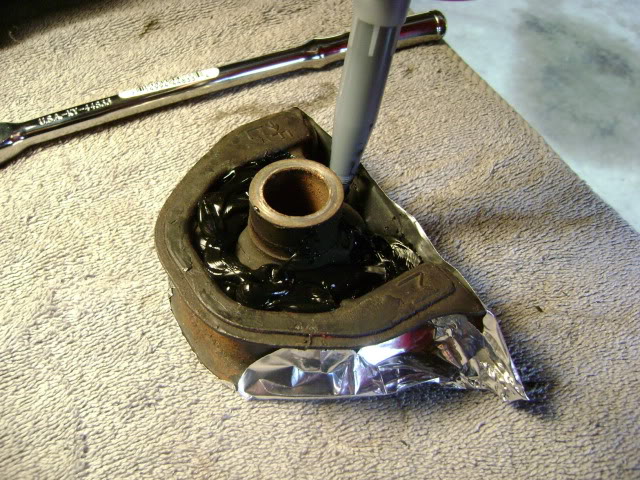
Now, get something that will make everything smooth and flatten out the polyurethane.
It should look something like this when you're finished.
Step 4 - Let dry and Re-install
Read the directions on the tube of polyurethane you used for specific drying directions. Mine said to allow for 36 hours for full curing, but I let them dry for 48 hours. After the 48 hours, I remove the tape on the backs and allow the other side (which wasn't exposed to air) to dry for 48 hours.
Re-Installation.......
- My passenger side slipped right on and I put all the bolts back where they were originally.
- For the driver side, I had to loosen the 2 bolts basically holding the engine to the motor mount on the driver side to allow the motor to "sag" down. Once it is down a little bit, slip the mount on the A/C bracket (where it was removed from), hand tighten the nut on the end, then tighten the engine mount bolts, raising the motor back up to it's proper position.
- Now, you have solid torque mounts for better/smoother shifting/less engine movement within the bay. Additionally, you won't have to worry about them cracking and having to replace them for a loooong time!
Remember to wear gloves! I usually don't think about stuff like this until it's too late. This is after scrubbing my hands with Gojo, Goop, and dish soap.
Hope this helps you guys!
Last edited by WellFedHobo; 02-25-2010 at 01:22 PM.


#3
01-24-2010, 09:47 AM
^^ Thanks buddy. I never heard of it until about 3 days ago. I'm extremely glad I did this as I did not know the condition of my torque mounts (never touched them in my life before this)
I almost forgot to take the pics for the DIY guide, my buddy and I had everything out, then I was like "OH SNAP! Wait! Get the camera, stop what we're doing, and start taking pics!"
I almost forgot to take the pics for the DIY guide, my buddy and I had everything out, then I was like "OH SNAP! Wait! Get the camera, stop what we're doing, and start taking pics!"
#4
01-24-2010, 02:17 PM

nice write up. I actually used this method on the 97 civic I had when I boosted it. worked like a charm! o and im oved it! Keep it up!

Thread
Thread Starter
Forum
Replies
Last Post
Paul Warren
Mechanical Problems & Technical Chat
2
04-18-2013 02:04 PM
scooled101
PRIVATE For Sale / Trade Classifieds
5
07-26-2008 06:28 PM