please DIY... DO NOT REPLY PEOPLE PLEASE!
#1
 01-18-2007, 09:36 PM

Join Date: Jun 2006
Location: Brownsburg, IN 46112
Posts: 11,203
swaping out stock gauge bulbs for colored leds.
2ways to do this.... the easy way and the hard way.. to each his own easiest is not the best but hardest way reps all the rewards
first off.... DO NOT MESS WITH THE GAUGE NEEDLES... YOU CANNOT REMOVE THEM... they will just snap and leave you with a busted gauge that will never work again!
i apolagize for not taking more pictures but i believe you can get the gist of it from just looking at my pictures
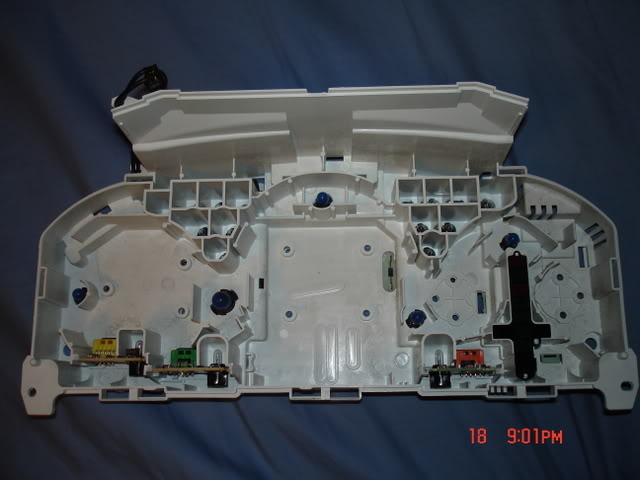
first off..... remove the black bezel off the dash. a short philips screw driver will work best! thiers 2 screws along the top inside... and then once that trim panel is removed you should see the gauges preaty open... now thier will be 4 bolts (sorry again not sure exact size)
once you remove those 4bolts you should be able to pull the cluster out alittle and start unpluging the wiring harnesses off the rear... can take awhile cause most likely they have never been removed and are preaty tight along with a very tight area to work in!
once you remove all of those youll be able to simply pull the cluster out of the car and work on a bench.
EASIEST WAY to just do a simple LED bulb swap thats all ya have to remove, then remove the bulbs and simply twist in the replacement led bulbs... check out this picture to see the bulbs with the blue covers.. those are the ones you need to swap.
now when swaping in simple leds... GET THE MORE $$ LEDS! you want the widest viewing angle and brightest!
i sugest these "Super bright pre-wired LED"
http://www.oznium.com/prewired-leds
youll just have to buy those leds and have to directly solder them onto the board..... which can be tuff since leds must be conected positive to positive! if the led doesnt work that means you put it in backwards...i advice the prewired onces cause you can solder them all onto one bulb spot and if you wire them up backwards you can simply cut the wires and turn them around and not have to worry about unsoldering and then reduing it again!id also say lightly sand the led bulbs clear tips.... ive heard that helps spreading out the light alittle beter...
and to attach them to the cluster... a simple HOT GLUE GUNjust hold the led or leds inplace and glue around the hole and onto the leds and hold it thier till the glue cools and hardens...now you can get creative here. either multiple leds bent in different directions either 5mm size or 3mm size... now youll be able to squize in more 3mm leds...
or just try some "Extremely bright pre-wired superflux 4-chip LED" http://www.oznium.com/prewired-superfluxtho youll only be able to use one per bulb hole...
now its not as much work but still some basic soldering skills needed...
but after replacing those bulbs its a simple reversal... BUT BEFORE plugen everything back together... ONLY PUT THE GAUGES layed loosly in the dash and plug in the harness thats on the left side near the top in and turn on your parking lights.. and check for all the leds to be LITE UP..... IF any arent lite up then simply unplug the harness again and switch the wires positive and negative.....
and once your sure all the lights are lite up start conecting all the harnesses again and bolt everything back together and your done...
BUT thier will be bright and dark spots....
WAY 2 definatly the harder but looks SO MUCH BETER!
i used three 9.5 length led flexstrips
http://www.oznium.com/led-flex-strips
these strips kick @ss!
check out a short video i made of my blue strip which i plan on using under my seats eventualy...
http://s40.photobucket.com/albums/e2...nt=leds005.flv
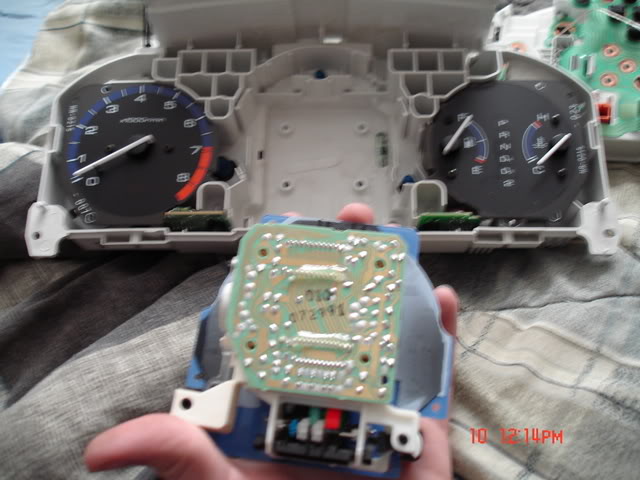
now pull off the clear bezel and the black inner bezel and also pull off the inner black bezel/ the gauges dumby lights off from around gauges.
then it will look like this. (well with the speedo still attached)
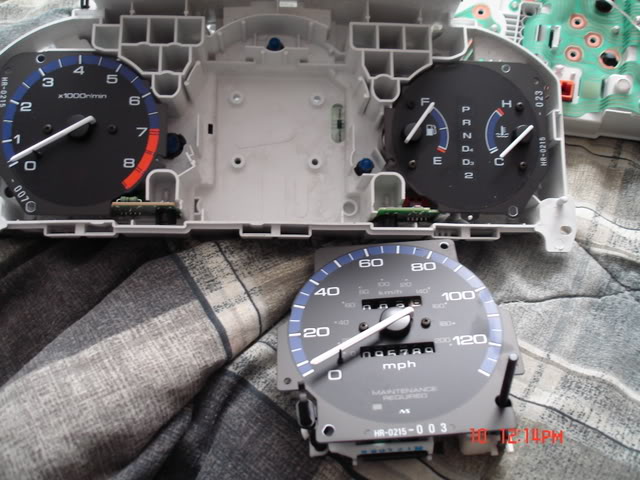
heres the pictures after removal...
youll see two clusters... both the same both EX automatics...
on the manual ones the white box will not be thier i dont think so...
but to remove the white box simply use a flat screw driver and put it in the outter edges... youll see the clip spots and pry the screw driver in the hole and pry outwards and just keep worken around the clips to remove it.
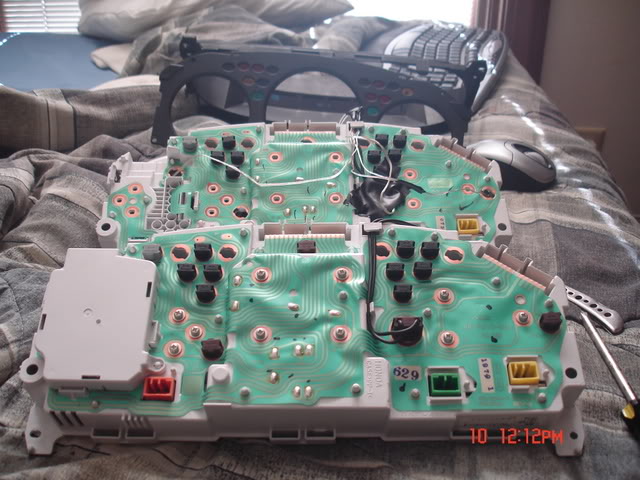
after ya remove the white cover and pull the led board for the automatic display it will look like the upper gauges....
now look at the lower gauges and youll see the silver philips screws.
now remove the three sections each at a time then the instruments will start to be able to remove them... like previous picture..
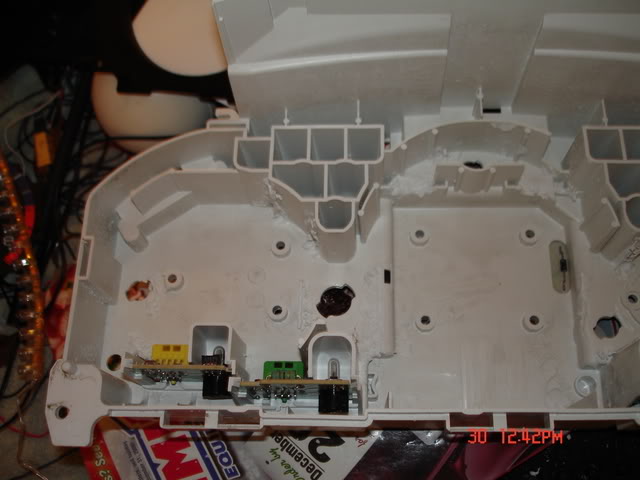
and once you have all three out it will look like this.
as you can see thiers the stock bulbs with thier blue cover on them....
those are your stock illumination bulbs... now if you did the easy/quick LED swap youd just replace those bulbs.... now with doing that you will have lots of hot spots and dim spots....
now doing it my way takes alot more work and cuting and some bending BUT looks O SO MUCH BETER!
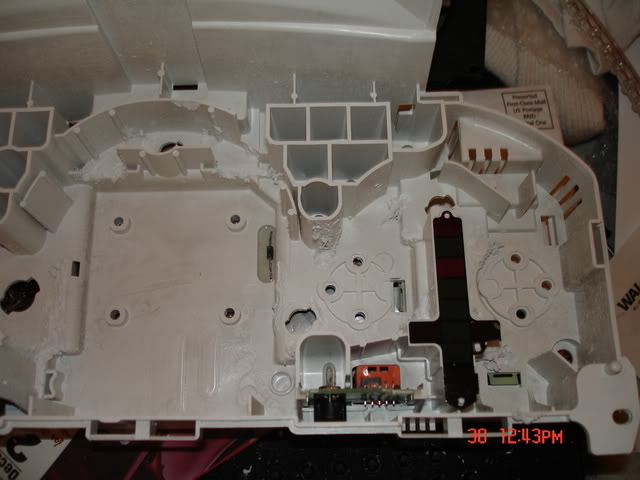
now start hacken out the inner white plastic bulb guides....
now i missed a few.... but ill soon enough remove them...
if you want ALOT larger pictures for a clearer view check out my larger pictures..
http://s40.photobucket.com/albums/e2...20%20pictures/
now once ya chop out all those little plastic light guides out the inside youll be able to start routing the led strips....
now your hardest part will be cuting out the outter automatic led slots that arent used and the worst is guiding the temp/gas gauge location!
because the led strips are so tight you need to slide off the metal circular case off them, they simply slide off... and once you put them where they bolt up to route the strips and then.... the most brain freak youll have with the project... bending the tiny little metal resitor looken pieces on the actual gauges in the rear to slightly bend them around to fit.... i had to bend mine up and inwards alittle... that was my most tense moment of the whole build cause you want to be VERY EASY and try not to break the wires off the TINY wound wires and not to break the resistor looken parts! BE VERY CAREFULL!!!!!
and once ya have all the led strips routed try and reinstal the gauges and be sure it will fit!
for instance on my TACH side i had to glue the upper part of the strip up alittle high to be able to angle the board in and down flat.... one of those things ya realy have to just experiment with till you get it right!!!!! every gauge has its own tuff spot!
the tach was the upper electrical board... the speedos hardest part is the milage trip arm and the maintance clear arm from the inside! and the gas/temp those resistor and metal case for them to slide into!
but if ya got enough time its very doable!
BUT i would sugest buying a extra cluster to experiment with first... that way if you do break somet
2ways to do this.... the easy way and the hard way.. to each his own easiest is not the best but hardest way reps all the rewards
first off.... DO NOT MESS WITH THE GAUGE NEEDLES... YOU CANNOT REMOVE THEM... they will just snap and leave you with a busted gauge that will never work again!
i apolagize for not taking more pictures but i believe you can get the gist of it from just looking at my pictures
first off..... remove the black bezel off the dash. a short philips screw driver will work best! thiers 2 screws along the top inside... and then once that trim panel is removed you should see the gauges preaty open... now thier will be 4 bolts (sorry again not sure exact size)
once you remove those 4bolts you should be able to pull the cluster out alittle and start unpluging the wiring harnesses off the rear... can take awhile cause most likely they have never been removed and are preaty tight
along with a very tight area to work in!once you remove all of those youll be able to simply pull the cluster out of the car and work on a bench.
EASIEST WAY to just do a simple LED bulb swap thats all ya have to remove, then remove the bulbs and simply twist in the replacement led bulbs... check out this picture to see the bulbs with the blue covers.. those are the ones you need to swap.
now when swaping in simple leds... GET THE MORE $$ LEDS! you want the widest viewing angle and brightest!
i sugest these "Super bright pre-wired LED"
http://www.oznium.com/prewired-leds
youll just have to buy those leds and have to directly solder them onto the board..... which can be tuff since leds must be conected positive to positive! if the led doesnt work that means you put it in backwards...i advice the prewired onces cause you can solder them all onto one bulb spot and if you wire them up backwards you can simply cut the wires and turn them around and not have to worry about unsoldering and then reduing it again!id also say lightly sand the led bulbs clear tips.... ive heard that helps spreading out the light alittle beter...
and to attach them to the cluster... a simple HOT GLUE GUN
just hold the led or leds inplace and glue around the hole and onto the leds and hold it thier till the glue cools and hardens...now you can get creative here. either multiple leds bent in different directions either 5mm size or 3mm size... now youll be able to squize in more 3mm leds...or just try some "Extremely bright pre-wired superflux 4-chip LED" http://www.oznium.com/prewired-superfluxtho youll only be able to use one per bulb hole...
now its not as much work but still some basic soldering skills needed...
but after replacing those bulbs its a simple reversal... BUT BEFORE plugen everything back together... ONLY PUT THE GAUGES layed loosly in the dash and plug in the harness thats on the left side near the top in and turn on your parking lights.. and check for all the leds to be LITE UP..... IF any arent lite up then simply unplug the harness again and switch the wires positive and negative.....
and once your sure all the lights are lite up start conecting all the harnesses again and bolt everything back together and your done...
BUT thier will be bright and dark spots....
WAY 2 definatly the harder but looks SO MUCH BETER!
i used three 9.5 length led flexstrips
http://www.oznium.com/led-flex-strips
these strips kick @ss!
check out a short video i made of my blue strip which i plan on using under my seats eventualy...
http://s40.photobucket.com/albums/e2...nt=leds005.flv
now pull off the clear bezel and the black inner bezel and also pull off the inner black bezel/ the gauges dumby lights off from around gauges.
then it will look like this. (well with the speedo still attached)
heres the pictures after removal...
youll see two clusters... both the same both EX automatics...
on the manual ones the white box will not be thier i dont think so...
but to remove the white box simply use a flat screw driver and put it in the outter edges... youll see the clip spots and pry the screw driver in the hole and pry outwards and just keep worken around the clips to remove it.
after ya remove the white cover and pull the led board for the automatic display it will look like the upper gauges....
now look at the lower gauges and youll see the silver philips screws.
now remove the three sections each at a time then the instruments will start to be able to remove them... like previous picture..
and once you have all three out it will look like this.
as you can see thiers the stock bulbs with thier blue cover on them....
those are your stock illumination bulbs... now if you did the easy/quick LED swap youd just replace those bulbs.... now with doing that you will have lots of hot spots and dim spots....
now doing it my way takes alot more work and cuting and some bending BUT looks O SO MUCH BETER!
now start hacken out the inner white plastic bulb guides....
now i missed a few.... but ill soon enough remove them...
if you want ALOT larger pictures for a clearer view check out my larger pictures..
http://s40.photobucket.com/albums/e2...20%20pictures/
now once ya chop out all those little plastic light guides out the inside youll be able to start routing the led strips....
now your hardest part will be cuting out the outter automatic led slots that arent used and the worst is guiding the temp/gas gauge location!
because the led strips are so tight you need to slide off the metal circular case off them, they simply slide off... and once you put them where they bolt up to route the strips and then.... the most brain freak youll have with the project... bending the tiny little metal resitor looken pieces on the actual gauges in the rear to slightly bend them around to fit.... i had to bend mine up and inwards alittle... that was my most tense moment of the whole build cause you want to be VERY EASY and try not to break the wires off the TINY wound wires and not to break the resistor looken parts! BE VERY CAREFULL!!!!!
and once ya have all the led strips routed try and reinstal the gauges and be sure it will fit!
for instance on my TACH side i had to glue the upper part of the strip up alittle high to be able to angle the board in and down flat.... one of those things ya realy have to just experiment with till you get it right!!!!! every gauge has its own tuff spot!
the tach was the upper electrical board... the speedos hardest part is the milage trip arm and the maintance clear arm from the inside! and the gas/temp those resistor and metal case for them to slide into!
but if ya got enough time its very doable!
BUT i would sugest buying a extra cluster to experiment with first... that way if you do break somet
#2
01-27-2007, 06:27 PM
Join Date: Jun 2006
Location: Brownsburg, IN 46112
Posts: 11,203
HUM... i guess this isnt gonna be DIYed..............
i emailed to the email posted but no replys and the post is still here....
maybe ya just think its to difficult or confusing.... o well just tryin to help people out...
i emailed to the email posted but no replys and the post is still here....
maybe ya just think its to difficult or confusing.... o well just tryin to help people out...

Thread
Thread Starter
Forum
Replies
Last Post
civicmotorhead
Private 'Wanted' Classifieds
2
12-05-2005 06:55 PM