Thermostat Replacement
#1
 02-23-2010, 05:59 PM


1. Why would you want to do this?
If your thermostat is stuck closed (over heating car), or stuck open (car not warming up at all), or leaking, you would want to replace your T-Stat.
2. How long does this take?
About 45-60 minutes.
3. Precautions?
Never open the radiator cap/release pressure in the system when the car's engine is warm, or immediately after operating. Use jackstands.
4. What's needed?
Replacement T-Stat
Coolant (Honda genuine coolant is best IMO - 2 gallons at least)
Pliers
10mm socket
socket wrench
socket wrench extensions
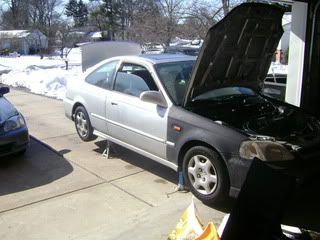
Step 1 – Drain Coolant
Jack up the car. Usually, it is easier to drain the coolant when the front of the car is lower than the rear.
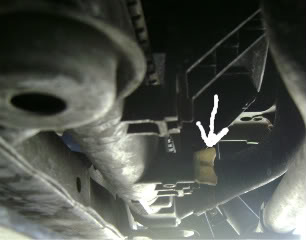
Remove radiator cap. Crawl under the car and open petcock to drain the coolant from the system. Once it is slowly dripping, you can squeeze the lower (and possibly the upper) hoses to get more of the coolant out. If you plan on re-using the coolant, have a clean drain pan underneath it.
Step 2 – Remove Lower Radiator Hose
Get a pair of pliers, loosen the metal clip, move it back and away from where the hose connects to the radiator.
Now, follow the lower radiator hose back to where it meets the block, and remove the metal clip the same way as before.
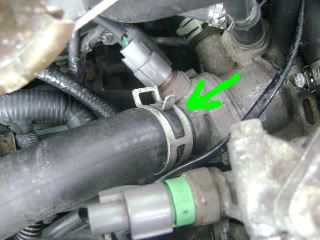
And the hose should be off.
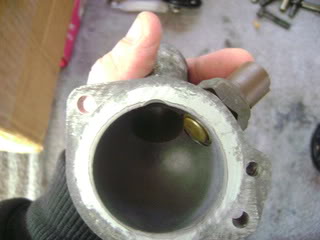
*Be sure to clean everything up, especially if it looks like this!*
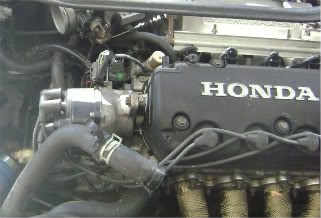
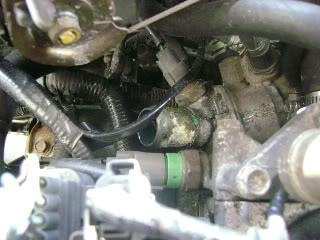
Step 3 – Remove Thermostat Housing
Unplug the fan switch solenoid (green). Unbolt ground wire (white). Remove the two bolts holding the thermostat housing to the block (red).
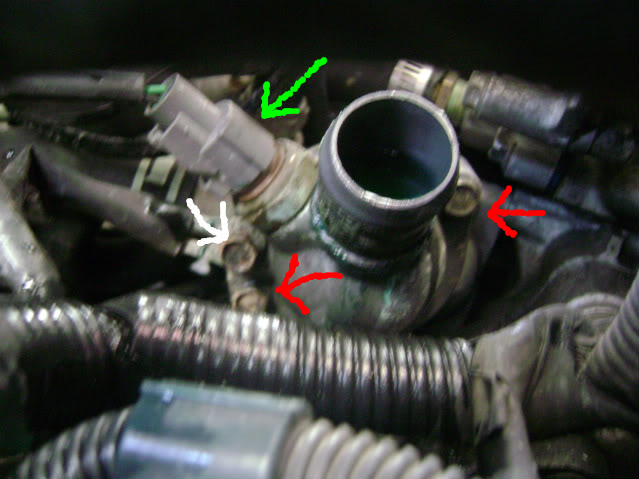
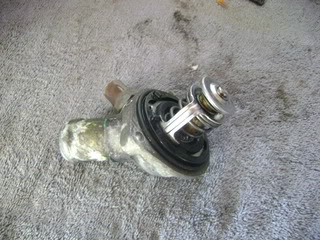
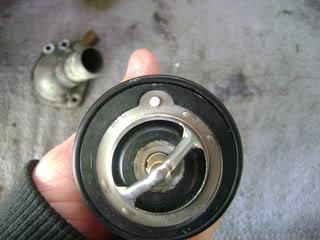
At this point, the housing should come off. This is what it looks like now after taking the thermostat out, too.
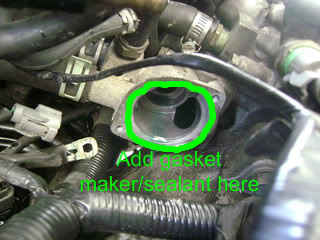
Add sealant/gasket maker where the T-stat meets the block to prevent leaks. Allow to fully cured before driving the care. Check product label for curing/drying times.
Step 4 – Putting It All Back Together
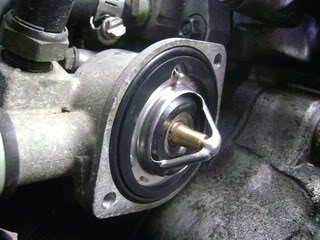
Line up the air release valve with the groove(s) on the thermostat housing and block.
Place Thermostat onto the block.
Reinstall thermostat housing, fan switch, and lower radiator hose. Finally, close petcock on radiator.
Fill radiator with coolant, and bleed for air. You are done!
If your thermostat is stuck closed (over heating car), or stuck open (car not warming up at all), or leaking, you would want to replace your T-Stat.
2. How long does this take?
About 45-60 minutes.
3. Precautions?
Never open the radiator cap/release pressure in the system when the car's engine is warm, or immediately after operating. Use jackstands.
4. What's needed?
Replacement T-Stat
Coolant (Honda genuine coolant is best IMO - 2 gallons at least)
Pliers
10mm socket
socket wrench
socket wrench extensions
Step 1 – Drain Coolant
Jack up the car. Usually, it is easier to drain the coolant when the front of the car is lower than the rear.
Remove radiator cap. Crawl under the car and open petcock to drain the coolant from the system. Once it is slowly dripping, you can squeeze the lower (and possibly the upper) hoses to get more of the coolant out. If you plan on re-using the coolant, have a clean drain pan underneath it.
Step 2 – Remove Lower Radiator Hose
Get a pair of pliers, loosen the metal clip, move it back and away from where the hose connects to the radiator.
Now, follow the lower radiator hose back to where it meets the block, and remove the metal clip the same way as before.
And the hose should be off.
*Be sure to clean everything up, especially if it looks like this!*
Step 3 – Remove Thermostat Housing
Unplug the fan switch solenoid (green). Unbolt ground wire (white). Remove the two bolts holding the thermostat housing to the block (red).
At this point, the housing should come off. This is what it looks like now after taking the thermostat out, too.
Add sealant/gasket maker where the T-stat meets the block to prevent leaks. Allow to fully cured before driving the care. Check product label for curing/drying times.
Step 4 – Putting It All Back Together
Line up the air release valve with the groove(s) on the thermostat housing and block.
Place Thermostat onto the block.
Reinstall thermostat housing, fan switch, and lower radiator hose. Finally, close petcock on radiator.
Fill radiator with coolant, and bleed for air. You are done!
Last edited by WellFedHobo; 02-25-2010 at 01:15 PM.
#2
02-23-2010, 06:06 PM

I also recommend replacing the thermostat gasket at the same time if your new one doesn't come with one. Cheap insurance policy.

Thread
Thread Starter
Forum
Replies
Last Post
Ska-T
Mechanical Problems & Technical Chat
2
07-08-2012 11:40 AM
7th, 99, air, civic, dyi, generation, honda, location, release, replace, replacing, thermostat, therostate, valve, visual