Exhaust Manifold Wrap
#1
 01-29-2010, 07:49 PM


***I scaled the pictures down just in case we have some 56k users looking at this.***
1. Why do you want to do this?
Less heat soak, Lower IATs
2. How long does this take?
This varies depending on how much wrap you have, and how long/big the header that's being wrapped is.
3. What you need to do this...
- exhaust header
- exhaust heat wrap (I used Mishimoto's Exhaust Heat Wrap Kit)
- steel zip ties (A nice set of black ties came with the Heat Wrap Kit mentioned above)
- gloves
- mask
- pliers
4. Precautions?
Wear rubber gloves. The fiberglass wrap will make your hands and face itchy. It's probably not the greatest thing to breathe in, so you could also go get a face mask type thing (the ones painters/doctors wear)
Step #1 – Cleaning and Preparation
Clean off any and all dirt, oils, or anything else that may have made it’s way onto the surface. I sprayed it down with Simple Green, cleaned it, and then wiped it down with a cloth and Brakleen.

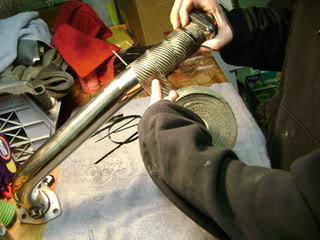
Step #2 – Starting the Wrap
I started with the downpipe first. Unroll about 2 feet or so and make the first wrap. Put some zip ties on it to prevent the wrap from moving.
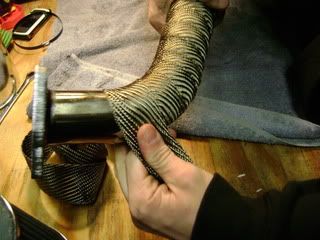
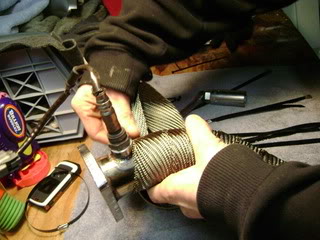
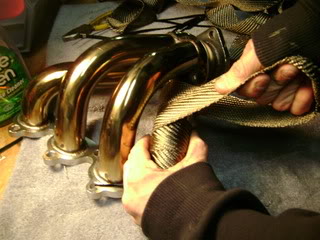
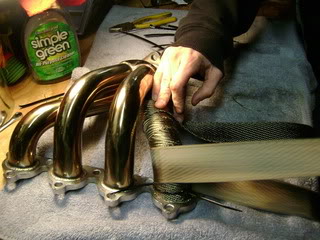
Step #3 – Wrapping
Begin to wrap tightly around the exhaust piece while pulling on the wrap itself.

*Remember to continually pull on the wrap to keep it tight!
**Make sure you over lap about a �”**
When you get to a bend, you must pull the wrap in order to get any creases, overlaps, and folds out!
**I found it would be easier to wrap while the o2 sensor was installed. This prevented from getting any of the wrap stuck in the threads.
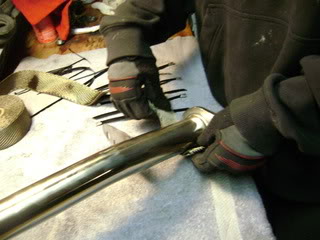
Apply zip ties to hold it in place. Almost done!
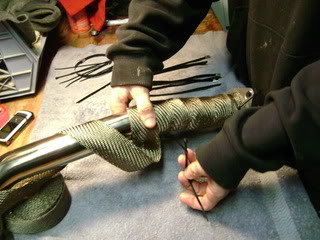
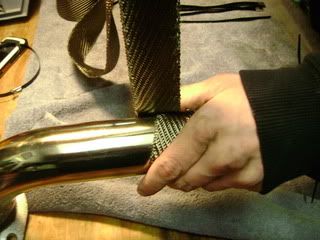
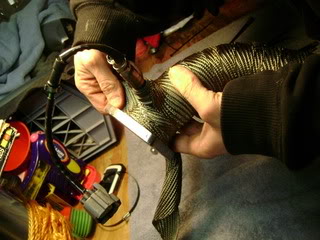
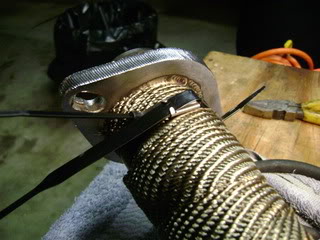
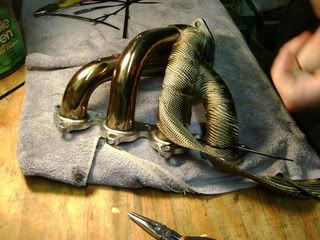
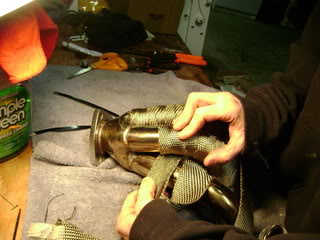
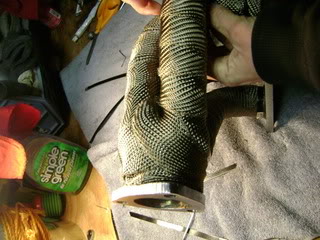
Step #4 – Finishing the Wrap
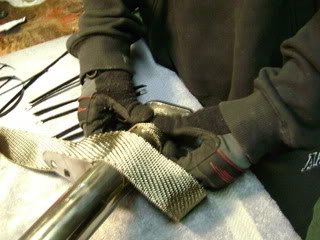
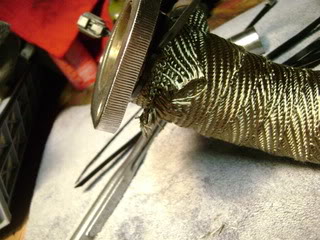
Take a steel tie, put it around where you started wrapping.
Now, get a buddy to help. Hold the silver piece, and pull on the black steel to tighten the tie. We used pliers to do this. Once tightened, fold the extra back over the silver piece and then push the metal “clips” down to hold everything in place.
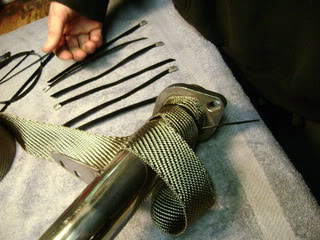
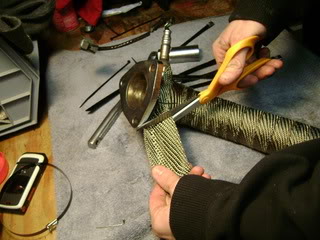
Now repeat step #4 where the wrap ends (at the other side of the exhaust piece). Cut off the extra that’s left over.
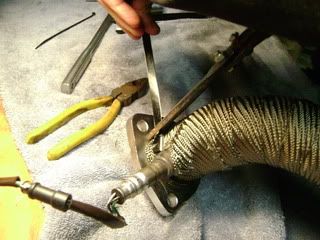
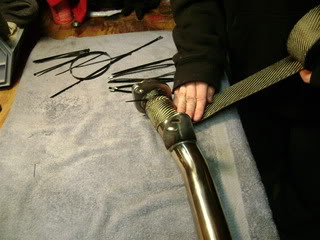
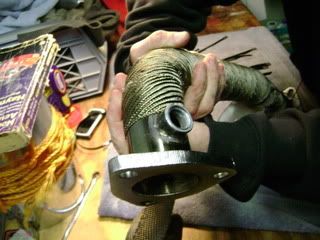
Done the downpipe!
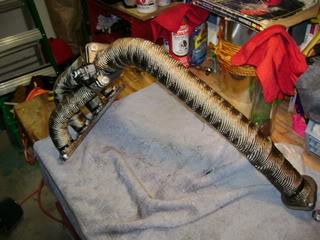
Step #5 - Repeat as necessary
Now, repeat steps #1-4 for the upper piece. Remember to keep it tight! The more bends the manifold has, the more of a chance a fold, or flap can develop! We found it was easier to unroll the remaining wrap and pull it all through with each pass.
Pulling the wrap through:
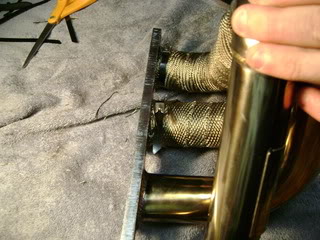
Try to do as much wrapping as possible without stopping. We chose to go down runner #4, and up runner #3 and cut. Then, a separate piece going down runner #2 and coming up #1. This was the preferred method rather than wrapping each runner, then cutting when we got to the end. Not mention, you would probably run out of the steel ties, too.
Both #3 and #4 runners wrapped, and tied.
Now, begin wrapping the remaining runners of the manifold the same way.
If you can't quite get where the runner join wrapped without sliding around, go in between them and cross over:
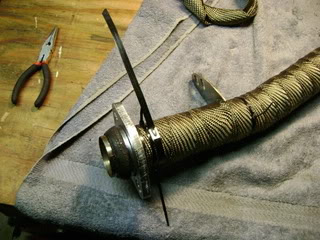
Manifold is now done!
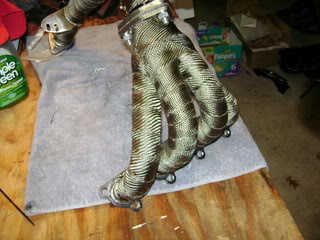
I then bolted the two pieces together and I was finished! Here are some pictures of the final product.
Upon first start up, keep the hood open and let the car idle for 20-30 minutes. Fumes will come off the header wrap, this is normal to last from anywhere between 30-45 minutes. Try not to breathe it in.
I hope this was helpful!!
1. Why do you want to do this?
Less heat soak, Lower IATs
2. How long does this take?
This varies depending on how much wrap you have, and how long/big the header that's being wrapped is.
3. What you need to do this...
- exhaust header
- exhaust heat wrap (I used Mishimoto's Exhaust Heat Wrap Kit)
- steel zip ties (A nice set of black ties came with the Heat Wrap Kit mentioned above)
- gloves
- mask
- pliers
4. Precautions?
Wear rubber gloves. The fiberglass wrap will make your hands and face itchy. It's probably not the greatest thing to breathe in, so you could also go get a face mask type thing (the ones painters/doctors wear)
Step #1 – Cleaning and Preparation
Clean off any and all dirt, oils, or anything else that may have made it’s way onto the surface. I sprayed it down with Simple Green, cleaned it, and then wiped it down with a cloth and Brakleen.
Step #2 – Starting the Wrap
I started with the downpipe first. Unroll about 2 feet or so and make the first wrap. Put some zip ties on it to prevent the wrap from moving.
Step #3 – Wrapping
Begin to wrap tightly around the exhaust piece while pulling on the wrap itself.
*Remember to continually pull on the wrap to keep it tight!
**Make sure you over lap about a �”**
When you get to a bend, you must pull the wrap in order to get any creases, overlaps, and folds out!
**I found it would be easier to wrap while the o2 sensor was installed. This prevented from getting any of the wrap stuck in the threads.
Apply zip ties to hold it in place. Almost done!
Step #4 – Finishing the Wrap
Take a steel tie, put it around where you started wrapping.
Now, get a buddy to help. Hold the silver piece, and pull on the black steel to tighten the tie. We used pliers to do this. Once tightened, fold the extra back over the silver piece and then push the metal “clips” down to hold everything in place.
Now repeat step #4 where the wrap ends (at the other side of the exhaust piece). Cut off the extra that’s left over.
Done the downpipe!
Step #5 - Repeat as necessary
Now, repeat steps #1-4 for the upper piece. Remember to keep it tight! The more bends the manifold has, the more of a chance a fold, or flap can develop! We found it was easier to unroll the remaining wrap and pull it all through with each pass.
Pulling the wrap through:
Try to do as much wrapping as possible without stopping. We chose to go down runner #4, and up runner #3 and cut. Then, a separate piece going down runner #2 and coming up #1. This was the preferred method rather than wrapping each runner, then cutting when we got to the end. Not mention, you would probably run out of the steel ties, too.
Both #3 and #4 runners wrapped, and tied.
Now, begin wrapping the remaining runners of the manifold the same way.
If you can't quite get where the runner join wrapped without sliding around, go in between them and cross over:
Manifold is now done!
I then bolted the two pieces together and I was finished! Here are some pictures of the final product.
Upon first start up, keep the hood open and let the car idle for 20-30 minutes. Fumes will come off the header wrap, this is normal to last from anywhere between 30-45 minutes. Try not to breathe it in.
I hope this was helpful!!
Last edited by WellFedHobo; 02-25-2010 at 01:19 PM.


Thread
Thread Starter
Forum
Replies
Last Post

