Fiberglassing Tutorial
#1
 12-22-2008, 12:23 PM


Join Date: Feb 2007
Location: Lexington, KY
Posts: 7,081
Okay, I'm finally bored enough to do a fiberglassing write-up. Fiberglassing is actually very simple, but takes a good bit of patience (sanding takes forever).
Here's what you'll need:
1) Fiberglass cloth/mat
2) Fiberglass resin/liquid hardener (which will come with the resin)
3) Cheap paint brush (I found 2" brushes at Wal-Mart work great, and they're something like $.96 each)
4) PPE: disposable gloves, mask/respirator, long sleeves, etc.
5) Sand paper (100 grit to 800 grit should do nicely)
6) Flexible sanding block
7) Body filler & hardener cream
8) Flexible spreaders (It's a few bucks for a pack of three)
9) Mixing containers (a container for the fiberglass and something flat for the body filler)
9) Patience... lots of patience
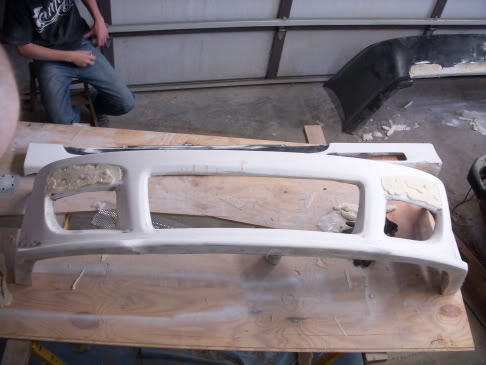
Okay, I'm going to use my body kit modification as a walk-through on fiberglassing (since a picture's worth a thousand words). Anyway, here's what you'll need for the fiberglassing portion at least:
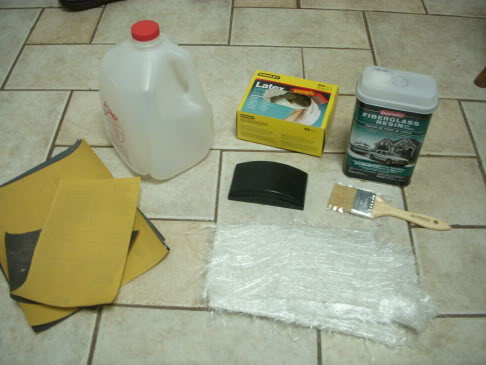
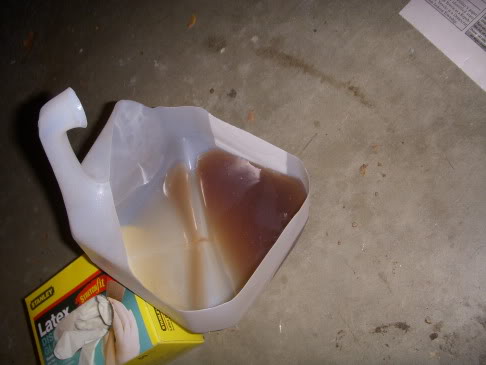
"What's the jug for?"... Well, I'll tell you. It's to make a handy-dandy resin-mixing bowl:
Step 1:
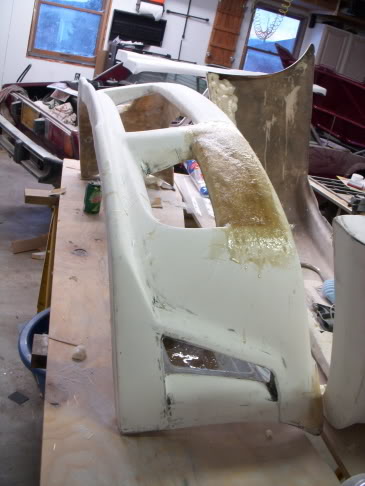
You're going to need to get your general shape of whatever you're going to be fiberglassing. My personal favorite method is to use expanding insulating foam to get the shape (let it dry and sand it to shape), but there's a few other methods. Another popular method is to make a skeleton out of wood, then staple a type of fabric (I believe a type of fleece is popular) to the skeleton. Then, apply resin to the fabric; then the resin sets up, you have your shape to fiberglass.
Step 2:
Now, take your fiberglass cloth/mat and trim it to fit the areas you plan on fiberglassing. Cut at least two pieces for every area; you'll want to double up the fiberglass for strength. Trust me on this, it's a lot easier to cut the cloth now than it will be when you're covered in resin, so make sure you have every piece cut out.
Step 3:
Now, here's one of the trickiest parts to fiberglassing; mixing the resin and hardener. If you use too much hardener, the resin will start setting up too soon, and that's not good. If you use too little, the resin will take forever to dry, and might not at all in some spots. I believe the ratio is 1:100; that is, 1 part hardener for every 100 parts resin. To be honest, it's mostly an experience/guessing game type deal. Keep in mind that you'll need more hardener for colder temperatures and less hardener when it's warmer.
Step 4:
Now take your handy-dandy cheap-o paintbrush and dip it in the resin. Lightly coat the area you plan to fiberglass with resin. This helps the cloth stick to the area when you're coating it with resin (which is real helpful if you're fiberglassing on a vertical surface). Now take the piece of cloth you cut out and lay it in place. Using the paint brush, spread resin over the cloth, making sure it gets nice and soaked. Try not to get air bubbles (if you get one, dab at it with the paint brush to try to push the air out), since they can be a PITA later on. Once the first piece is completely covered in resin, repeat the step for the second piece of cloth.
Step 5:
Take a nice break, make a sandwich, take a nap, whatever. Just find something to do for at least an hour so the fiberglass can cure.
Step 6:
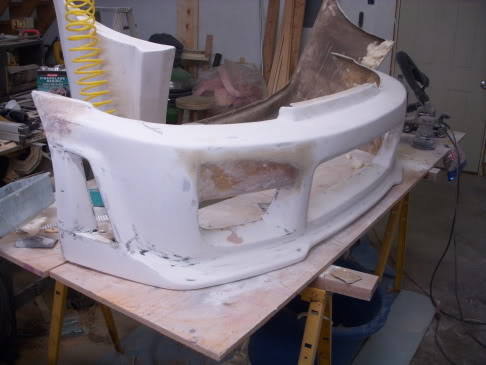
Now the fun part begins... now you get to wet sand! Aren't you excited? Clear your schedule for this step; sanding fiberglass is a time-consuming and mind-numbing process. I heavily recommend wet sanding over dry sanding; it cuts down the dust 100-fold, and the sandpaper will last a long while. Basically, you don't have to get the fiberglass mirror-smooth, but try to get it fairly smooth, since body filler shouldn't be more than .25" thick. I'd recommend starting at 120 grit paper and working your way to whatever grit you want.
Step 7:
Now that the fiberglass is fairly smooth, it's time to use body filler to get the finish perfect. Body filler is much easier to work with than fiberglass (that and it actually comes off if you get some on your skin, unlike fiberglass). Anyway, mix the filler on something flat (a 6"x6" piece of cardboard works great). Start by taking a roughly golf ball-sized glob of body filler. Now squeeze a line of hardener cream across the length of the body filler pile. To mix it, take a spreader and sort of fold the filler across itself to avoid air bubbles. If you're using the gray/white Bondo, the final mixture should be a shade of pink. Now take the spreader, and scoop some filler up on it. Spread it across the fiberglassed surface using even pressure.
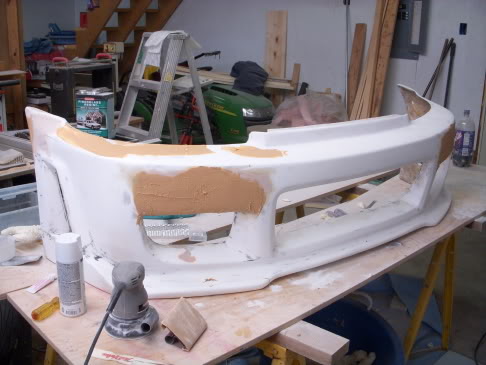
Step 8:
Give the body filler a good half-hour to dry; realistically, you can sand after 15-20 minutes, but let's play it safe, shall we? I wouldn't really recommend wet-sanding the body filler (it will absorb water, and if the body filler is over metal, it can eventually rust the underlying metal), but it can be done. I'd start with 120 grit and work my way to whatever grit you feel is smooth enough. Generally, you're going to need at least two layers of body filler unless you're really good
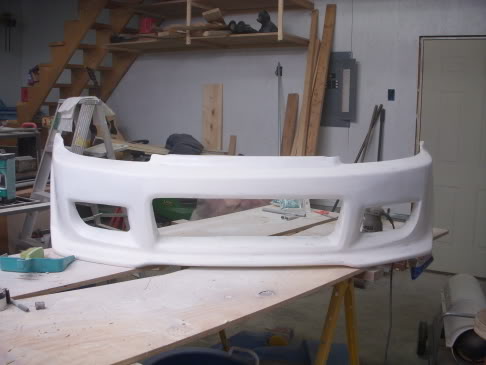
Step 9:
Once you're happy with the final finish of the fiberglass/body filler, it's time to prime and paint. Now that wasn't that hard, was it?
Here's what you'll need:
1) Fiberglass cloth/mat
2) Fiberglass resin/liquid hardener (which will come with the resin)
3) Cheap paint brush (I found 2" brushes at Wal-Mart work great, and they're something like $.96 each)
4) PPE: disposable gloves, mask/respirator, long sleeves, etc.
5) Sand paper (100 grit to 800 grit should do nicely)
6) Flexible sanding block
7) Body filler & hardener cream
8) Flexible spreaders (It's a few bucks for a pack of three)
9) Mixing containers (a container for the fiberglass and something flat for the body filler)
9) Patience... lots of patience
Okay, I'm going to use my body kit modification as a walk-through on fiberglassing (since a picture's worth a thousand words). Anyway, here's what you'll need for the fiberglassing portion at least:
"What's the jug for?"... Well, I'll tell you. It's to make a handy-dandy resin-mixing bowl:
Step 1:
You're going to need to get your general shape of whatever you're going to be fiberglassing. My personal favorite method is to use expanding insulating foam to get the shape (let it dry and sand it to shape), but there's a few other methods. Another popular method is to make a skeleton out of wood, then staple a type of fabric (I believe a type of fleece is popular) to the skeleton. Then, apply resin to the fabric; then the resin sets up, you have your shape to fiberglass.
Step 2:
Now, take your fiberglass cloth/mat and trim it to fit the areas you plan on fiberglassing. Cut at least two pieces for every area; you'll want to double up the fiberglass for strength. Trust me on this, it's a lot easier to cut the cloth now than it will be when you're covered in resin, so make sure you have every piece cut out.
Step 3:
Now, here's one of the trickiest parts to fiberglassing; mixing the resin and hardener. If you use too much hardener, the resin will start setting up too soon, and that's not good. If you use too little, the resin will take forever to dry, and might not at all in some spots. I believe the ratio is 1:100; that is, 1 part hardener for every 100 parts resin. To be honest, it's mostly an experience/guessing game type deal. Keep in mind that you'll need more hardener for colder temperatures and less hardener when it's warmer.
Step 4:
Now take your handy-dandy cheap-o paintbrush and dip it in the resin. Lightly coat the area you plan to fiberglass with resin. This helps the cloth stick to the area when you're coating it with resin (which is real helpful if you're fiberglassing on a vertical surface). Now take the piece of cloth you cut out and lay it in place. Using the paint brush, spread resin over the cloth, making sure it gets nice and soaked. Try not to get air bubbles (if you get one, dab at it with the paint brush to try to push the air out), since they can be a PITA later on. Once the first piece is completely covered in resin, repeat the step for the second piece of cloth.
Step 5:
Take a nice break, make a sandwich, take a nap, whatever. Just find something to do for at least an hour so the fiberglass can cure.
Step 6:
Now the fun part begins... now you get to wet sand! Aren't you excited? Clear your schedule for this step; sanding fiberglass is a time-consuming and mind-numbing process. I heavily recommend wet sanding over dry sanding; it cuts down the dust 100-fold, and the sandpaper will last a long while. Basically, you don't have to get the fiberglass mirror-smooth, but try to get it fairly smooth, since body filler shouldn't be more than .25" thick. I'd recommend starting at 120 grit paper and working your way to whatever grit you want.
Step 7:
Now that the fiberglass is fairly smooth, it's time to use body filler to get the finish perfect. Body filler is much easier to work with than fiberglass (that and it actually comes off if you get some on your skin, unlike fiberglass). Anyway, mix the filler on something flat (a 6"x6" piece of cardboard works great). Start by taking a roughly golf ball-sized glob of body filler. Now squeeze a line of hardener cream across the length of the body filler pile. To mix it, take a spreader and sort of fold the filler across itself to avoid air bubbles. If you're using the gray/white Bondo, the final mixture should be a shade of pink. Now take the spreader, and scoop some filler up on it. Spread it across the fiberglassed surface using even pressure.
Step 8:
Give the body filler a good half-hour to dry; realistically, you can sand after 15-20 minutes, but let's play it safe, shall we? I wouldn't really recommend wet-sanding the body filler (it will absorb water, and if the body filler is over metal, it can eventually rust the underlying metal), but it can be done. I'd start with 120 grit and work my way to whatever grit you feel is smooth enough. Generally, you're going to need at least two layers of body filler unless you're really good
Step 9:
Once you're happy with the final finish of the fiberglass/body filler, it's time to prime and paint. Now that wasn't that hard, was it?
Last edited by reaper2022; 02-21-2009 at 11:10 AM.

Thread
Thread Starter
Forum
Replies
Last Post
Spoolin.Em
Suspension, Brakes, Tires & Wheels
2
09-22-2011 05:18 PM

