
LED CLUSTER INSTALL =)


HCF Member
Joined: Jan 2007
Posts: 397
From:
addict said once that recalibrating the guages when you're done puttin LED's in is a pain in the azz. how is that done? im thinking about doin the same thing to my guages but i dont even know where to start. and i dont wanna get in over my head.
Recognized HCF Member
Joined: Jun 2006
Posts: 11,203
From: Brownsburg, IN 46112
recalibriatiing them can not be done on hondas!!!!!!
the needles will snap off and be trash!!!!!!
i said on my chevy truck gauges.... i pulled the needles and cleared them... but with hondas they arent removable
the needles will snap off and be trash!!!!!!
i said on my chevy truck gauges.... i pulled the needles and cleared them... but with hondas they arent removable
Recognized HCF Member
Joined: Jun 2006
Posts: 11,203
From: Brownsburg, IN 46112
ok... finaly got my picture issue fixed..

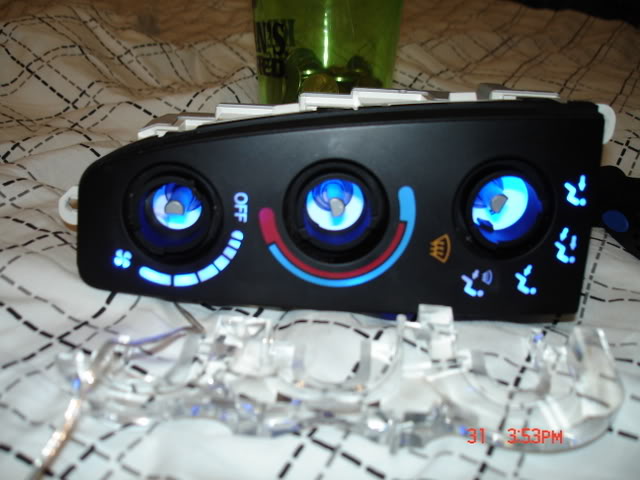
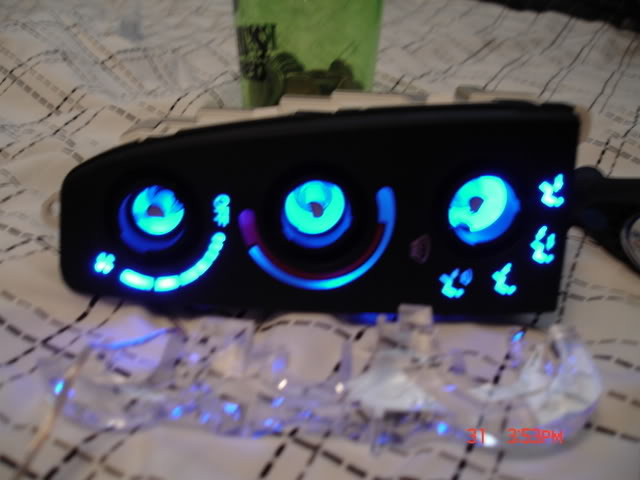


and well.... not to bad... but like i said... it will look SO MUCH BETER after i get two 4.5inch versions in blue and another in white... that way i can seperate the temp colors so they look true....
but definatly ALOT brighter than the two tiny bulbs that used to be thier
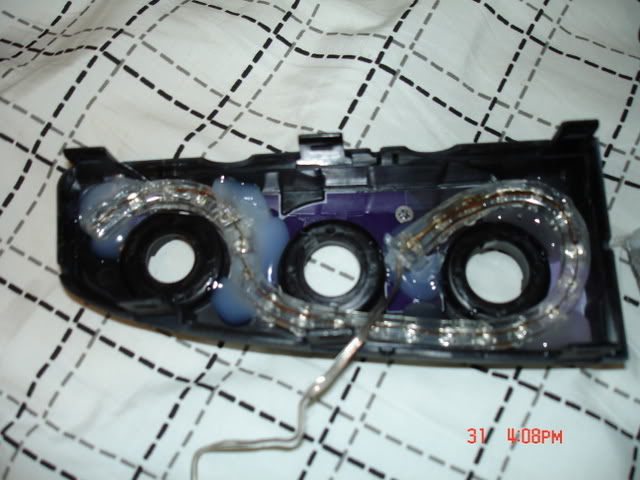
and since i soldered the leds to the board the stock dimmer still works
id still like to try some prewired superflux leds with the stock clear directional thing still thier.... maybe that is.... if your cheap and dont care about the temp display colors being right just remove the bulbs and solder and hot glue the bulb lights into the two holes
and well.... not to bad... but like i said... it will look SO MUCH BETER after i get two 4.5inch versions in blue and another in white... that way i can seperate the temp colors so they look true....
but definatly ALOT brighter than the two tiny bulbs that used to be thier
and since i soldered the leds to the board the stock dimmer still works
id still like to try some prewired superflux leds with the stock clear directional thing still thier.... maybe that is.... if your cheap and dont care about the temp display colors being right just remove the bulbs and solder and hot glue the bulb lights into the two holes

HCF Member
Joined: Mar 2006
Posts: 8,442
From: Marquette, MI
Addiction those seem a little dull^ isnt there supposed to be a light behind the Hazards switch and on each of the three *****? Still looks sick as hell man 
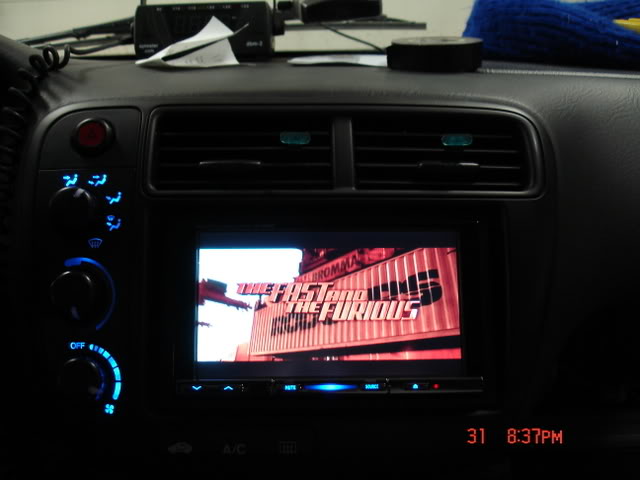
Wanna give me a quick run down as to how to remove your dash and get in there to do the Climate Control LEDs like u did?I can remove the driverside dash but i'm not really sure hwo to get into the center console.
Wanna give me a quick run down as to how to remove your dash and get in there to do the Climate Control LEDs like u did?I can remove the driverside dash but i'm not really sure hwo to get into the center console.
Recognized HCF Member
Joined: Jun 2006
Posts: 11,203
From: Brownsburg, IN 46112
not sure what ya mean to remove the dash... you mean the radio trim? and the cluster?
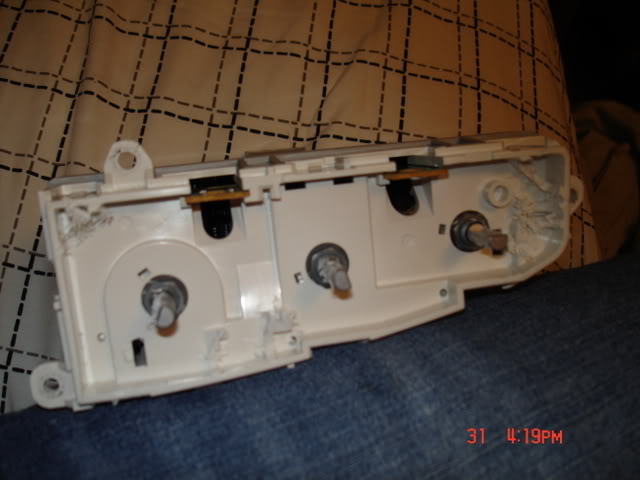
the cluster just comes out by removing the 2 philips screws from around the bezel on the cluster and 4 bolts on the cluster itself are clearly visable once ya remove that cluster trim piece...
and to remove the radio bezel... remove the lower drivers side panel under the colum.... then flip down the glove box.... just open it up and bend the back sides of the glove box inwards so the little plastic/metal tabs will clear the dash and the glove box will fold all the way down to the floor.... then remove the cigerate lighter trim panel 3 screws one and two are on the top corners, and the third is next to the lower glove box hinge, the drivers lower side is removed when ya remove the drivers trim... just remember that when reinstaling it!... and remove the lighter plug harness from behind the lighter... then thiers 4 bolts going preaty much straight up behind thier which hold the radio bezel in.....
remove those 4 bolts and to make it easier to remove look for the AC wires near the back left side... thiers a plastic retainer clip that holds the wires securely to the car.... i cut mine so that the radio bezel would come out further to make it easier to unplug all those harnesses and plug them back in ALOT EASIER!
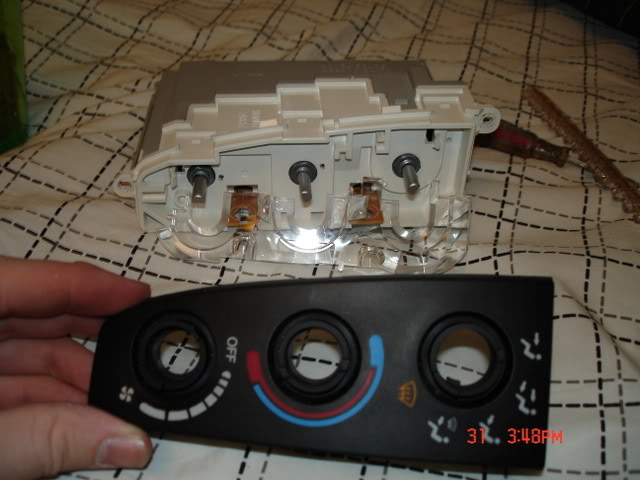
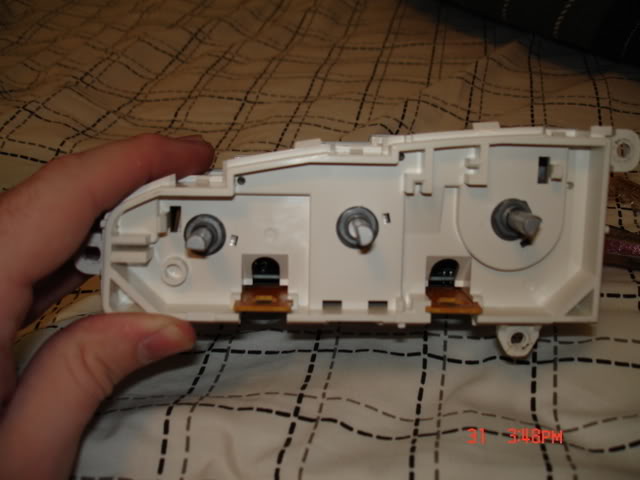
then the AC controls just come off by removing 3 philips screws from the back of the bezel and just pops out... then you can get to the radio mounting screws if your swapen the radio as well
the cluster just comes out by removing the 2 philips screws from around the bezel on the cluster and 4 bolts on the cluster itself are clearly visable once ya remove that cluster trim piece...
and to remove the radio bezel... remove the lower drivers side panel under the colum.... then flip down the glove box.... just open it up and bend the back sides of the glove box inwards so the little plastic/metal tabs will clear the dash and the glove box will fold all the way down to the floor.... then remove the cigerate lighter trim panel 3 screws one and two are on the top corners, and the third is next to the lower glove box hinge, the drivers lower side is removed when ya remove the drivers trim... just remember that when reinstaling it!... and remove the lighter plug harness from behind the lighter... then thiers 4 bolts going preaty much straight up behind thier which hold the radio bezel in.....
remove those 4 bolts and to make it easier to remove look for the AC wires near the back left side... thiers a plastic retainer clip that holds the wires securely to the car.... i cut mine so that the radio bezel would come out further to make it easier to unplug all those harnesses and plug them back in ALOT EASIER!
then the AC controls just come off by removing 3 philips screws from the back of the bezel and just pops out... then you can get to the radio mounting screws if your swapen the radio as well
Recognized HCF Member
Joined: Jun 2006
Posts: 11,203
From: Brownsburg, IN 46112
if all else fails for typical work.... buy a manual for it..... i thought i had a manual for my civic.... but i dont think i do.LOL i think it is for the older crx i had...
HCF Member
Joined: Mar 2006
Posts: 8,442
From: Marquette, MI
and no, i didnt mean the cluster. Ive installed reverse glow gauges, an aftermarket tach, a shift light and soon to be a triple pillar pod.I'm very comfortable with working back in there i was talking more about the radio trim (like you described)
i was talking more about the radio trim (like you described)

Thread
Thread Starter
Forum
Replies
Last Post
addiction2bass
Interior DIYs
1
Sep 25, 2008 11:41 AM
christophertowle
Mechanical Problems & Technical Chat
2
Apr 30, 2006 08:47 PM