
LED Gauge Cluster (96-00 Civic) & LED Climate Control (99-00 Civic)

Thread Starter
|
Recognized HCF Member
Joined: Jun 2006
Posts: 11,203
From: Brownsburg, IN 46112

TOOLS NEEDED;
1. Hot-glue gun.
2. THREE 9.5-inch led flexstrips. (another for AC controls) and 10 LEDS for cup holder glow.
3. a soldering iron and solder.
4. philips screw driver.
5. electrical tape.
6. a few small flat screw drivers.
7. DREMEL (preferably corded 110 cause battery dremel battery dies quickly!) along with small stone grinder or blade.
Well here it is! The coolest cluster work that anyone can do! Forget those ugly white face gauge overlays. Change up your own cluster to be a eye catcher when they are light up and sleeper when they are not ON.
BEFORE YOU START! KNOW THAT IF YOU TRY TO PULL THE NEEDLES OFF OR EVEN MOVE THEM TOO MUCH THEY WILL SNAP OFF� AND YOU'LL BE LEFT WITH A BUSTED CLUSTER!
NOW YOU WILL SEE SOME PICTURES with the needles removed BUT that was a spare cluster i bought to experiment with just in case this project didn't turn out right... but i swapped in my stock electronics.
Now with that out of the way lets start.
First off is to remove the cluster from your car. With a Philips screw driver remove the 2 upper screws on the clusters trim panel, once you remove those 2 screws simply pull out that panel. After that you'll see the 4 screws holding the cluster into place on each corner. Simply remove those screws to pull the cluster out a few inches. BUT don't pull the cluster out too hard because there are quite a few wire harness plugs in the rear that you need to unplug first. They are all different so don't worry about mixing them up!
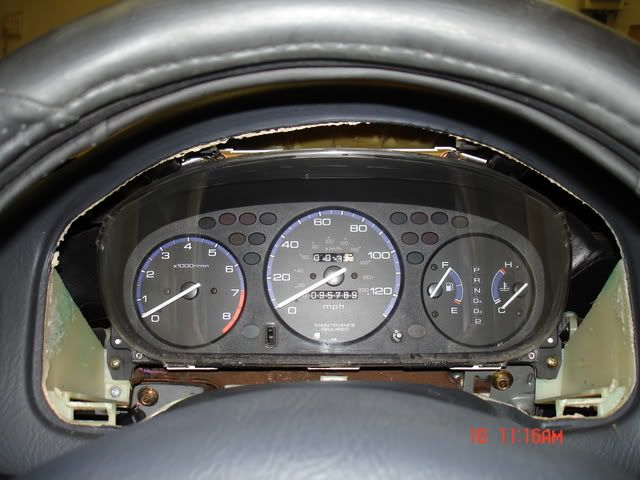
Now with the cluster pulled out you can really get to work with it on a bench.
From the front you want to remove the front black trim panel on front of the cluster. Then remove the clear cluster cover. Both have little tabs along the sides where, with your finger or small screw driver, you can pop them in a little and they will slide right out. Then pull off the black ring that goes around all the gauges. I believe that just pulled off with a few small snaps. NOW REMEMBER DO NOT MOVE THE NEEDLES OR TRY TO REMOVE THEM! IT WONT WORK! Do not even touch the screws on the front of the faces! Those do not need to be removed!
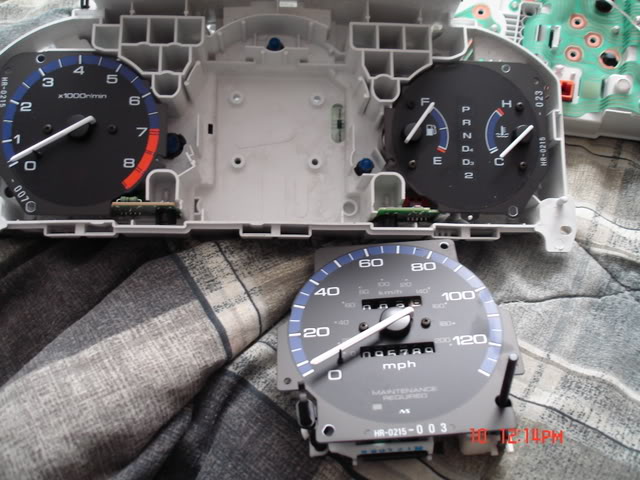
Now get a blanket or towel out to put the face of the gauges on. Just to prevent any pressure on the needles.
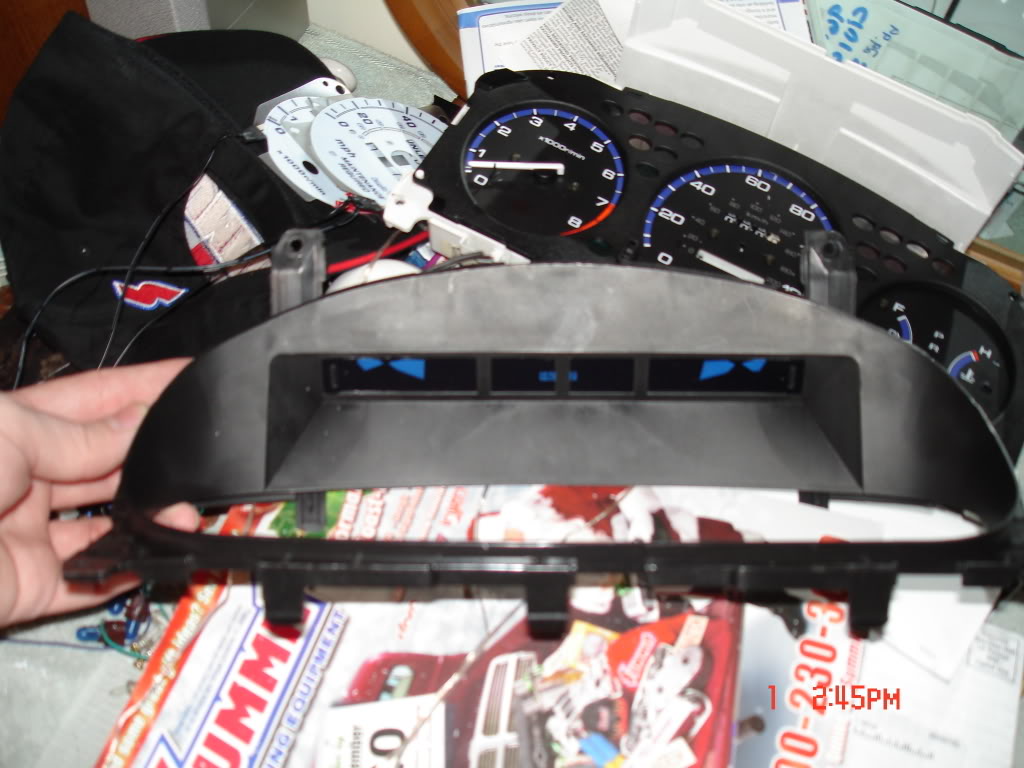
Now put the gauges on their face to see the back. (now with an AUTO and MANUAL transmission only a small difference)
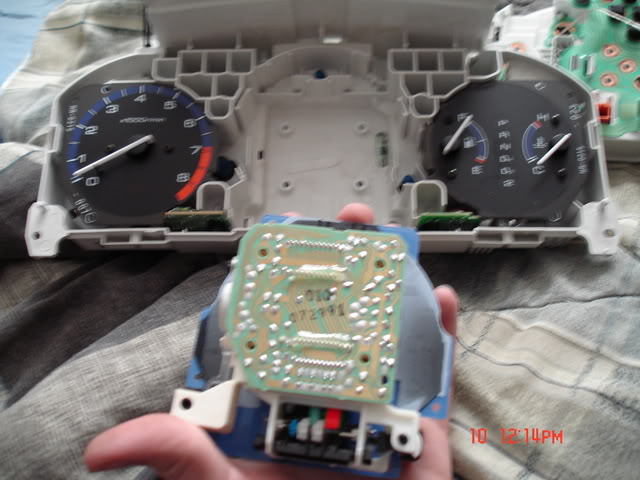
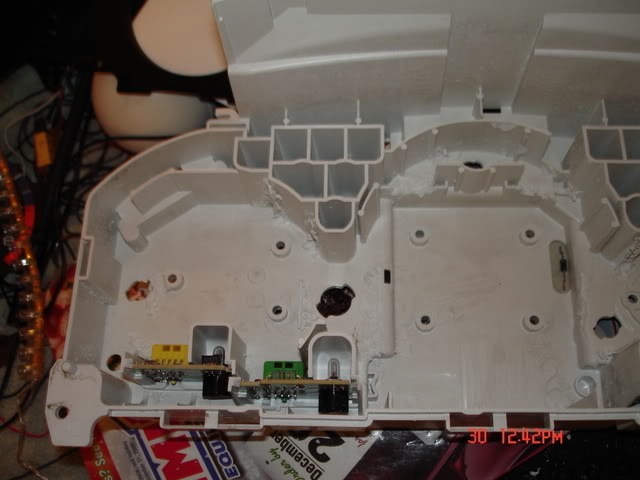
Which should just be the white plastic box shown on the left in the picture. With a flat screw driver go between the cap and tab and lightly pry the tab into the cap and pull up slightly and just work your way around. Then with the cap pulled off remove the electrical board that also holds the leds.
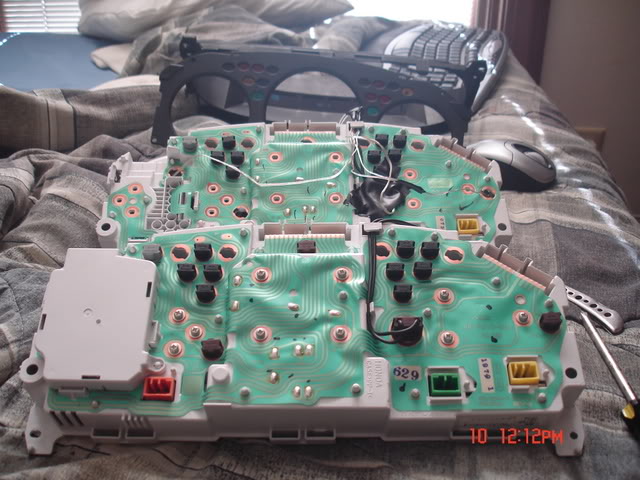
Now you have access to the whole backside openly.
Now look again at the picture and you will see the 4 screws in the center section, 3 on the other side, and 6 on the other side!
Now start removing those Phillips screws in those 3 sections. Left side, right side and center.
Those screws are what holds in the gauges in 3 sections which you can tell. Do not try to pull the gauges out they should slide right out if you have all the screws removed
So pull them all out and set them to the side FACES UP and just put them to the side. You won't have to touch them for a while.
Now you'll be able to see the raw shell.
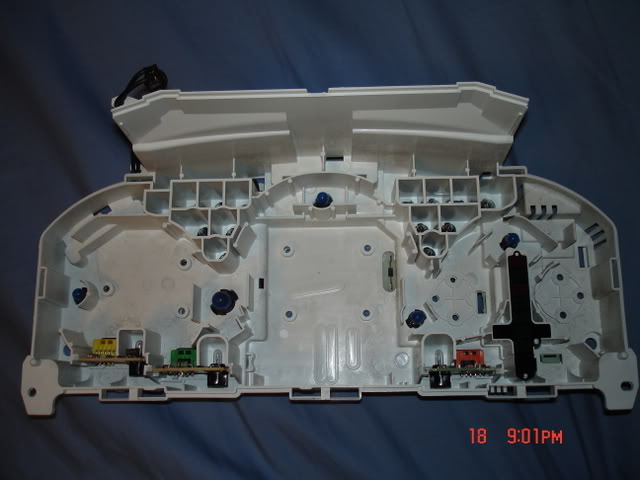
NOW bust out your dremel with a little grinding bit is what I used. You could use a few other cut off or grinder tools but I felt that this was the best bit because of its size to be able to get into tight spots.
Now with your cut off tool start hacking away

You want to remove these tabs that used to help displace the bulb light more evenly BUT NOW you don't need them!
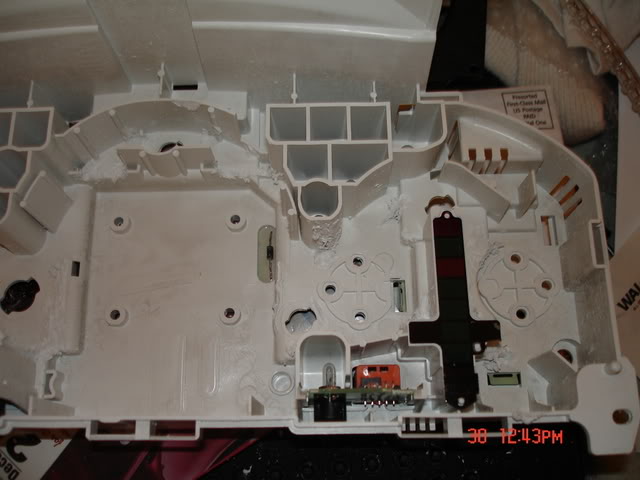
Though I did miss the middle top tab. Go ahead and cut it out as well.
Now with all the tabs and a little of the right side of the gear selector also cut out. You don't need those side caps anyways. I don't know why they are there!
Hardest part in routing the led strips is the EX or SI clusters is the gas gauge and temp gauge side. Due to the gauges being so tight together. AND THIS IS THE SCARIEST PART TO DO! Now pull the metal caps off the back of the gauges, they slide right off! Now with a few of the screws put them in the holes where they belong with the steel caps in place and route the strips. Now the most mind-wracking part! On the back of the gauges you need to VERY CAREFULLY bend in the gauges resistors. You need to bend them around so the strips and the gauges will fit. Don't just quickly bend them or they could break. Bend them very carefully..
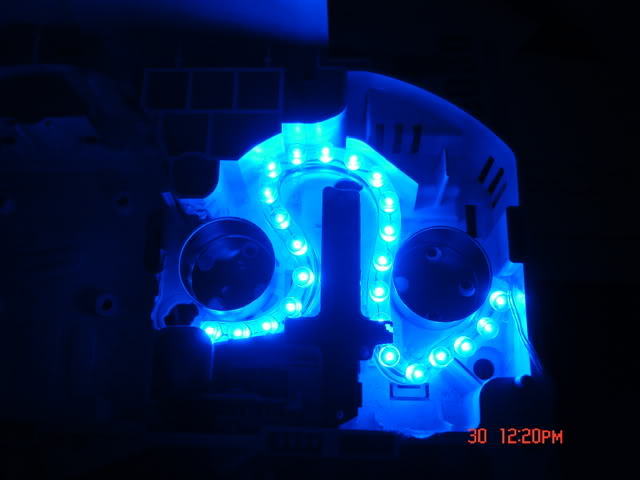
Now get your HOT GLUE GUN and after routing your led flex strips from Oznium
Route them in there so they fit and test fit every gauge in there before you do the next.. And then glue them in there while holding the strips their till the glue cools and hardens.

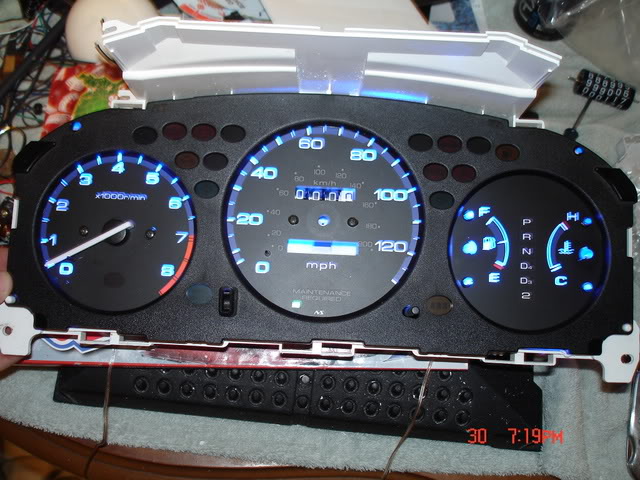
Now with the flex strips all in place you can move onto wiring them in.
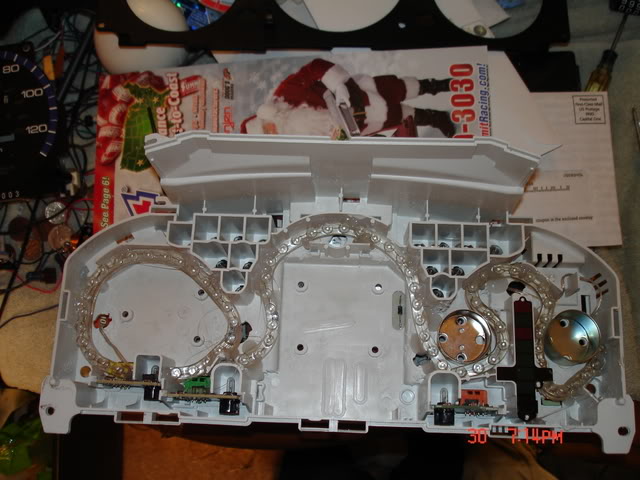
BUT FIRST you must re-attach the gauges into your cluster, so put the screws back in and then the black flat trim, the clear trim, and then the outer black trim panel.
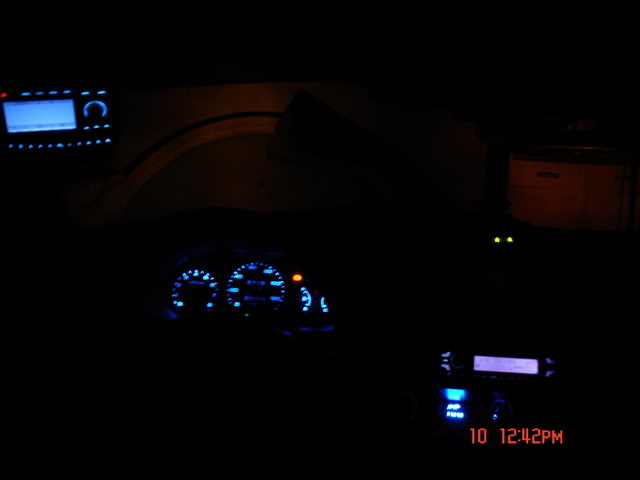
You have two choices for wiring.. Either wire into a ignition source (for light up all the time) OR into the parking lights (so they only light up when the parking lights are ON) OR like I did solder onto the stock cluster bulb location. (that way they only come on with the parking lights AND you can still adjust them with your stock dimmer control) which I say is the best way to wire it up. ONLY PROBLEM this way is testing wires. Sorry I forgot to write down which spot on the board is power or ground. BUT just solder some other wires onto the board and if your flex strips don't light up then just switch the wires. Easy fix! To test out simply take your cluster back into the car and plug in the left upper wire harness. Plug it in and then simply turn on your parking lights and test out the dimmer control you know have.
And IF it doesn't light up simply pull the cluster and either unsolder the wires and simply switch OR easier just cut the wires and switch them and crimp on some wire terminals.
You also need to solder the black wires on the back of the cluster for those 2 upper inside bulbs. you want to keep those original so the white will be just enough to light up the white dials.
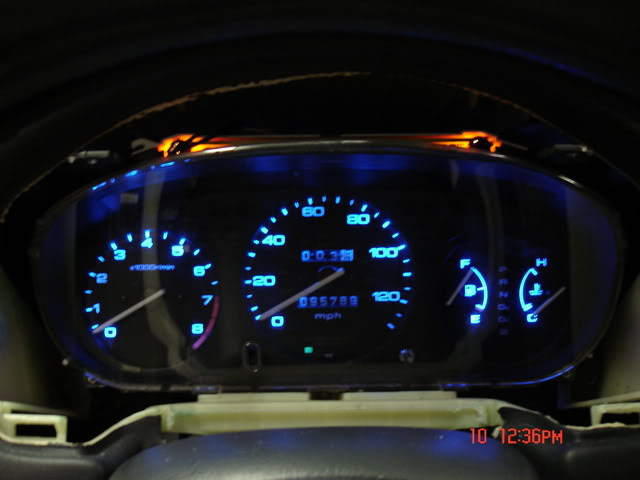
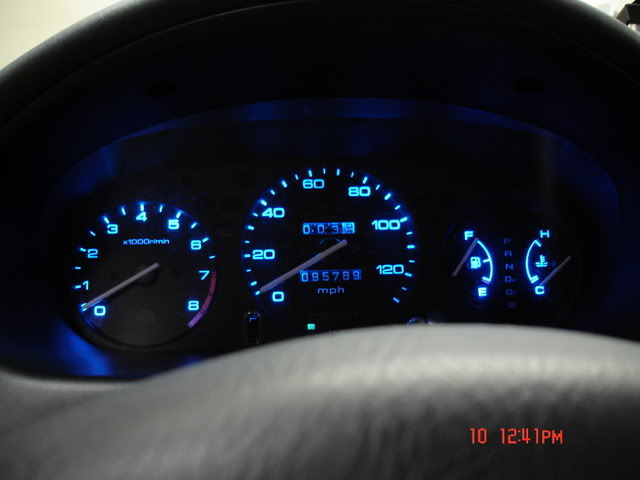
and now you can dimm the leds just like stock if you wired them to the cluster like stock bulbs are.

Last edited by reaper2022; Jan 26, 2010 at 03:49 PM.
Thread Starter
|
Recognized HCF Member
Joined: Jun 2006
Posts: 11,203
From: Brownsburg, IN 46112
NOW FOR THE AC CONTROLS pretty much same idea but alittle easier.
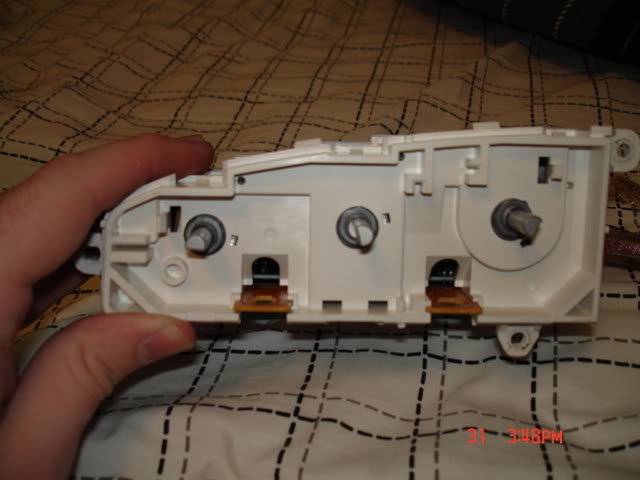
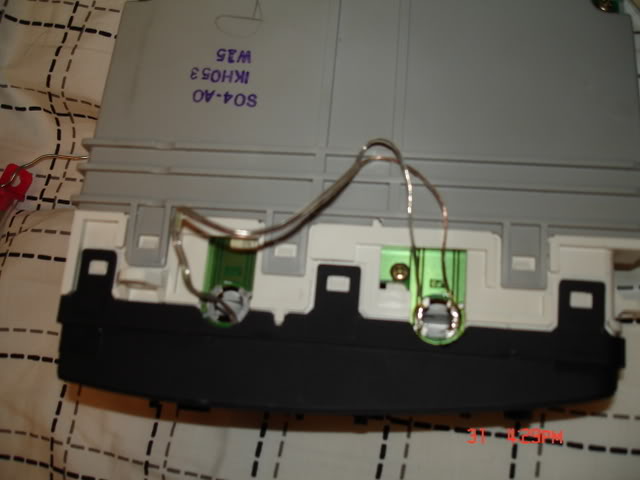
pull the center audio console and remove the AC controls.
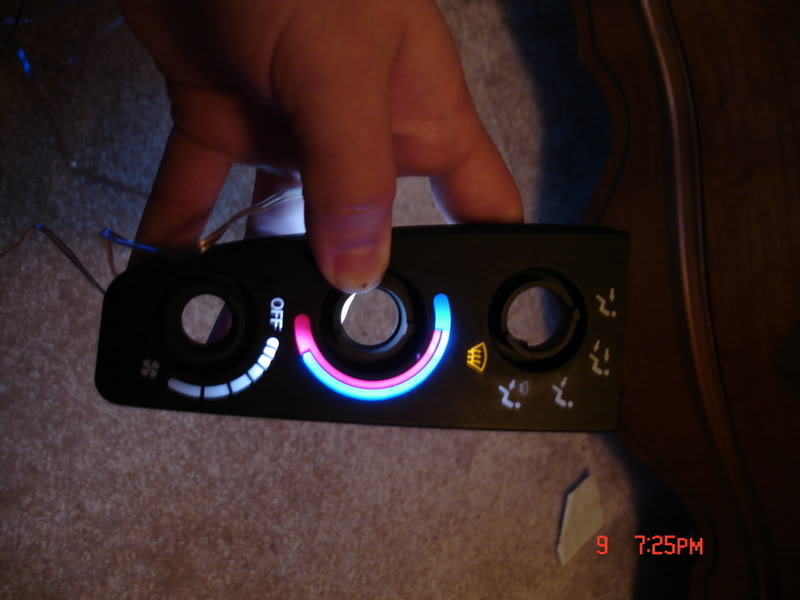
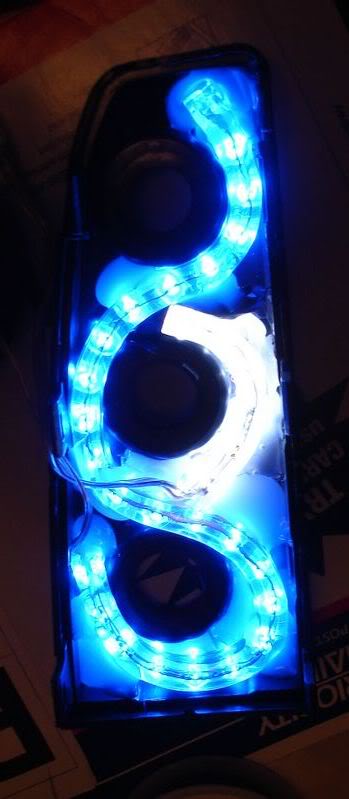
BEST to use white leds on the temp section just because it looks so much better. or if your cheap or dont care this is what it will look like without the white strip.
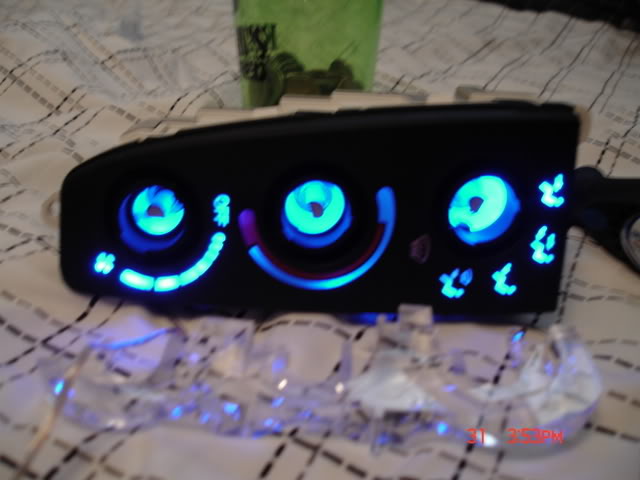
kinda weak yes....
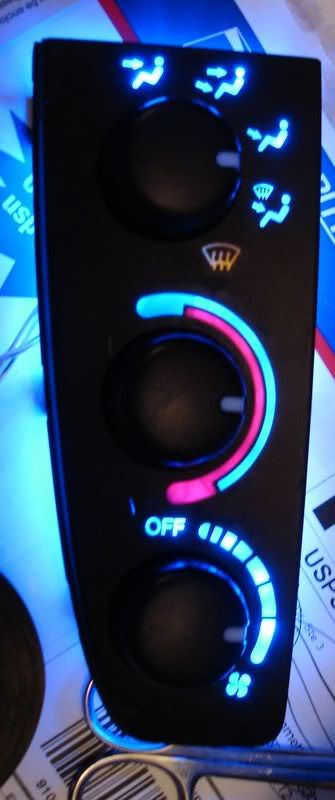
this way looks so much better!
Well first with the AC controls once you remove them pull the front ***** off. they simply pull off the front.
and the face has some plastic clips holding it to the unit, just pull the face off.
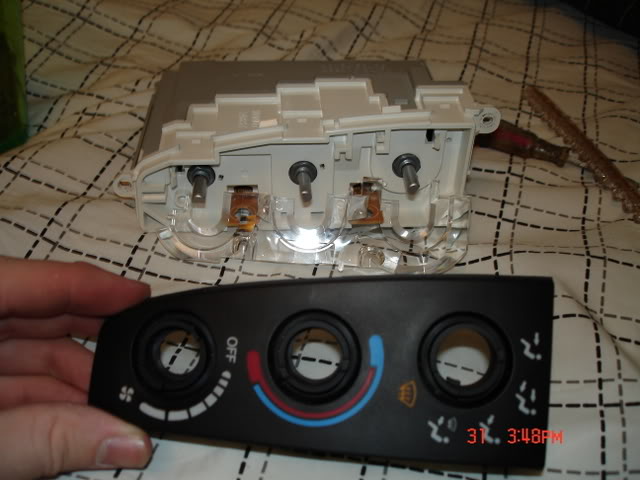
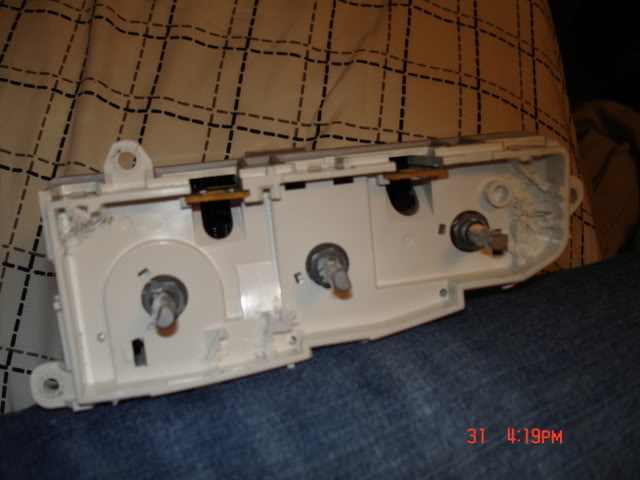
now pull out the clear plastic
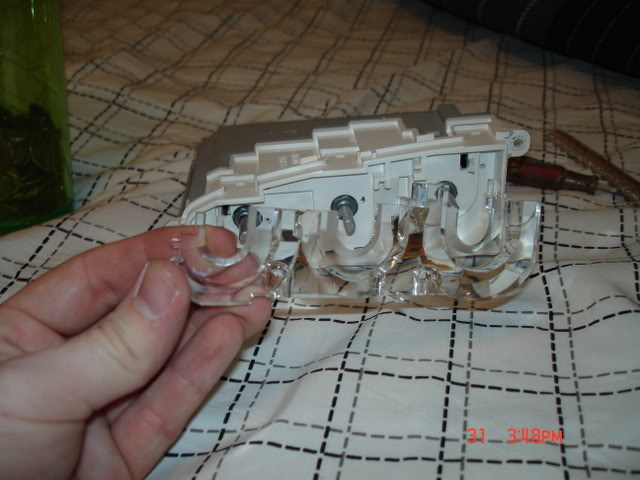
again DREMEL TIME
now BEST to power the led strips to position them better on the back of the face, position them around and glue them down.

NOTE this is a picture of the just colored led strip, but they are simply glued inplace with some more hot glue
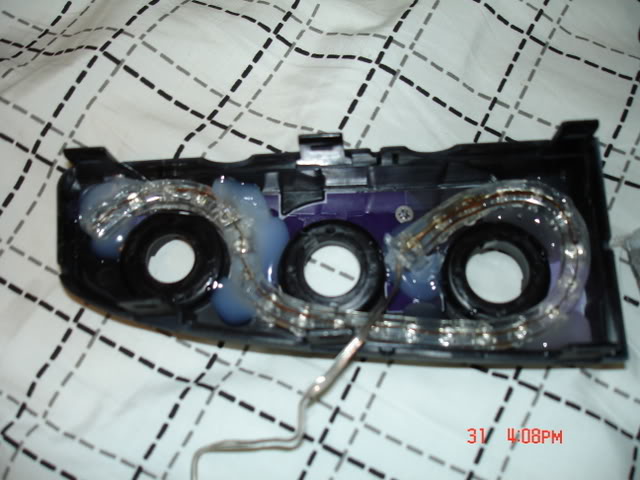
and solder the wires to the board.
and if you want to take it EVEN FURTHER change out the leds on the lower button controls.
tho you need raw leds and resistors for them... use th esmall 3MM leds. 5MM are to large for the buttons.
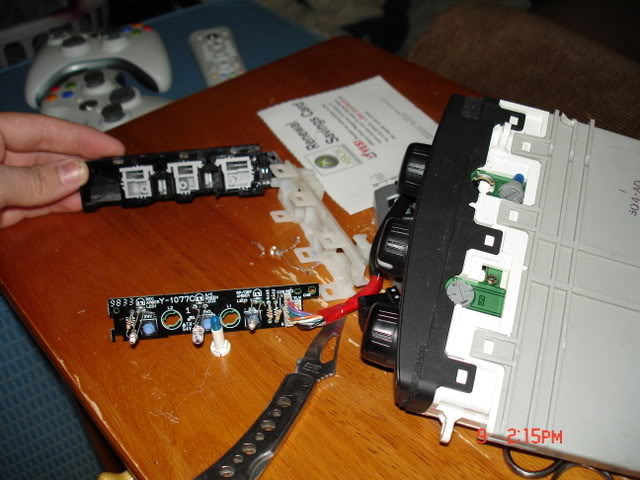
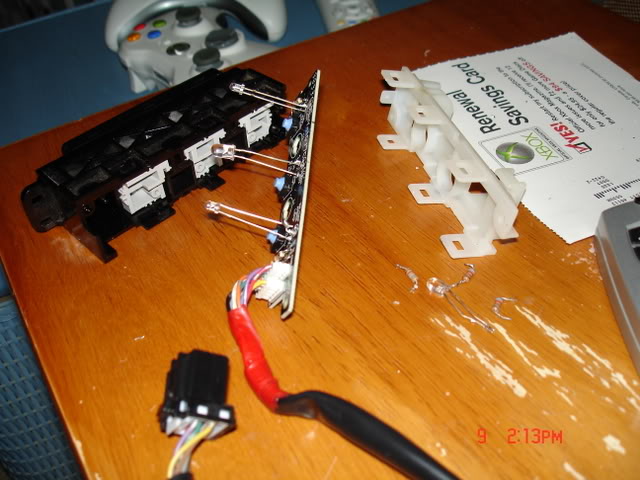
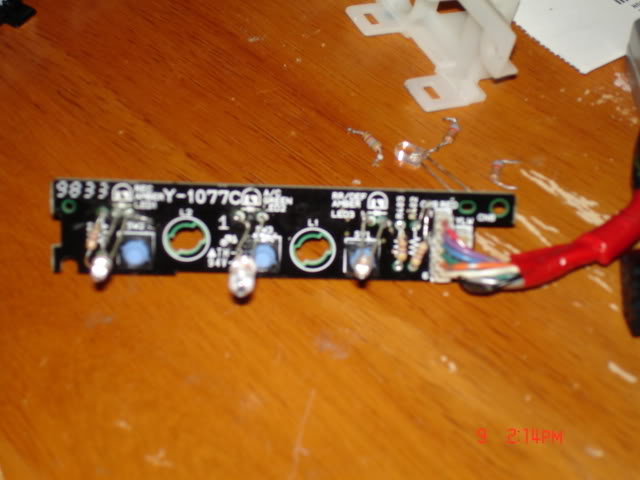
unsolder the stock leds NOTING THE led diodes position inside the head and be sure to solder the led in the same way! and also unsolder the resistors and solder in new resistors for the brighter leds.... you can use stock resistors BUT your leds wont be as bright.
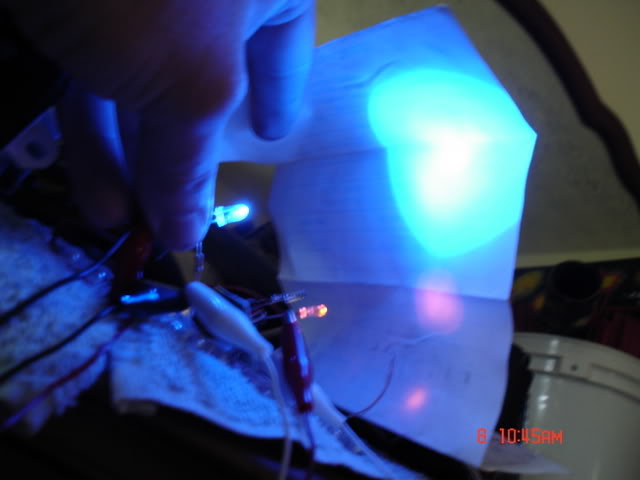
stock yellow led compared to blue led from oznium
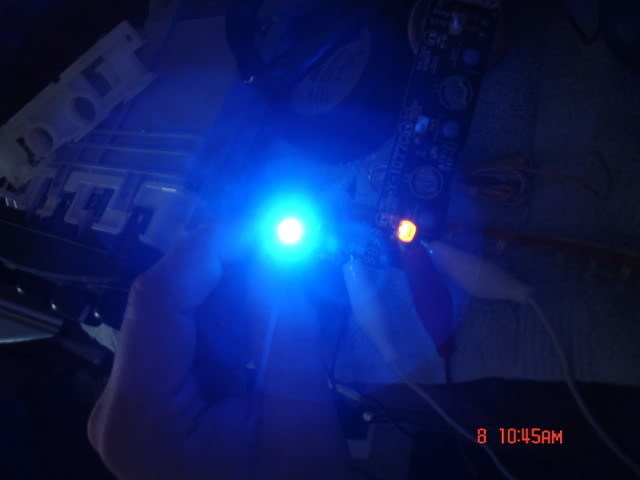
use any color you want....
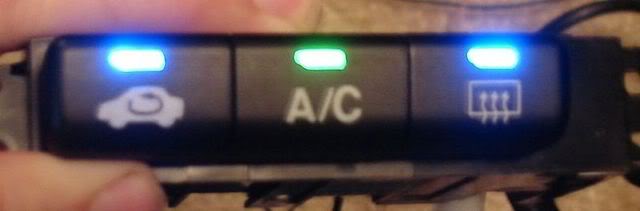
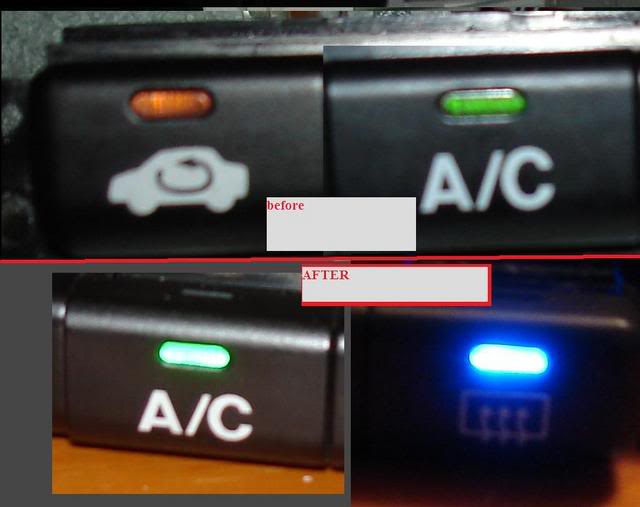
i just really hate not being able to see the AC light during the day.. hard to tell if it was ON or off from a angle. not anymore!
pull the center audio console and remove the AC controls.
BEST to use white leds on the temp section just because it looks so much better. or if your cheap or dont care this is what it will look like without the white strip.
kinda weak yes....
this way looks so much better!
Well first with the AC controls once you remove them pull the front ***** off. they simply pull off the front.
and the face has some plastic clips holding it to the unit, just pull the face off.
now pull out the clear plastic
again DREMEL TIME
now BEST to power the led strips to position them better on the back of the face, position them around and glue them down.
NOTE this is a picture of the just colored led strip, but they are simply glued inplace with some more hot glue
and solder the wires to the board.
and if you want to take it EVEN FURTHER change out the leds on the lower button controls.
tho you need raw leds and resistors for them... use th esmall 3MM leds. 5MM are to large for the buttons.
unsolder the stock leds NOTING THE led diodes position inside the head and be sure to solder the led in the same way! and also unsolder the resistors and solder in new resistors for the brighter leds.... you can use stock resistors BUT your leds wont be as bright.
stock yellow led compared to blue led from oznium
use any color you want....
i just really hate not being able to see the AC light during the day.. hard to tell if it was ON or off from a angle. not anymore!

Thread
Thread Starter
Forum
Replies
Last Post
Lewy2k
Mechanical Problems & Technical Chat
8
Oct 30, 2010 08:12 AM
new_2_civics
Mechanical Problems & Technical Chat
0
Apr 1, 2010 02:37 AM