
LED Headlight Accents


Thread Starter
|
HCF Member
Joined: Oct 2006
Posts: 749
From:
This DIY will show you how to make/install your own custom LED headlight accents. Enjoy!
Before you attempt this project, read through it once first.
Tools You'll Need:
1) Phillips and Flat Headed Screwdrivers
2) Ratchet Wrench: 10mm socket
3) Hot Glue Gun
4) Drill with various bits
5) Needle-nosed Pliers (not required but helpful)
6) Wire Strippers/Crimpers
7) Compressed Air source/Canned Air (not needed but again helpful)
Note*: My civic is a '99 civic, so bumper/headlight removal may be a little different for previous or newer generations.
Remove the Bumper
There are 4 screws, 2 bolts, and 7 clips that hold the bumper on. First open the hood, and then use a flathead screwdriver to pop out the clips above the grill. You have to pop the top part up first, and then they easily pull out.
Remove 1 screw from the front of each wheel well (where the bumper connects).
Remove the 2 screws on the bottom front part of the bumper.
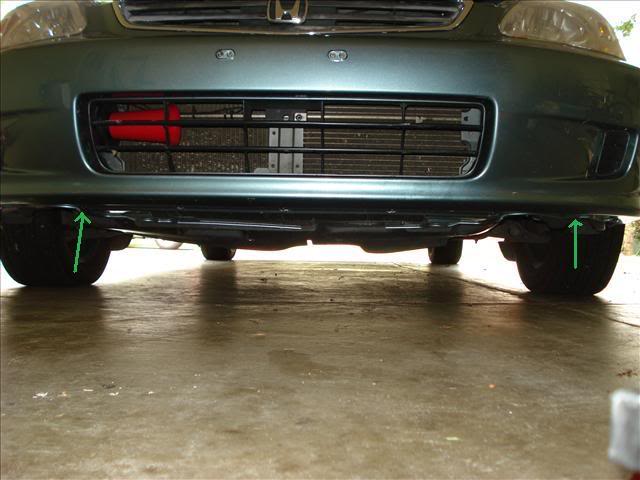
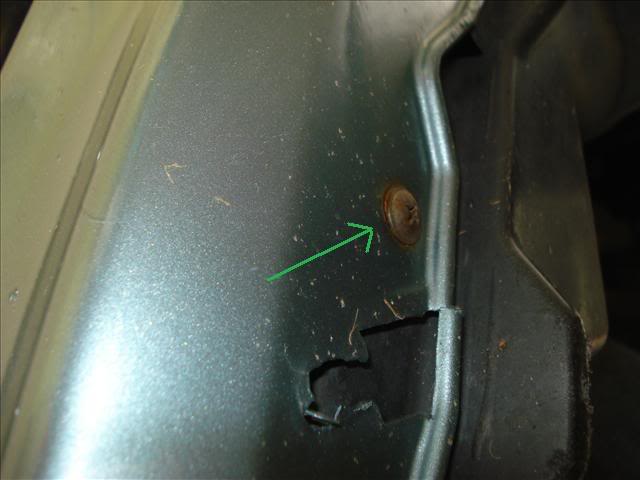
Remove the 2 10mm bolts on the bottom front part of the bumper.
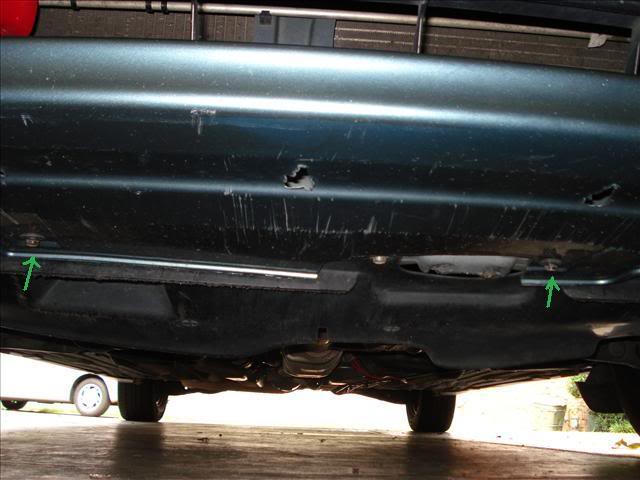
*Note: If your bumper has rubber trim on it, you may need to cut it where it overlaps the line where the fender and bumper touch.
Pull the bumper out towards you and set it aside (preferably on a towel to prevent scratches).
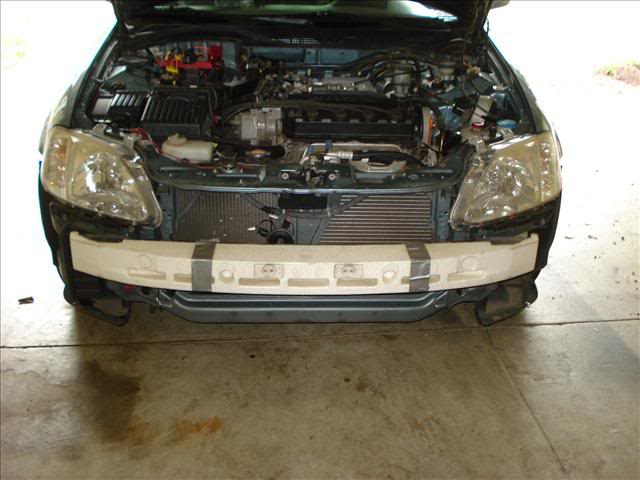
Headlight and Bulb Removal
Take the 10mm socket and remove the 4 bolts holding the headlights in. Then pull the headlight out a few inches so you have room to unplug the headlight bulbs.

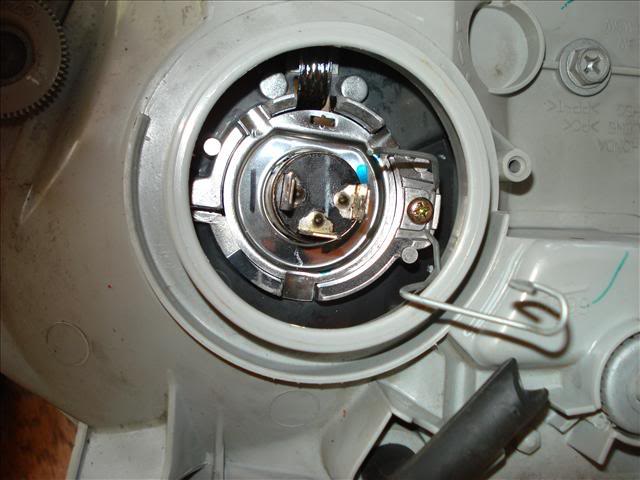
The main bulb connector should pull right out. There should be a small tab you press for the parking bulb which then allows you to just pull the connector out (this is where the needle-nosed pliers were helpful). Once you disconnect the wires pull out the headlight housing from the car.
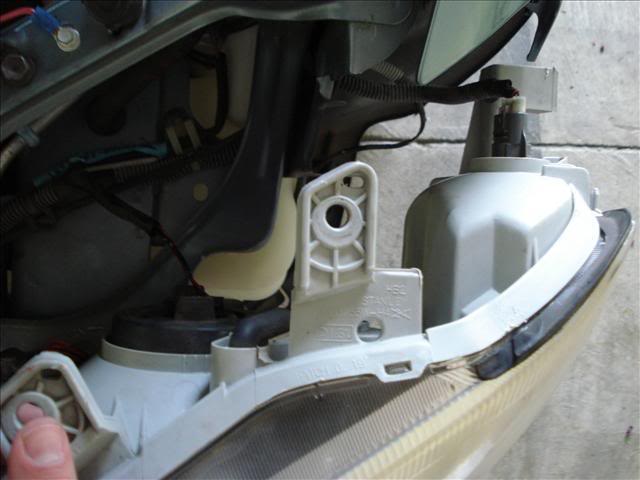
For the main bulb, remove the rubber grommet-like seal.
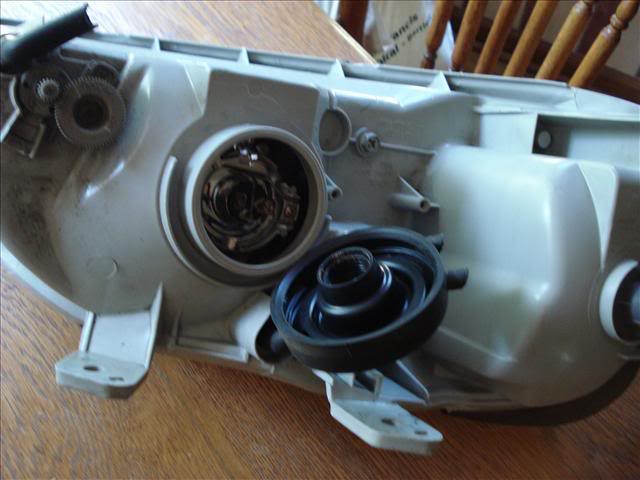
Then remove the bulb by pulling on the metal tabs.
For the parking light just twist and pull.
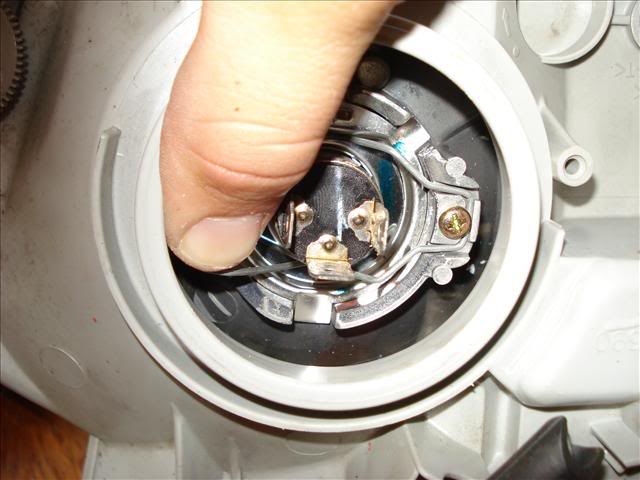
*Don't touch the bulb's glass surface with your fingers. (The oils can cause them to overheat and prematurely fail). Make sure you set them aside on a paper towel some where safe.
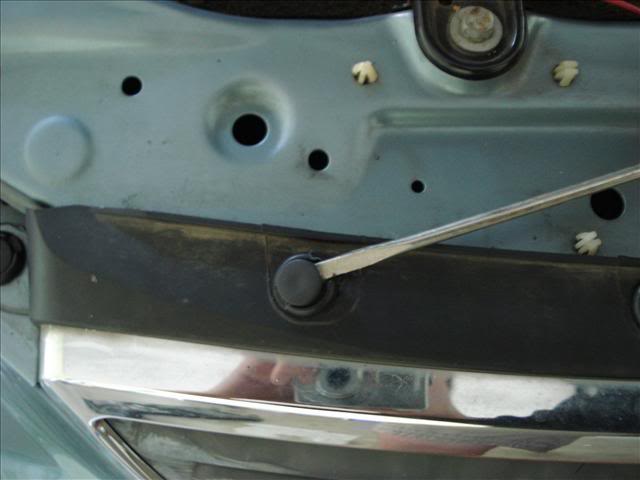
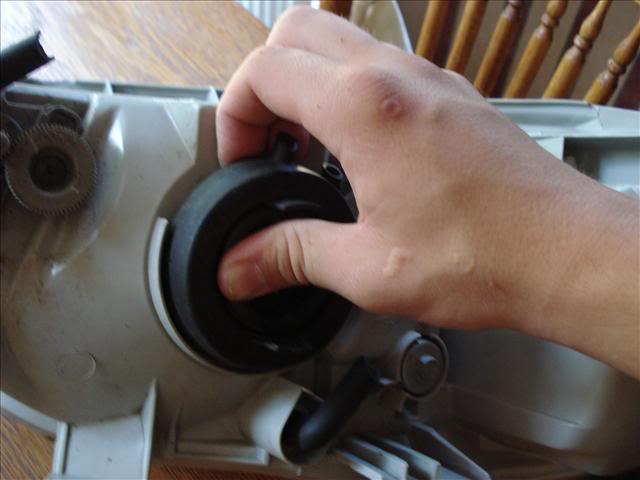
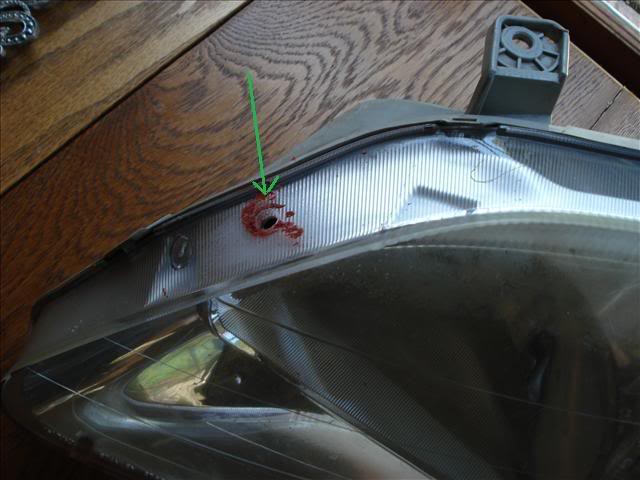
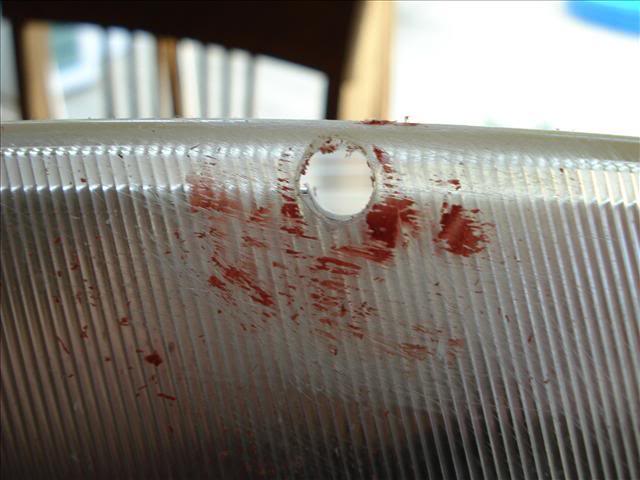
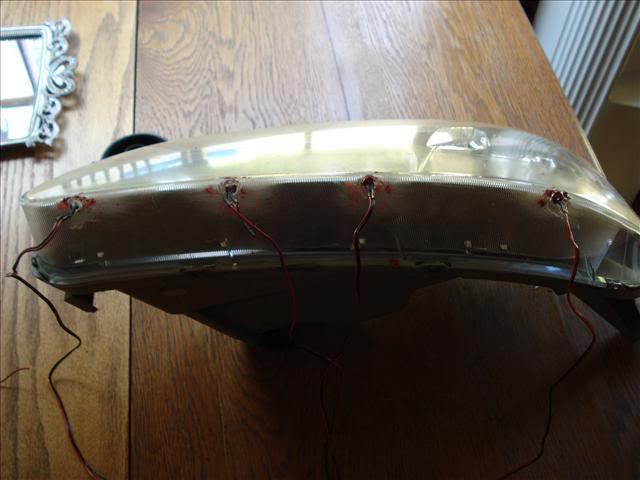
Drilling the holes
Determine the size drill bit that will drill a hole to ideally fit your LED. Drill the 5 holes. I figured that the best locations for the holes were:
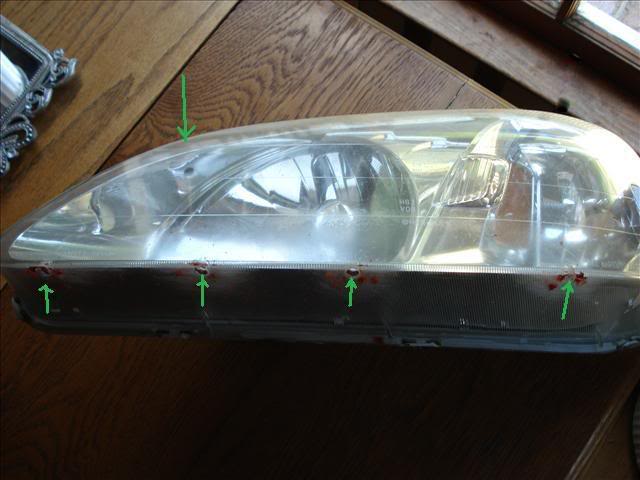
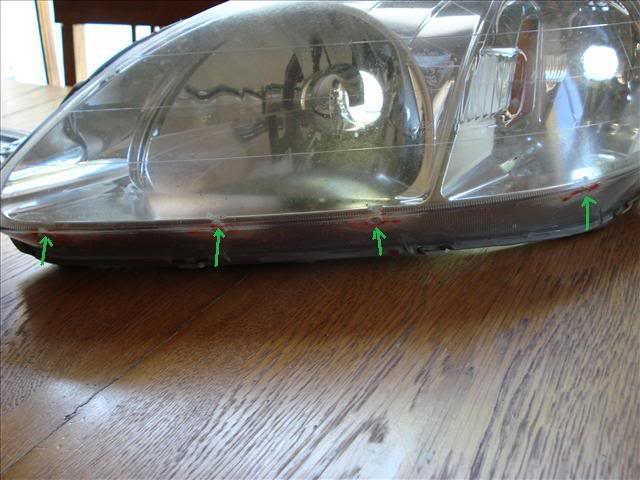
(Ignore the red stuff. That's just some silicone I put on there when I did it the first time cause I didn't have any clear).
When you drill the holes try to angle them slightly inward (since LEDs are directional) so the LEDs themselves will not be as visible, and so they will be aimed at the reflective interior of the housing.
I suggest you follow my approximate LED locations, but you can drill in different locations or use a different amount of LEDs. Just make sure when you drill into the housing that you do not drill into the parabolic mirror in the back. Since this is movable it would effect the alignment of your headlights. Wherever you drill them you want them where the will shine the most light and be the least visible (The LEDs themselves I mean).
Next using your compressed air source, hold the housing with the headlight part facing down and blast air into each one of the holes you drilled. Then shake the housing until you get most of the plastic shavings out of there.
Mount the LEDs and run wires
One at a time, glue the LEDs into the holes.
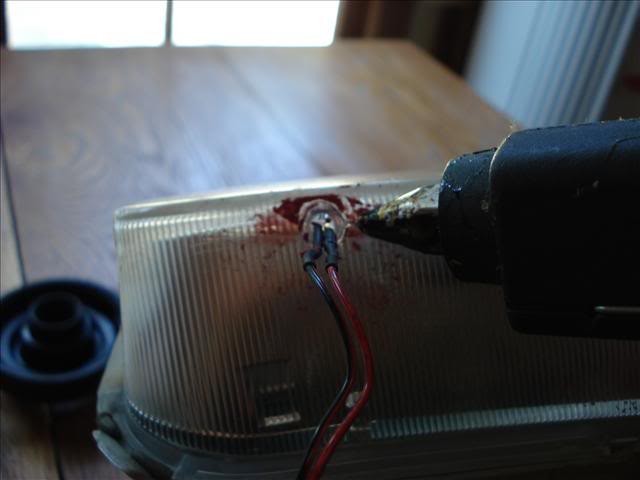
*If you're really paranoid about the headlight sealing, you can apply some clear silicone afterward but the glue should provide a sufficient seal.
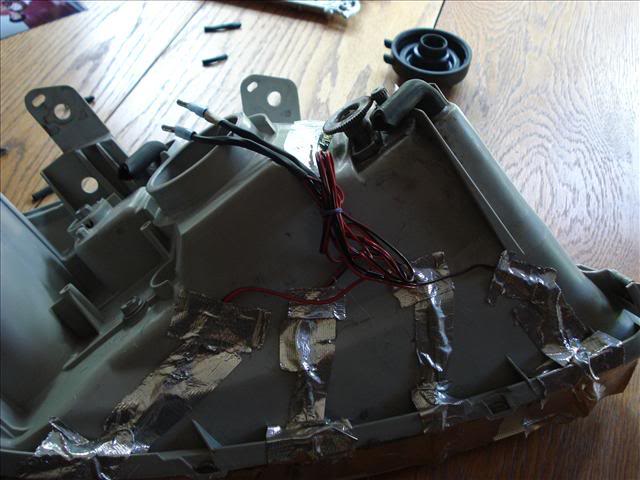
Once the glue has all dried bend the wires on the LEDs inward toward the rear of the headlight.
Take all the positive wires and wrap the wires altogether.
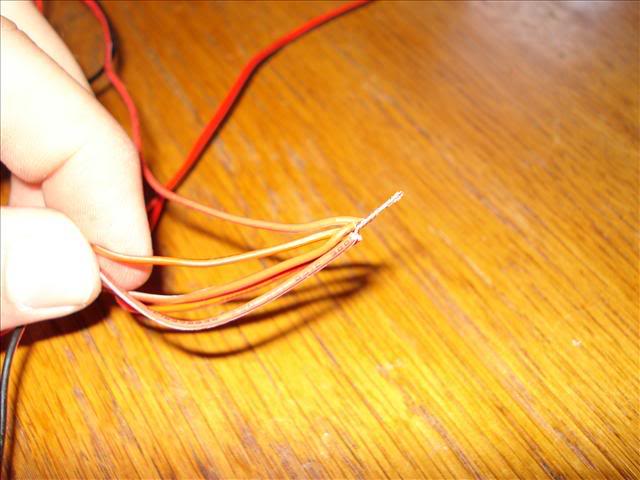
Repeat with negative side.
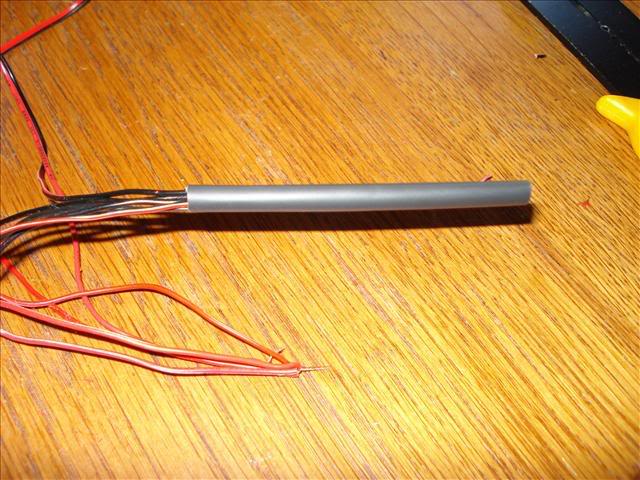
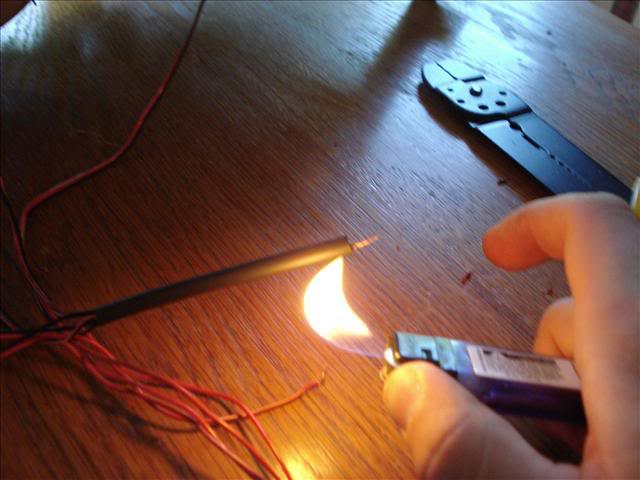
Then take heat shrink tubing and put some over each LEAD but don't cover the bare wire.
Then using some quick disconnects, crimp one onto the + and one onto the -.
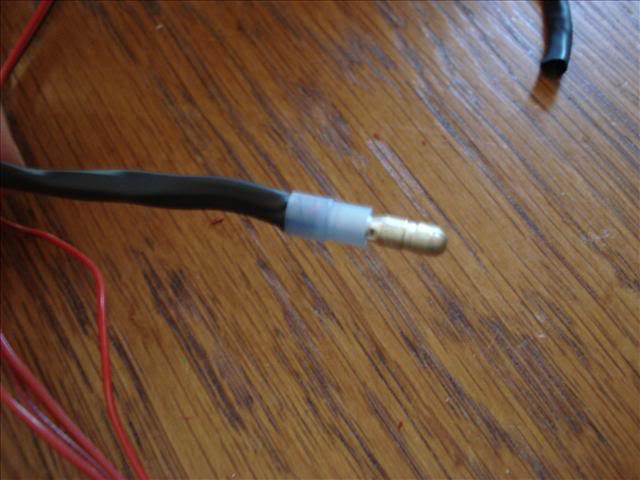
*Always use a female connector on any hot wires.
To protect the thin LED wires I used silver duct tape. Silver, black or colored (whatever your color scheme is) will look the best (most non-ricey) to protect and direct the wires (I used a rubber band to bind the loose wire together)

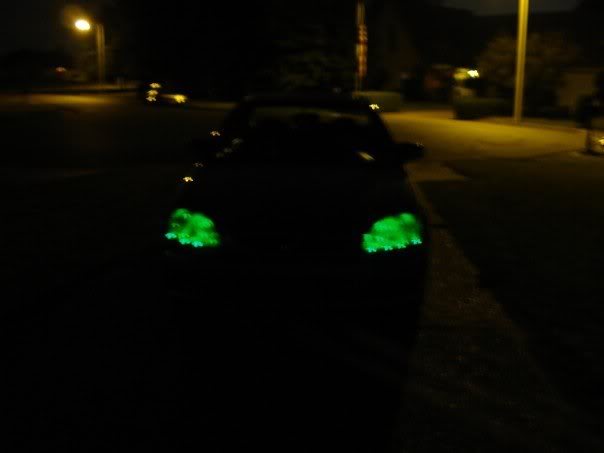
Final Steps: Next repeat the same process on the other headlight. After that wire them up to your desired 12v power source and switch. Reinstall the headlights and bumper. Like Haynes says: Installation in the reverse of removal.That's all, I hope you liked this DIY and the results that it gives. If you have any questions just PM them to me: ltkenbo
Enjoy!!!
End Result:
Before you attempt this project, read through it once first.
Tools You'll Need:
1) Phillips and Flat Headed Screwdrivers
2) Ratchet Wrench: 10mm socket
3) Hot Glue Gun
4) Drill with various bits
5) Needle-nosed Pliers (not required but helpful)
6) Wire Strippers/Crimpers
7) Compressed Air source/Canned Air (not needed but again helpful)
Note*: My civic is a '99 civic, so bumper/headlight removal may be a little different for previous or newer generations.
Remove the Bumper
There are 4 screws, 2 bolts, and 7 clips that hold the bumper on. First open the hood, and then use a flathead screwdriver to pop out the clips above the grill. You have to pop the top part up first, and then they easily pull out.
Remove 1 screw from the front of each wheel well (where the bumper connects).
Remove the 2 screws on the bottom front part of the bumper.
Remove the 2 10mm bolts on the bottom front part of the bumper.
*Note: If your bumper has rubber trim on it, you may need to cut it where it overlaps the line where the fender and bumper touch.
Pull the bumper out towards you and set it aside (preferably on a towel to prevent scratches).
Headlight and Bulb Removal
Take the 10mm socket and remove the 4 bolts holding the headlights in. Then pull the headlight out a few inches so you have room to unplug the headlight bulbs.
The main bulb connector should pull right out. There should be a small tab you press for the parking bulb which then allows you to just pull the connector out (this is where the needle-nosed pliers were helpful). Once you disconnect the wires pull out the headlight housing from the car.
For the main bulb, remove the rubber grommet-like seal.
Then remove the bulb by pulling on the metal tabs.
For the parking light just twist and pull.
*Don't touch the bulb's glass surface with your fingers. (The oils can cause them to overheat and prematurely fail). Make sure you set them aside on a paper towel some where safe.
Drilling the holes
Determine the size drill bit that will drill a hole to ideally fit your LED. Drill the 5 holes. I figured that the best locations for the holes were:
(Ignore the red stuff. That's just some silicone I put on there when I did it the first time cause I didn't have any clear).
When you drill the holes try to angle them slightly inward (since LEDs are directional) so the LEDs themselves will not be as visible, and so they will be aimed at the reflective interior of the housing.
I suggest you follow my approximate LED locations, but you can drill in different locations or use a different amount of LEDs. Just make sure when you drill into the housing that you do not drill into the parabolic mirror in the back. Since this is movable it would effect the alignment of your headlights. Wherever you drill them you want them where the will shine the most light and be the least visible (The LEDs themselves I mean).
Next using your compressed air source, hold the housing with the headlight part facing down and blast air into each one of the holes you drilled. Then shake the housing until you get most of the plastic shavings out of there.
Mount the LEDs and run wires
One at a time, glue the LEDs into the holes.
*If you're really paranoid about the headlight sealing, you can apply some clear silicone afterward but the glue should provide a sufficient seal.
Once the glue has all dried bend the wires on the LEDs inward toward the rear of the headlight.
Take all the positive wires and wrap the wires altogether.
Repeat with negative side.
Then take heat shrink tubing and put some over each LEAD but don't cover the bare wire.
Then using some quick disconnects, crimp one onto the + and one onto the -.
*Always use a female connector on any hot wires.
To protect the thin LED wires I used silver duct tape. Silver, black or colored (whatever your color scheme is) will look the best (most non-ricey) to protect and direct the wires (I used a rubber band to bind the loose wire together)
Final Steps: Next repeat the same process on the other headlight. After that wire them up to your desired 12v power source and switch. Reinstall the headlights and bumper. Like Haynes says: Installation in the reverse of removal.That's all, I hope you liked this DIY and the results that it gives. If you have any questions just PM them to me: ltkenbo
Enjoy!!!
End Result:
Last edited by WellFedHobo; Jan 30, 2010 at 11:20 AM.


Thread
Thread Starter
Forum
Replies
Last Post