
Smoked Tail Lights (Vinyl)


Thread Starter
|
HCF Member
Joined: Jul 2010
Posts: 81
From: Delray Beach Florida
This thread will cover what you need to do to have smoked taillights
Okay, first things first.
1. vinyl not tint, not paint, transparent black vinyl works the best for the curves and edges of tail lights. most newer civics have complex curves in the taillights this will make your install much easier.
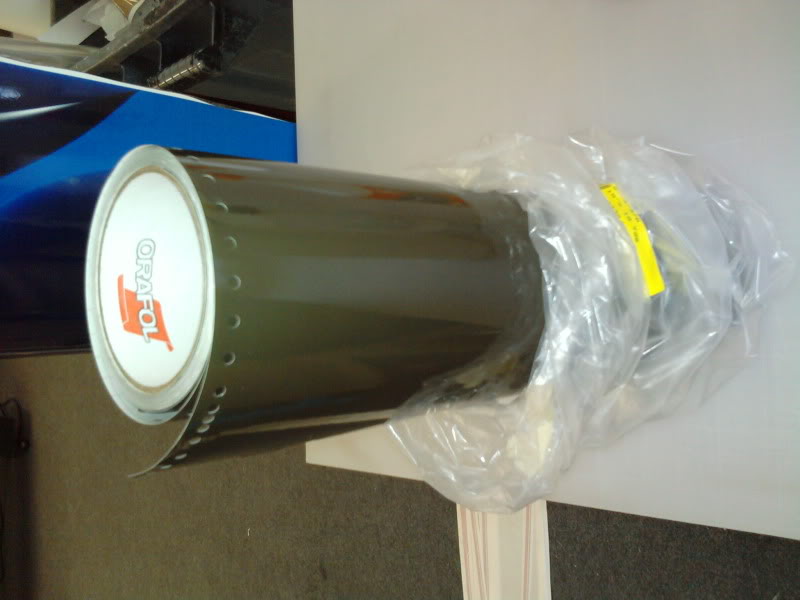
orical makes a great product for this.
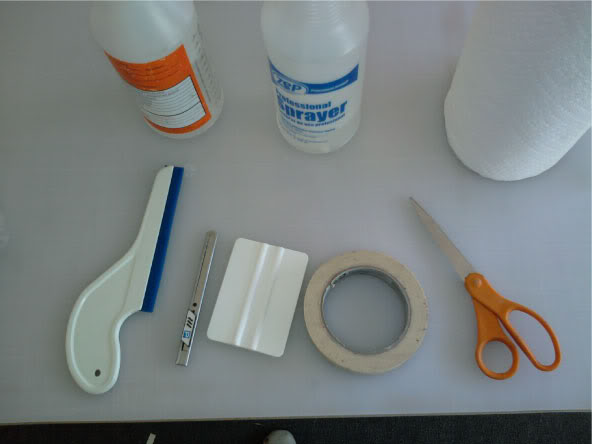
2. Tools, make sure you have the right tools to do this for optimal install,
here is what i used for this project. i used a soap and water solution(2 drops of soap to 1 bottle of water (shake well)) along with denatured alcohol/water mix(i use a 70%alcohol to 30% water but you may want to have that switched if you have never done this before).
3. Make sure you over size the piece you need to make sure you cover
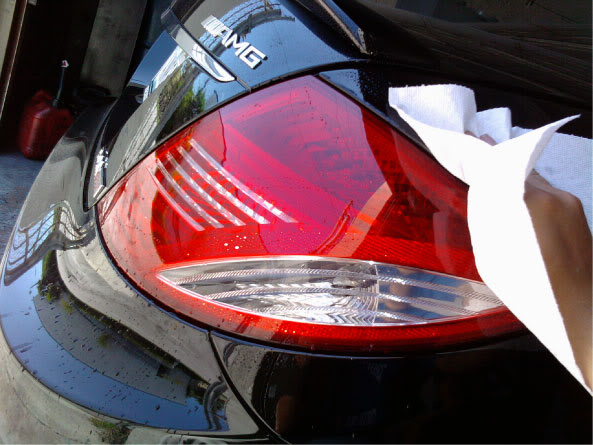
4. Clean the area of debree, dust, etc.. any dust or dirt can be seen
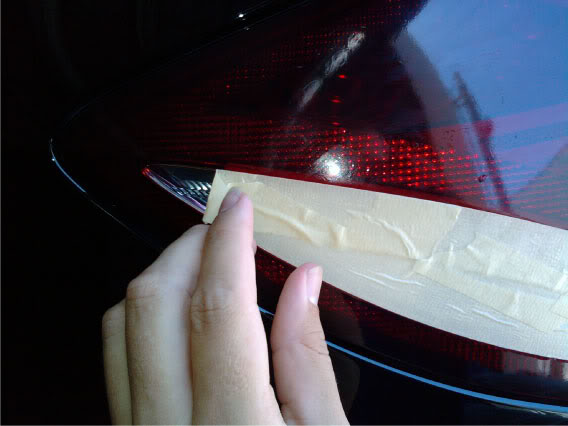
5. this car had the reverse lights in the same housing and the customer did not want them coverd so i used masking tape to cover the area that was not to be smoked. this also alows you to cut the vinyl to shape without cutting on the housing
6.soak the area very well with your soap and water mix to insure you can slide your piece around for best placement, remove the vinyl from the wax paper, while spraying the sticky side with denatured alcohol
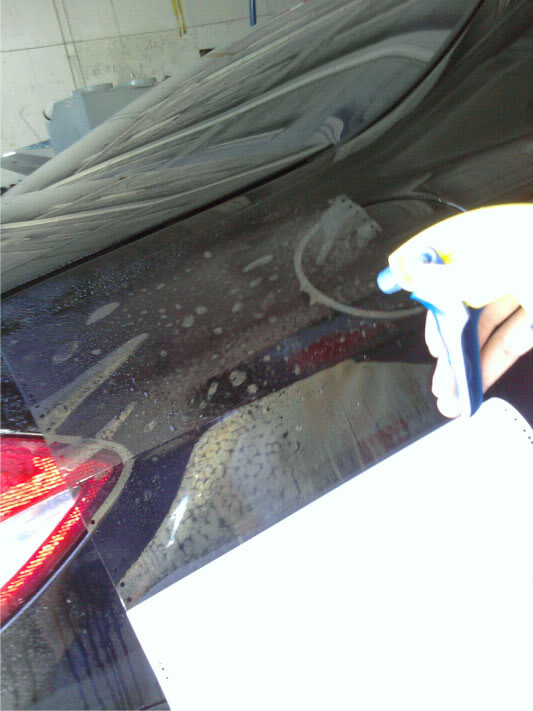
7. apply the piece to the taillight and start application from the center out. smooth out the vinyl using a rubber squeegee(on far left of tools pic)
8. heat..... well that is on a case by case bassis, i did not use any heat for this application but I have used it on other lights depends on the situation, just remember to go slow when using a heat gun i would rather take my time and heat it up slow then try to heat it really fast and burn the material.
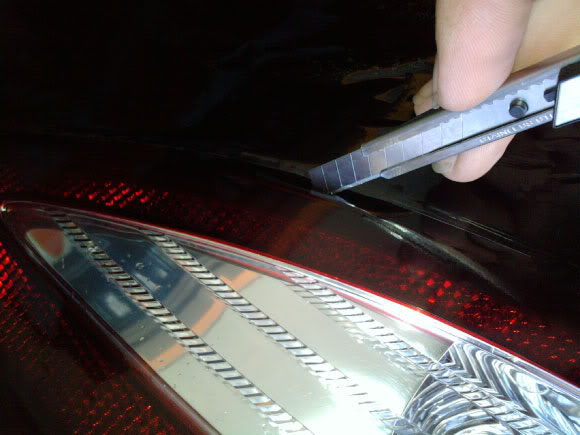
9. use a razorblade to cut off access material, remember when you are cutting not to cut on the car but the space between the housing and the paint. also leave your self some room to tuck the vinyl in around the edges so you dont leave any edges exposed

10.Remove all access material from work area
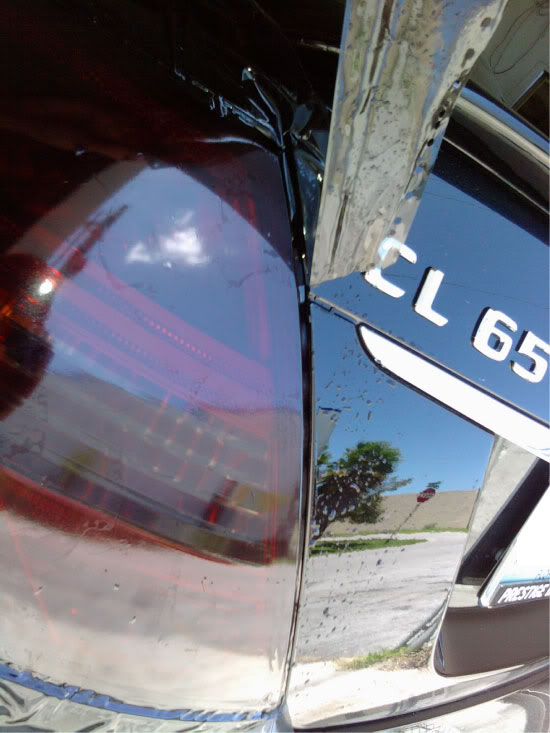
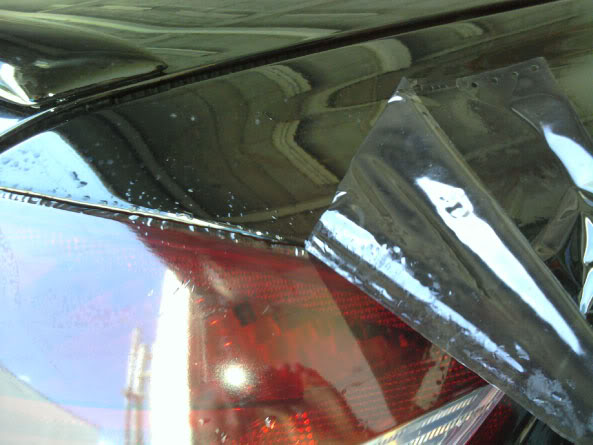
11. tuck the edge in with your squeegee
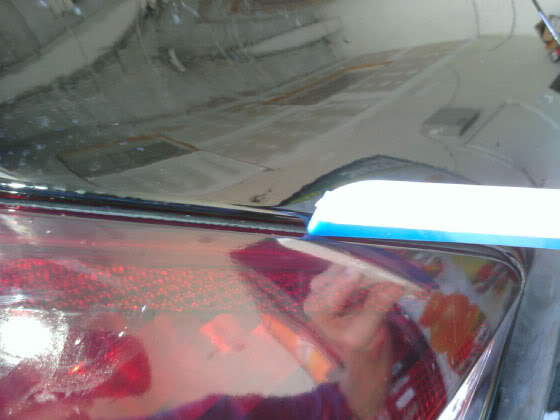

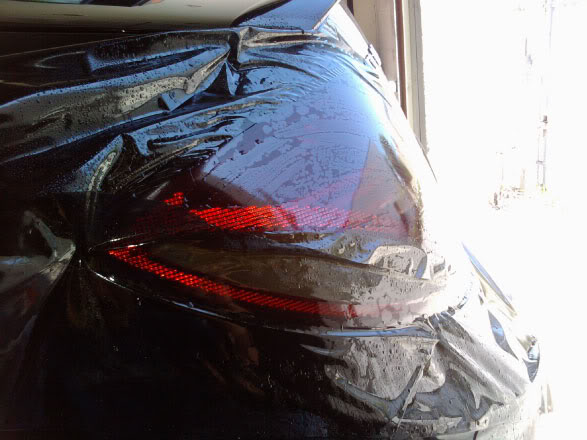
Here is a picture so show the difference between smoked and not
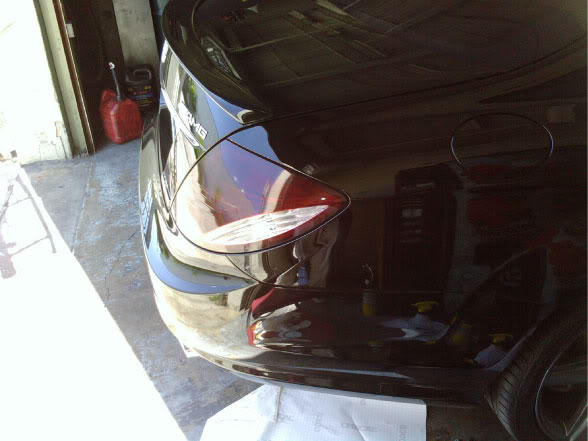
12.completed tail light with cut out reverse light


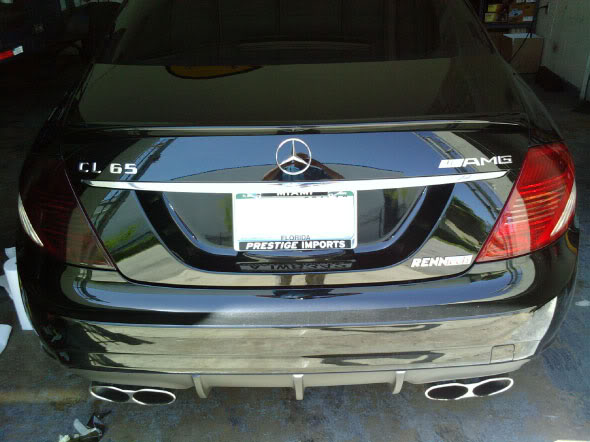
I think that covers it. if I missed anything or you have questions please let me know I will add to it. and for those of you who dont know the car it is sick

Good Luck
Okay, first things first.
1. vinyl not tint, not paint, transparent black vinyl works the best for the curves and edges of tail lights. most newer civics have complex curves in the taillights this will make your install much easier.
orical makes a great product for this.
2. Tools, make sure you have the right tools to do this for optimal install,
here is what i used for this project. i used a soap and water solution(2 drops of soap to 1 bottle of water (shake well)) along with denatured alcohol/water mix(i use a 70%alcohol to 30% water but you may want to have that switched if you have never done this before).
3. Make sure you over size the piece you need to make sure you cover
4. Clean the area of debree, dust, etc.. any dust or dirt can be seen
5. this car had the reverse lights in the same housing and the customer did not want them coverd so i used masking tape to cover the area that was not to be smoked. this also alows you to cut the vinyl to shape without cutting on the housing
6.soak the area very well with your soap and water mix to insure you can slide your piece around for best placement, remove the vinyl from the wax paper, while spraying the sticky side with denatured alcohol
7. apply the piece to the taillight and start application from the center out. smooth out the vinyl using a rubber squeegee(on far left of tools pic)
8. heat..... well that is on a case by case bassis, i did not use any heat for this application but I have used it on other lights depends on the situation, just remember to go slow when using a heat gun i would rather take my time and heat it up slow then try to heat it really fast and burn the material.
9. use a razorblade to cut off access material, remember when you are cutting not to cut on the car but the space between the housing and the paint. also leave your self some room to tuck the vinyl in around the edges so you dont leave any edges exposed
10.Remove all access material from work area
11. tuck the edge in with your squeegee
Here is a picture so show the difference between smoked and not
12.completed tail light with cut out reverse light
I think that covers it. if I missed anything or you have questions please let me know I will add to it. and for those of you who dont know the car it is sick
Good Luck

Thread
Thread Starter
Forum
Replies
Last Post
itzcorky
Mechanical Problems & Technical Chat
3
Sep 21, 2011 07:45 AM