Inside and Out Talk about your interior and exterior mods here.

Guage Pod Cluster

Thread Tools
 
Search this Thread
 
Old Sep 29, 2009 | 10:00 AM
  #1  
fabmaster's Avatar
Thread Starter
|
HCF Member
Joined: Sep 2009
Posts: 58
From: South Haven, MI
Default Guage Pod Cluster

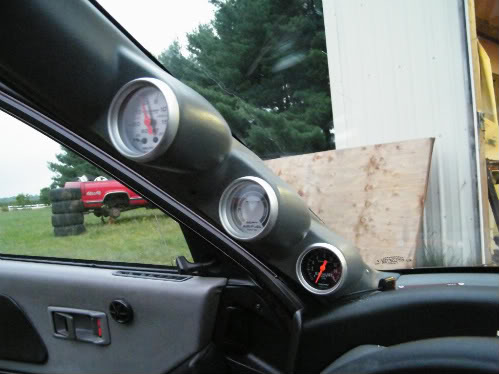
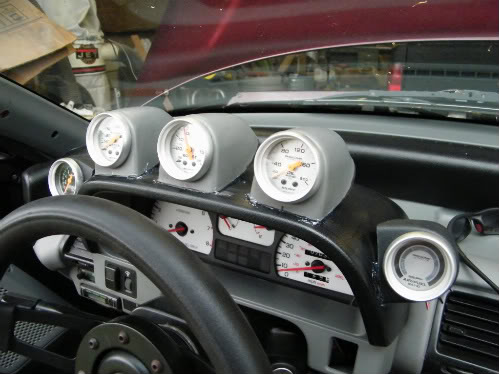
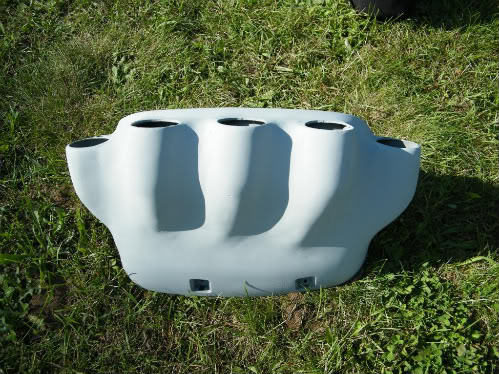
I wanted to do something about the guage pods on the A-pillar. Everyone has them there and......I'm not everyone. I also have two in the center console.

Name:  DSCF4444.jpg
Views: 73
Size:  36.1 KB

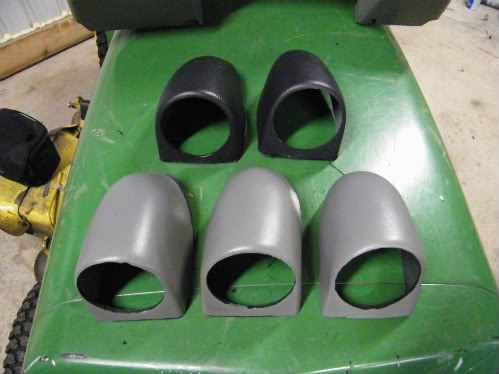
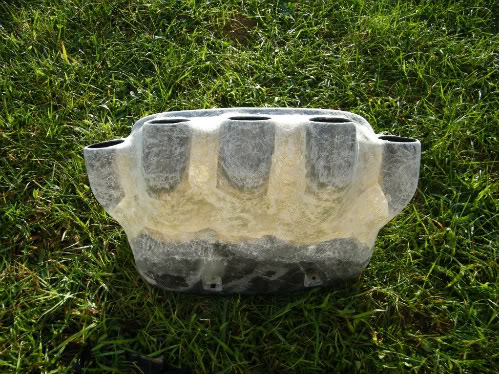
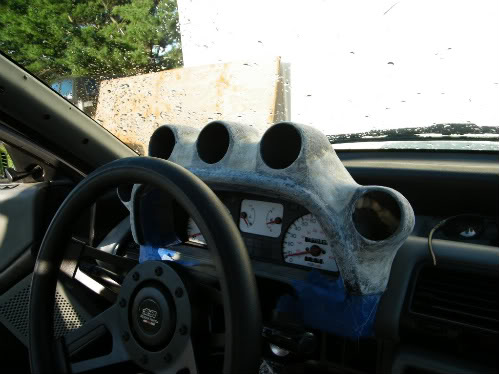
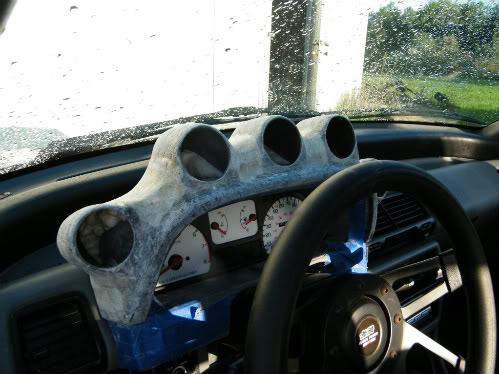
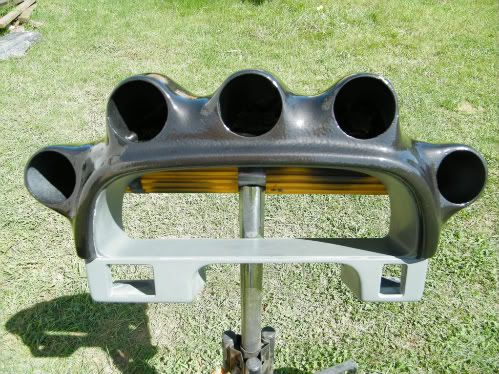
I cut up the A-pillar pod and got another double one from a buddy of mine.
Name:  DSCF4445.jpg
Views: 91
Size:  31.8 KB

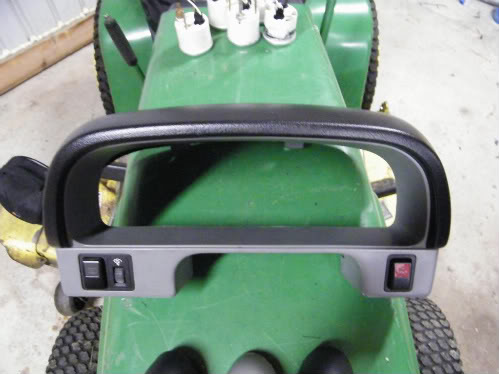
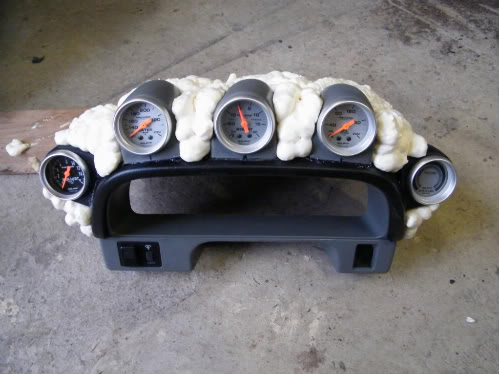
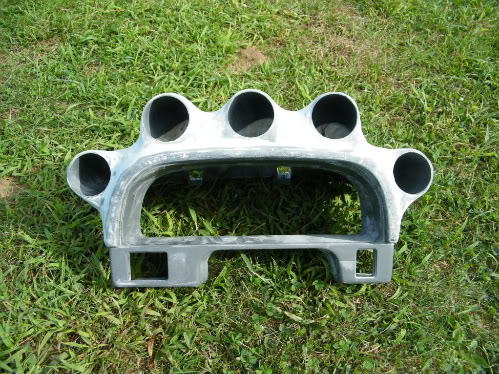
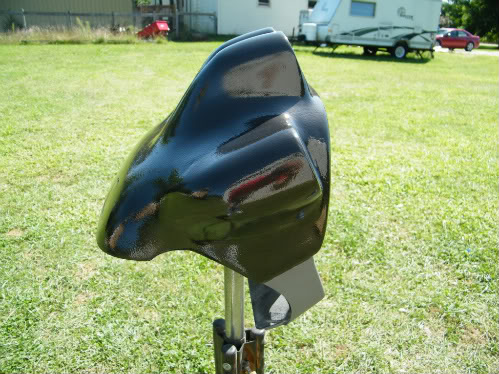
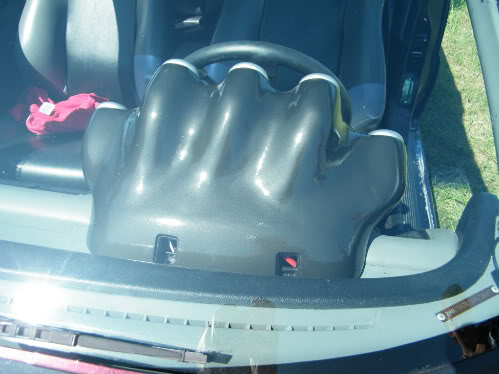
I took off the guage cluster cover to start the modifications
Name:  DSCF4446.jpg
Views: 71
Size:  32.4 KB

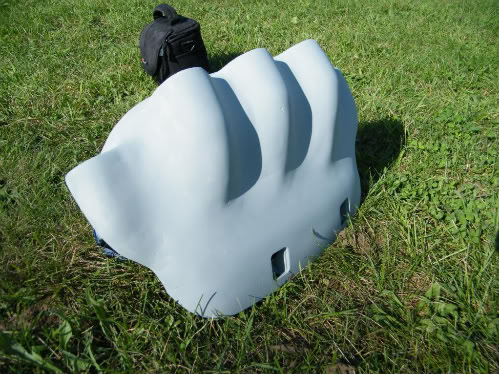
Hot glued the pods into place
Name:  DSCF4458.jpg
Views: 75
Size:  35.1 KB
Name:  DSCF4457.jpg
Views: 69
Size:  42.8 KB
Name:  DSCF4454.jpg
Views: 89
Size:  41.6 KB

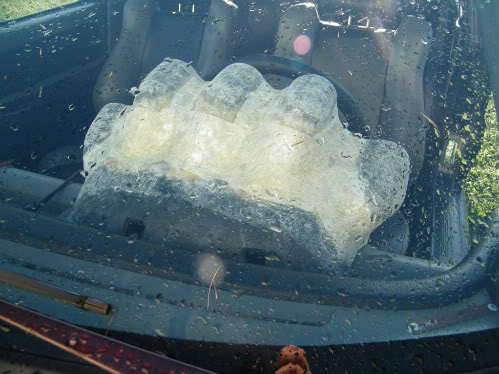
Filled in the space with great stuff
Name:  DSCF4461.jpg
Views: 84
Size:  37.5 KB
Name:  DSCF4462.jpg
Views: 63
Size:  40.8 KB

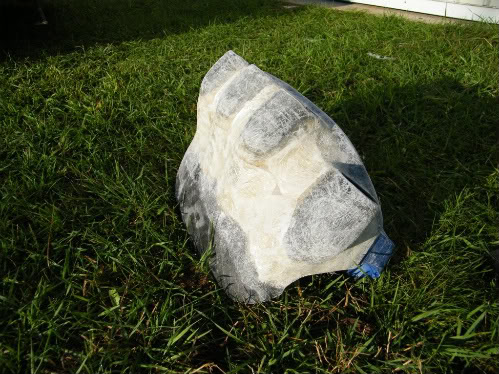
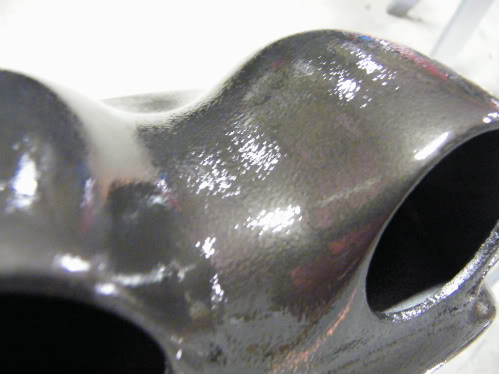
After sculpting the foam I covered it with foil to prevent the resin from eating it and layed down some glass.
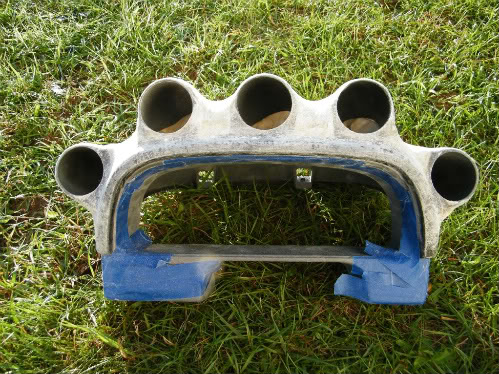
Name:  DSCF4464.jpg
Views: 76
Size:  90.0 KB
Name:  DSCF4465.jpg
Views: 73
Size:  72.6 KB
Name:  DSCF4466.jpg
Views: 76
Size:  85.8 KB
 
Old Sep 29, 2009 | 10:01 AM
  #2  
fabmaster's Avatar
Thread Starter
|
HCF Member
Joined: Sep 2009
Posts: 58
From: South Haven, MI
Default

Test fit
Name:  DSCF4475.jpg
Views: 67
Size:  33.4 KB
Name:  DSCF4469.jpg
Views: 76
Size:  39.3 KB
Name:  DSCF4470.jpg
Views: 71
Size:  45.6 KB
Name:  DSCF4471.jpg
Views: 78
Size:  49.3 KB

Added body filler
Name:  DSCF4477.jpg
Views: 79
Size:  88.3 KB
Name:  DSCF4479.jpg
Views: 86
Size:  83.8 KB

Shot with some sandable primer to see all the work I have left
Name:  DSCF4481.jpg
Views: 71
Size:  82.5 KB
Name:  DSCF4482.jpg
Views: 62
Size:  76.5 KB
Name:  DSCF4483.jpg
Views: 73
Size:  71.5 KB
 
Old Sep 29, 2009 | 10:02 AM
  #3  
fabmaster's Avatar
Thread Starter
|
HCF Member
Joined: Sep 2009
Posts: 58
From: South Haven, MI
Default

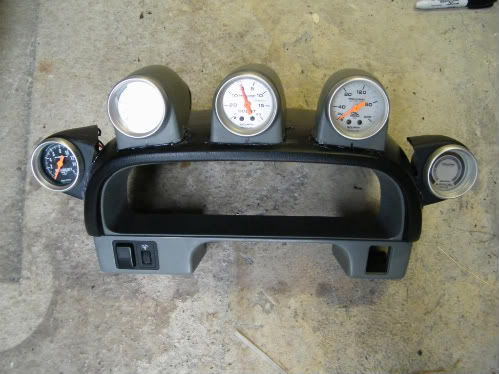
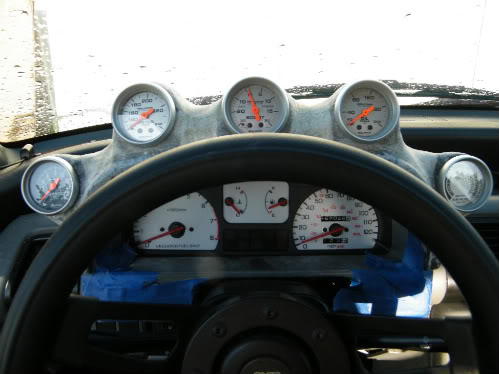
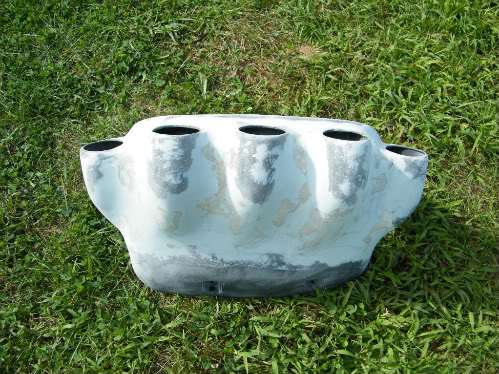
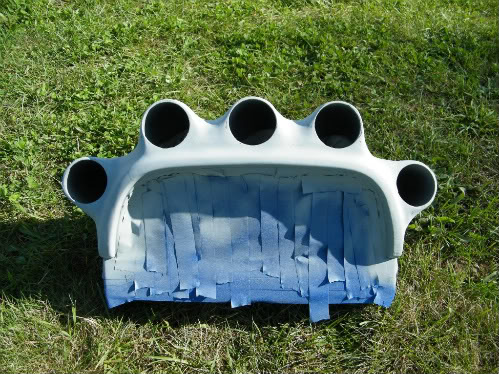
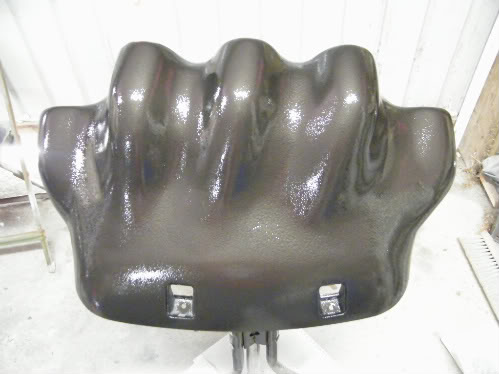
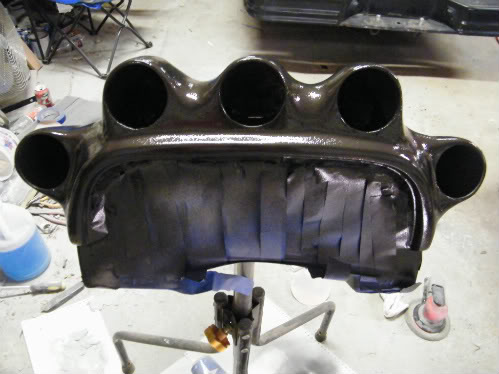
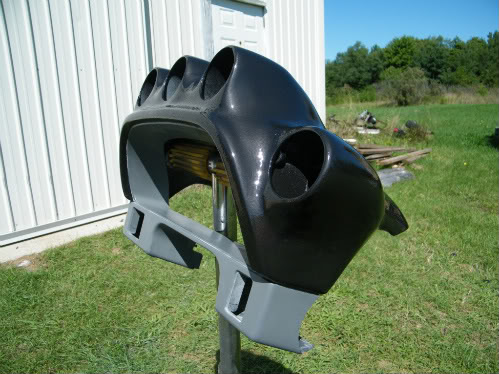
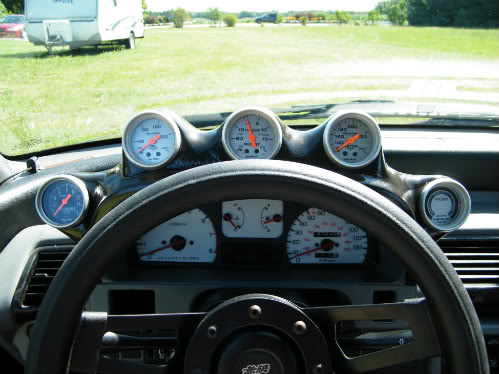
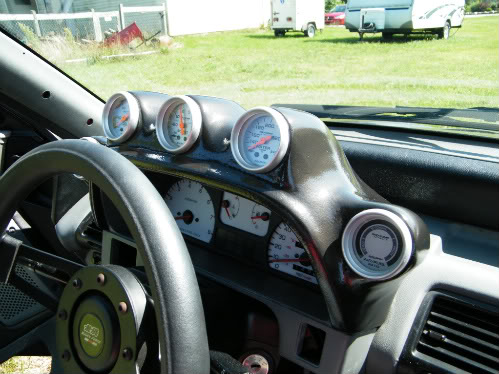
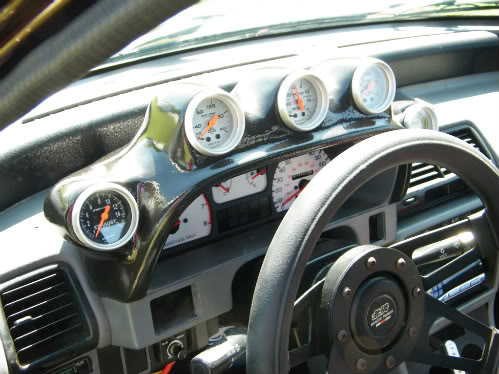
I extended two of the pod "tails" on the top of the dash to even things up and shot it with more primer. Sanded that up and threw on the first coat of paint. It is a hammered metal black. I think I like the look.

Name:  DSCF4488.jpg
Views: 68
Size:  30.7 KB
Name:  DSCF4489.jpg
Views: 67
Size:  33.7 KB
Name:  DSCF4490.jpg
Views: 70
Size:  38.2 KB
Name:  DSCF4491.jpg
Views: 65
Size:  28.2 KB
 
Old Sep 29, 2009 | 10:04 AM
  #4  
fabmaster's Avatar
Thread Starter
|
HCF Member
Joined: Sep 2009
Posts: 58
From: South Haven, MI
Default

I got 6 coats of paint on it and now I'm going to let it bake in the car where it's warm. (the paint is still a little soft)

Name:  DSCF4492.jpg
Views: 81
Size:  75.2 KB
Name:  DSCF4493.jpg
Views: 74
Size:  54.0 KB
Name:  DSCF4494.jpg
Views: 64
Size:  64.8 KB
Name:  DSCF4495.jpg
Views: 63
Size:  65.3 KB

Installed minus the screw caps
Name:  DSCF4497.jpg
Views: 62
Size:  40.3 KB
Name:  DSCF4498.jpg
Views: 72
Size:  35.8 KB
Name:  DSCF4499.jpg
Views: 65
Size:  45.2 KB
Name:  DSCF4500.jpg
Views: 82
Size:  51.6 KB
Name:  DSCF4501.jpg
Views: 90
Size:  51.9 KB
 
Old Sep 29, 2009 | 10:04 AM
  #5  
94civichatchback's Avatar
Chubby Chaser
Joined: Dec 2007
Posts: 4,681
From: whitwell,Tn 37397
Default

looks like alot of work im glad your creative but thats way to many gauges for me looks like a space ship console
 
Old Sep 29, 2009 | 10:23 AM
  #6  
danomatic93's Avatar
June 2010 ROTM
Joined: Oct 2006
Posts: 3,284
From: Milwaukee, WI
Default

When I first looked I said eww. But I'm all for innovation and creativity, so great work! It looks like a hand or fist to me. Again, great work!
 
Old Sep 29, 2009 | 10:40 AM
  #7  
trustdestruction's Avatar
Moderator
Joined: May 2007
Posts: 11,417
From: FL
Default

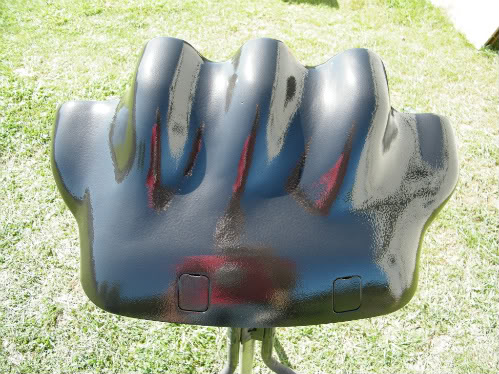
You did a good job and the work looks good but it's sort of ugly in shape.

I feel that it should be a continuous raised curve rather than a hump where every gauge is. Another idea would be that you could put 2 or 3 of those gauges below the cluster, sort of like the 96-00 Cluster pod that I believe autometer makes.
 

Last edited by trustdestruction; Sep 29, 2009 at 05:59 PM.
Old Sep 29, 2009 | 02:34 PM
  #8  
sfazngiants's Avatar
HCF Member
Joined: Oct 2007
Posts: 3,199
From: NorCal
Default

great fab work, very creative
 
Old Oct 3, 2009 | 06:12 PM
  #9  
FlipHKD720's Avatar
HCF Member
Joined: Mar 2006
Posts: 8,442
From: Marquette, MI
Default

wow, looks great, super unique, definitely like it
 
Old Apr 10, 2010 | 08:09 PM
  #10  
Kenny-g's Avatar
I'm Spock Dammit!!!!!
Joined: Mar 2010
Posts: 1,563
From: Cibolo, TX (NE San Antonio)
Default

I kno im uber late on this one but imo it wouldve been kooler with only the two on the far outside (minus the three on the top if that helps my explanation) and putting leaving the other three on the pillar where they originally were suppost to be...wouldve been sleek and look like some company made it that way.


All times are GMT -8. The time now is 03:56 PM.