
DIY Combination Switch Fix (Headlight Switch)


Thread Starter
|
June 2010 ROTM
Joined: Oct 2006
Posts: 3,284
From: Milwaukee, WI
With age and use the Combination Switch (Headlight switch) will fail to turn on the headlights, sometimes intermittently. It’s annoying and there is a way to fix it.

VIDEO 1
Quick video:
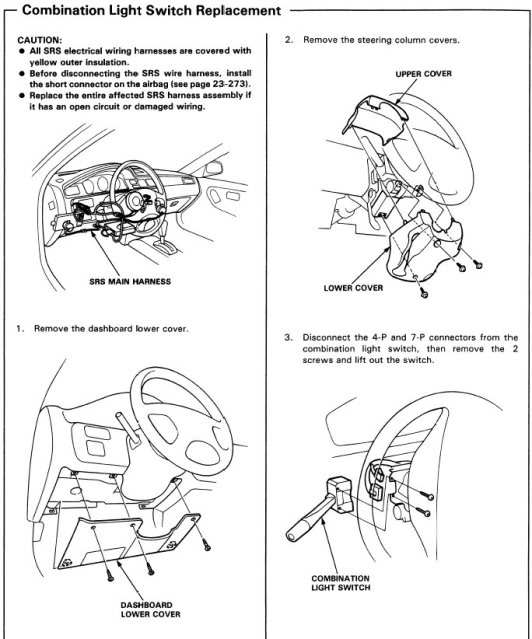
1. To start, remove the steering column’s three screws and remove the column. (step 2 in manual image)
2. Turn the steering wheel so that you can remove the two screws holding the Combination switch in. Then unplug the two plugs to remove the switch. (step 3 in manual image)
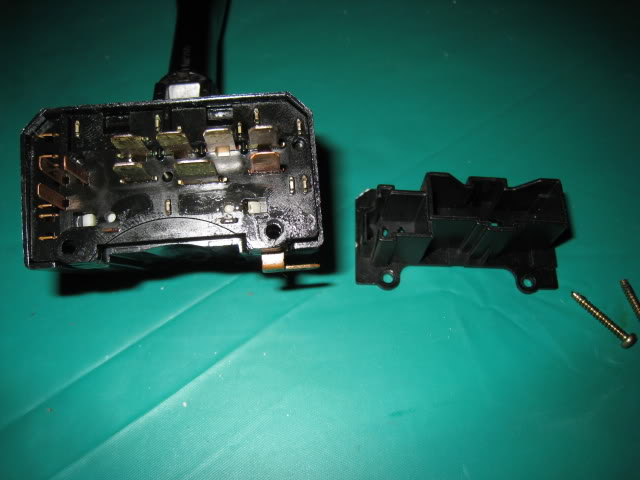
3. Remove the two screws on the back of the switch.
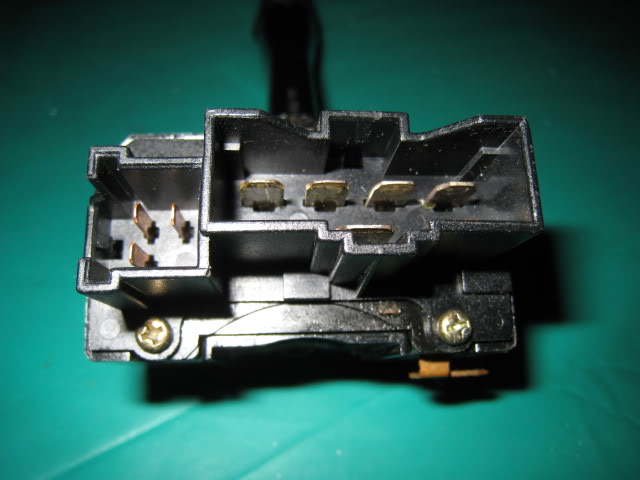
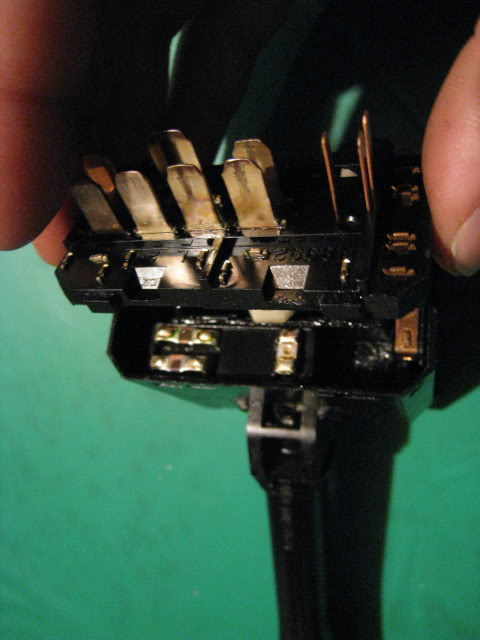
4. Notice that the pin shield is a separate piece from the pin piece underneath. If you hold the pin piece underneath down, you can pull the top shield piece off. Pull from the side with the two screw holes.
5. Notice the two little white tabs below the pins (seen in image above). They are part of yet another separate white piece. Also, notice that just like the previous step, you can hold down on this new white underneath piece. So, press in these two white tabs while holding the white piece down and pull up on the top pin piece.
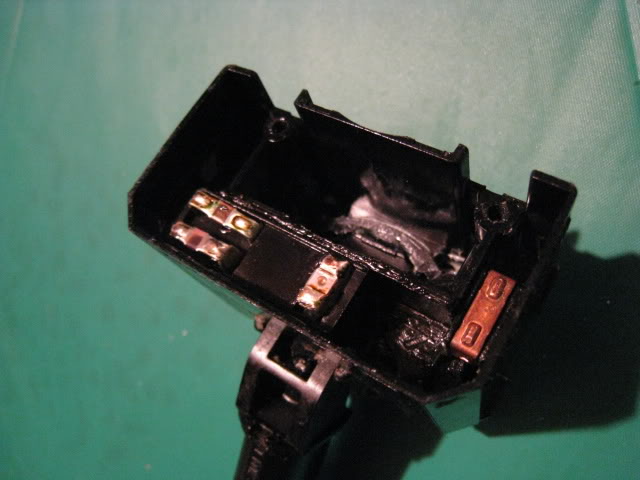
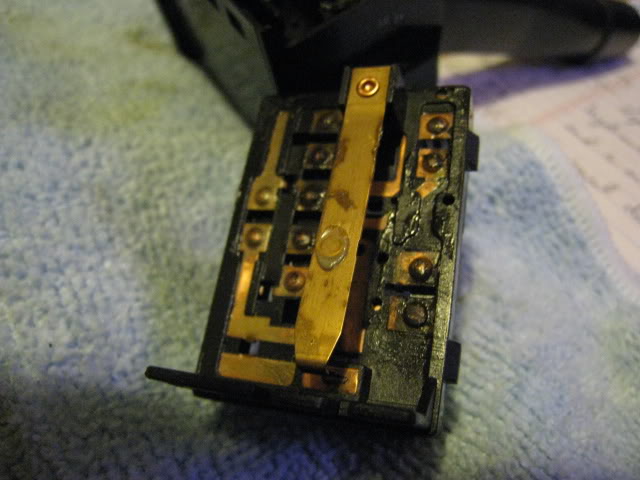
Once that top pin part is off, here’s what you’ll see:
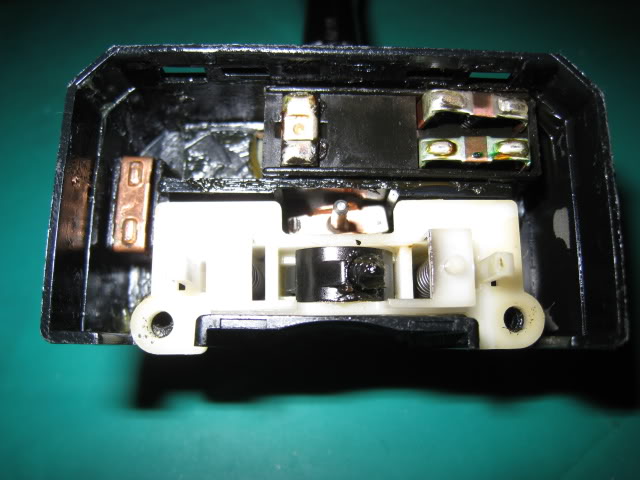
Make sure the contact piece on the left stays in the middle otherwise you’ll lose you blinkers.
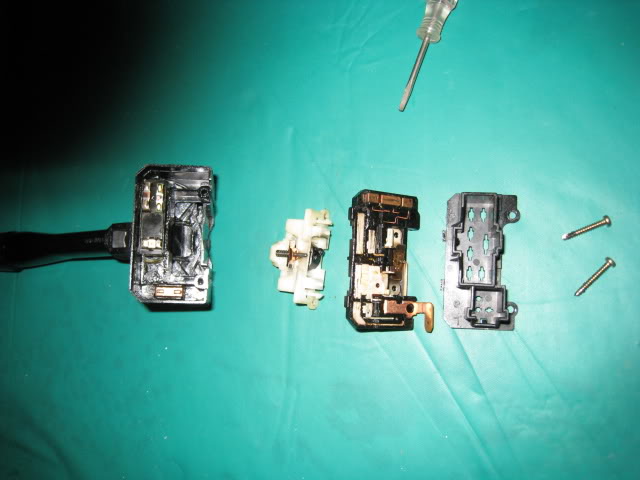
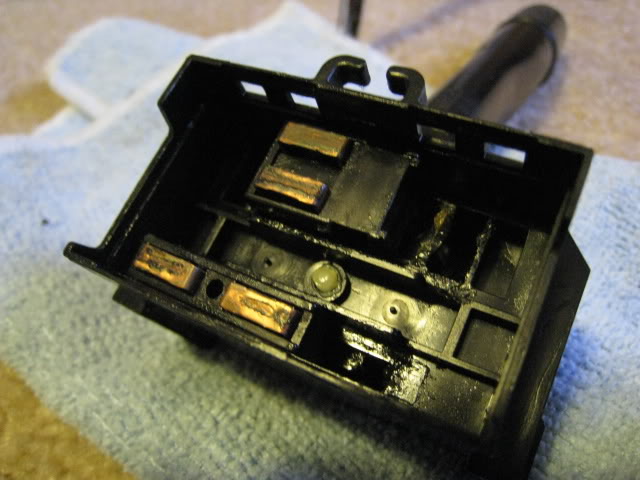
Everything is now apart:
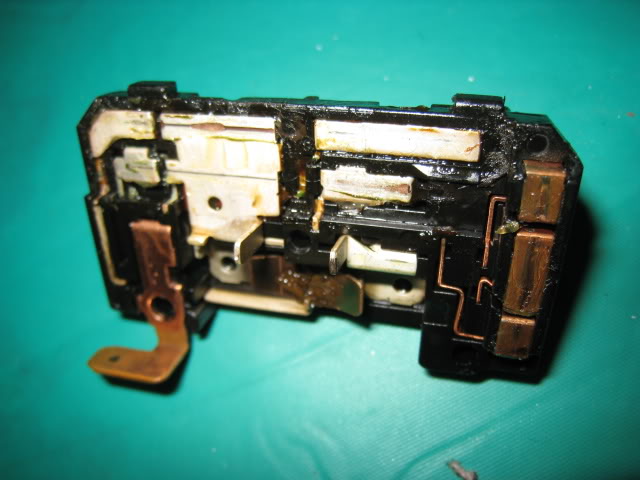
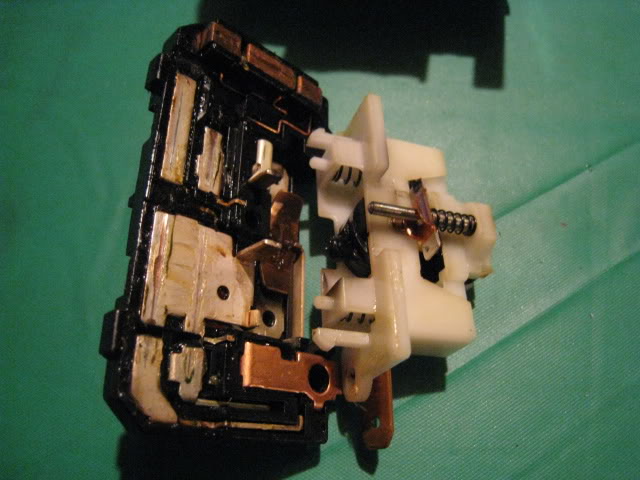
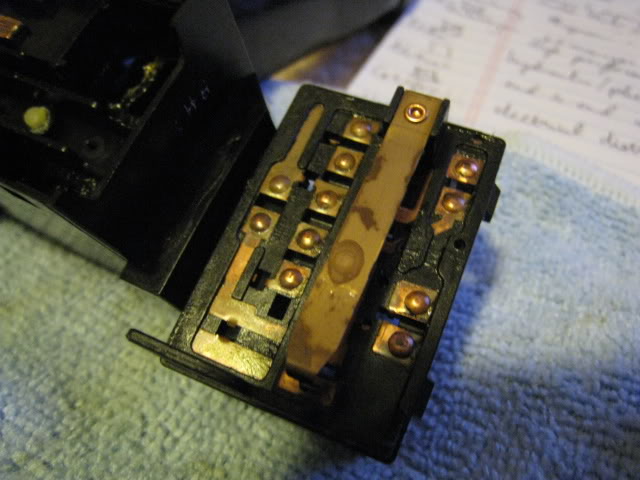
6. Clean the contacts on the underside of the piece with the pins. My tool of choice is a Q-tip and rubbing alcohol. It should look like this after being cleaned:
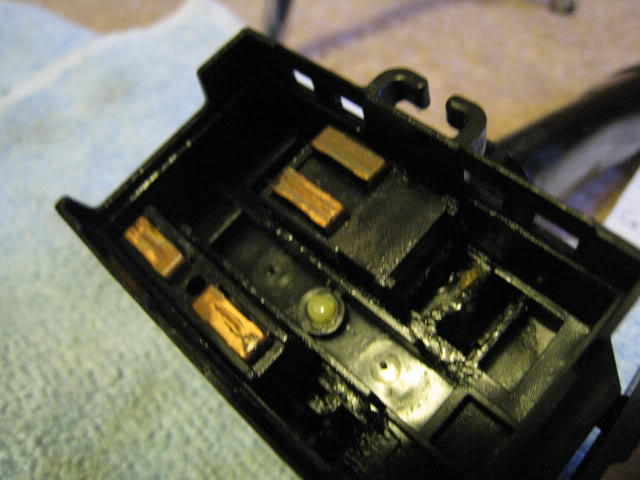
7. Lubricate the contacts. Add some dielectric grease to the contacts. You can use some of the grease that’s in the switch or grab a $1 pack of dielectric grease next time you’re at a parts store.
8. Reassemble

VIDEO 2
Quick video of checking operation of the other side of the Combo Switch. Basically just an inspection and finding the springs, to replace any broken ones, would be quite difficult to find:
VIDEO 3
Wiper Combo Switch, procedure similar to Headlight Switch, so if you need check out this video for a quick walkthrough:
Dirty
Clean
VIDEO 1
Quick video:
1. To start, remove the steering column’s three screws and remove the column. (step 2 in manual image)
2. Turn the steering wheel so that you can remove the two screws holding the Combination switch in. Then unplug the two plugs to remove the switch. (step 3 in manual image)
3. Remove the two screws on the back of the switch.
4. Notice that the pin shield is a separate piece from the pin piece underneath. If you hold the pin piece underneath down, you can pull the top shield piece off. Pull from the side with the two screw holes.
5. Notice the two little white tabs below the pins (seen in image above). They are part of yet another separate white piece. Also, notice that just like the previous step, you can hold down on this new white underneath piece. So, press in these two white tabs while holding the white piece down and pull up on the top pin piece.
Once that top pin part is off, here’s what you’ll see:
Make sure the contact piece on the left stays in the middle otherwise you’ll lose you blinkers.
Everything is now apart:
6. Clean the contacts on the underside of the piece with the pins. My tool of choice is a Q-tip and rubbing alcohol. It should look like this after being cleaned:
7. Lubricate the contacts. Add some dielectric grease to the contacts. You can use some of the grease that’s in the switch or grab a $1 pack of dielectric grease next time you’re at a parts store.
8. Reassemble
VIDEO 2
Quick video of checking operation of the other side of the Combo Switch. Basically just an inspection and finding the springs, to replace any broken ones, would be quite difficult to find:
VIDEO 3
Wiper Combo Switch, procedure similar to Headlight Switch, so if you need check out this video for a quick walkthrough:
Dirty
Clean
Last edited by danomatic93; Mar 24, 2009 at 08:40 PM.


Thread
Thread Starter
Forum
Replies
Last Post
DannyHC
Mechanical Problems & Technical Chat
8
Jun 21, 2009 09:53 PM
Fiirkan
Header, Intake, & Exhaust
8
Jul 29, 2006 05:24 PM