
DIY VTEC solenoid minor overhaul


Thread Starter
|
HCF Member
Joined: Dec 2007
Posts: 689
From: Saskatchewan, Canada
While I'm waiting on the machine shop to finish my head and block, I figured I'd clean my VTEC solenoid. I didn't do a complete overhaul, but, it's good enough for me.
I won't go over removal of the actual solenoid, as I had already removed mine, and it is fairly easy to do.
The whole process took maybe an hour, depending on how clean you want it. I'd rate it at a level of super easy. It is just cleaning after all!
Tools/parts/supplies required:
10mm socket wrench
22mm box end wrench
Tiny flathead screwdriver or pick
Toothbrushes, the smaller the better
Paper towel
Intake cleaner, brake cleaner, Acetone, anything to remove caked on oil
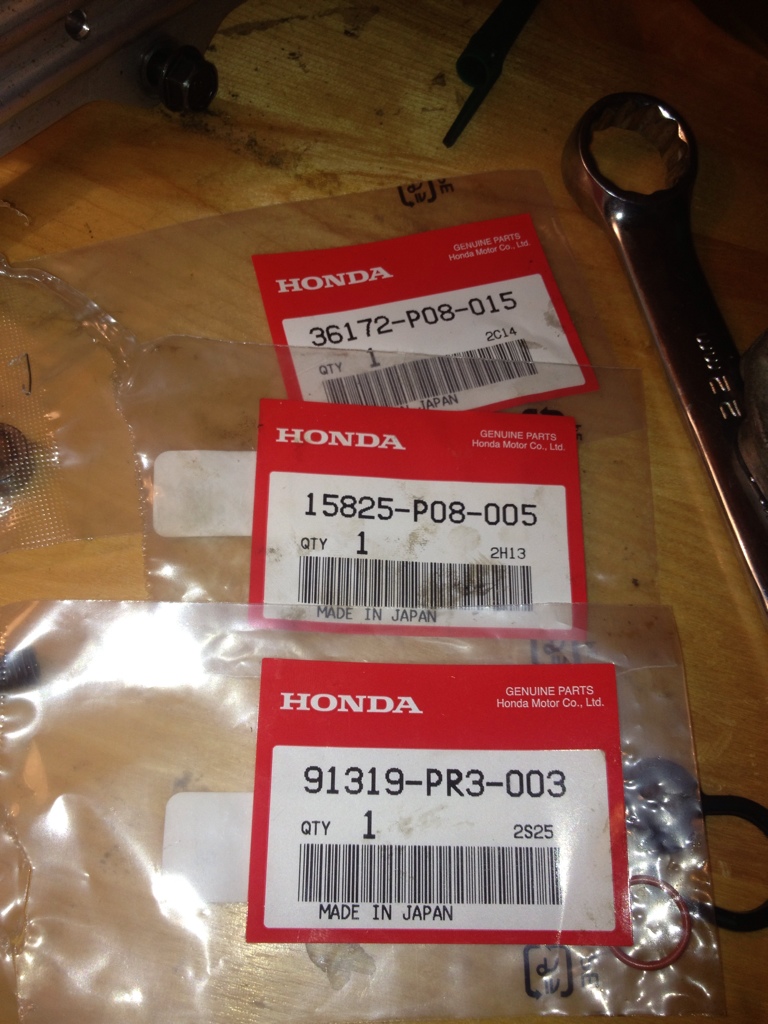
Part numbers for 2 gaskets, 1 o-ring
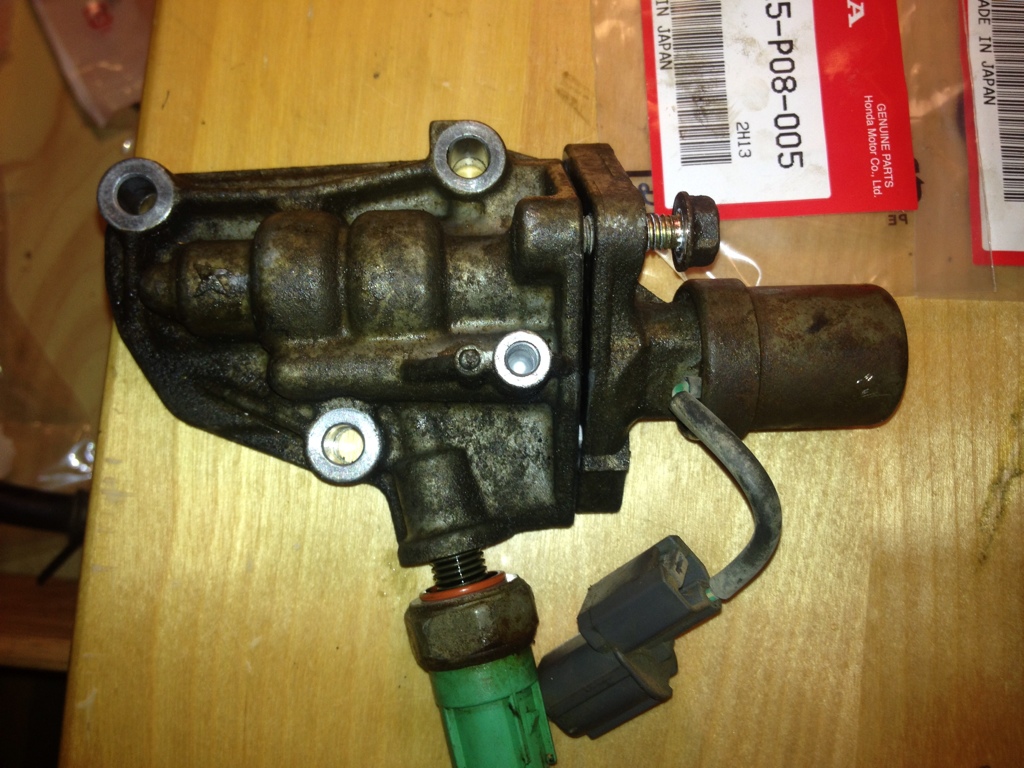
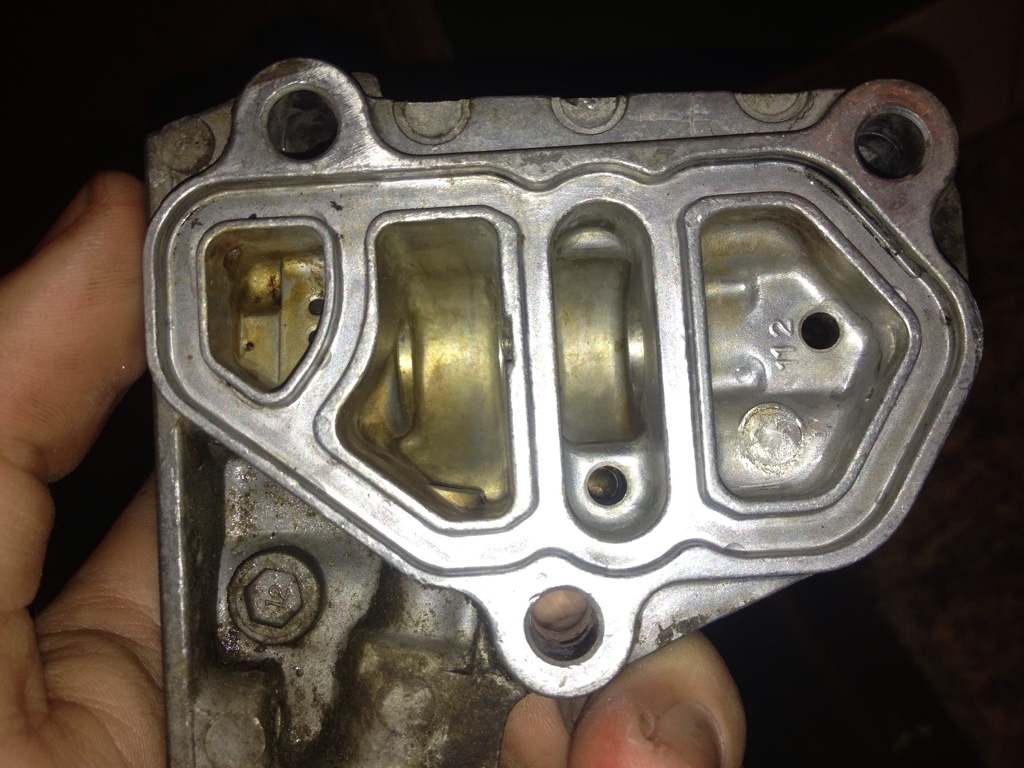
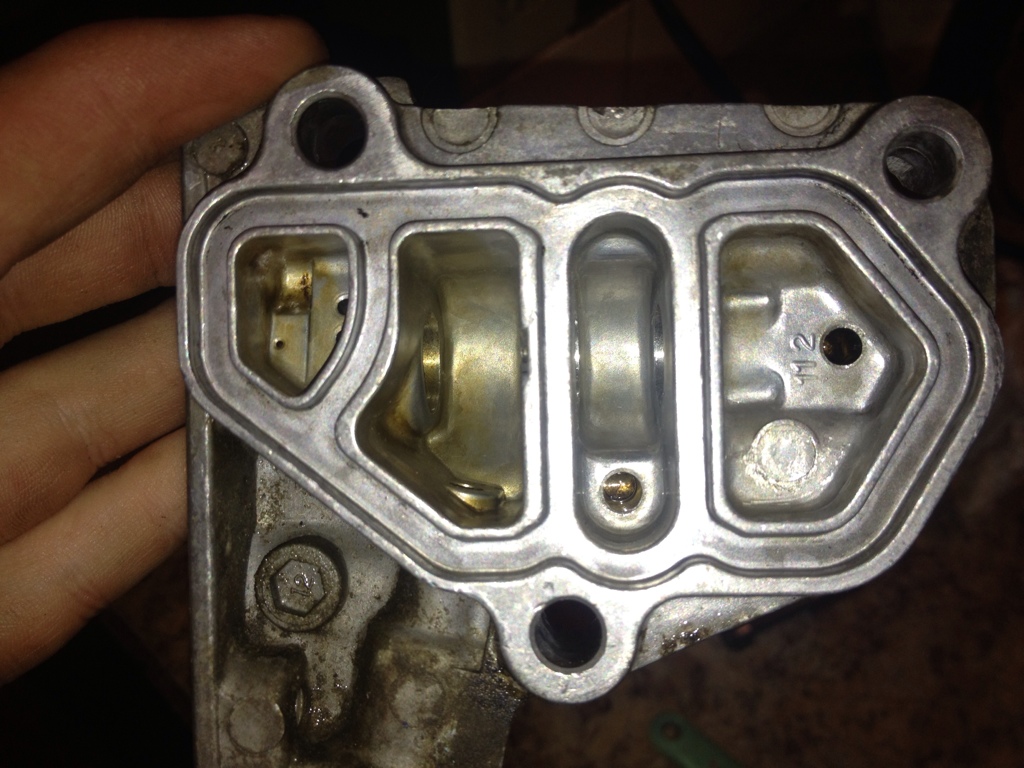
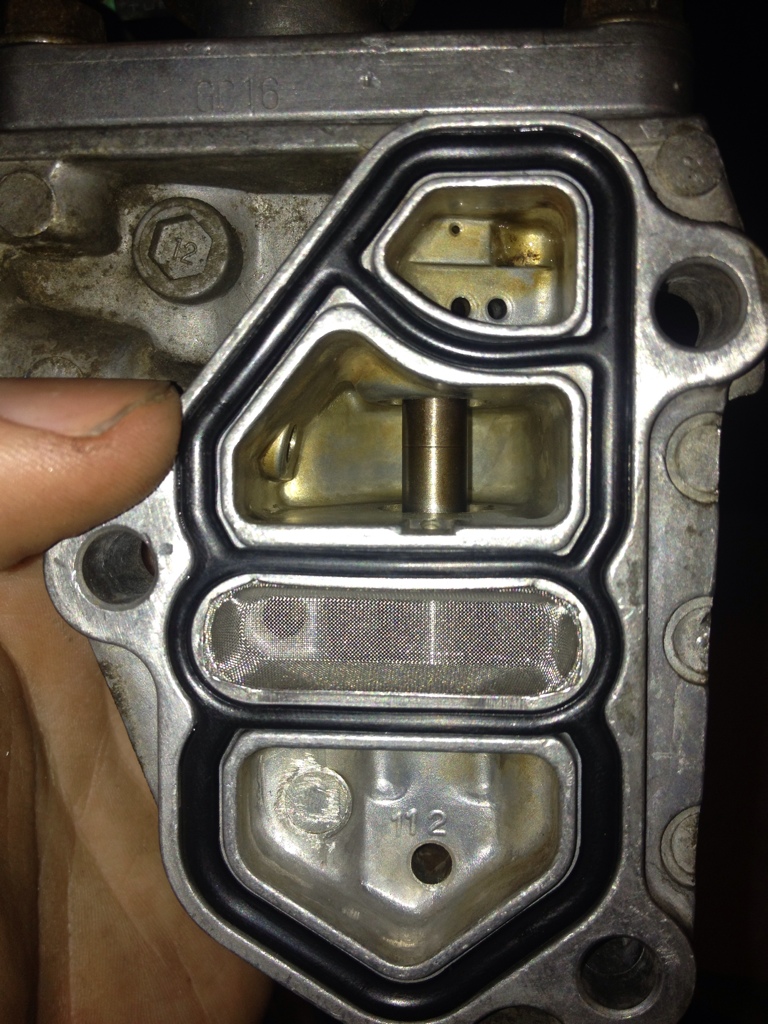
Here's the dirty bastard...
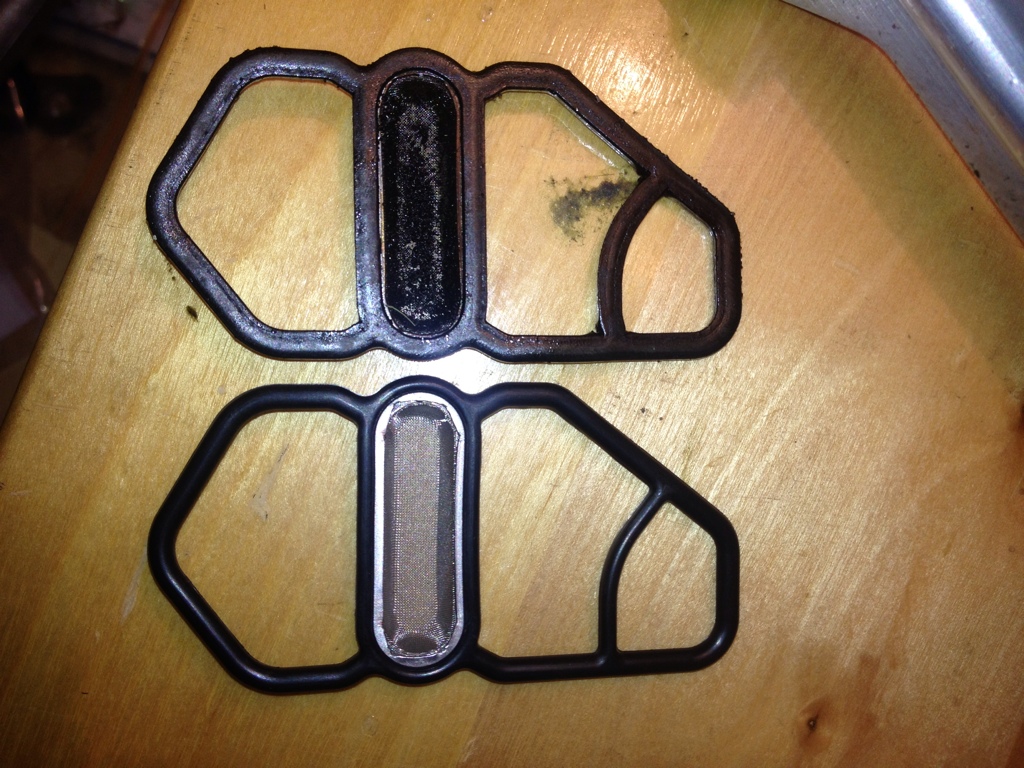
First thing is first, pick the obviously visible gasket out from the solenoid. It might be dirty, might not be.
Mine was pretty damn dirty. I'm very happy I've decided to do this.
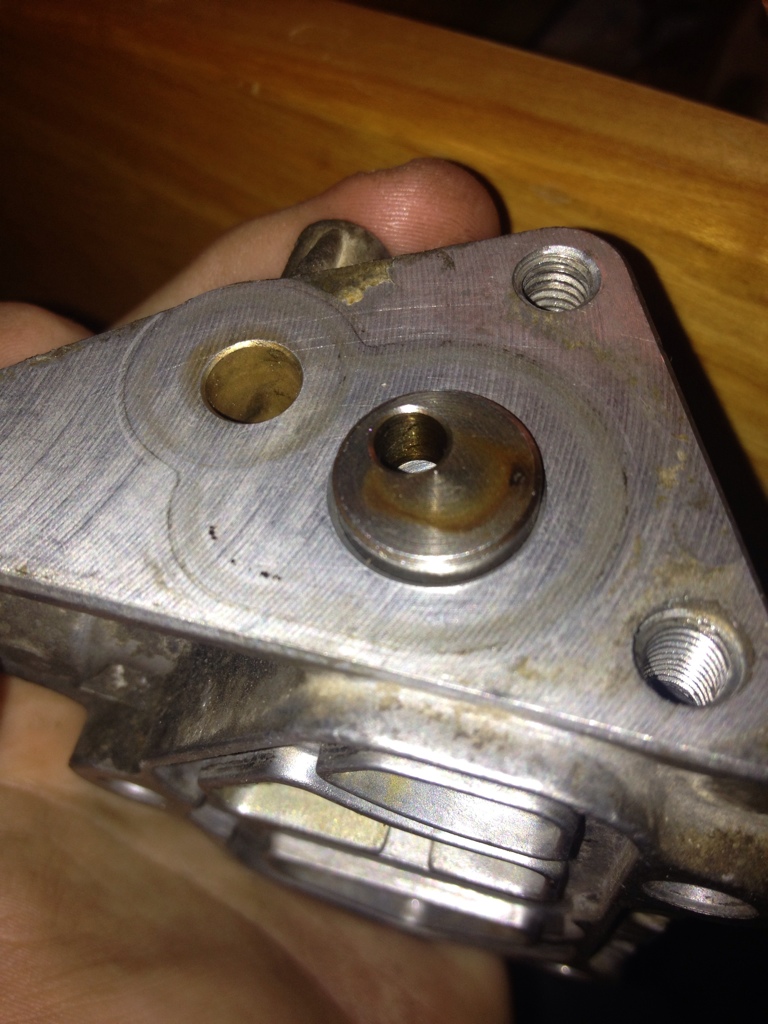
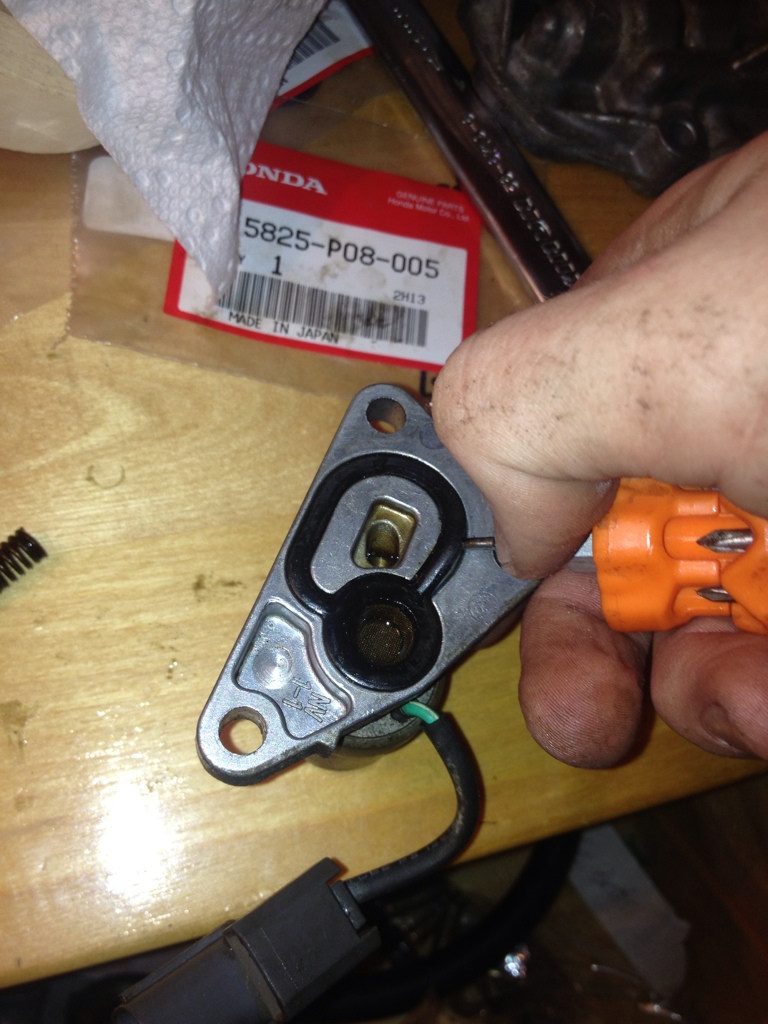
After that's out, remove the 3 10mm bolts from the top, you should see this thing. Remove it, it's just sitting there. Underneath is a plunger and spring which will fall out, hopefully into your hand. Keep the spring and small disk w/hole safe somewhere. Remove the oil pressure sensor from the side using the 22mm wrench. You'll see the small orange O ring that we'll be replacing soon...
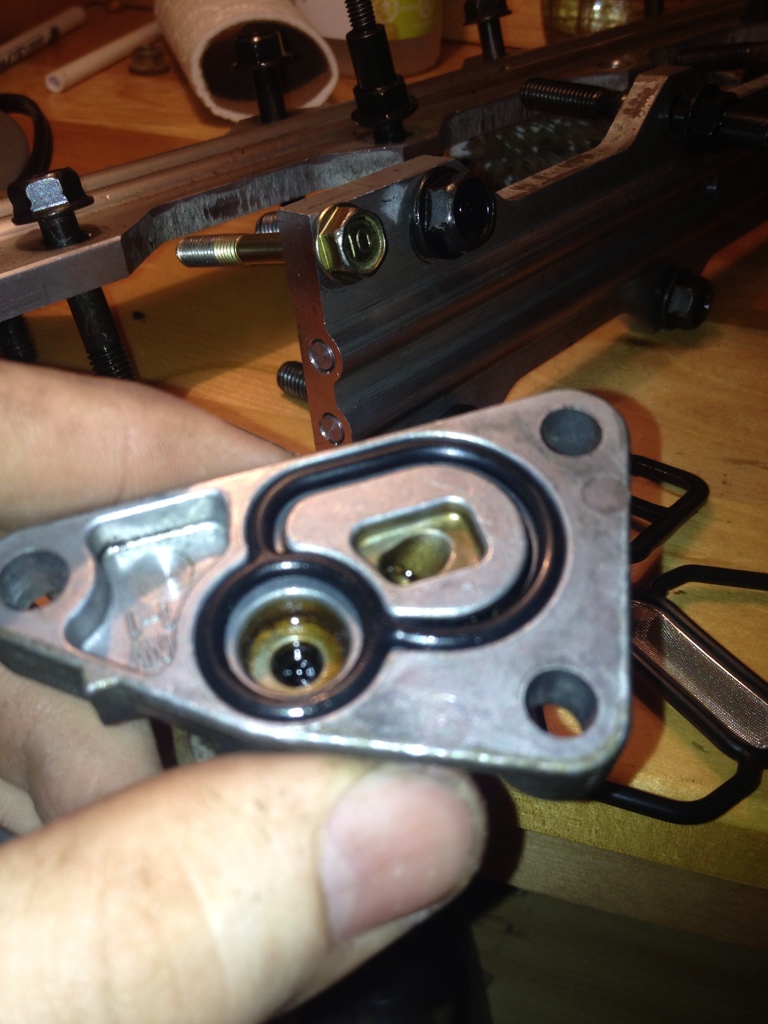
Remove the upper solenoid gasket using a small flathead or pick.
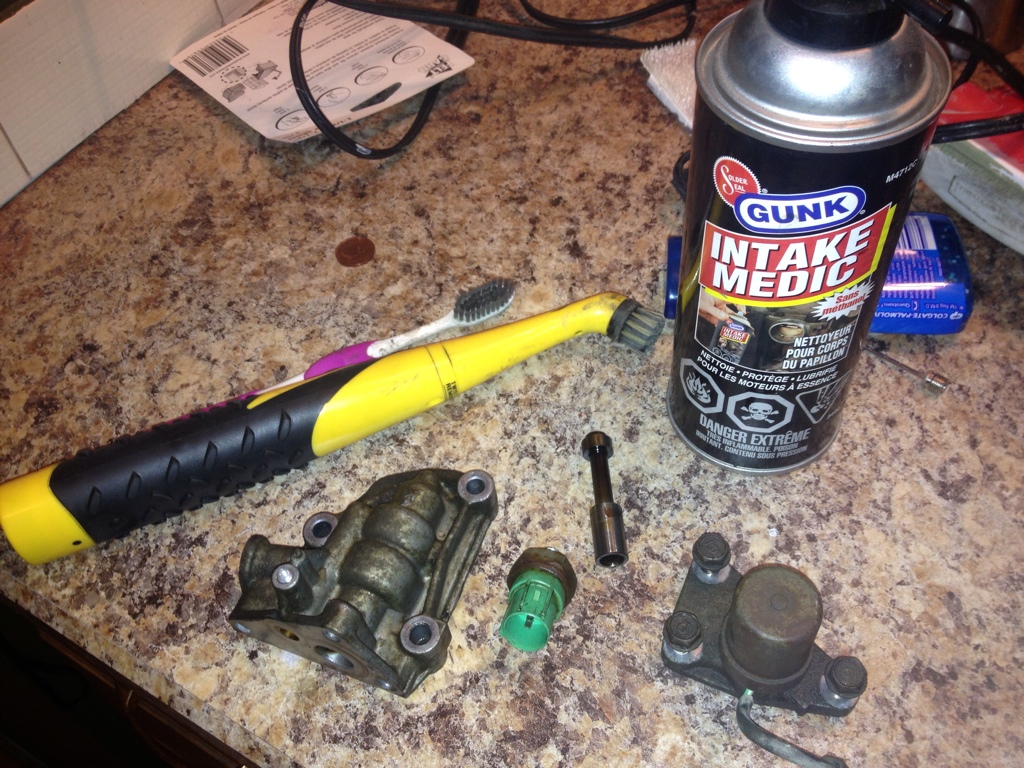
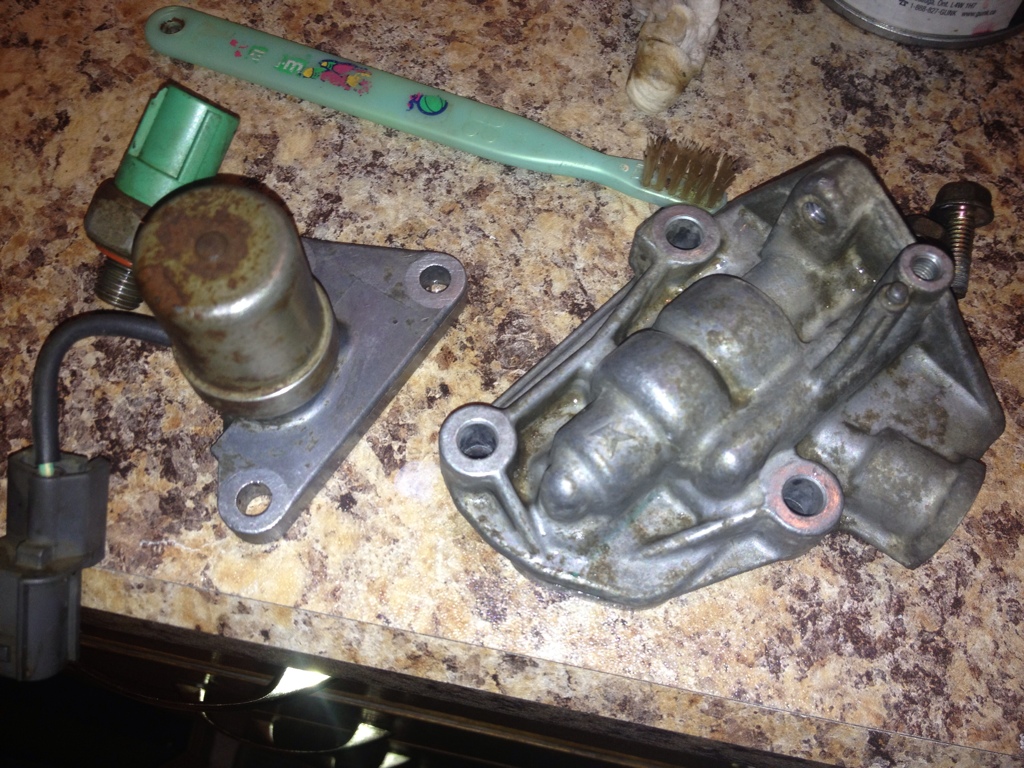
Alright now that she's stripped down, we can start to clean. Assemble your cleaning supplies.
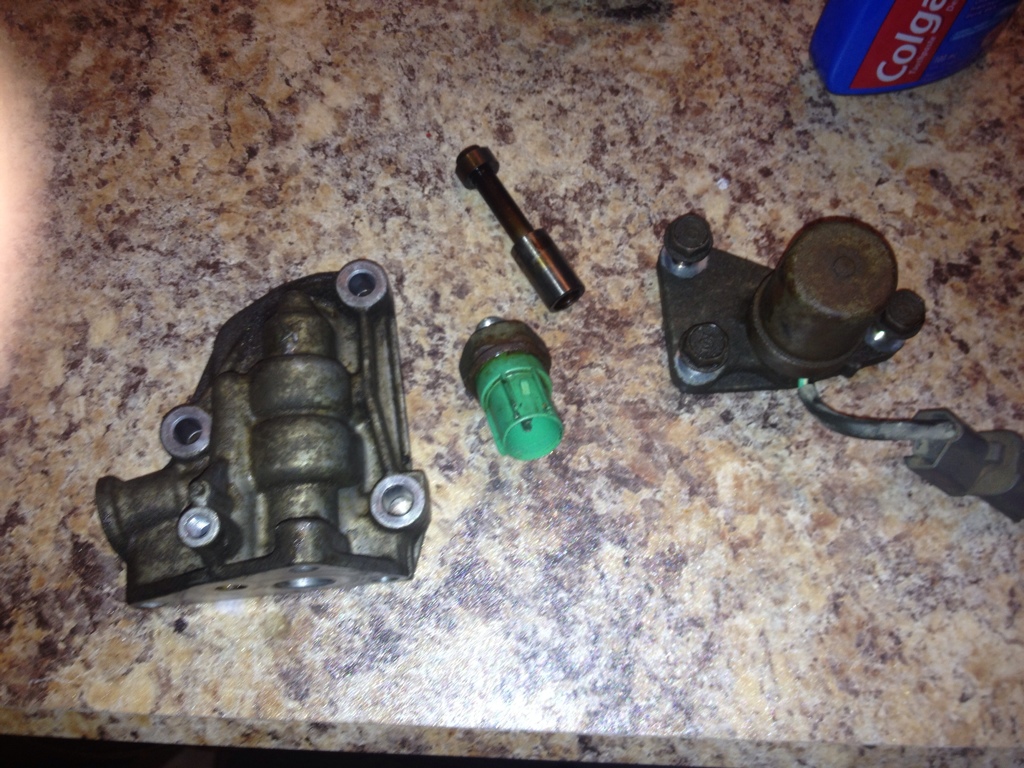
We'll be cleaning these parts today. The plunger shouldn't be too dirty. I cleaned whatever I could off of it. Don't use anything abrasive.
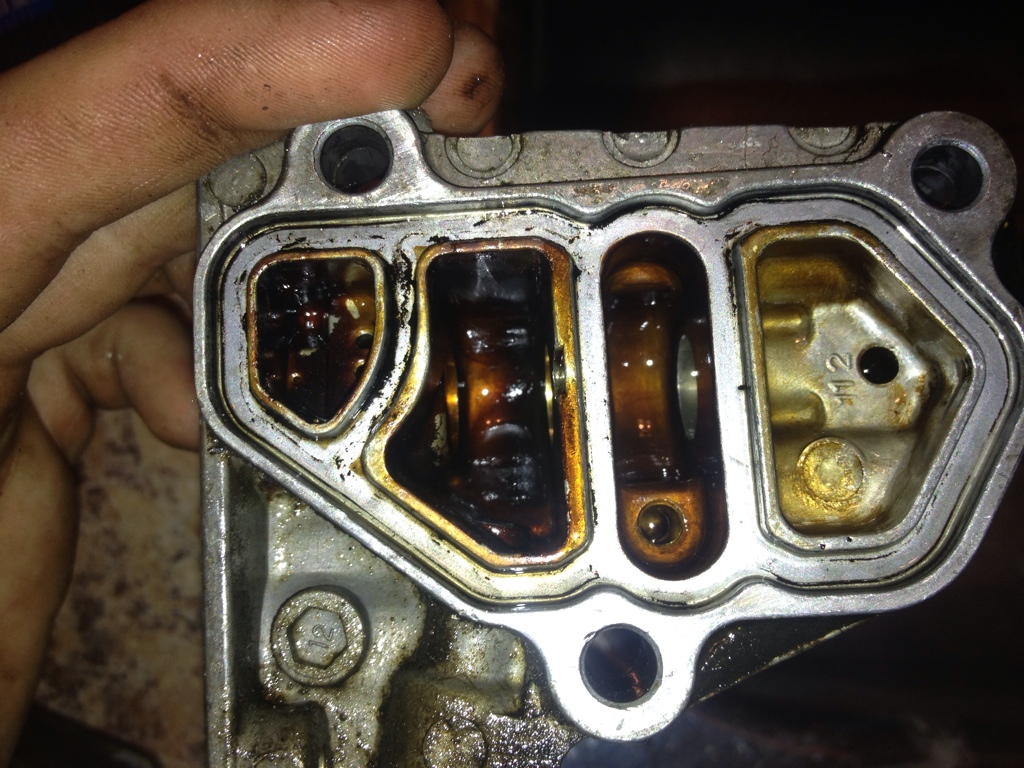
Naaaaasty. Spray that bittthhh down with your cleaner and let it soak. I find it easiest to plug the big hole (where the plunger and disk came from) with a rolled up bit of paper towel. This way the cleaning agent doesn't drip out the end.
Use your small toothbrush and scrub inside there. Get aaaaallll that nastiness out of there. Take a piece of paper towel and wrap it around the handle of the toothbrush to get deep inside her. Bow-chika...
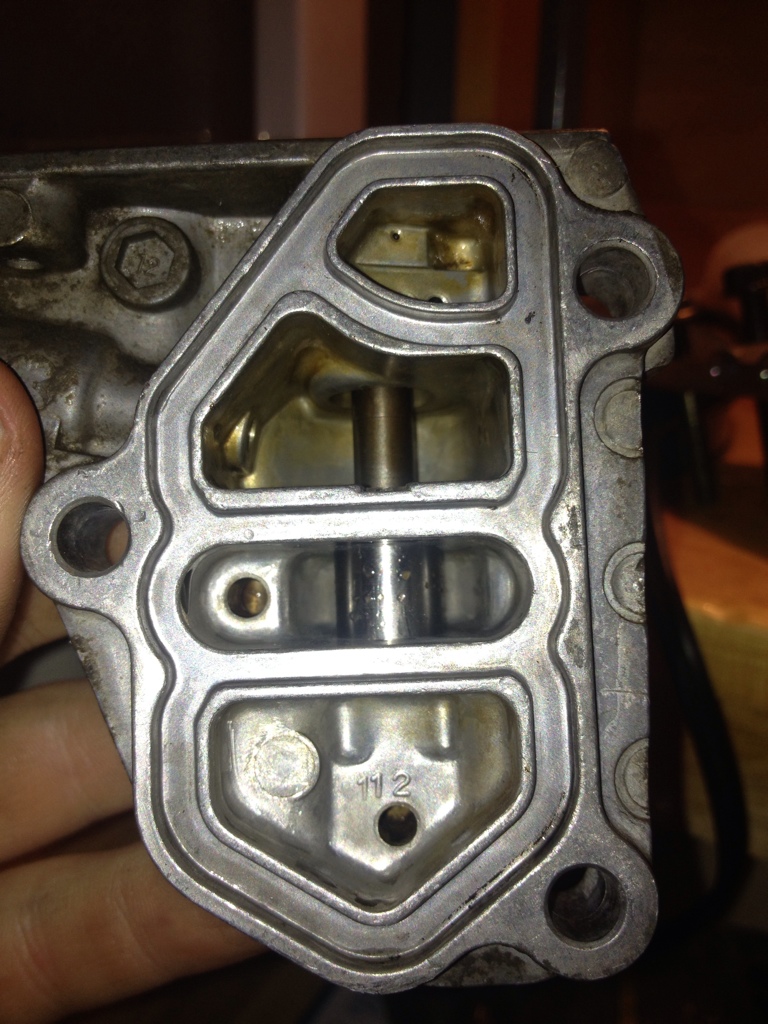
After two soaks and scrubs, I was left with this:
The top solenoid doesn't need much cleaning. I sprayed some cleaner into it, but I don't think it did much.
After you're satisfied, bask in the glow of your clean parts on the counter...
Put the spring into the plunger, put the plunger into the lower solenoid, and place the disk back on top!
Install the new gaskets...
The new upper solenoid gasket didn't have the little strainer thing on it. I don't think it really matters too much. It wasn't overly dirty compared to the lower gasket!
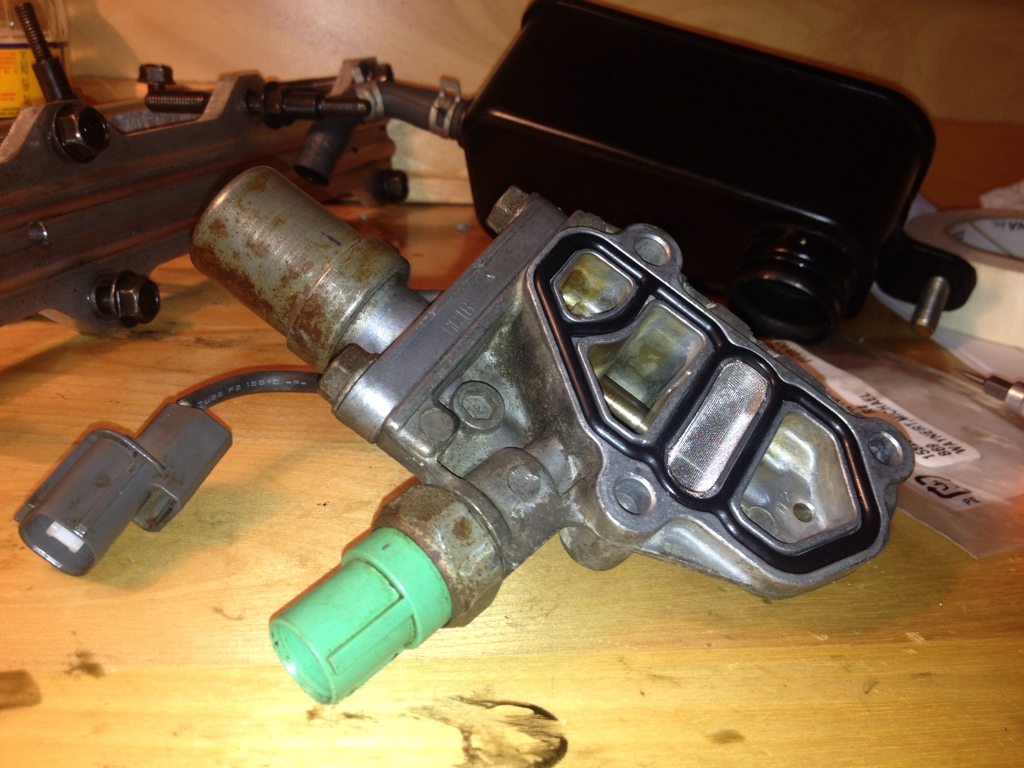
Replace the O ring on the oil pressure sensor... put the 3 10mm bolts back in place... presto! So fresh, so clean.
Congrats. Go have a beer!
I won't go over removal of the actual solenoid, as I had already removed mine, and it is fairly easy to do.
The whole process took maybe an hour, depending on how clean you want it. I'd rate it at a level of super easy. It is just cleaning after all!
Tools/parts/supplies required:
10mm socket wrench
22mm box end wrench
Tiny flathead screwdriver or pick
Toothbrushes, the smaller the better
Paper towel
Intake cleaner, brake cleaner, Acetone, anything to remove caked on oil
Part numbers for 2 gaskets, 1 o-ring
Here's the dirty bastard...
First thing is first, pick the obviously visible gasket out from the solenoid. It might be dirty, might not be.
Mine was pretty damn dirty. I'm very happy I've decided to do this.
After that's out, remove the 3 10mm bolts from the top, you should see this thing. Remove it, it's just sitting there. Underneath is a plunger and spring which will fall out, hopefully into your hand. Keep the spring and small disk w/hole safe somewhere. Remove the oil pressure sensor from the side using the 22mm wrench. You'll see the small orange O ring that we'll be replacing soon...
Remove the upper solenoid gasket using a small flathead or pick.
Alright now that she's stripped down, we can start to clean. Assemble your cleaning supplies.
We'll be cleaning these parts today. The plunger shouldn't be too dirty. I cleaned whatever I could off of it. Don't use anything abrasive.
Naaaaasty. Spray that bittthhh down with your cleaner and let it soak. I find it easiest to plug the big hole (where the plunger and disk came from) with a rolled up bit of paper towel. This way the cleaning agent doesn't drip out the end.
Use your small toothbrush and scrub inside there. Get aaaaallll that nastiness out of there. Take a piece of paper towel and wrap it around the handle of the toothbrush to get deep inside her. Bow-chika...
After two soaks and scrubs, I was left with this:
The top solenoid doesn't need much cleaning. I sprayed some cleaner into it, but I don't think it did much.
After you're satisfied, bask in the glow of your clean parts on the counter...
Put the spring into the plunger, put the plunger into the lower solenoid, and place the disk back on top!
Install the new gaskets...
The new upper solenoid gasket didn't have the little strainer thing on it. I don't think it really matters too much. It wasn't overly dirty compared to the lower gasket!
Replace the O ring on the oil pressure sensor... put the 3 10mm bolts back in place... presto! So fresh, so clean.
Congrats. Go have a beer!


Thread
Thread Starter
Forum
Replies
Last Post
marquez0721
ECU Tuning & Fuel Management
1
Sep 19, 2008 07:19 PM