
Picture updates


Thread Starter
|
HCF Member
Joined: Jun 2009
Posts: 924
From: Pittsburgh, PA
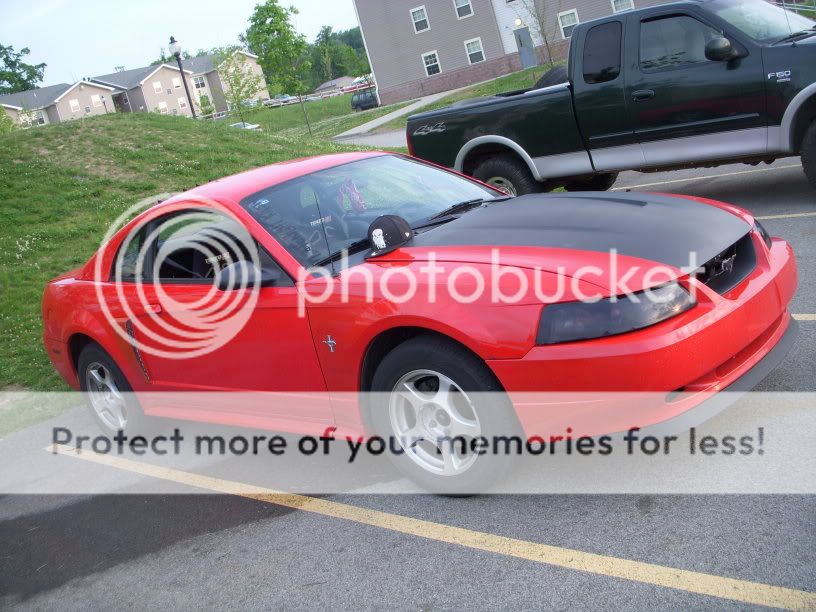
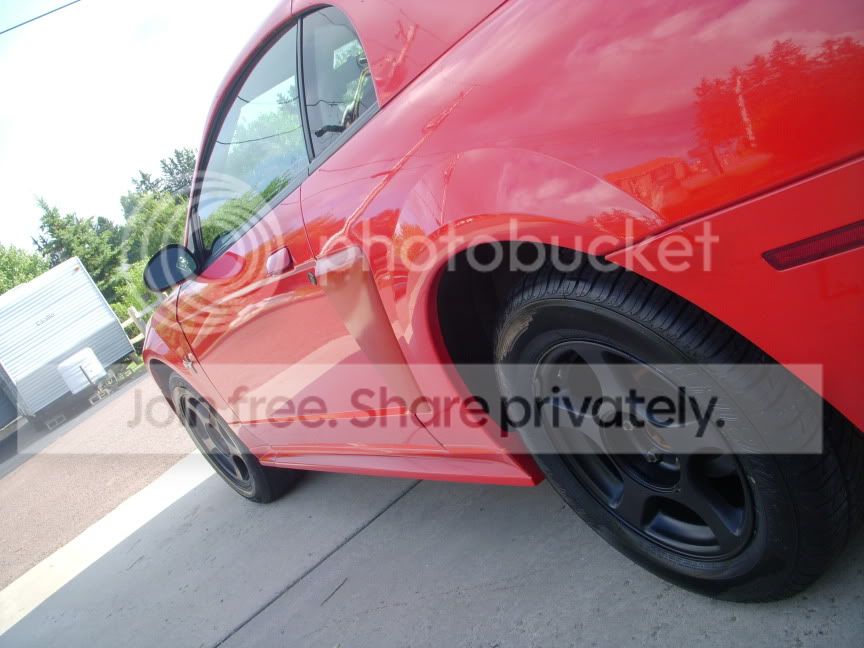
99-00 tails FTW. and paint the rims gunmetal like others said. not hard at all, basically clean them up with soap sand them down, primer, and the color paint. lots of patience and prep though, but well worth it. have you thought of painting the grill as well to color match?
Super Cereal Admin
Joined: Feb 2007
Posts: 7,081
From: Lexington, KY
Okay, here's what you'll need. I'd recommend doing it over a weekend, as it'll take about 8 hours if you know what you're doing, and possibly longer depending on how many coats you lay and if you use clear coat or not.
-Sandpaper, preferably 3M wetordry since you can use it to wetsand without it falling apart. Unfortunately, you'll be hand-sanding with wheels since there's no flat surfaces, so a sanding block won't do much good. Prepare for your hand to get cramped up. I'd recommend 120, 220, 400, 800, and 1000 grit.
-Primer. I almost always use dupli-color filler primer for this kind of thing. Different color primers may or may not change the overall color of the final product. If you want a true gunmetal, go with white or gray primer. If you want it to be a little darker, black primer may be best. You'll want two to three cans, depending on how many coats of primer you use.
-Paint. I believe dupli-color makes wheel-specific paint, though it isn't necessary. I used regular spray-paint on my wheels, and after two trips back and forth between PA and KY, as well as DD'ing the car, they show no signs of chipping or the paint cracking (except where I curbed my RR wheel... D'oh!). Again, two to three cans for four wheels.
-Clear coat. It's optional, but if you want a glossy finish, I'd recommend using clear. At least three cans if you want an uber-glossy shine that blinds pedestrians when you drive in direct sunlight.
-4"x6" or 5"x7" index cards. You can get them cheap at Wal-Mart, and it saves you a lot of taping and masking. I bought a pack of 50 (4x6's) and used half of them, though I re-used a lot of them on different wheels.
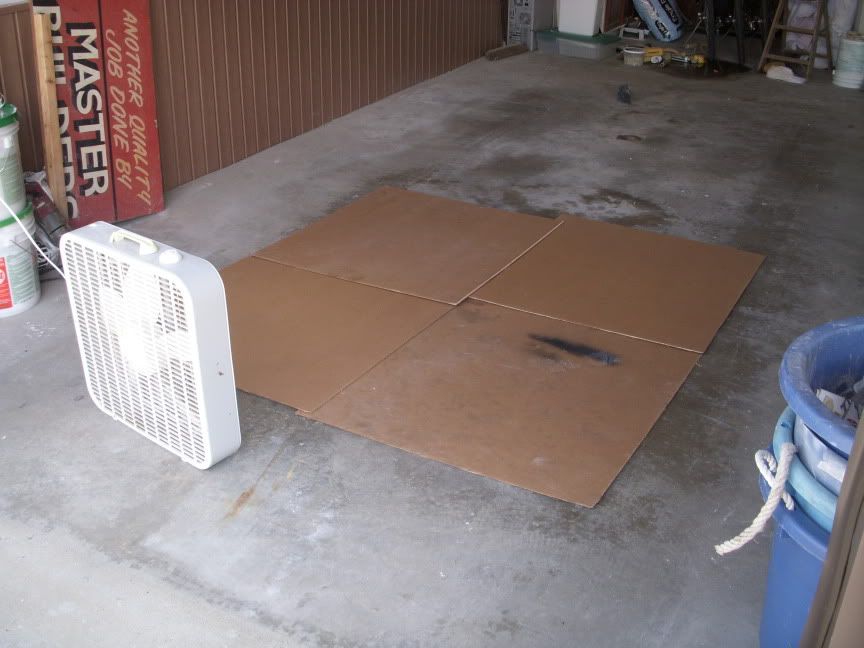
-If you're doing the painting and everything indoors, I highly, highly recommend making yourself a makeshift spray-booth like I did. It won't help to keep the area dust-free, but it'll help avoid getting paint dust on everything wherever you're working and you won't be huffing paint fumes the whole time. You'll need some cardboard and a fan, and that's about it.
-Tire shine. It's also optional, but come on... your wheels are going to look brand-new and you'll have crappy faded-black tires. It's like $5 for Black Magic Titanium tire wet (the kit that comes in the box. It's f*cking amazing and I'd recommend it to anyone) and makes your tires look like they're fresh off the shelf.
That's the basics of what you'll need. If you have some serious curb rash or something, I've heard using JB Weld as a filler works, but I've never tried it. I'd assume it would involve a lot of sanding, and I'm much too lazy for that.
So, first off, set up your spray booth if you're going to make one. Something like this works wonders:

Turn the fan on medium (pointing away from the cardboard. That's kind of important as facing it towards what you're painting will just trap the paint dust in the garage as well as cover the wet paint in whatever dust or pollen happens to be in the air at the time.)
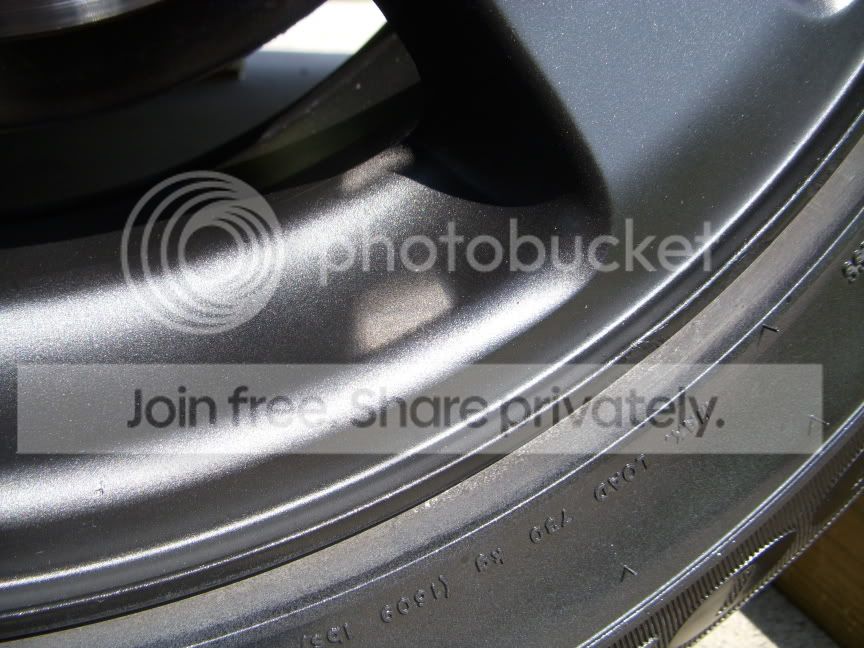
Now that your booth is set up, it's time to start the prep work. Remember that the best paint job in the world will look like complete garbage if the prep work sucks, so take your time and expect to spend the greater part of the day sanding. For the sake of the write-up, I'm going to assume the wheels are already off the car. If not, for God's sake, take them off the car already! Now, start with one wheel at a time. Pop the center cap out, get a bucket of water, grab some 120 grit paper, and start wetsanding your little heart out. If you don't know what wetsanding is, it's exactly what it sounds like; you soak the sandpaper and whatever surface you're sanding and go to town, keeping everything pretty wet. It gives a smoother surface than dry sanding and helps the paper last longer.
Once you have the wheel sanded down with 120 grit, do the same with 220 grit. I recommend doing two wheels at a time, so you can prep the second two wheels while you're waiting for the primer/paint to dry on the first two wheels. Save yourself some frustration and prep both the face and back of the wheels if you don't want the wheels to look ghetto.
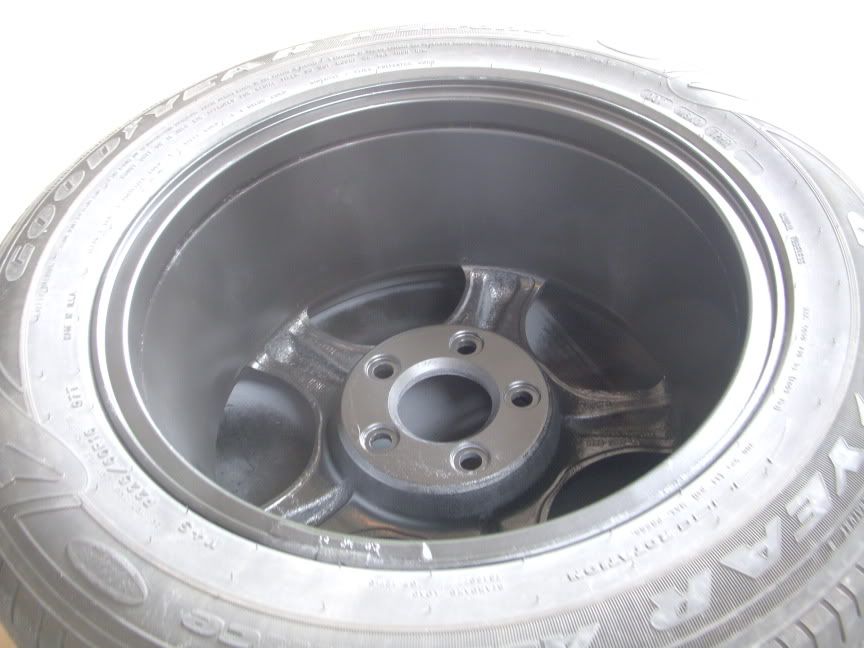
Now that the first two wheels are sanded down, it's time to start priming them. Wash down the wheels and let them dry completely. Paint will dry over top of drops of water, and will peel right off in the spots where water lays, so it's imperative that the wheels are perfectly dust-free and dry. Get that pack of index cards you bought out, and stick them between the wheel and tire, overlapping them. It doesn't matter if you stick them horizontally or vertically, as long as they overlap. Shake up the can of primer and go to town. A lot of thin coats are best, as they don't usually allow the paint to bubble or run. If you've never really spray-painted, here's a walk-through I wrote up a while ago. I'd recommend waiting around 5 minutes between each coat. Continue your thin coats until the primer is solid-colored and covering the front surface of the wheels. While the primer is drying, start prepping the second two wheels. Once they're prepped, the primer should be fairly dry on the first two wheels. Take the index cards out and flip the wheels upside down (depending on the offset of the wheels, you may have to be careful to make sure the face of the wheel doesn't touch the ground). Do exactly what you did with the face of the wheels (the index cards and the painting and whatnot).
Now have yourself a cigarette, alcoholic beverage of choice, sammich, whatever. You really don't have anything you can do while the first two wheels dry. Depending on the temperature and humidity of where you're painting, it could take any amount of time for the paint to set up enough to sand. As a rule of thumb, give it at least a half hour and check the paint. If the paint is still tacky and shows a fingerprint when you touch it, wait some more. If it's completely dry to the touch, you can sand it.
Wet sand the primed wheels with 400 grit until they're perfectly smooth. Put little to no pressure on the sandpaper; just keep it soaked with water and let the paper do its job. If you end up sanding through the primer in spots, feel free to throw anything near you and use your vulgar word of choice, because it means you get to re-prime that wheel.
If you didn't sand through the primer and you have all the orange peel off the first two wheels, both inside and out, set those two wheels aside, and repeat the priming process with the other two wheels. See why this is going to take all day?
I'm sure an hour or two has passed, but congrats, you're almost halfway done! Now that all the wheels are primed, free of orange peel, and dry, it's time to lay the color. Do the same thing you did with the primer; use the index cards to mask off the tires and spray light coats. As a rule of thumb, the after the first coat, you should be able to plainly see through the color to the primer behind it. The second coat should be about the same, but you should be able to see more of the color coat than the primer. The third coat should cover up most of the primer, and by the fourth coat, most if not all the primer should be covered up. After the primer is completely painted over, I'd recommend spraying a few more coats just to thicken the paint a little bit (you are going to be sanding it, after all). Flip the wheels over and paint the back of them. Repeat the color coat steps on the second two wheels.
Again, after the paint is tack-free and dry, sand 'em down with 400 grit, wet sanding and using no pressure. Just run the paper along the wheel surface. If you accidentally sand through to the primer, kick something (small dogs or babies work great) and get ready to lay more color on that wheel. Do the same for the second two wheels.
Once the wheels are painted and free of orange peel, it's time to start clearing them (if you don't want to use clear coat, skip to the tire shine step. If you're not going to use tire shine, let the paint on the wheels set up for a few hours and throw 'em on the car). The clear you can spray a little thicker coats than the primer and color, but do try to avoid runs; they're a PITA to sand down. Let the clear dry for a while. Depending on the type of clear, it may look white/foggy at first depending how thick you lay it. Don't worry, it's normal, and will be clear when it dries. It freaked me out the first time it happened to me lol.
Once the clear coat is dry, wet sand it using no pressure using the 800-grit sandpaper. After the orange peel is gone, switch to 1,000-grit and repeat. If you're really **** about it shining like a ****, sand it down with 2,000-grit. If you're ultra-**** about it, buff and polish the paint, but personally I think that's going a little too far (seeing as how your wheels will be shinier than your paint lol).
Now use the tire shine. Just follow the instructions on the bottle; don't use too much gel, and let the tires dry for about 15 minutes. Black Magic's Titanium doesn't seem to sling at all (at least it never has for me) and gives you a shine that lasts for weeks. After the tire shine has set up a little, throw the wheels back on (be careful bolting the wheels down. you just spend all that time painting the wheels, you don't want to chip/scratch the paint being careless while tightening the lugs. Enjoy your freshly-painted wheels
Before:
5-17.jpg?t=1251053093
After:
1-23.jpg?t=1251053121
teasershot.jpg?t=1251053147


-Sandpaper, preferably 3M wetordry since you can use it to wetsand without it falling apart. Unfortunately, you'll be hand-sanding with wheels since there's no flat surfaces, so a sanding block won't do much good. Prepare for your hand to get cramped up. I'd recommend 120, 220, 400, 800, and 1000 grit.
-Primer. I almost always use dupli-color filler primer for this kind of thing. Different color primers may or may not change the overall color of the final product. If you want a true gunmetal, go with white or gray primer. If you want it to be a little darker, black primer may be best. You'll want two to three cans, depending on how many coats of primer you use.
-Paint. I believe dupli-color makes wheel-specific paint, though it isn't necessary. I used regular spray-paint on my wheels, and after two trips back and forth between PA and KY, as well as DD'ing the car, they show no signs of chipping or the paint cracking (except where I curbed my RR wheel... D'oh!). Again, two to three cans for four wheels.
-Clear coat. It's optional, but if you want a glossy finish, I'd recommend using clear. At least three cans if you want an uber-glossy shine that blinds pedestrians when you drive in direct sunlight.
-4"x6" or 5"x7" index cards. You can get them cheap at Wal-Mart, and it saves you a lot of taping and masking. I bought a pack of 50 (4x6's) and used half of them, though I re-used a lot of them on different wheels.
-If you're doing the painting and everything indoors, I highly, highly recommend making yourself a makeshift spray-booth like I did. It won't help to keep the area dust-free, but it'll help avoid getting paint dust on everything wherever you're working and you won't be huffing paint fumes the whole time. You'll need some cardboard and a fan, and that's about it.
-Tire shine. It's also optional, but come on... your wheels are going to look brand-new and you'll have crappy faded-black tires. It's like $5 for Black Magic Titanium tire wet (the kit that comes in the box. It's f*cking amazing and I'd recommend it to anyone) and makes your tires look like they're fresh off the shelf.
That's the basics of what you'll need. If you have some serious curb rash or something, I've heard using JB Weld as a filler works, but I've never tried it. I'd assume it would involve a lot of sanding, and I'm much too lazy for that.
So, first off, set up your spray booth if you're going to make one. Something like this works wonders:
Turn the fan on medium (pointing away from the cardboard. That's kind of important as facing it towards what you're painting will just trap the paint dust in the garage as well as cover the wet paint in whatever dust or pollen happens to be in the air at the time.)
Now that your booth is set up, it's time to start the prep work. Remember that the best paint job in the world will look like complete garbage if the prep work sucks, so take your time and expect to spend the greater part of the day sanding. For the sake of the write-up, I'm going to assume the wheels are already off the car. If not, for God's sake, take them off the car already! Now, start with one wheel at a time. Pop the center cap out, get a bucket of water, grab some 120 grit paper, and start wetsanding your little heart out. If you don't know what wetsanding is, it's exactly what it sounds like; you soak the sandpaper and whatever surface you're sanding and go to town, keeping everything pretty wet. It gives a smoother surface than dry sanding and helps the paper last longer.
Once you have the wheel sanded down with 120 grit, do the same with 220 grit. I recommend doing two wheels at a time, so you can prep the second two wheels while you're waiting for the primer/paint to dry on the first two wheels. Save yourself some frustration and prep both the face and back of the wheels if you don't want the wheels to look ghetto.
Now that the first two wheels are sanded down, it's time to start priming them. Wash down the wheels and let them dry completely. Paint will dry over top of drops of water, and will peel right off in the spots where water lays, so it's imperative that the wheels are perfectly dust-free and dry. Get that pack of index cards you bought out, and stick them between the wheel and tire, overlapping them. It doesn't matter if you stick them horizontally or vertically, as long as they overlap. Shake up the can of primer and go to town. A lot of thin coats are best, as they don't usually allow the paint to bubble or run. If you've never really spray-painted, here's a walk-through I wrote up a while ago. I'd recommend waiting around 5 minutes between each coat. Continue your thin coats until the primer is solid-colored and covering the front surface of the wheels. While the primer is drying, start prepping the second two wheels. Once they're prepped, the primer should be fairly dry on the first two wheels. Take the index cards out and flip the wheels upside down (depending on the offset of the wheels, you may have to be careful to make sure the face of the wheel doesn't touch the ground). Do exactly what you did with the face of the wheels (the index cards and the painting and whatnot).
Now have yourself a cigarette, alcoholic beverage of choice, sammich, whatever. You really don't have anything you can do while the first two wheels dry. Depending on the temperature and humidity of where you're painting, it could take any amount of time for the paint to set up enough to sand. As a rule of thumb, give it at least a half hour and check the paint. If the paint is still tacky and shows a fingerprint when you touch it, wait some more. If it's completely dry to the touch, you can sand it.
Wet sand the primed wheels with 400 grit until they're perfectly smooth. Put little to no pressure on the sandpaper; just keep it soaked with water and let the paper do its job. If you end up sanding through the primer in spots, feel free to throw anything near you and use your vulgar word of choice, because it means you get to re-prime that wheel.
If you didn't sand through the primer and you have all the orange peel off the first two wheels, both inside and out, set those two wheels aside, and repeat the priming process with the other two wheels. See why this is going to take all day?
I'm sure an hour or two has passed, but congrats, you're almost halfway done! Now that all the wheels are primed, free of orange peel, and dry, it's time to lay the color. Do the same thing you did with the primer; use the index cards to mask off the tires and spray light coats. As a rule of thumb, the after the first coat, you should be able to plainly see through the color to the primer behind it. The second coat should be about the same, but you should be able to see more of the color coat than the primer. The third coat should cover up most of the primer, and by the fourth coat, most if not all the primer should be covered up. After the primer is completely painted over, I'd recommend spraying a few more coats just to thicken the paint a little bit (you are going to be sanding it, after all). Flip the wheels over and paint the back of them. Repeat the color coat steps on the second two wheels.
Again, after the paint is tack-free and dry, sand 'em down with 400 grit, wet sanding and using no pressure. Just run the paper along the wheel surface. If you accidentally sand through to the primer, kick something (small dogs or babies work great) and get ready to lay more color on that wheel. Do the same for the second two wheels.
Once the wheels are painted and free of orange peel, it's time to start clearing them (if you don't want to use clear coat, skip to the tire shine step. If you're not going to use tire shine, let the paint on the wheels set up for a few hours and throw 'em on the car). The clear you can spray a little thicker coats than the primer and color, but do try to avoid runs; they're a PITA to sand down. Let the clear dry for a while. Depending on the type of clear, it may look white/foggy at first depending how thick you lay it. Don't worry, it's normal, and will be clear when it dries. It freaked me out the first time it happened to me lol.
Once the clear coat is dry, wet sand it using no pressure using the 800-grit sandpaper. After the orange peel is gone, switch to 1,000-grit and repeat. If you're really **** about it shining like a ****, sand it down with 2,000-grit. If you're ultra-**** about it, buff and polish the paint, but personally I think that's going a little too far (seeing as how your wheels will be shinier than your paint lol).
Now use the tire shine. Just follow the instructions on the bottle; don't use too much gel, and let the tires dry for about 15 minutes. Black Magic's Titanium doesn't seem to sling at all (at least it never has for me) and gives you a shine that lasts for weeks. After the tire shine has set up a little, throw the wheels back on (be careful bolting the wheels down. you just spend all that time painting the wheels, you don't want to chip/scratch the paint being careless while tightening the lugs. Enjoy your freshly-painted wheels
Before:
5-17.jpg?t=1251053093
After:
1-23.jpg?t=1251053121
teasershot.jpg?t=1251053147
Thread Starter
|
HCF Member
Joined: Jun 2009
Posts: 924
From: Pittsburgh, PA
Okay, here's what you'll need. I'd recommend doing it over a weekend, as it'll take about 8 hours if you know what you're doing, and possibly longer depending on how many coats you lay and if you use clear coat or not.
-Sandpaper, preferably 3M wetordry since you can use it to wetsand without it falling apart. Unfortunately, you'll be hand-sanding with wheels since there's no flat surfaces, so a sanding block won't do much good. Prepare for your hand to get cramped up. I'd recommend 120, 220, 400, 800, and 1000 grit.
-Primer. I almost always use dupli-color filler primer for this kind of thing. Different color primers may or may not change the overall color of the final product. If you want a true gunmetal, go with white or gray primer. If you want it to be a little darker, black primer may be best. You'll want two to three cans, depending on how many coats of primer you use.
-Paint. I believe dupli-color makes wheel-specific paint, though it isn't necessary. I used regular spray-paint on my wheels, and after two trips back and forth between PA and KY, as well as DD'ing the car, they show no signs of chipping or the paint cracking (except where I curbed my RR wheel... D'oh!). Again, two to three cans for four wheels.
-Clear coat. It's optional, but if you want a glossy finish, I'd recommend using clear. At least three cans if you want an uber-glossy shine that blinds pedestrians when you drive in direct sunlight.
-4"x6" or 5"x7" index cards. You can get them cheap at Wal-Mart, and it saves you a lot of taping and masking. I bought a pack of 50 (4x6's) and used half of them, though I re-used a lot of them on different wheels.
-If you're doing the painting and everything indoors, I highly, highly recommend making yourself a makeshift spray-booth like I did. It won't help to keep the area dust-free, but it'll help avoid getting paint dust on everything wherever you're working and you won't be huffing paint fumes the whole time. You'll need some cardboard and a fan, and that's about it.
-Tire shine. It's also optional, but come on... your wheels are going to look brand-new and you'll have crappy faded-black tires. It's like $5 for Black Magic Titanium tire wet (the kit that comes in the box. It's f*cking amazing and I'd recommend it to anyone) and makes your tires look like they're fresh off the shelf.
That's the basics of what you'll need. If you have some serious curb rash or something, I've heard using JB Weld as a filler works, but I've never tried it. I'd assume it would involve a lot of sanding, and I'm much too lazy for that.
So, first off, set up your spray booth if you're going to make one. Something like this works wonders:
Turn the fan on medium (pointing away from the cardboard. That's kind of important as facing it towards what you're painting will just trap the paint dust in the garage as well as cover the wet paint in whatever dust or pollen happens to be in the air at the time.)
Now that your booth is set up, it's time to start the prep work. Remember that the best paint job in the world will look like complete garbage if the prep work sucks, so take your time and expect to spend the greater part of the day sanding. For the sake of the write-up, I'm going to assume the wheels are already off the car. If not, for God's sake, take them off the car already! Now, start with one wheel at a time. Pop the center cap out, get a bucket of water, grab some 120 grit paper, and start wetsanding your little heart out. If you don't know what wetsanding is, it's exactly what it sounds like; you soak the sandpaper and whatever surface you're sanding and go to town, keeping everything pretty wet. It gives a smoother surface than dry sanding and helps the paper last longer.
Once you have the wheel sanded down with 120 grit, do the same with 220 grit. I recommend doing two wheels at a time, so you can prep the second two wheels while you're waiting for the primer/paint to dry on the first two wheels. Save yourself some frustration and prep both the face and back of the wheels if you don't want the wheels to look ghetto.
Now that the first two wheels are sanded down, it's time to start priming them. Wash down the wheels and let them dry completely. Paint will dry over top of drops of water, and will peel right off in the spots where water lays, so it's imperative that the wheels are perfectly dust-free and dry. Get that pack of index cards you bought out, and stick them between the wheel and tire, overlapping them. It doesn't matter if you stick them horizontally or vertically, as long as they overlap. Shake up the can of primer and go to town. A lot of thin coats are best, as they don't usually allow the paint to bubble or run. If you've never really spray-painted, here's a walk-through I wrote up a while ago. I'd recommend waiting around 5 minutes between each coat. Continue your thin coats until the primer is solid-colored and covering the front surface of the wheels. While the primer is drying, start prepping the second two wheels. Once they're prepped, the primer should be fairly dry on the first two wheels. Take the index cards out and flip the wheels upside down (depending on the offset of the wheels, you may have to be careful to make sure the face of the wheel doesn't touch the ground). Do exactly what you did with the face of the wheels (the index cards and the painting and whatnot).
Now have yourself a cigarette, alcoholic beverage of choice, sammich, whatever. You really don't have anything you can do while the first two wheels dry. Depending on the temperature and humidity of where you're painting, it could take any amount of time for the paint to set up enough to sand. As a rule of thumb, give it at least a half hour and check the paint. If the paint is still tacky and shows a fingerprint when you touch it, wait some more. If it's completely dry to the touch, you can sand it.
Wet sand the primed wheels with 400 grit until they're perfectly smooth. Put little to no pressure on the sandpaper; just keep it soaked with water and let the paper do its job. If you end up sanding through the primer in spots, feel free to throw anything near you and use your vulgar word of choice, because it means you get to re-prime that wheel.
If you didn't sand through the primer and you have all the orange peel off the first two wheels, both inside and out, set those two wheels aside, and repeat the priming process with the other two wheels. See why this is going to take all day?
I'm sure an hour or two has passed, but congrats, you're almost halfway done! Now that all the wheels are primed, free of orange peel, and dry, it's time to lay the color. Do the same thing you did with the primer; use the index cards to mask off the tires and spray light coats. As a rule of thumb, the after the first coat, you should be able to plainly see through the color to the primer behind it. The second coat should be about the same, but you should be able to see more of the color coat than the primer. The third coat should cover up most of the primer, and by the fourth coat, most if not all the primer should be covered up. After the primer is completely painted over, I'd recommend spraying a few more coats just to thicken the paint a little bit (you are going to be sanding it, after all). Flip the wheels over and paint the back of them. Repeat the color coat steps on the second two wheels.
Again, after the paint is tack-free and dry, sand 'em down with 400 grit, wet sanding and using no pressure. Just run the paper along the wheel surface. If you accidentally sand through to the primer, kick something (small dogs or babies work great) and get ready to lay more color on that wheel. Do the same for the second two wheels.
Once the wheels are painted and free of orange peel, it's time to start clearing them (if you don't want to use clear coat, skip to the tire shine step. If you're not going to use tire shine, let the paint on the wheels set up for a few hours and throw 'em on the car). The clear you can spray a little thicker coats than the primer and color, but do try to avoid runs; they're a PITA to sand down. Let the clear dry for a while. Depending on the type of clear, it may look white/foggy at first depending how thick you lay it. Don't worry, it's normal, and will be clear when it dries. It freaked me out the first time it happened to me lol.
Once the clear coat is dry, wet sand it using no pressure using the 800-grit sandpaper. After the orange peel is gone, switch to 1,000-grit and repeat. If you're really **** about it shining like a ****, sand it down with 2,000-grit. If you're ultra-**** about it, buff and polish the paint, but personally I think that's going a little too far (seeing as how your wheels will be shinier than your paint lol).
Now use the tire shine. Just follow the instructions on the bottle; don't use too much gel, and let the tires dry for about 15 minutes. Black Magic's Titanium doesn't seem to sling at all (at least it never has for me) and gives you a shine that lasts for weeks. After the tire shine has set up a little, throw the wheels back on (be careful bolting the wheels down. you just spend all that time painting the wheels, you don't want to chip/scratch the paint being careless while tightening the lugs. Enjoy your freshly-painted wheels
Before:
After:
Super Cereal Admin
Joined: Feb 2007
Posts: 7,081
From: Lexington, KY
Yeah, it's not too bad of a job, just time consuming and sanding's a PITA if your wheels have a lot of little nooks and crannies like mine did. Actually, looking at those pics reminds me, my car needs washed pretty badly... my wheels are already coated in brake dust... d*mn cheap brake pads lol
If you have any questions, feel free to post them up, pm me, or if it's important, text me. If you need my number, pm me.
Also, have you thought about tinting your tail lights? I'd think it would look pretty decent if you did it light enough to give it a gunmetal tint instead of fully blacked out.
If you have any questions, feel free to post them up, pm me, or if it's important, text me. If you need my number, pm me.
Also, have you thought about tinting your tail lights? I'd think it would look pretty decent if you did it light enough to give it a gunmetal tint instead of fully blacked out.

HCF Member
Joined: Jul 2008
Posts: 3,428
From: Pueblo, CO
Definately paint the grill and get some 50/50 tails.....
The grill will stick contrast since the actual MESH-STYLE part will still be black.... but it will be much cleaner....
and wheels would look a lot better painted... Ill get a sig whipped up when I can muhahahaha
The grill will stick contrast since the actual MESH-STYLE part will still be black.... but it will be much cleaner....
and wheels would look a lot better painted... Ill get a sig whipped up when I can muhahahaha
August 2010 ROTM
Joined: Sep 2008
Posts: 716
From: West Palm Beach, FL
You have such a nice car, I love red EK coupes, but the tail lights just kill it! Save your money and get a set of tails that Trust posted, and your car will look 1000000x better. It'll definitely look nicer with gunmetal wheels too!


Banned
Joined: Dec 2008
Posts: 1,220
From: Mankato, MN
Wow reaper. I read that whole thing and your other write up. You are pretty smart when it comes to rattle cans.
OP - Car looks good. I would paint the outside of the new grille red to match and leave the mesh black. It will look 10x cleaner. Other then that, everythings looking great.
OP - Car looks good. I would paint the outside of the new grille red to match and leave the mesh black. It will look 10x cleaner. Other then that, everythings looking great.
Super Cereal Admin
Joined: Feb 2007
Posts: 7,081
From: Lexington, KY
Well, I have painted an entire sportbike with spray paint. Twice. It's something you pretty much learn as you do it, and taking on a lot of projects like that is how you get better at it. You find out what works and what doesn't, and you figure out the easiest ways to do something. What's scary is I did both of those write-ups from memory... neither one of them was planned. I just got bored one night and figured I'd do the spray paint write-up, and the one on wheels was obviously because a member asked (I wish I had more pics of the actual painting process. I know I took a bunch, but I guess that's what happens when your hard drive crashes =/ ).

March 2010 ROTM
Joined: Sep 2007
Posts: 1,962
From: Louisville, KY
Spray paint can do soooo much more than people think. Once you get used to using the can and get a feel for the pressure your set. I do wall murals with spray cans so doing my wheels was a breeze.