
Spray Paint Tutorial


Thread Starter
Joined: Mar 2004
Posts: 0
From: United States
Thanks To Mossy For This Article!!
First of all, I highly recomend using Duplicolor. Might cost you a few more bucks but the outcome is definately worth it.
Now that we've cleared that up, heres a few tips:
- Sand everything down with 1000 or 1500 wet/dry sand paper from 3M.
- Next, spray a light layer of primer over the surface. I say light layers so that it doesn't drip. Use nice smooth overlapping strokes about 8 inches above the surface.
- Now wet sand the layer using 1500 wet/dry sand paper if the surface is rough (when using spray cans, you well get whats called "orange peel", this is the tiny bumps that form with each layer of paint).
- Now repeat this step 2-3 more times. Its import that you do the primer well because thats what determines how well the paint comes out.
- Use this same process for the color, except maybe add an extra layer. I don't normally sand my last coat of color.
- Now spray the clear coat over the paint. I usually spray it on thicker so that its nice and smooth, just make sure you don't use so much that it drips.
- After that, I use a nice 3M rubbing compound to polish the paint. Do this by adding a small amount of compound onto a rag and rub it lightly in circles. This acts as a very fine sand paper. Now wipe off all of the compound once you've gone over whole the piece.
- Then just use a little car wax to buff it up and you should have yourself a nice shiny new paintjob.
Here's a picture of the finished product of a panel I painted.

Hope that helps, good luck!
First of all, I highly recomend using Duplicolor. Might cost you a few more bucks but the outcome is definately worth it.
Now that we've cleared that up, heres a few tips:
- Sand everything down with 1000 or 1500 wet/dry sand paper from 3M.
- Next, spray a light layer of primer over the surface. I say light layers so that it doesn't drip. Use nice smooth overlapping strokes about 8 inches above the surface.
- Now wet sand the layer using 1500 wet/dry sand paper if the surface is rough (when using spray cans, you well get whats called "orange peel", this is the tiny bumps that form with each layer of paint).
- Now repeat this step 2-3 more times. Its import that you do the primer well because thats what determines how well the paint comes out.
- Use this same process for the color, except maybe add an extra layer. I don't normally sand my last coat of color.
- Now spray the clear coat over the paint. I usually spray it on thicker so that its nice and smooth, just make sure you don't use so much that it drips.
- After that, I use a nice 3M rubbing compound to polish the paint. Do this by adding a small amount of compound onto a rag and rub it lightly in circles. This acts as a very fine sand paper. Now wipe off all of the compound once you've gone over whole the piece.
- Then just use a little car wax to buff it up and you should have yourself a nice shiny new paintjob.
Here's a picture of the finished product of a panel I painted.
Hope that helps, good luck!
Super Cereal Admin
Joined: Feb 2007
Posts: 7,081
From: Lexington, KY
Okay, so the original spray paint DIY by Mossy doesn't have pictures after the switch to Vb, so I figured I'd write this up (yeah, that's how bored I am right now  )
)
Anyway, here's what you'll need:
1) Sandpaper, 220 grit to 2000 grit. I recommend 3M wetordy based on the fact that it's good, waterproof paper.
2) Flexible sanding block
4) Primer (number of cans will vary depending on what you're painting)
5) Color (again, the amount depends on what you're painting)
6) Clear coat (amount depends on size)
7) (optional) bucket of water (for wet-sanding)
Step 1:
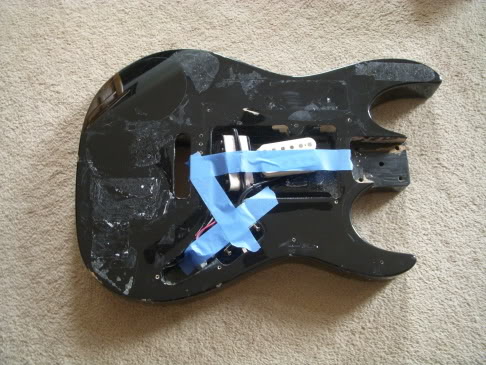
Okay, so you have your... umm. Whatever it is you're painting. Now, for the sake of this DIY, we're going to assume it's already painted and you don't like the color. The first step will be to sand down the existing paint. You don't have to sand it down to metal/plastic/whatever; you just have to scuff up the paint. The general rule of thumb is if the original paint was gloss, the paint should have no shine left to it when you're done sanding. For paint removal, I start at 120 grit and work my way to 800 grit*.
So here's the guitar I painted before sanding:
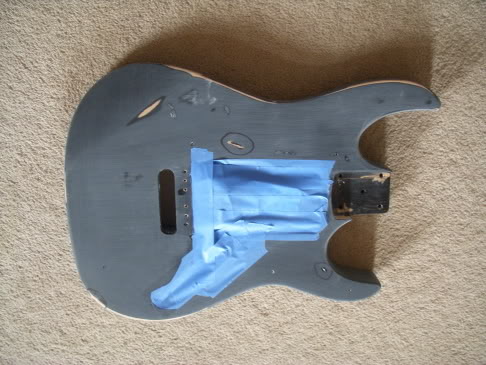
And After (see what I'm saying about no gloss?):
Step 2:
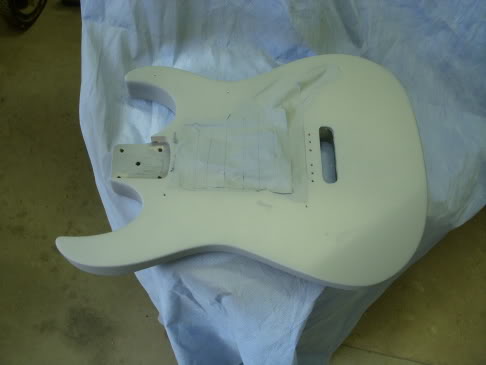
Okay, so you've sanded the item down with 800 grit, so now what? Now you should wipe down whatever you're painting and let it dry. Once it's dry, it's time for the first coat of primer. If you're not familiar with using spray-paint, it's rather simple. You want to make overlapping side-to-side passes with the can, keeping the can about 10" from the surface. When you reach the end of your pass (I usually do about 12"-16" passes), you don't abruptly stop spraying, rather you feather the nozzle. That way, when you overlap the passes, the paint isn't thick in some spots and thin in others; it blends together. Also, remember that 100 thin coats is better than 1 thick coat. After your first coat of primer, you should still be able to see the original color through the primer; the second should cover up most of the color, and by the third coat of primer you shouldn't be able to see the original color at all (if you still can, keep adding additional thin coats until you can't see the color).
After the first few coats of primer:
Step 3:
Okay, now that the primer is dry, we're going to want to wet-sand the primer smooth. Remember that the prep work (initial sanding and primer) will determine the total outcome of the paint job. I'd start at no coarser than 220 grit, and once again work your way to 800 grit. After the sanding is done, wipe the surface down, let it dry, and spray another coat. I usually end up doing 3 coats of primer, sanding between each coat. If you sand through the primer down to the surface, you get to spray an additional coat of primer... isn't painting fun?
Step 4:
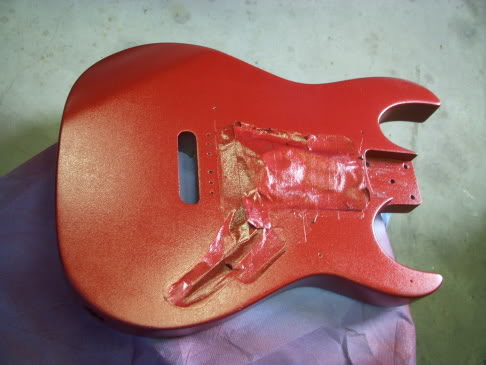
So you're done with the primer, and you worked your way down to 800 grit on the final coat. So now it's time to do the color; it's sprayed the same way the primer is, but (personal preference here) I usually don't sand too much between color coats; what I do (I'm not saying this is right, but it seems to give good results) is start at 800 grit and work my way to 1000 grit, wet sanding between coats. Generally, I do 3 to 4 coats of color. And if you choose to sand between coats and sand down and you sand down to the primer, you get to spray additional coats to make up for the coat you just sanded through. Again, after the first coat you should be able to see the primer; after the second, most (but not all) the primer should be covered, and by the third, you shouldn't really be able to see the primer any more.
I believe this was the second layer of color on the guitar:
Step 5:
So now you have your 3+ layers of color laid, and you're ready to clear coat it. The clear coat goes on just like the primer/paint, but this time you can spray it a little thicker (but not so thick that you get runs). I usually do a minimum of 2 layers of clear, both fairly thick. After the clear has dried, you can use a rubbing compound to make the clear nice and shiny, and then an automotive wax to make it look nice and pretty.
The finished guitar:
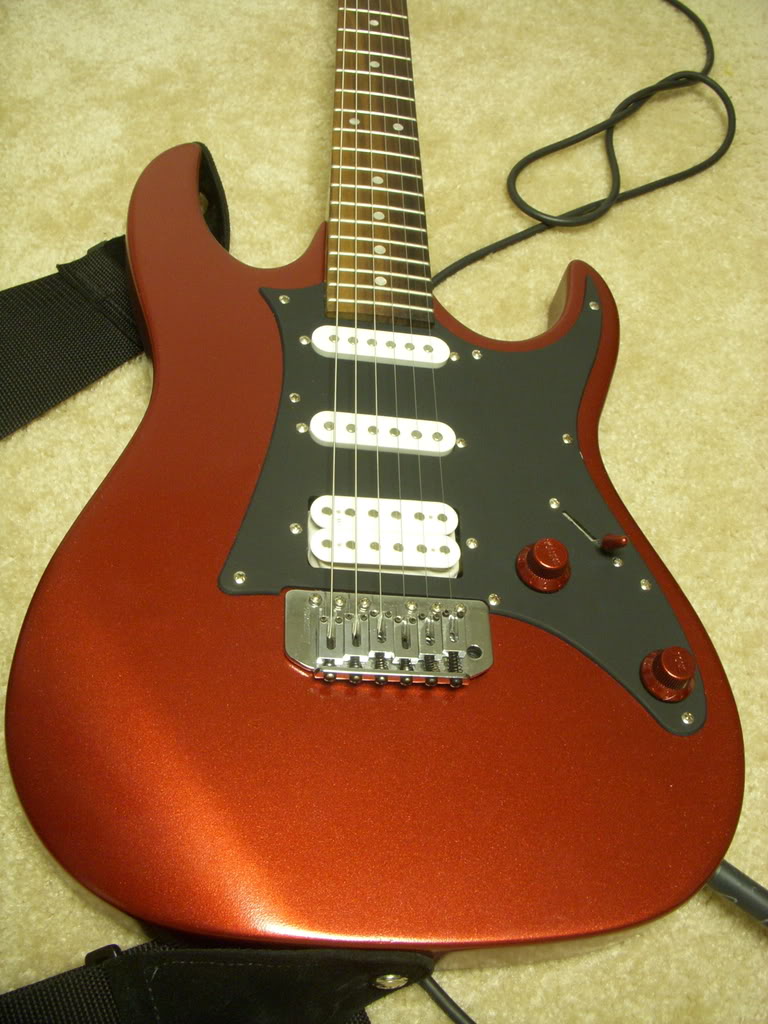
Who says spray paint can't look good?
*If you don't know how to wet-sand, it's surprisingly simple. Basically, you have a bucket of warm water, and you keep the sandpaper soaked. It helps the paper sand a little smoother, and the sandpaper doesn't get clogged (which you'll appreciate if you've ever sanded fiberglass).
)Anyway, here's what you'll need:
1) Sandpaper, 220 grit to 2000 grit. I recommend 3M wetordy based on the fact that it's good, waterproof paper.
2) Flexible sanding block
4) Primer (number of cans will vary depending on what you're painting)
5) Color (again, the amount depends on what you're painting)
6) Clear coat (amount depends on size)
7) (optional) bucket of water (for wet-sanding)
Step 1:
Okay, so you have your... umm. Whatever it is you're painting. Now, for the sake of this DIY, we're going to assume it's already painted and you don't like the color. The first step will be to sand down the existing paint. You don't have to sand it down to metal/plastic/whatever; you just have to scuff up the paint. The general rule of thumb is if the original paint was gloss, the paint should have no shine left to it when you're done sanding. For paint removal, I start at 120 grit and work my way to 800 grit*.
So here's the guitar I painted before sanding:
And After (see what I'm saying about no gloss?):
Step 2:
Okay, so you've sanded the item down with 800 grit, so now what? Now you should wipe down whatever you're painting and let it dry. Once it's dry, it's time for the first coat of primer. If you're not familiar with using spray-paint, it's rather simple. You want to make overlapping side-to-side passes with the can, keeping the can about 10" from the surface. When you reach the end of your pass (I usually do about 12"-16" passes), you don't abruptly stop spraying, rather you feather the nozzle. That way, when you overlap the passes, the paint isn't thick in some spots and thin in others; it blends together. Also, remember that 100 thin coats is better than 1 thick coat. After your first coat of primer, you should still be able to see the original color through the primer; the second should cover up most of the color, and by the third coat of primer you shouldn't be able to see the original color at all (if you still can, keep adding additional thin coats until you can't see the color).
After the first few coats of primer:
Step 3:
Okay, now that the primer is dry, we're going to want to wet-sand the primer smooth. Remember that the prep work (initial sanding and primer) will determine the total outcome of the paint job. I'd start at no coarser than 220 grit, and once again work your way to 800 grit. After the sanding is done, wipe the surface down, let it dry, and spray another coat. I usually end up doing 3 coats of primer, sanding between each coat. If you sand through the primer down to the surface, you get to spray an additional coat of primer... isn't painting fun?
Step 4:
So you're done with the primer, and you worked your way down to 800 grit on the final coat. So now it's time to do the color; it's sprayed the same way the primer is, but (personal preference here) I usually don't sand too much between color coats; what I do (I'm not saying this is right, but it seems to give good results) is start at 800 grit and work my way to 1000 grit, wet sanding between coats. Generally, I do 3 to 4 coats of color. And if you choose to sand between coats and sand down and you sand down to the primer, you get to spray additional coats to make up for the coat you just sanded through. Again, after the first coat you should be able to see the primer; after the second, most (but not all) the primer should be covered, and by the third, you shouldn't really be able to see the primer any more.
I believe this was the second layer of color on the guitar:
Step 5:
So now you have your 3+ layers of color laid, and you're ready to clear coat it. The clear coat goes on just like the primer/paint, but this time you can spray it a little thicker (but not so thick that you get runs). I usually do a minimum of 2 layers of clear, both fairly thick. After the clear has dried, you can use a rubbing compound to make the clear nice and shiny, and then an automotive wax to make it look nice and pretty.
The finished guitar:
Who says spray paint can't look good?
*If you don't know how to wet-sand, it's surprisingly simple. Basically, you have a bucket of warm water, and you keep the sandpaper soaked. It helps the paper sand a little smoother, and the sandpaper doesn't get clogged (which you'll appreciate if you've ever sanded fiberglass).

Thread
Thread Starter
Forum
Replies
Last Post
Spoolin.Em
Suspension, Brakes, Tires & Wheels
2
Sep 22, 2011 05:18 PM
Erad
Mechanical Problems & Technical Chat
5
Mar 12, 2009 08:05 PM