
Motor Swap (D16A6 to D16Y7)


Thread Starter
|
HCF Member
Joined: Jan 2007
Posts: 631
From: Bayarea, CA
DIY - Motor Swap from D16A6 to D16Y7 by Droopy128
Here's another major project that I tackled with the help from my good buddy Leon. This car had gone through a major overhaul before I decided to do this swap. The history of the car is that I purchased it for $1200 in January 2007. I basically bought it because the interior and exterior was in very good condition, knowing that the transmission grinded like hell and that it needed a head gasket, shocks, and exhaust. I bought it anyway. Since then, I've replaced the following: head gasket, shocks (on DIY), rebuilt my own tranny (on DIY), changed the entire exhaust, all with stock replacement parts.
A year has passed. This civic burned and leaked oil and I got tired of it after a year, so decided to replace the whole motor instead of rebuilding it. So I bought the used motor on Craigslist for $200, not knowing anything about the history of the motor, so I tooka chance on it based on the previous owner who said it's in great running condition.
The entire swap takes 2 days (approx 14 hours total), these pictures I took are only few of the processes because didn't have time to stop and think about taking pictures.
This will be a crash course for a swap if you are familiar with it and I will not going into detail how to remove basic stuff. I'll try to explain as much as possible, so here it goes...
Working from top to bottom.
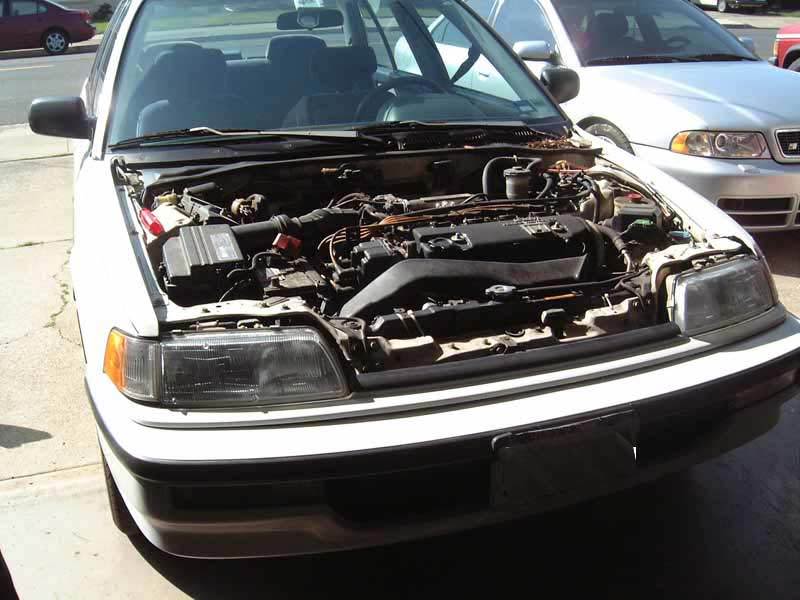
1. Remove hood for clearance so I can use the cherry picker (motor hoist).
2. Remove the battery, bracket, plate, everything you can take out.
3. Air filter box and tubing, etc..
4. Remove radiator with fan attached, disconnect all the wiring harness from both side of the radiator, bracket etc.. lift the whole thing out. (NO PIX)
5. My A/C was out of freon and didn't work so I just left it intact and just removed the hose from the pump. Remove the power steering pump and move it to the side (don't disconnect the hose), remove the pump from the bracket and move it to the side. (NO PIX)
6. Disconnect the main wiring harness assembly, trace it from the intake and just disconnect it, it's on the left and other on the right of the car. Whatever hoses that attached to intake or the motor must be disconnected and don't forget the fuel line too. (NO PIX)
7. Now jack up the car and work on the bottom, basically remove the wheel, drain oil (motor and tranny), tranny linkage, axles, exhaust. (NO PIX)
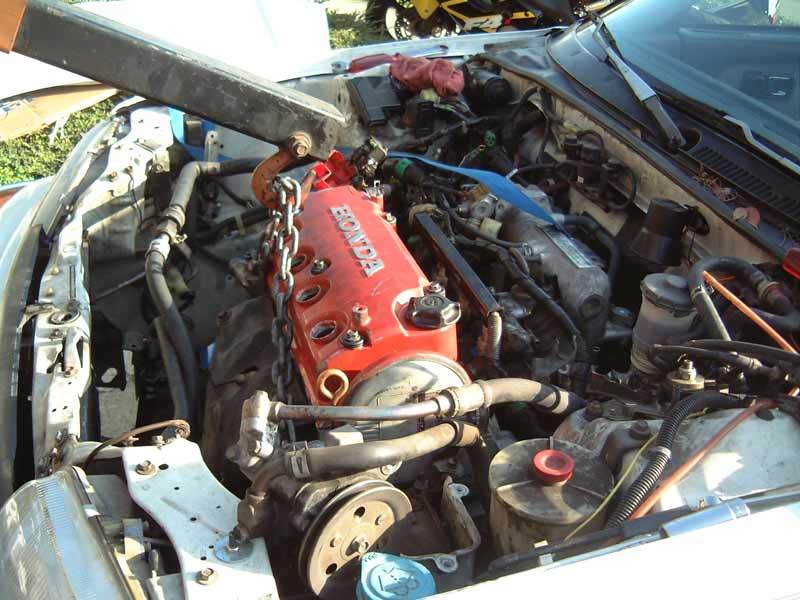
8. Using the cherry picker, attached a chain and hook it up the motor, (you'll need to find a secure place where it has enough strength to hold the chain to lift the motor with. Don't chain up the intake. Just hook it up for now and hold the motor firmly with the cherry picker, can't lift motor yet because all of the mounts are still attached. (NO PIX)
9. Remove the pulley and save the pin, put it in a safe place. (you need to remove the pulley so the motor and tranny can come out as a whole). If you don't remove the pulley, you have to remove the tranny and motor separately. (NO PIX)
10. Remove the motor mount, tranny mount etc. on all four sides, then you're ready for the motor to be lifted out. (NO PIX)
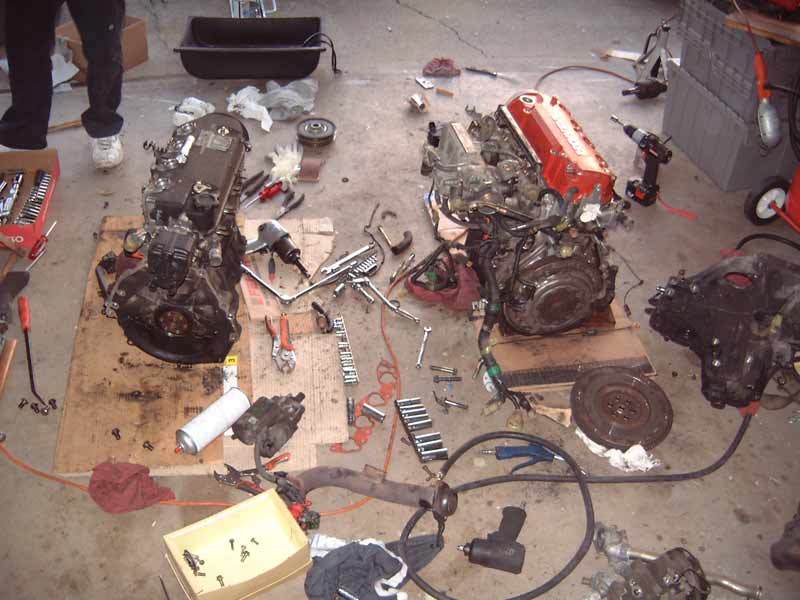
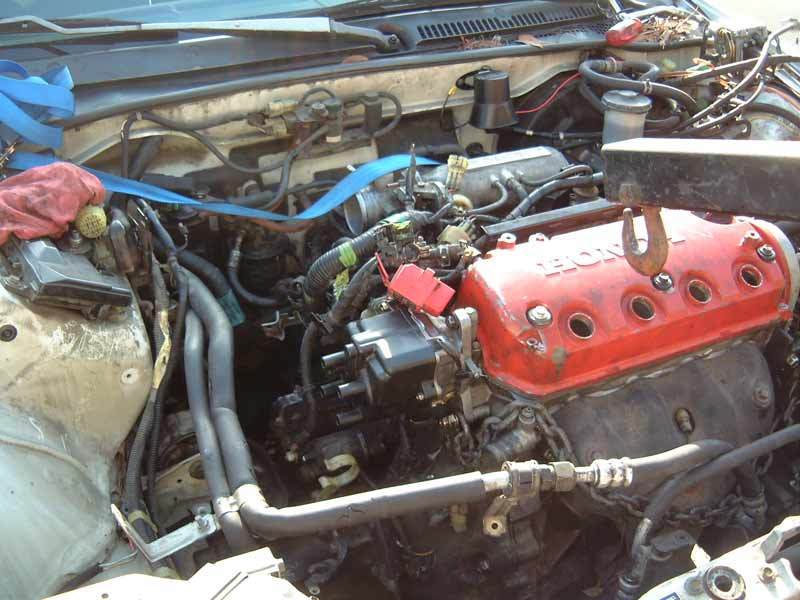
With both motor side by side on the ground, we remove intake, exhaust, motor mount, A/C bracket, alternator bracket, tranny, basically everything and install in the new motor.
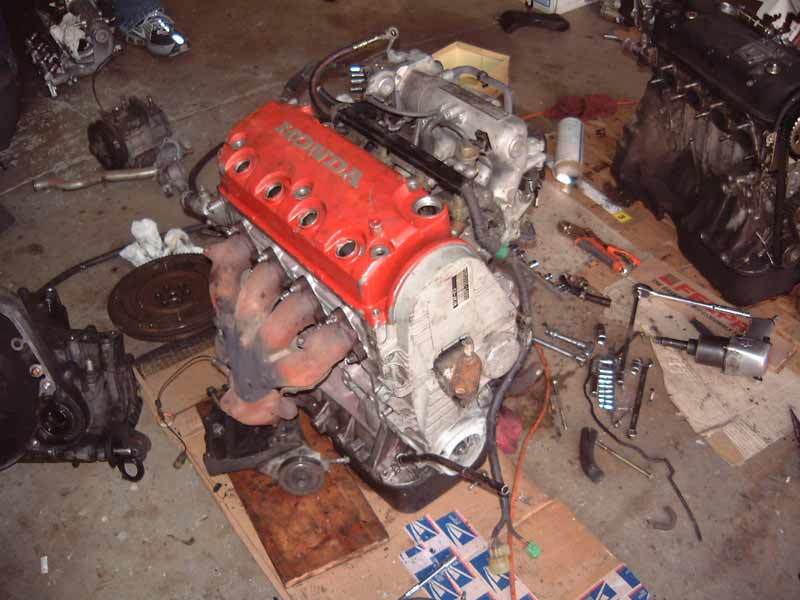
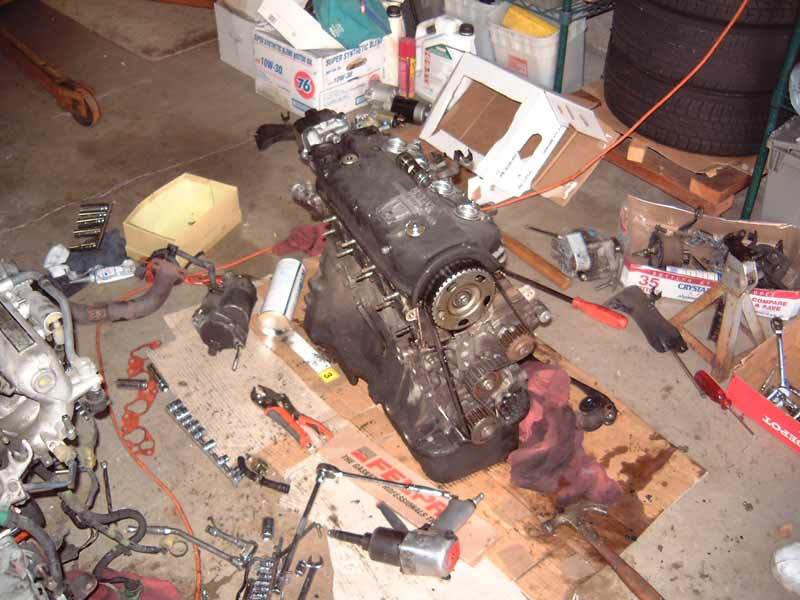

It was a mess with all those nuts and bolts everywhere. We knew exactly where it all went, although we didn't separate it and tossed it all in one bucket. But if you work on car long enough, you'll know where it all goes.
Few of things we needed to modified were:
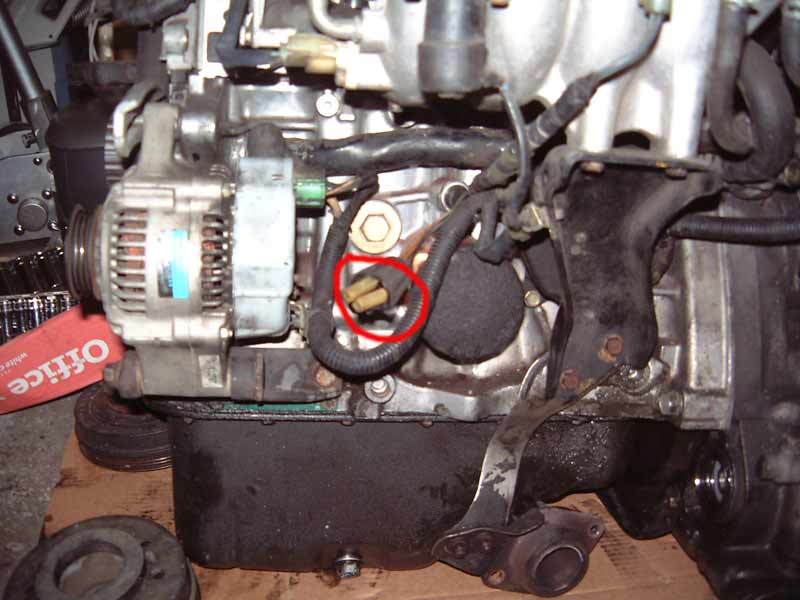
The coolant bypass tube behind the motor, using the tube from old motor, but swap the front unit because it has the fan switch sensor built in where the thermostat sits. The old fan switch was attached to side of the motor next to the oil filter, the new motor don't have that option.
Old motor where the switch is attached.. took it off but can't install on the Y7 motor because it doesn't have that fitting on the side of motor like in the pix below.

Here's the plug for the fan switch with nowhere to plug in so we extended the wire to plug in the fan switch which is on the thermostat housing on the Y7 motor (below).
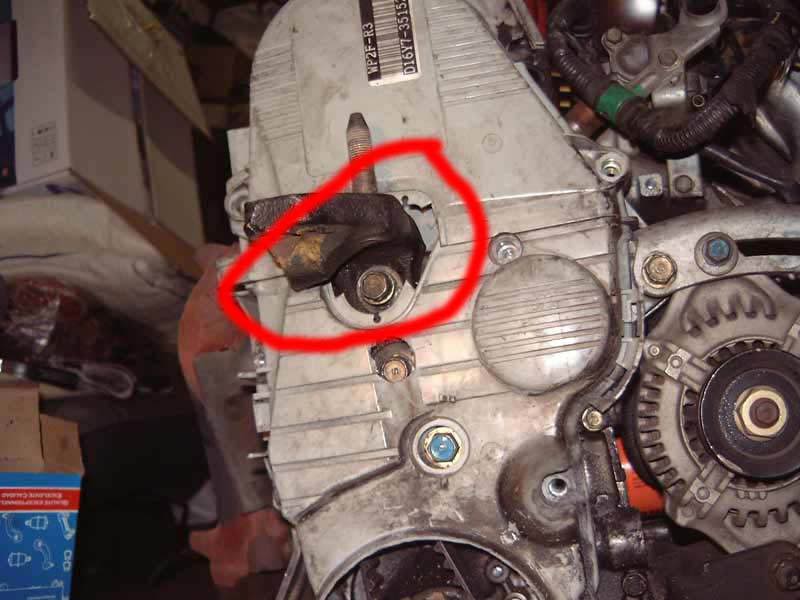
The timing cover where I used my original motor mount doesn't exactly fit it so the cover must be cut a little, but it leaves a gap. This may not sound important to some but to avoid debris e.g. possibly tiny rock can get in there and cause damages. So plastic was cut out to fill in the gap.
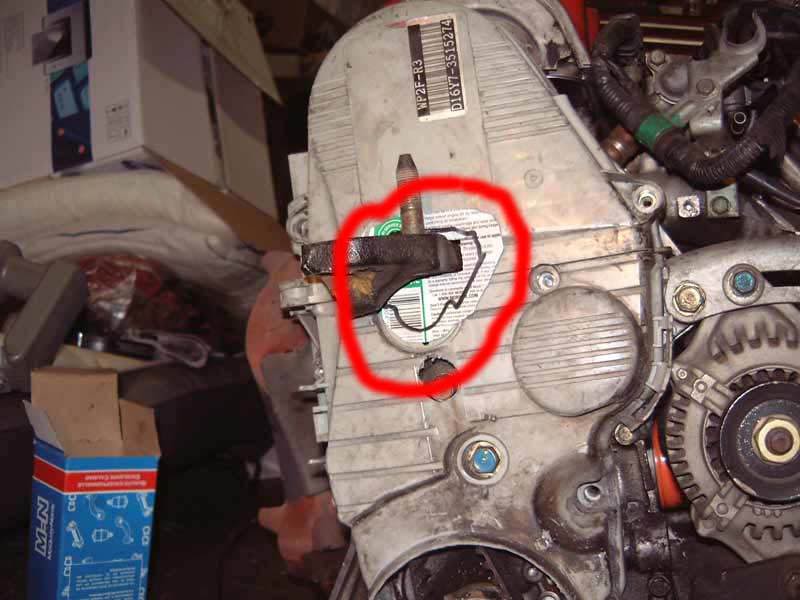
After..
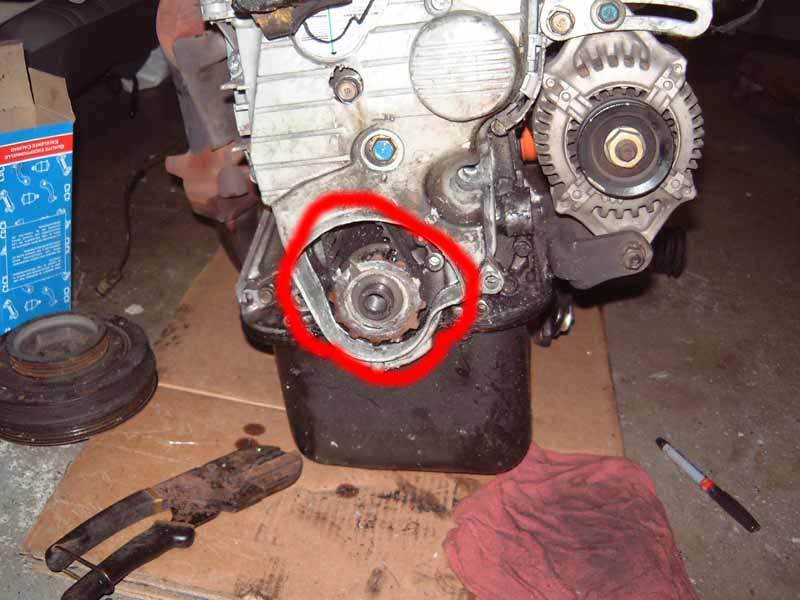
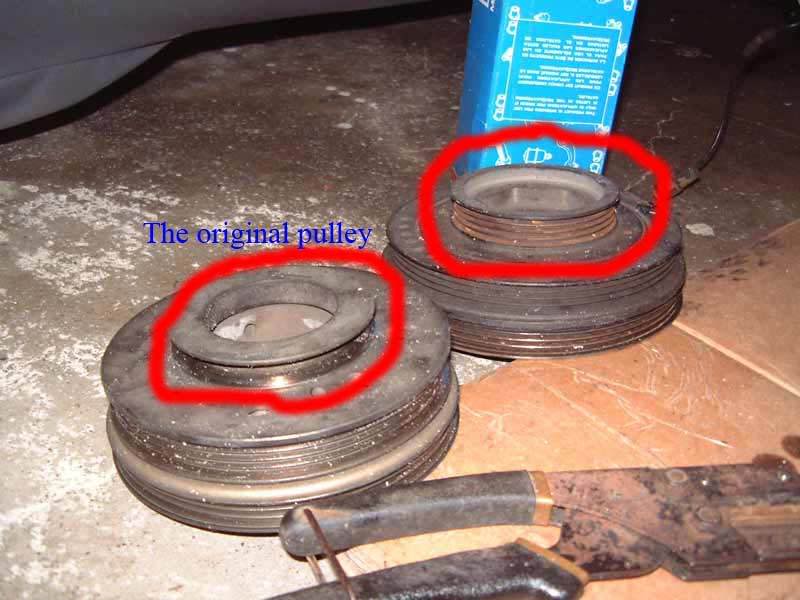
The bottom cover needed to be cut because I needed to use my old pulley. The belt for my power steering doesn't have a groove as you can see in the picture. This is the whole reason why it needs to be modified.
All of t his took one day to do. We started it about 12 noon and finished with all the reassembly by 7pm.
The next day we finished modifying the timing cover and installed the valve cover. The engine was ready to be lifted into the car.
With the car still on jack stands, we hoisted the motor slowly into the car, avoiding possible damage to any sensors, tubing, hoses, wires, etc as we dropped it in.
After aligning it with the mount areas, we installed the driver side mount side first, then the passenger side, then the rear mount, then the front tranny mount. After all were in place, we removed the hoist and reinstalled the pulley, all the drive belts, and power steering pump. We ran all the wiring harnesses, re-installed the radiator, battery area components, all the hoses, tranny cables, etc. then the air filter unit.
On the bottom, install the shift linkage, exhaust, axles, put oil in the tranny, reinstall the wheels, then put oil in the motor.
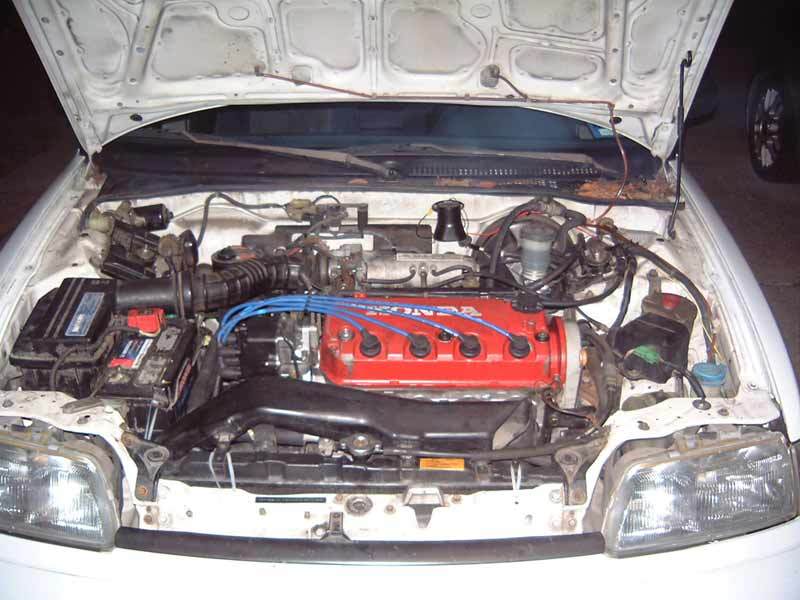
Viola'... Finished!
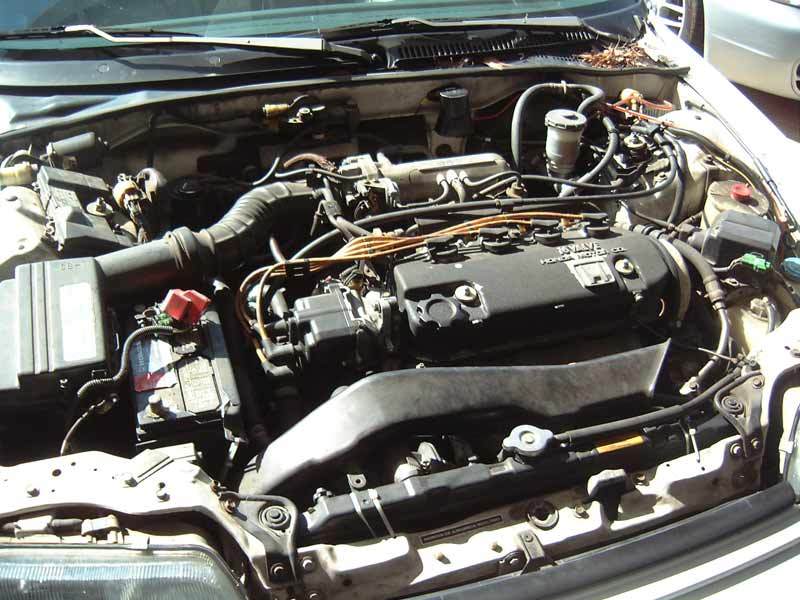
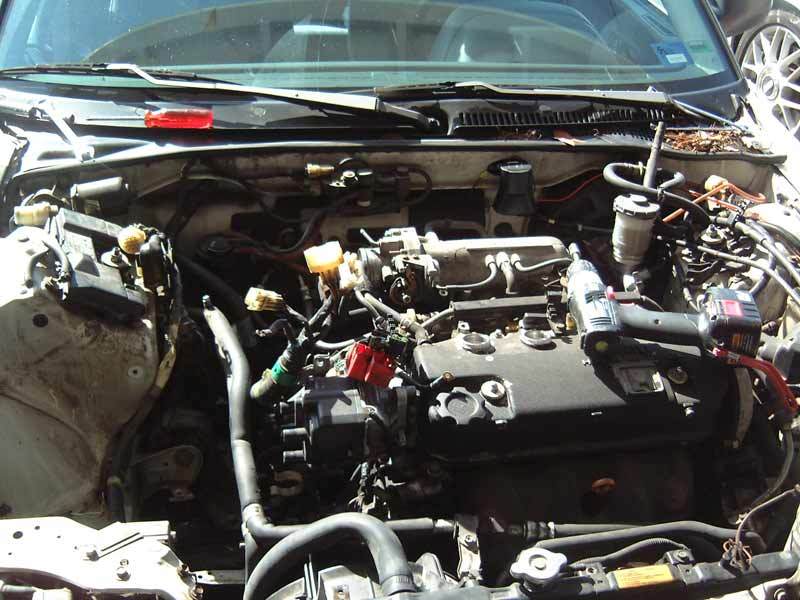
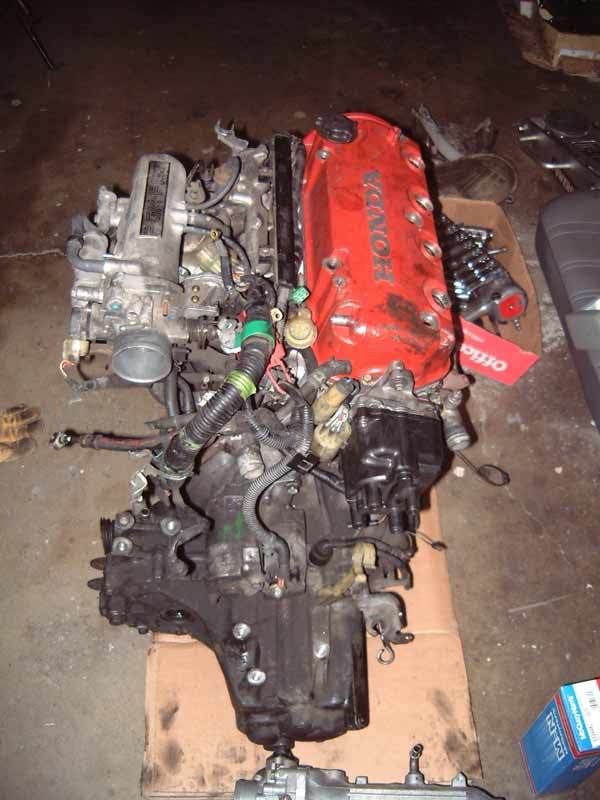
Comparison from BEFORE and AFTER
Here's another major project that I tackled with the help from my good buddy Leon. This car had gone through a major overhaul before I decided to do this swap. The history of the car is that I purchased it for $1200 in January 2007. I basically bought it because the interior and exterior was in very good condition, knowing that the transmission grinded like hell and that it needed a head gasket, shocks, and exhaust. I bought it anyway. Since then, I've replaced the following: head gasket, shocks (on DIY), rebuilt my own tranny (on DIY), changed the entire exhaust, all with stock replacement parts.
A year has passed. This civic burned and leaked oil and I got tired of it after a year, so decided to replace the whole motor instead of rebuilding it. So I bought the used motor on Craigslist for $200, not knowing anything about the history of the motor, so I tooka chance on it based on the previous owner who said it's in great running condition.
The entire swap takes 2 days (approx 14 hours total), these pictures I took are only few of the processes because didn't have time to stop and think about taking pictures.
This will be a crash course for a swap if you are familiar with it and I will not going into detail how to remove basic stuff. I'll try to explain as much as possible, so here it goes...
Working from top to bottom.
1. Remove hood for clearance so I can use the cherry picker (motor hoist).
2. Remove the battery, bracket, plate, everything you can take out.
3. Air filter box and tubing, etc..
4. Remove radiator with fan attached, disconnect all the wiring harness from both side of the radiator, bracket etc.. lift the whole thing out. (NO PIX)
5. My A/C was out of freon and didn't work so I just left it intact and just removed the hose from the pump. Remove the power steering pump and move it to the side (don't disconnect the hose), remove the pump from the bracket and move it to the side. (NO PIX)
6. Disconnect the main wiring harness assembly, trace it from the intake and just disconnect it, it's on the left and other on the right of the car. Whatever hoses that attached to intake or the motor must be disconnected and don't forget the fuel line too. (NO PIX)
7. Now jack up the car and work on the bottom, basically remove the wheel, drain oil (motor and tranny), tranny linkage, axles, exhaust. (NO PIX)
8. Using the cherry picker, attached a chain and hook it up the motor, (you'll need to find a secure place where it has enough strength to hold the chain to lift the motor with. Don't chain up the intake. Just hook it up for now and hold the motor firmly with the cherry picker, can't lift motor yet because all of the mounts are still attached. (NO PIX)
9. Remove the pulley and save the pin, put it in a safe place. (you need to remove the pulley so the motor and tranny can come out as a whole). If you don't remove the pulley, you have to remove the tranny and motor separately. (NO PIX)
10. Remove the motor mount, tranny mount etc. on all four sides, then you're ready for the motor to be lifted out. (NO PIX)
With both motor side by side on the ground, we remove intake, exhaust, motor mount, A/C bracket, alternator bracket, tranny, basically everything and install in the new motor.
It was a mess with all those nuts and bolts everywhere. We knew exactly where it all went, although we didn't separate it and tossed it all in one bucket. But if you work on car long enough, you'll know where it all goes.
Few of things we needed to modified were:
The coolant bypass tube behind the motor, using the tube from old motor, but swap the front unit because it has the fan switch sensor built in where the thermostat sits. The old fan switch was attached to side of the motor next to the oil filter, the new motor don't have that option.
Old motor where the switch is attached.. took it off but can't install on the Y7 motor because it doesn't have that fitting on the side of motor like in the pix below.
Here's the plug for the fan switch with nowhere to plug in so we extended the wire to plug in the fan switch which is on the thermostat housing on the Y7 motor (below).
The timing cover where I used my original motor mount doesn't exactly fit it so the cover must be cut a little, but it leaves a gap. This may not sound important to some but to avoid debris e.g. possibly tiny rock can get in there and cause damages. So plastic was cut out to fill in the gap.
After..
The bottom cover needed to be cut because I needed to use my old pulley. The belt for my power steering doesn't have a groove as you can see in the picture. This is the whole reason why it needs to be modified.
All of t his took one day to do. We started it about 12 noon and finished with all the reassembly by 7pm.
The next day we finished modifying the timing cover and installed the valve cover. The engine was ready to be lifted into the car.
With the car still on jack stands, we hoisted the motor slowly into the car, avoiding possible damage to any sensors, tubing, hoses, wires, etc as we dropped it in.
After aligning it with the mount areas, we installed the driver side mount side first, then the passenger side, then the rear mount, then the front tranny mount. After all were in place, we removed the hoist and reinstalled the pulley, all the drive belts, and power steering pump. We ran all the wiring harnesses, re-installed the radiator, battery area components, all the hoses, tranny cables, etc. then the air filter unit.
On the bottom, install the shift linkage, exhaust, axles, put oil in the tranny, reinstall the wheels, then put oil in the motor.
Viola'... Finished!
Comparison from BEFORE and AFTER
Last edited by WellFedHobo; Jan 30, 2010 at 01:08 PM.

Thread
Thread Starter
Forum
Replies
Last Post
Aaron A Archer
Mechanical Problems & Technical Chat
0
Dec 3, 2011 03:38 PM
johnwohl
Private 'Wanted' Classifieds
1
Jan 9, 2008 07:34 PM