
Door Handle Replacement/Keyless Entry (06-10 Civic Sedan)


Thread Starter
|
Administrator
Joined: Oct 2004
Posts: 4,358
Please read this entire document before you take on this project. In writing this DIY, I'm assuming you have worked on at least one previous car.
This install takes roughly 30 minutes to an hour based on your experience and knowledge of general automotive work. Not only is this knowledge essential, so are the right tools. Things you'll need for this project are as follows.
~Driver's side front or rear door handle (part numbers differ)
~Small flathead screwdriver
~Regular-sized Phillips head screwdriver (or a drill with the proper bit)
~Shop light or flashlight
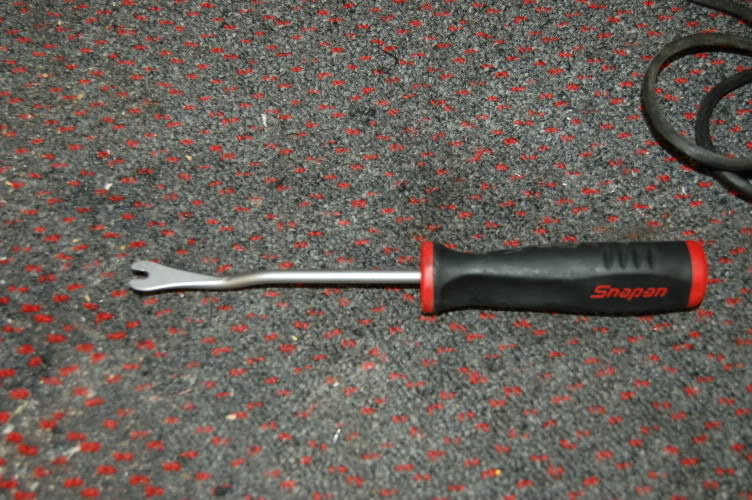
~Panel removing tool (pictured below)
*Turn off your dome light(s) as this install will require your door to be open for some time.
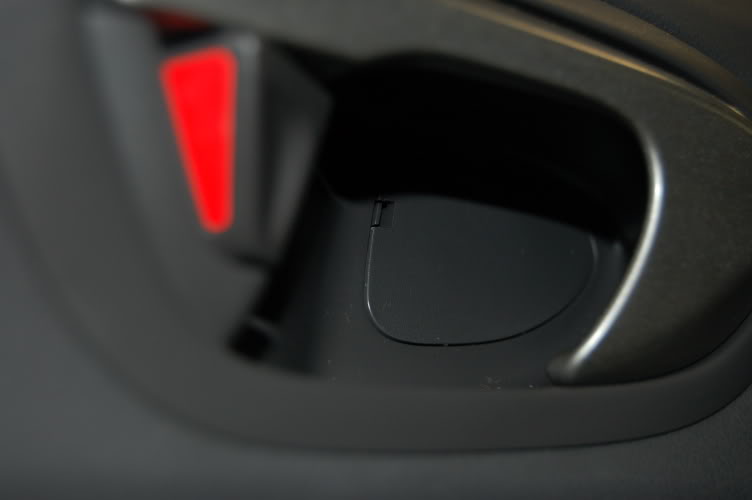
Step 1: Remove the small cover behind the interior door handle with the small flathead screwdriver. There is a Phillips head screw and a plastic screw behind the cover that need to be removed.
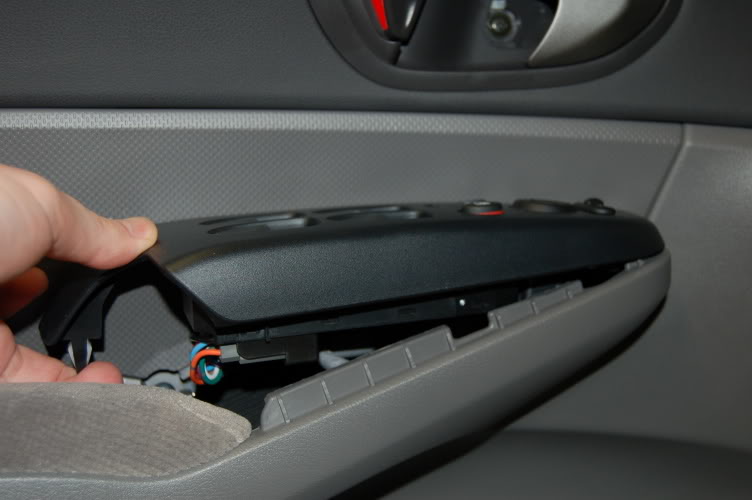
Step 2: Use the panel remover to pry the instrument panel up. Lift from the back as shown. Then pull toward the back of the car to release the last tab.
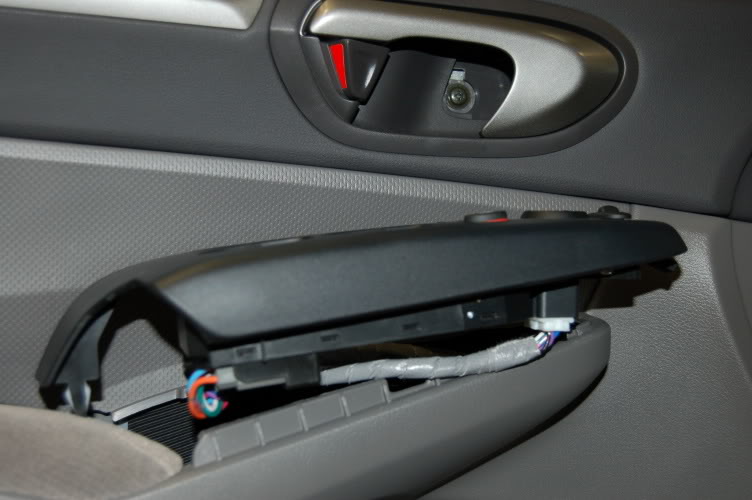
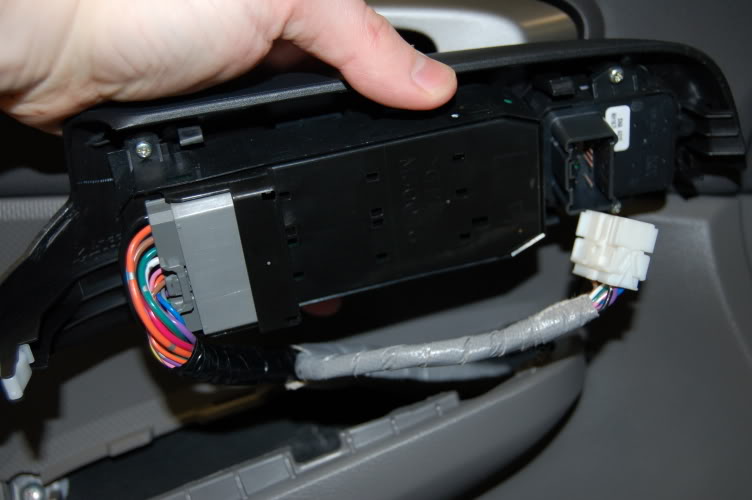
Here's a decent shot of the instrument panel and the small cover behind the door handle removed.
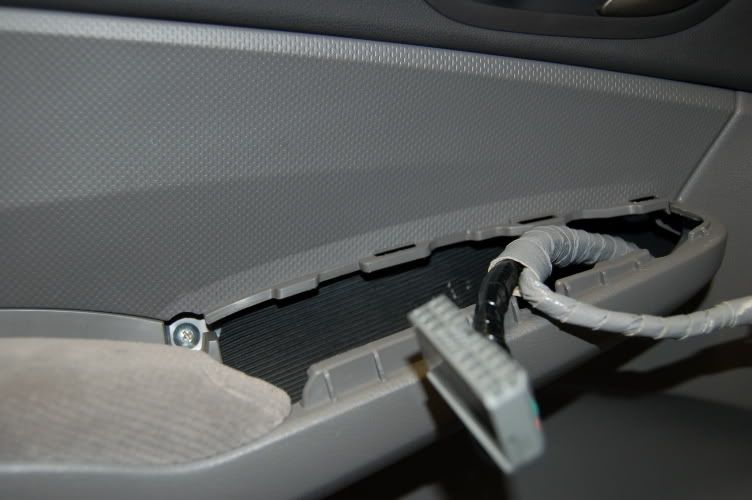
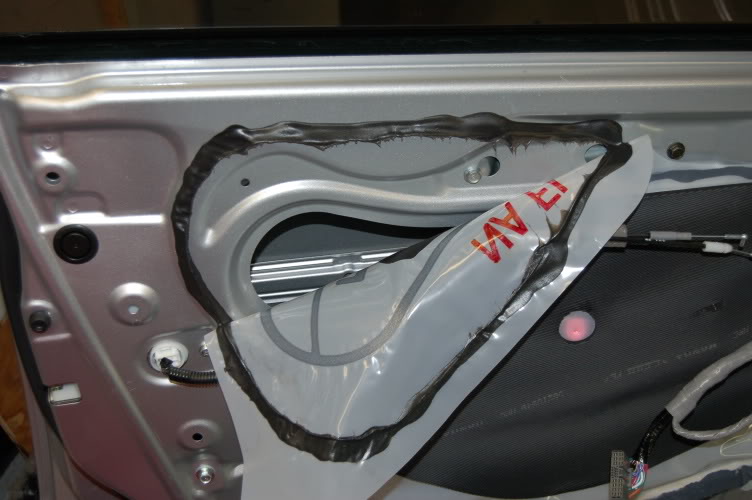
Step 3: Unplug the connections and place the panel to the side.
Step 4: Remove this screw that was behind the instrument panel.
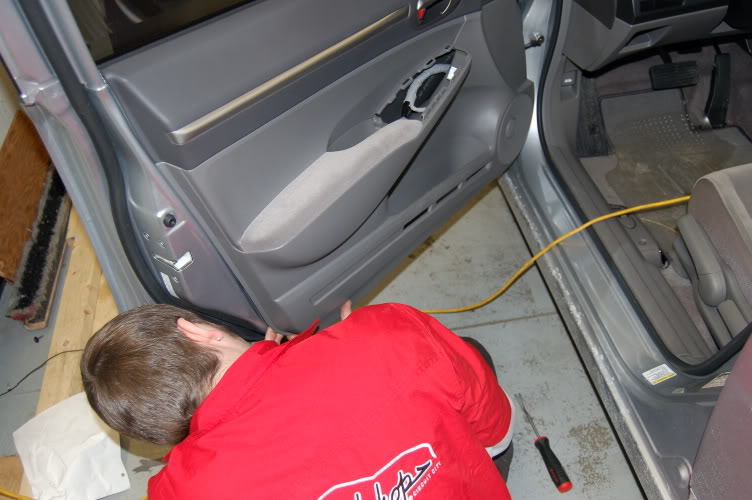
Step 5: Gently (or aggressively, depending on your doors) pry the door panels off. Use the panel remover to get started.
Note the location of the tabs. They are orange in this picture.
And they are white in this shot.
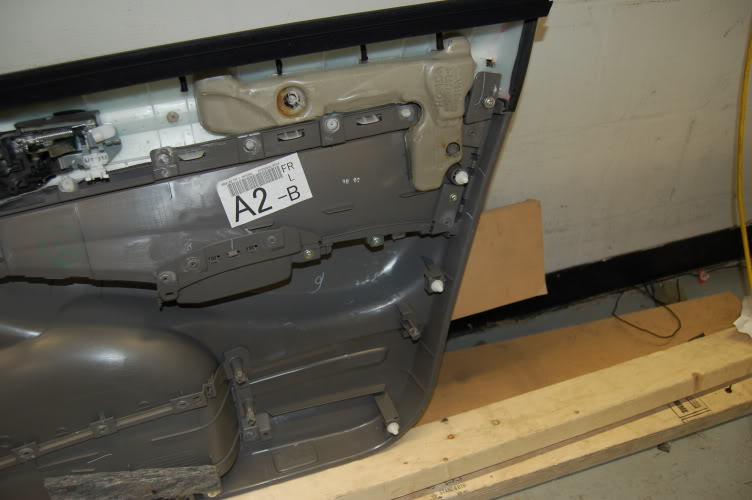
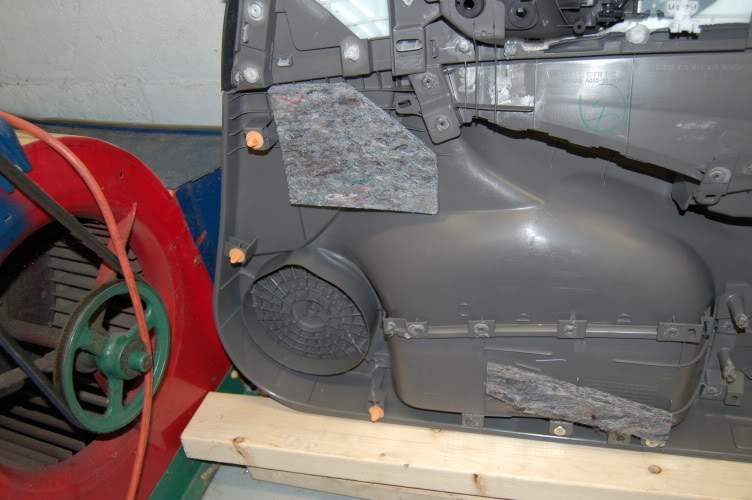
Watch out for the goop. It is super sticky, super messy, and a super pain in my ***.
Steps 1-5 for the coupe and Si can be found here (refer to steps 1-11):
http://www.lfranklin.org/DIY/front_speaker_install.html (Thanks to brolewis)
(1/30/10 link is dead)
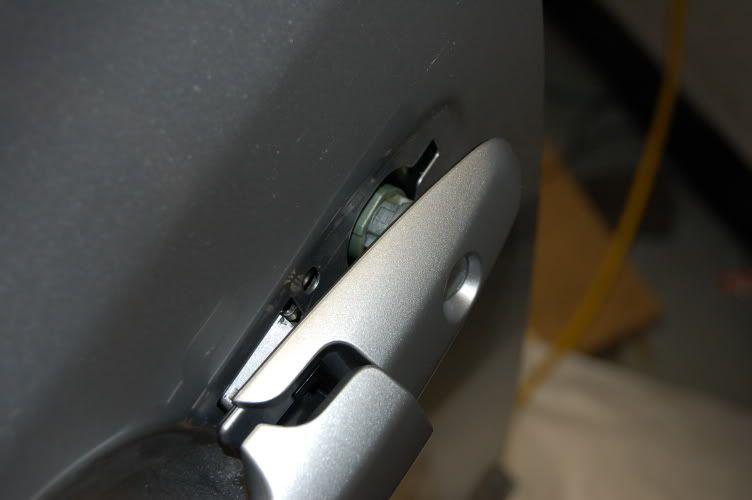
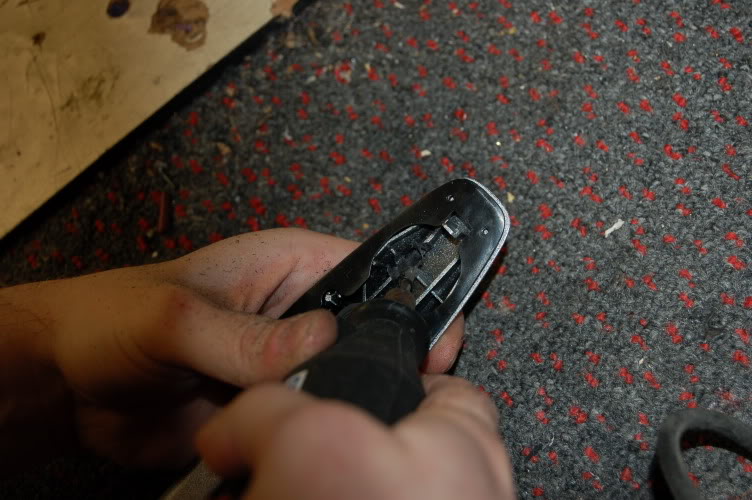
Step 6: From inside the door, pull the plastic clip from the metal actuator. Remove the actuator from the door handle. This does take some work. Don't be too afraid to pull hard.
Step 7: Once the actuator is free from the handle, there are two screws you must remove using the Phillips head screwdriver. They are hard to see, and thus, I have no pictures.
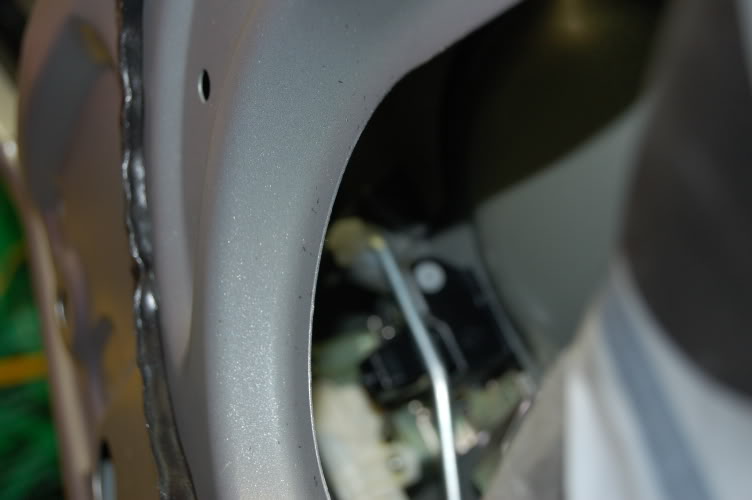
Step 8: From the outside, pull the door handle (gently) as you would normally to open the door. It should come free.
Step 9: Pull at an angle. Pull the handle upwards, and watch for the metal lever from inside the car. Carefully pull it free from the door. Use both hands to do this.

Step 10: Bring the front of the handle perpendicular to the door and gently pull free.

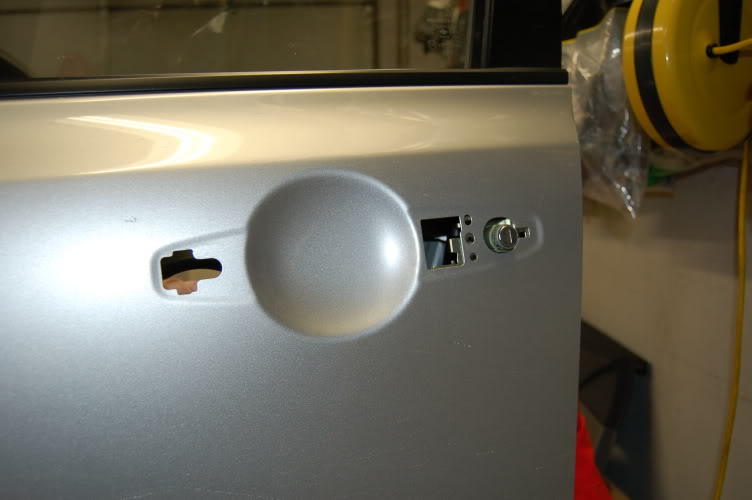
This is what your door should look like.
For a simple replacement, stop here and reverse the order of the steps. Replace your damaged handle and have a good day. If your intentions are to remove the keyhole from the front door, please continue.
For the rest of this install, I used a handle I ordered online for the back door. The part fits exactly the same; it just doesn't have a hole for the key.
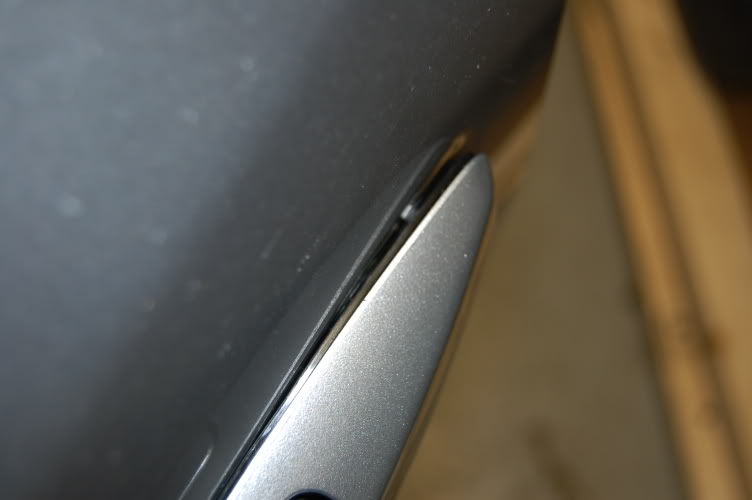
Step 11: Since I kept the lock in place, you need to Dremel a small section of the new handle.
Be sure to remove enough, or you'll have to repeat step 11. I obviously had to repeat.
Worry not. Just a bit more Dremelling and you're set. Replace the handle, the screws, and the actuator, replace your door panel, etc.
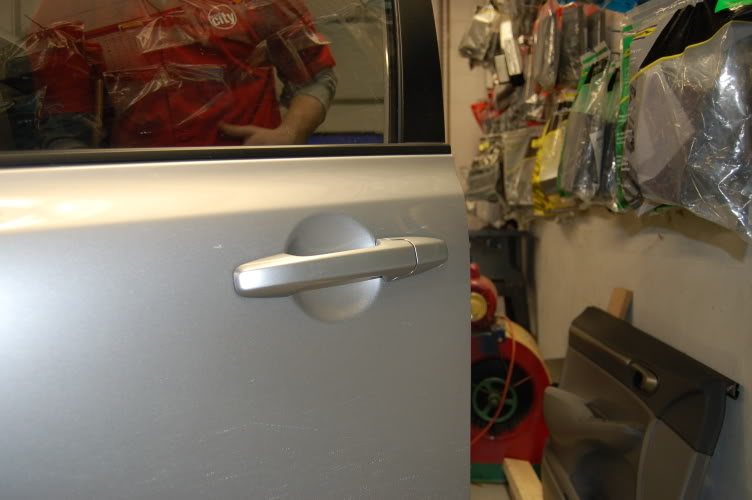
And here's your finished driver's door handle, minus keyhole.
FAQs
Q: What happens when the battery in my key dies, I'm miles away from home, and I have no keyhole?
A: I thought about this for a while. I figured I'd just put the extra key in the trunk. That way I can use my everyday key to unlock the trunk, then grab the extra key and use it. Then I realized that if anyone breaks into my trunk for any reason, they'll have access to my entire car. I can't have that.
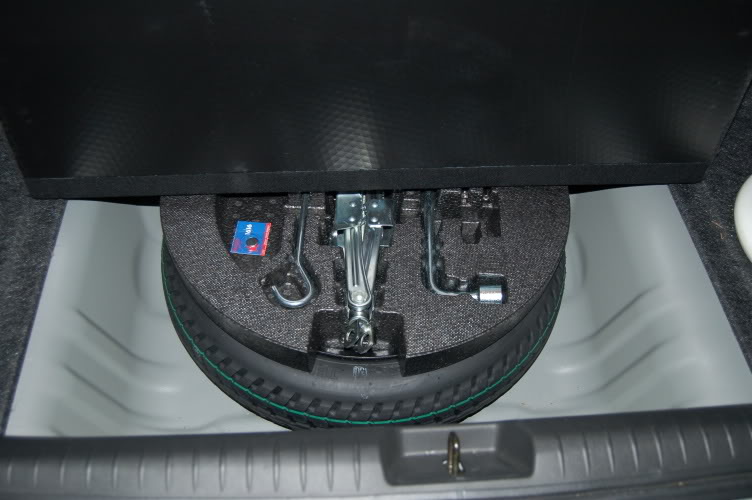
Instead, I got a CR1616 watch battery. You can pick this up at anyplace that starts with "Wal" or ends in "Mart." I also found some small screwdrivers lying around my basement. I took the battery and the screwdrivers and put them in the tray that sits on my spare tire. Now, when the battery dies, I unlock the trunk, replace the battery, and I'm on my way.
Q: Isn't this just a waste of time, money, energy, etc?
A: Eh, I don't care. I had fun doing it. I think it makes the car look cool. I work three jobs so I can have fun like this, and no one else has done it yet. I'm a pioneer.
If you don't like it, don't do it. If you do like it, you have $25 lying around and about half an hour to waste, get to it!
This install takes roughly 30 minutes to an hour based on your experience and knowledge of general automotive work. Not only is this knowledge essential, so are the right tools. Things you'll need for this project are as follows.
~Driver's side front or rear door handle (part numbers differ)
~Small flathead screwdriver
~Regular-sized Phillips head screwdriver (or a drill with the proper bit)
~Shop light or flashlight
~Panel removing tool (pictured below)
*Turn off your dome light(s) as this install will require your door to be open for some time.
Step 1: Remove the small cover behind the interior door handle with the small flathead screwdriver. There is a Phillips head screw and a plastic screw behind the cover that need to be removed.
Step 2: Use the panel remover to pry the instrument panel up. Lift from the back as shown. Then pull toward the back of the car to release the last tab.
Here's a decent shot of the instrument panel and the small cover behind the door handle removed.
Step 3: Unplug the connections and place the panel to the side.
Step 4: Remove this screw that was behind the instrument panel.
Step 5: Gently (or aggressively, depending on your doors) pry the door panels off. Use the panel remover to get started.
Note the location of the tabs. They are orange in this picture.
And they are white in this shot.
Watch out for the goop. It is super sticky, super messy, and a super pain in my ***.
Steps 1-5 for the coupe and Si can be found here (refer to steps 1-11):
http://www.lfranklin.org/DIY/front_speaker_install.html (Thanks to brolewis)
(1/30/10 link is dead)
Step 6: From inside the door, pull the plastic clip from the metal actuator. Remove the actuator from the door handle. This does take some work. Don't be too afraid to pull hard.
Step 7: Once the actuator is free from the handle, there are two screws you must remove using the Phillips head screwdriver. They are hard to see, and thus, I have no pictures.
Step 8: From the outside, pull the door handle (gently) as you would normally to open the door. It should come free.
Step 9: Pull at an angle. Pull the handle upwards, and watch for the metal lever from inside the car. Carefully pull it free from the door. Use both hands to do this.
Step 10: Bring the front of the handle perpendicular to the door and gently pull free.
This is what your door should look like.
For a simple replacement, stop here and reverse the order of the steps. Replace your damaged handle and have a good day. If your intentions are to remove the keyhole from the front door, please continue.
For the rest of this install, I used a handle I ordered online for the back door. The part fits exactly the same; it just doesn't have a hole for the key.
Step 11: Since I kept the lock in place, you need to Dremel a small section of the new handle.
Be sure to remove enough, or you'll have to repeat step 11. I obviously had to repeat.
Worry not. Just a bit more Dremelling and you're set. Replace the handle, the screws, and the actuator, replace your door panel, etc.
And here's your finished driver's door handle, minus keyhole.
FAQs
Q: What happens when the battery in my key dies, I'm miles away from home, and I have no keyhole?
A: I thought about this for a while. I figured I'd just put the extra key in the trunk. That way I can use my everyday key to unlock the trunk, then grab the extra key and use it. Then I realized that if anyone breaks into my trunk for any reason, they'll have access to my entire car. I can't have that.
Instead, I got a CR1616 watch battery. You can pick this up at anyplace that starts with "Wal" or ends in "Mart." I also found some small screwdrivers lying around my basement. I took the battery and the screwdrivers and put them in the tray that sits on my spare tire. Now, when the battery dies, I unlock the trunk, replace the battery, and I'm on my way.
Q: Isn't this just a waste of time, money, energy, etc?
A: Eh, I don't care. I had fun doing it. I think it makes the car look cool. I work three jobs so I can have fun like this, and no one else has done it yet. I'm a pioneer.
If you don't like it, don't do it. If you do like it, you have $25 lying around and about half an hour to waste, get to it!
Last edited by WellFedHobo; Jan 30, 2010 at 11:29 AM.

Thread
Thread Starter
Forum
Replies
Last Post
v1rtu0s1ty
Mechanical Problems & Technical Chat
2
Apr 6, 2011 04:42 AM
ashu
Mechanical Problems & Technical Chat
0
Aug 8, 2010 08:52 AM
drewzkie
Mechanical Problems & Technical Chat
0
Dec 8, 2009 02:09 PM
94civichatchback
Private 'Wanted' Classifieds
0
Dec 29, 2007 06:05 PM
epoch21
ECU Tuning & Fuel Management
26
Dec 22, 2005 12:44 PM