
Front End Conversion (96-98 to 99-00)


Thanks to turboej7 at Club Civic for this life saving DIY!
----
HOW � TO � �99-�00 Conversion
This is my tutorial showing and proving the fact that you don�t need an upper radiator core support from a 99-00 civic to do this swap, you can use your current stock one. This is a list of all the stuff I bought for my conversion
Front Bumper
Headlights
Fenders
Headlight brackets (not needed, but came with headlights)
Lip (optional)
Hood
Grill
My conversion took me maybe 4 hours to do and I haven�t done one before or have yet to see one done, this was all done by hear say. Most tools are simple� your basic drill, a hand size sledge hammer, screwdrivers, 10mm wrench or ratchet� most tools you would expect to use on a honda
Step 1 � Stripping the car down (the front end tear down)
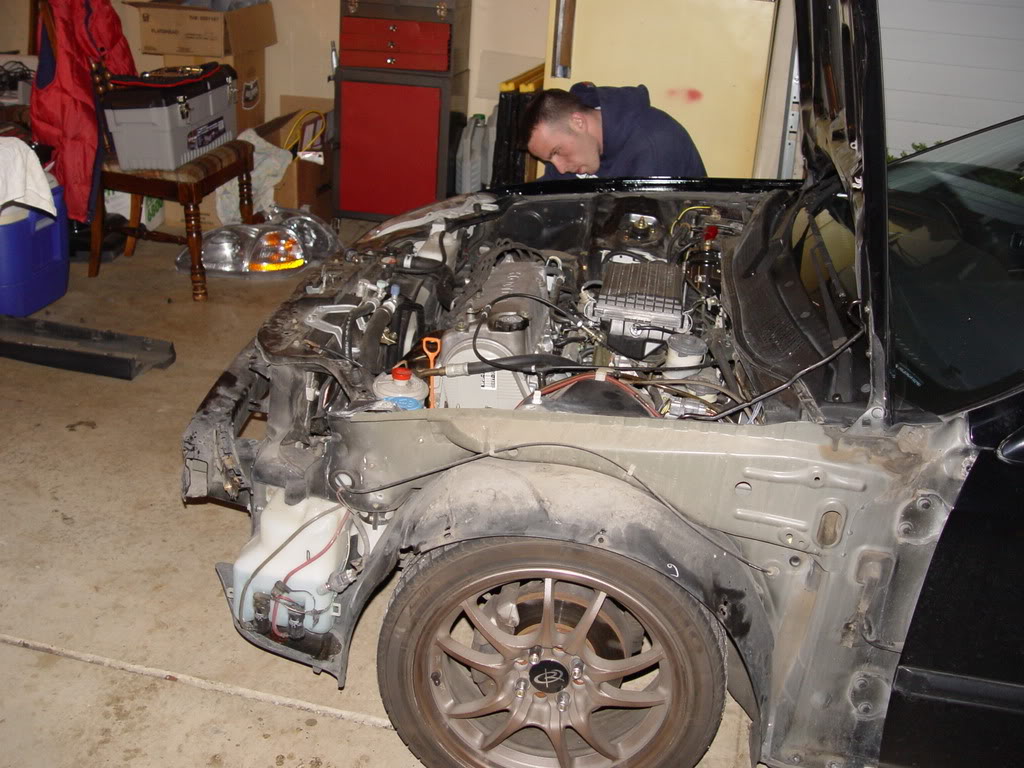
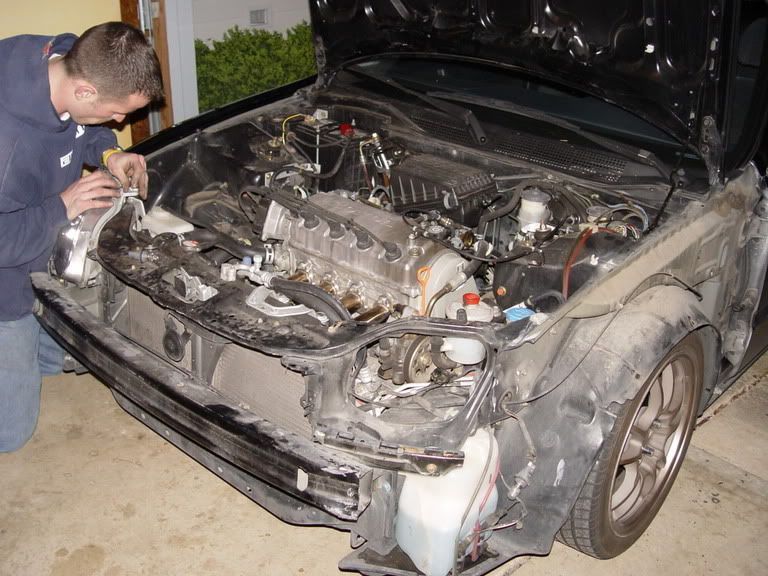
You need to take everything off here. Including hood, fenders, front bumper, headlight, & headlight brackets. You will have to massage your front bumper support later on so best to get rid of anything massaging distance.
Strip it down to like so (just finishing up taking of last fender shown here)
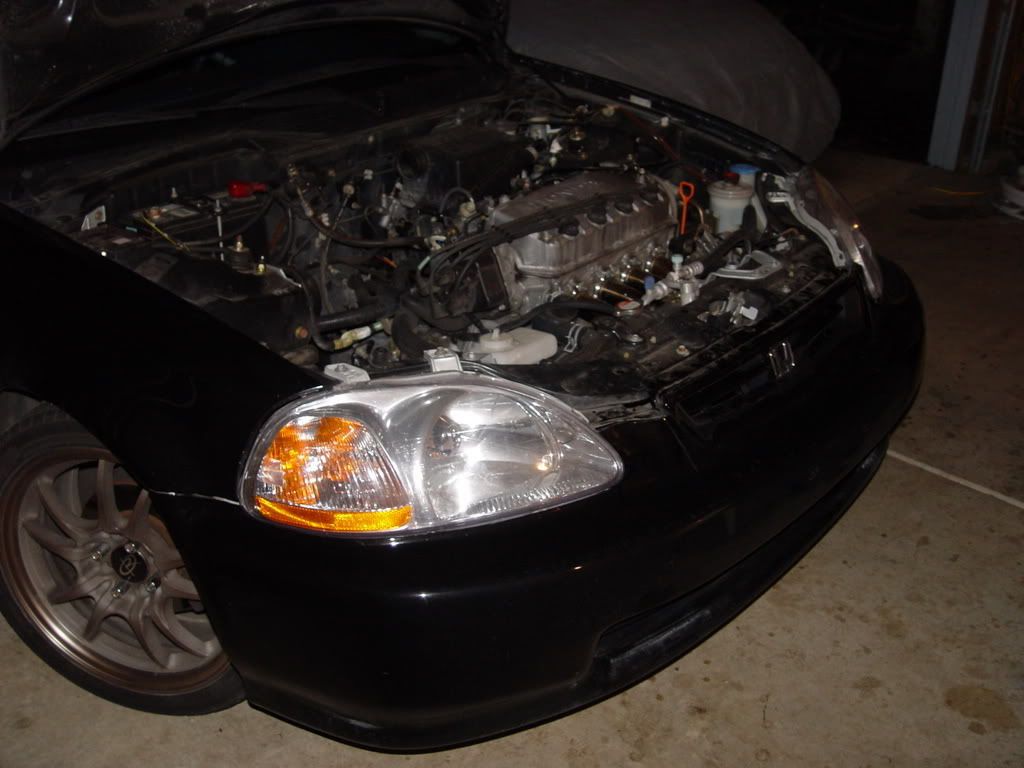
You can read through and go about this your own way, but I started with putting on the fenders first, it will give you something you can attach your front bumper to when you massaging your front bumper support. As you can see below I put in the light, I did that to merely make sure I had the fender all lined up, I highly suggest taking it back off when doing the next step. That is unless you want to buy another headlight
This is the fun part; I will show you the pics first and explain why afterwards so that you have the images in you head
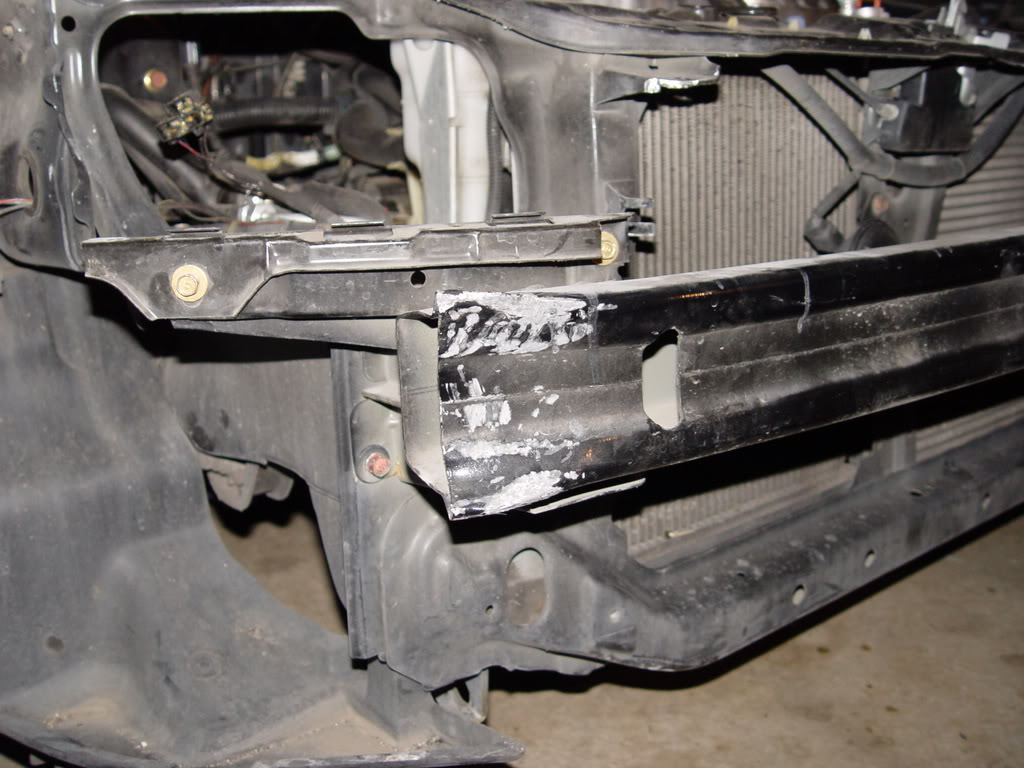
The reason for doing this is so that your lines will match up (lines = fender to bumper). I can give you a rough measurement but its best to put on your fenders and put your front bumper up for fitment so that you can see how far the ends are gonna have to be pushed back, it may take putting the bumper up a few time to get it perfect so its best to have a friend nearby to help you out if possible (rough measurement � of an inch). Make sure you get the top of that bumper support bent back enough so that you will have free play when buttoning it up to the upper radiator support for the final product. If you have any questions about this step feel free to pm or email or post below. I will mention the fact that you will no longer need the Styrofoam cover� it will not fit if you put that on, if your worried about the ends of the front support rubbing the bumper then tape them up or cover them with a thin material, I left mine as is and have yet to have a problem
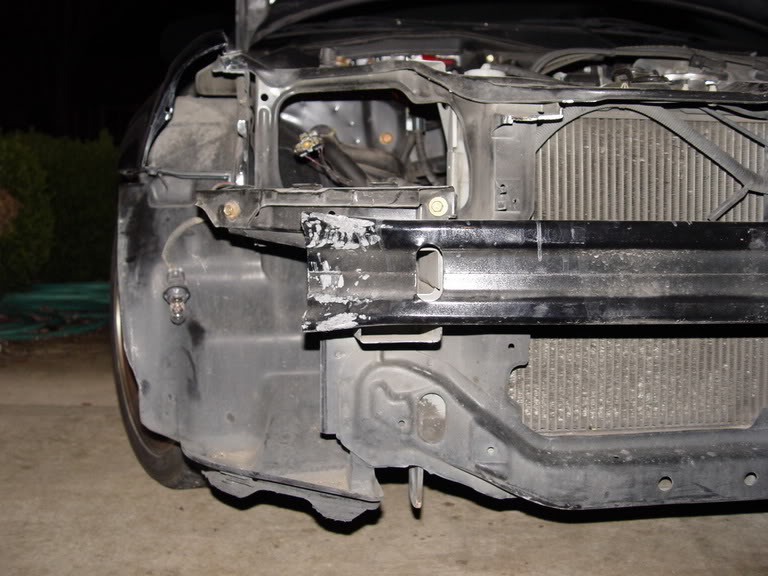
However it should line up like so�
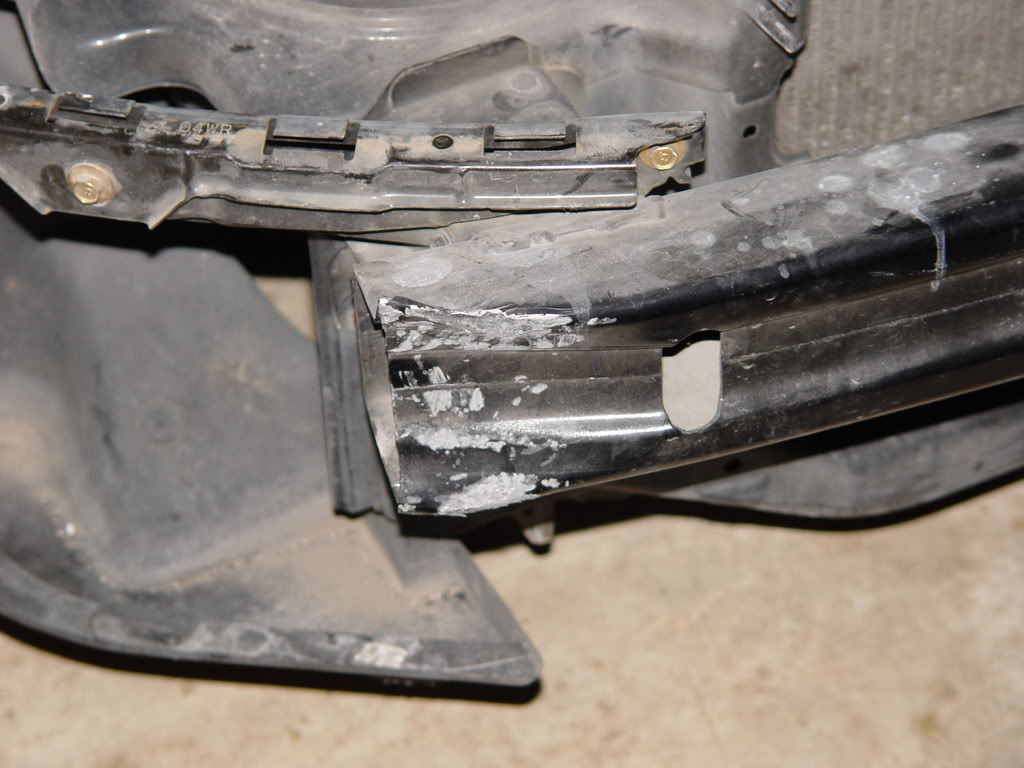
With that done you can now put in your headlights and swap the hoods... The picture below will show what to modify at the top of your bumper so that you can fasten it to your upper support�
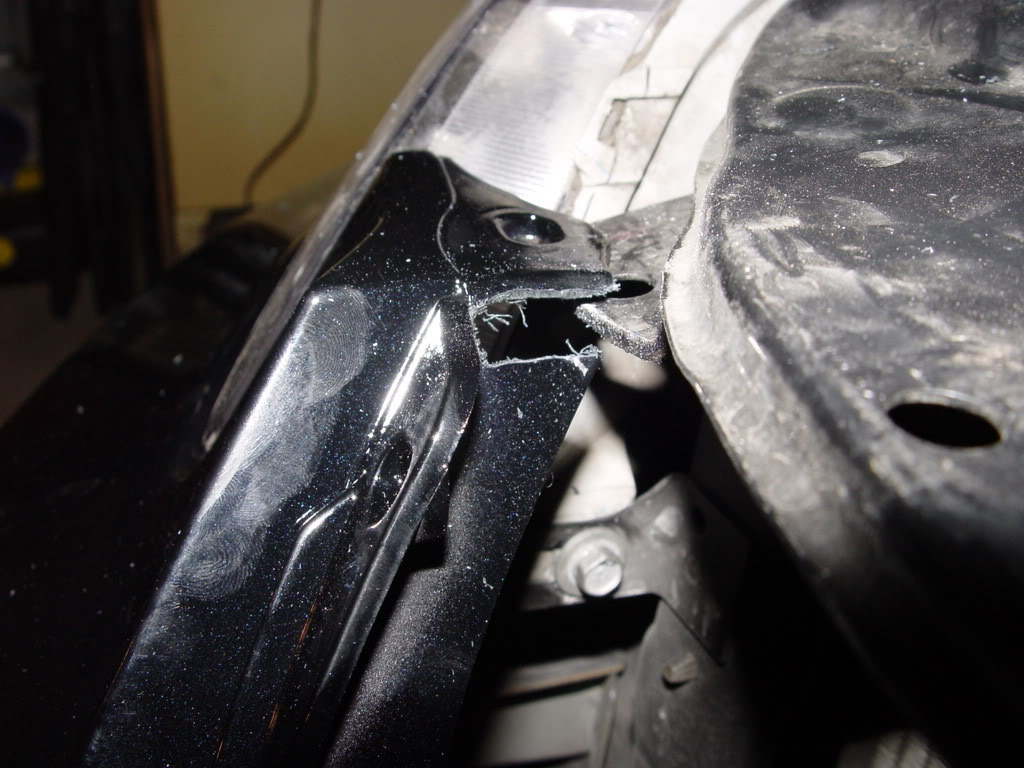
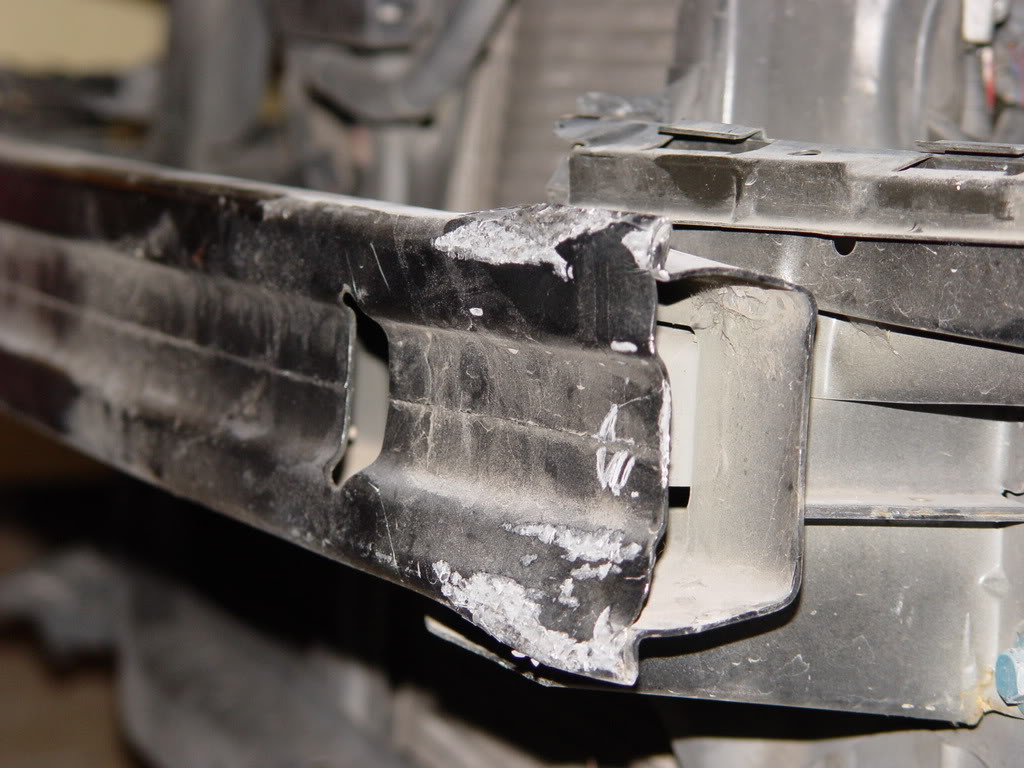
After doing that to both sides.... now you are gonna need to get a hold of a angle grinder of some sort to round the edges of your upper support... otherwise it will push the bumper out to far and wont be able to fasten your grill or bumper into the holes... see pictures below to see what you need to grind. If all else fails�. Then widen out your holes and fasten it the best you can� if you have massaged the front support enough you should have enough flex to move it around, but these outside aren�t the sole holders of the bumper if your still using a OEM grill (grill is well secured to bumper adding to stability of holding the bumper on from the top of the support)
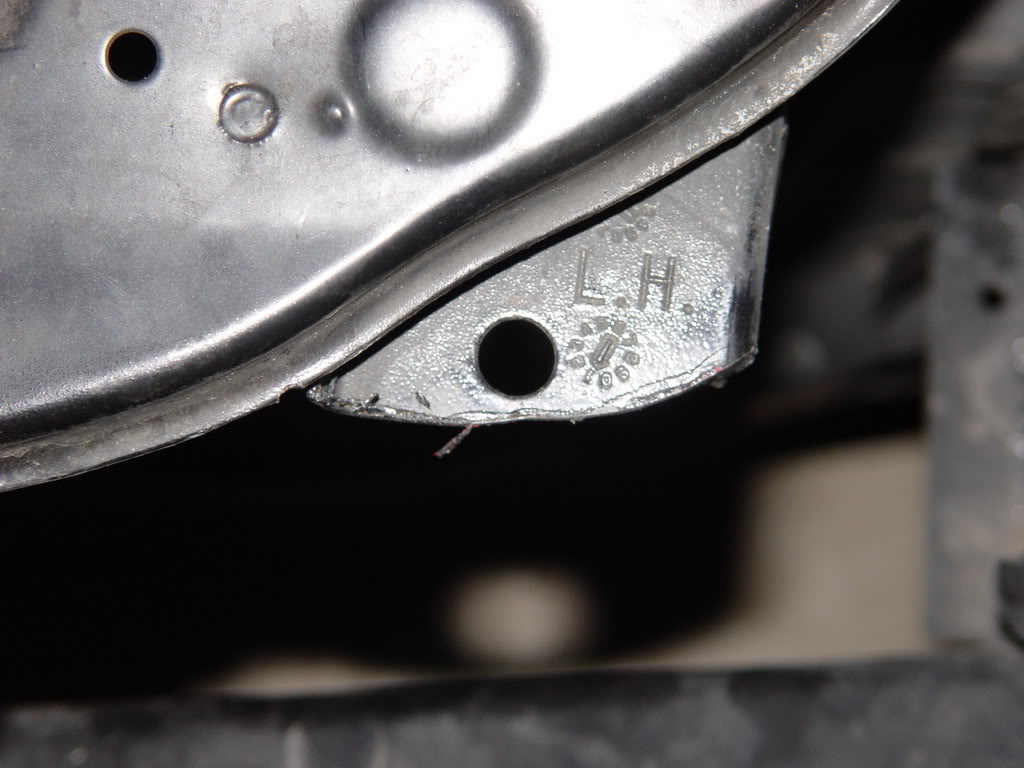
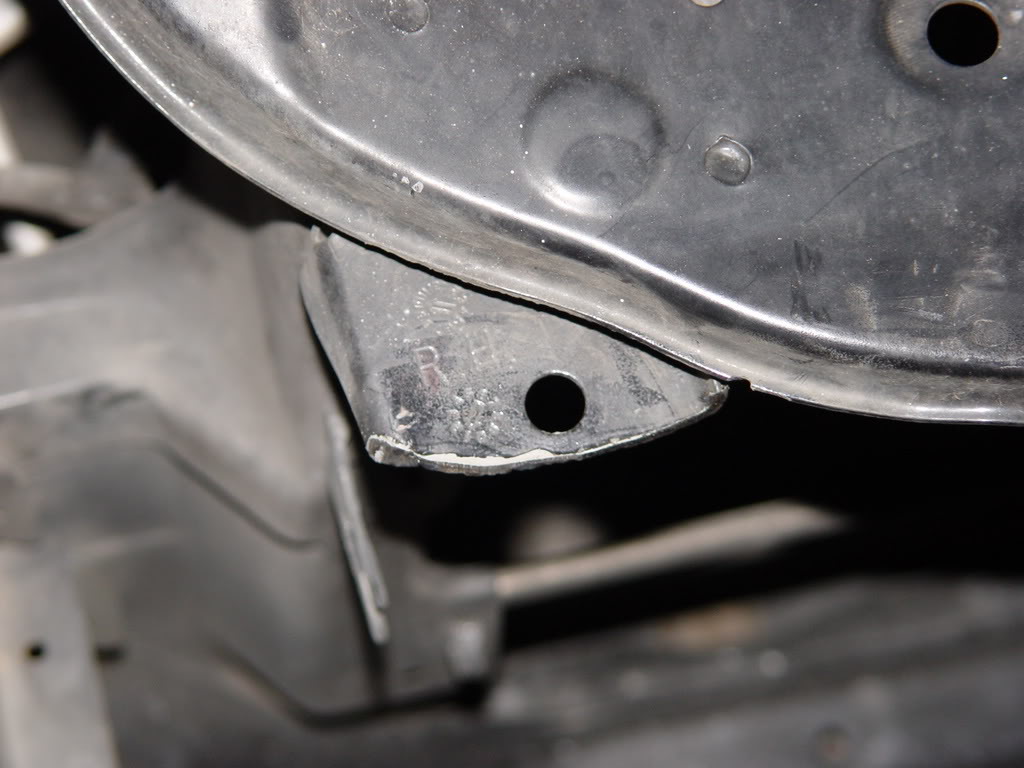
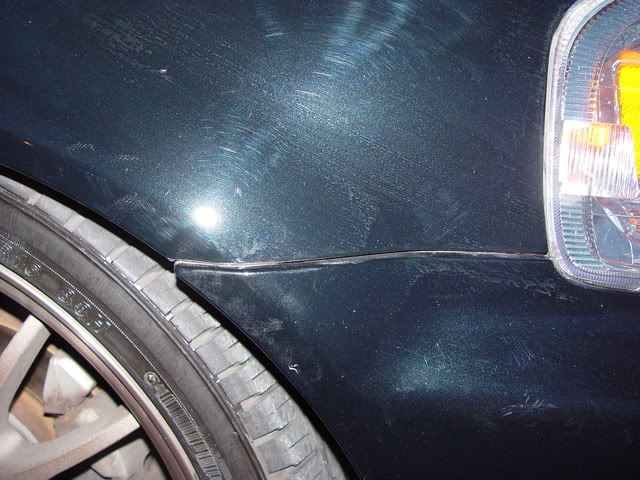
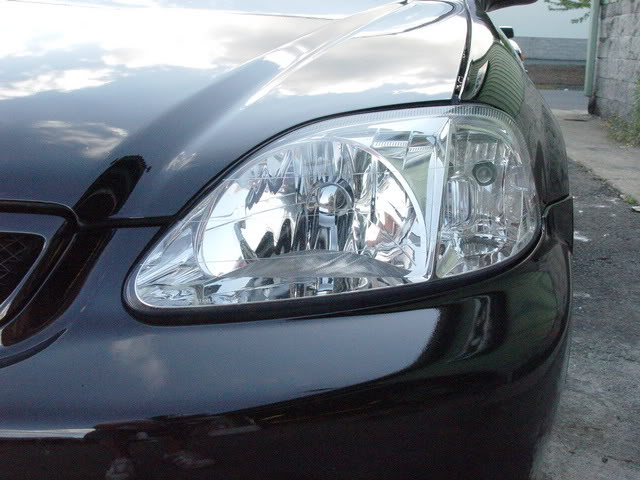
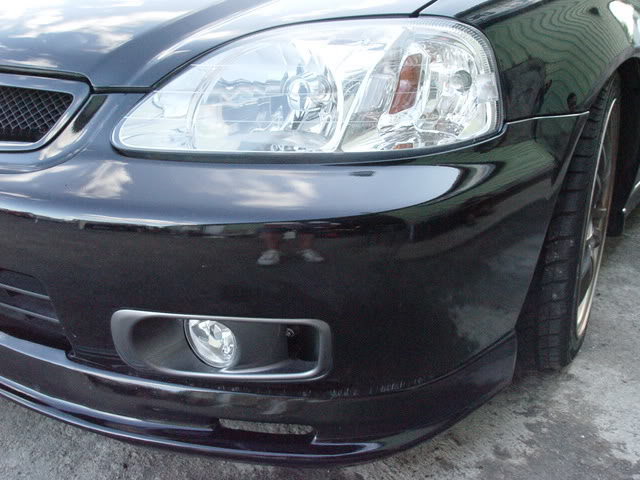
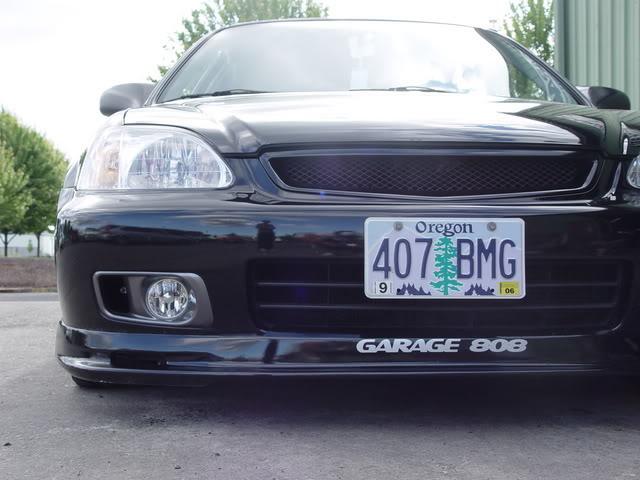
This may look hokey or seem obscured... but you will see none of these steps when it�s all said and done. Now finish up by fastening your grill and adjust whatever you deem necessary to get it to fit right... when I finished the only gap that I have is under my driver side headlight which I can fix by adjusting the headlight up further with a few simple massage techniques... here are some up close finishing shots of the end product.


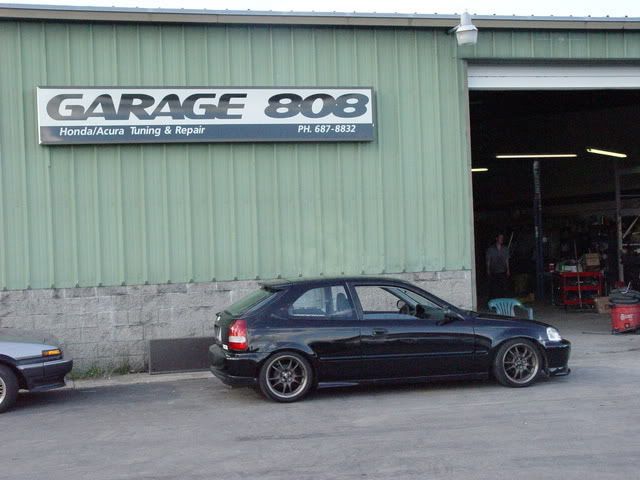
And last but not least� lil representing my local boys that take care of me and everyone else in the northwest that come knocking, stoped by to get parts for my motor swap next week � ( btw, now the only shop south of Salem, Oregon with a dyno � Garage 808 specializes in Honda, Acura, motor swaps, custom turbo installs, full motor builds, you name it and he will give it his best shot� ) (541-687-8832)
Thanks for checking out my how-to� if I missed anything feel free to let me know or if you have any questions� I will state this was done WITHOUT changing any supports whatsoever other than massaging the front bumper support alil. Thanks and good luck.
----
HOW � TO � �99-�00 Conversion
This is my tutorial showing and proving the fact that you don�t need an upper radiator core support from a 99-00 civic to do this swap, you can use your current stock one. This is a list of all the stuff I bought for my conversion
Front Bumper
Headlights
Fenders
Headlight brackets (not needed, but came with headlights)
Lip (optional)
Hood
Grill
My conversion took me maybe 4 hours to do and I haven�t done one before or have yet to see one done, this was all done by hear say. Most tools are simple� your basic drill, a hand size sledge hammer, screwdrivers, 10mm wrench or ratchet� most tools you would expect to use on a honda
Step 1 � Stripping the car down (the front end tear down)
You need to take everything off here. Including hood, fenders, front bumper, headlight, & headlight brackets. You will have to massage your front bumper support later on so best to get rid of anything massaging distance.
Strip it down to like so (just finishing up taking of last fender shown here)
You can read through and go about this your own way, but I started with putting on the fenders first, it will give you something you can attach your front bumper to when you massaging your front bumper support. As you can see below I put in the light, I did that to merely make sure I had the fender all lined up, I highly suggest taking it back off when doing the next step. That is unless you want to buy another headlight
This is the fun part; I will show you the pics first and explain why afterwards so that you have the images in you head
The reason for doing this is so that your lines will match up (lines = fender to bumper). I can give you a rough measurement but its best to put on your fenders and put your front bumper up for fitment so that you can see how far the ends are gonna have to be pushed back, it may take putting the bumper up a few time to get it perfect so its best to have a friend nearby to help you out if possible (rough measurement � of an inch). Make sure you get the top of that bumper support bent back enough so that you will have free play when buttoning it up to the upper radiator support for the final product. If you have any questions about this step feel free to pm or email or post below. I will mention the fact that you will no longer need the Styrofoam cover� it will not fit if you put that on, if your worried about the ends of the front support rubbing the bumper then tape them up or cover them with a thin material, I left mine as is and have yet to have a problem
However it should line up like so�
With that done you can now put in your headlights and swap the hoods... The picture below will show what to modify at the top of your bumper so that you can fasten it to your upper support�
After doing that to both sides.... now you are gonna need to get a hold of a angle grinder of some sort to round the edges of your upper support... otherwise it will push the bumper out to far and wont be able to fasten your grill or bumper into the holes... see pictures below to see what you need to grind. If all else fails�. Then widen out your holes and fasten it the best you can� if you have massaged the front support enough you should have enough flex to move it around, but these outside aren�t the sole holders of the bumper if your still using a OEM grill (grill is well secured to bumper adding to stability of holding the bumper on from the top of the support)
This may look hokey or seem obscured... but you will see none of these steps when it�s all said and done. Now finish up by fastening your grill and adjust whatever you deem necessary to get it to fit right... when I finished the only gap that I have is under my driver side headlight which I can fix by adjusting the headlight up further with a few simple massage techniques... here are some up close finishing shots of the end product.
And last but not least� lil representing my local boys that take care of me and everyone else in the northwest that come knocking, stoped by to get parts for my motor swap next week
Thanks for checking out my how-to� if I missed anything feel free to let me know or if you have any questions� I will state this was done WITHOUT changing any supports whatsoever other than massaging the front bumper support alil. Thanks and good luck.

Thread
Thread Starter
Forum
Replies
Last Post
pinkrsxcivic
PRIVATE For Sale / Trade Classifieds
7
Sep 13, 2005 06:02 PM