
Installing a spoiler this weekend

Thread Starter
|
HCF Member
Joined: Jun 2012
Posts: 147
From: NY state
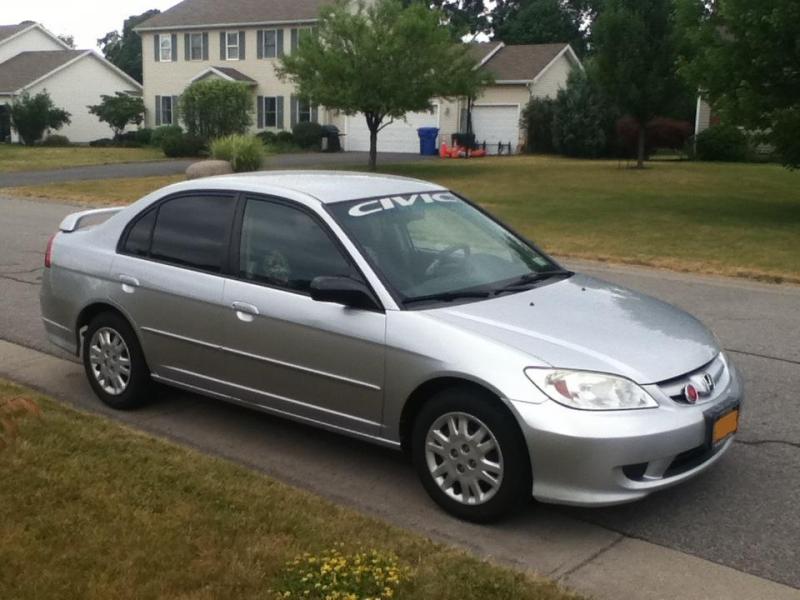
I bought this spoiler on eBay last week for my 2005 Honda Civic LX sedan:
2001 - 2005 Honda Civic 4 DR Painted Rear Spoiler Wing | eBay
It came with the lame locator strips. I have a copy of Honda's installation instructions, and there are two marks on either side of the inside of the trunk that indicate where to drill [see attachment]. I suspect these should line up with the factory spoiler I have bought.
Any measurement advice about how close to the end of the trunk I should put the spoiler? I'm tempted to just drill the holes in the marks, but thats a risk I wont take...
I have my dad's 2007 Accord that has a spoiler to compare to, but will the measurements (how close to put it to the end of the trunk) be the same?
I have never done anything like this before; any advice is welcome!

I went through the same process. Really, just drill through the center of those marks with a tiny drill bit, then a larger one, then the final size. Use that little locator strip to mark where the wires on the left side will go through. Once all the holes are there, put the spoiler on for a test fit. If it all looks good, mask off and tape the area, then spray clear coat over the exposed metal to prevent rust. Do this for all holes. No clear coat? Use nail polish or something. Anything. Just cover the bare metal. Then bolt it on and enjoy.
Thread Starter
|
HCF Member
Joined: Jun 2012
Posts: 147
From: NY state
During my lunch break, I thought of a way to double check that the marks on the underside of my hood will be in the correct locations to drill holes for my factory spoiler...
1) I will take a vertical piece of paper and cut a slit in it (long enough to reach the center of the marks, and high enough to match my trunk lid depth).
2) Using this vertical template, I will mark the location of the to-be-drilled spots on the top of my trunk with a washable marker.
3) Once I have all 4 marks on the trunk lid, I can measure the distance between corresponding marks, and compare this to the distance between the corresponding holes on the bottom of the spoiler... If all goes well, the measurements should match! Then I won't have to bother with the locator strips.
4) Except I might need a locator strip to locate the hole for the wiring harness, like you mentioned Hobo. Or I can make another paper template from the bottom of the spoiler itself, and then transfer this template to my trunk lid, and mark the placement of the hole with a washable marker...

Banned
Joined: Jun 2012
Posts: 72
i most certainly do have a thing against cheap ebay products. it mite not seem like it but im trying to help you. when i first got my car i ordered a couple ebay items that i regretted and one of those items was the same spoiler you just bought and guess what happened. the three year warranty is for the paint only not the LEDs mine lasted about 2 months . i had to learn the hard way but i guess you will also live and learn i guess.
Last edited by EM2slow; Jul 6, 2012 at 03:20 AM.
It's hit and miss on ebay. I bought my spoiler off ebay and 6 years later it's still lighting up perfectly.
If you buy exhaust components, there are tons of crap copies out there that will fail soon. Thats why they state "for offroad use only" in the description somewhere. It's not a real part, not backed up by tons of R&D, and not good for the road.
That auction is for a replica wing. It's sort of a no-name brand, so it's a gamble. Might be fine, might not. Install it and find out!
Thread Starter
|
HCF Member
Joined: Jun 2012
Posts: 147
From: NY state
Ah yes, they do put that '3 year warranty' in the same sentence as the paint.
I'm installing it tomorrow morning. Even if the LED stops working, I'll still have my 3 original brake lights. I bought this spoiler just to make my car look cool, anyway.
I'm installing it tomorrow morning. Even if the LED stops working, I'll still have my 3 original brake lights.
I bought this spoiler just to make my car look cool, anyway.
Thread Starter
|
HCF Member
Joined: Jun 2012
Posts: 147
From: NY state
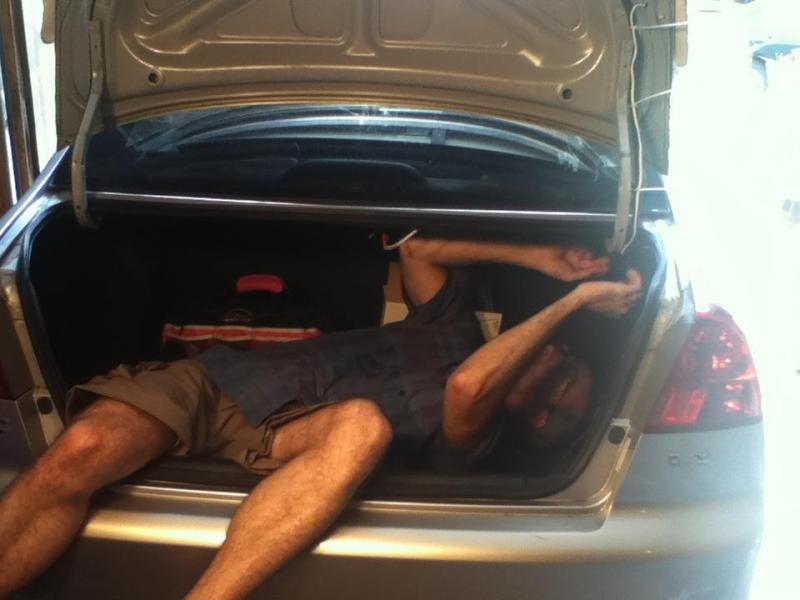
Installed it this morning with my dad! I will post pictures of the process soon. We had some interesting hiccups... You live and you learn I guess.
At least it came out looking good and the LED is working great.
At least it came out looking good and the LED is working great.
Thread Starter
|
HCF Member
Joined: Jun 2012
Posts: 147
From: NY state
I was going to add pictures to my existing album of my car, but it wont let me... So I suppose I will post them here. Unfortunately there are 15.
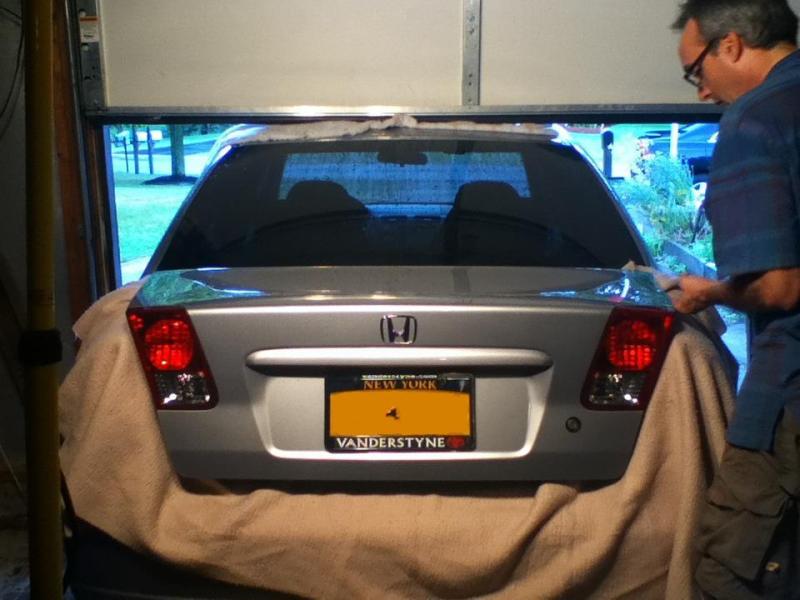
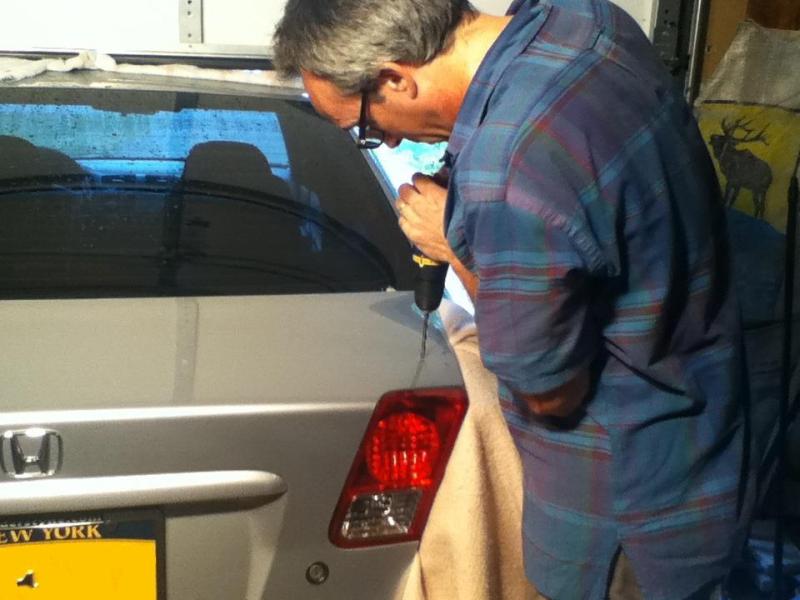
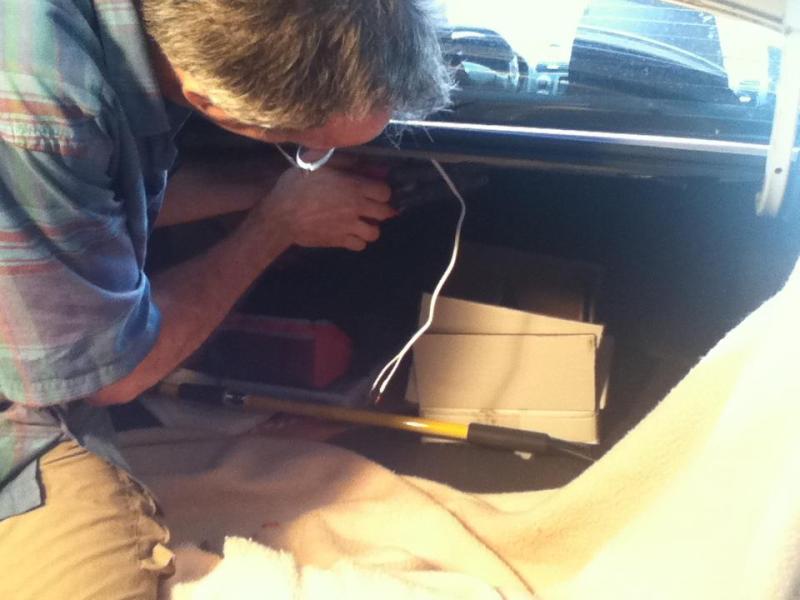
^Just starting out. My dad is center punching before he drills. We drilled the holes based on the marks on the inside of the trunk lid. It was thunder storming out so we worked from in my garage.
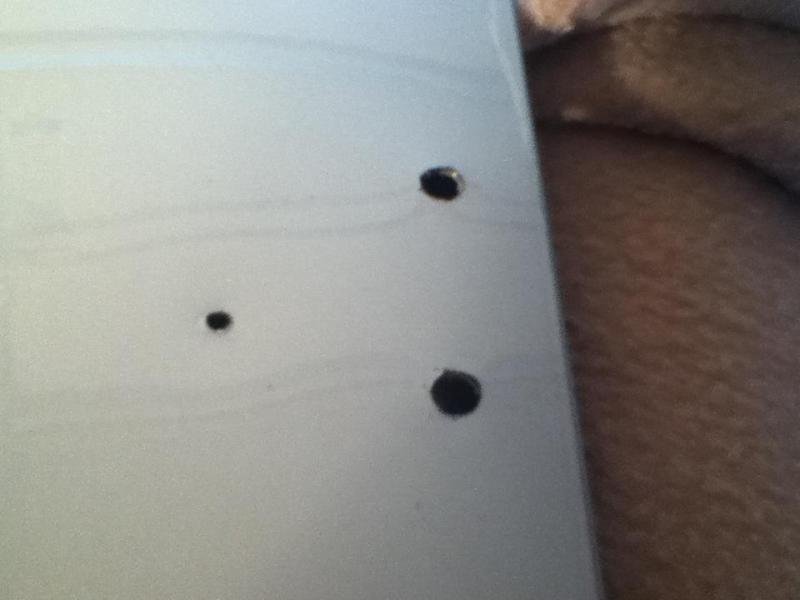
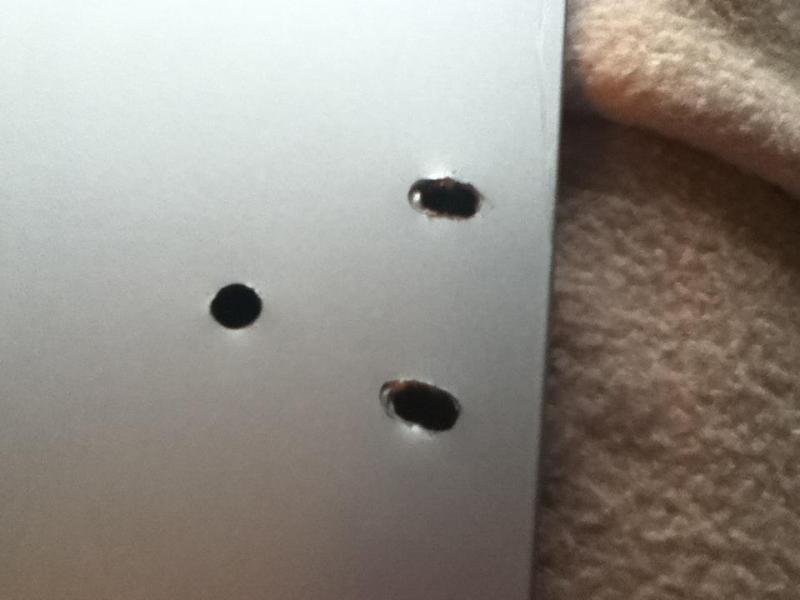
^Set of holes on the right. The smallest one is for the wiring harness, to connect the LED light to the brake lights wiring system.
^Set of holes on the left.
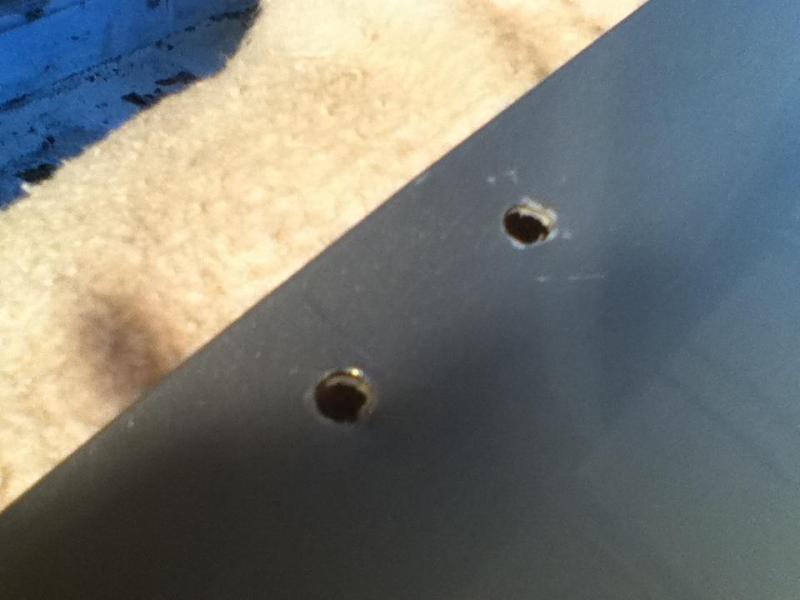
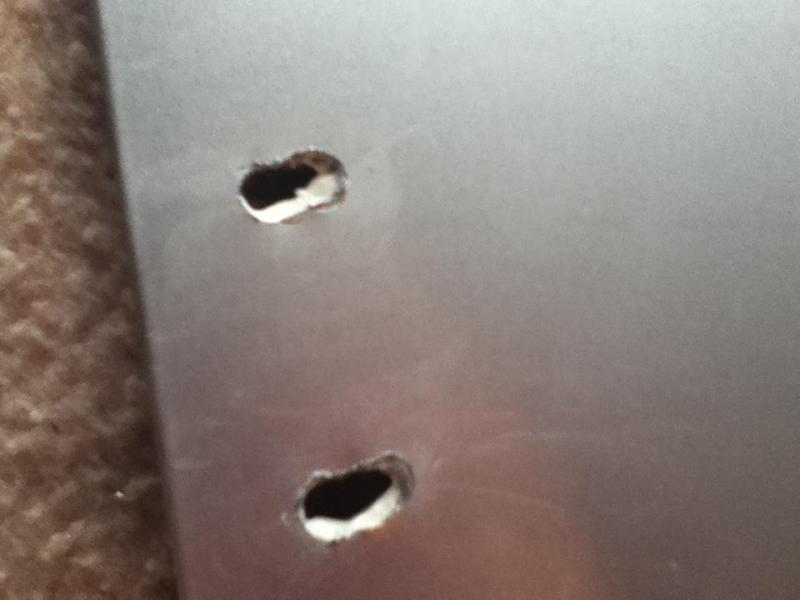
^So this is my dad drilling again... We tried a test fit of the spoiler on the original holes, and it didn't fit... The distance between the two sets of holes wasn't short enough. This was a factory spoiler, not a genuine Honda piece, so the holes did not end up matching the marks in the trunk... We made it work though.
^Enlarged holes on the right. We turned them into ovals. The screws for the spoiler will sit on the left side of the hole.
^Enlarged holes on the left. The screws will sit on the right sides of these oval holes. I coated all holes twice and let it dry for an hour and a half.
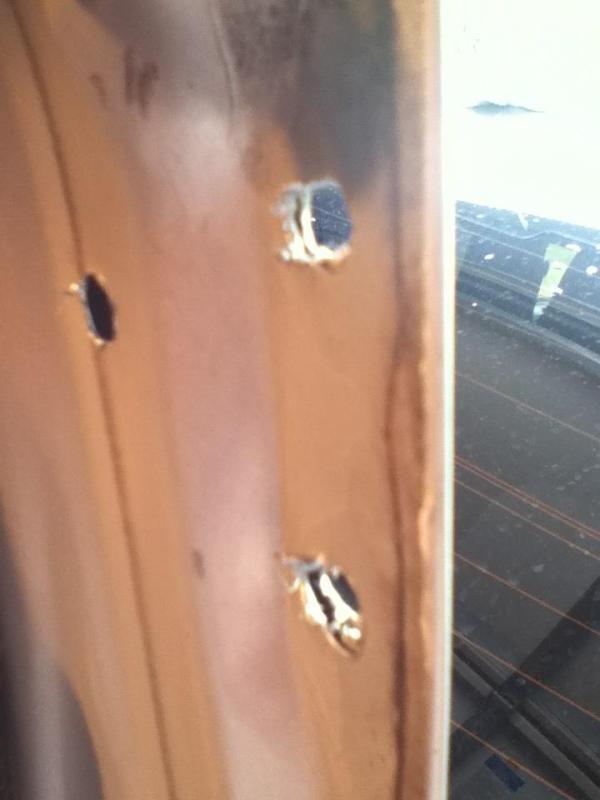
^Here you can see how to trunk has two layers of metal to it.
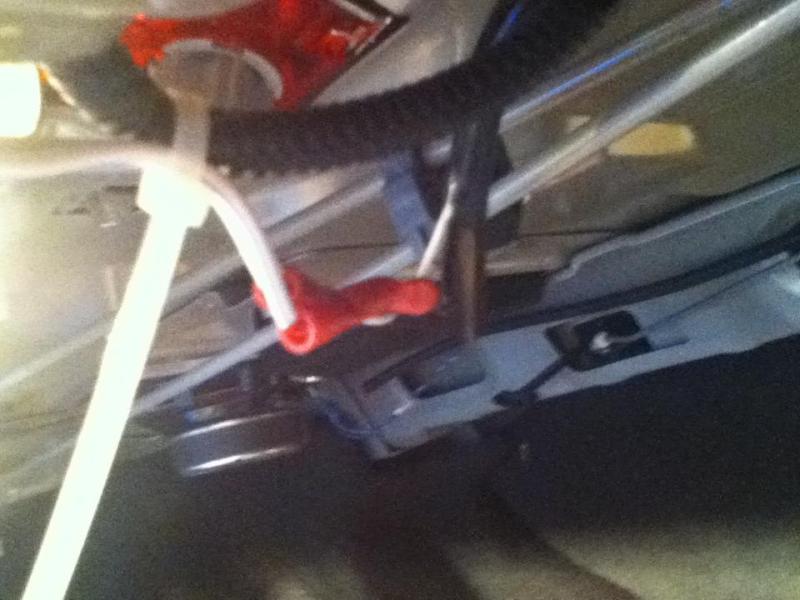
^My dad is splicing the wires to hook up the LED light.
^It worked!
^Finishing off with some wire tires. These weren't included with the spoiler. Luckily I had some in a tool kit in my trunk.
^We used crimping connectors.
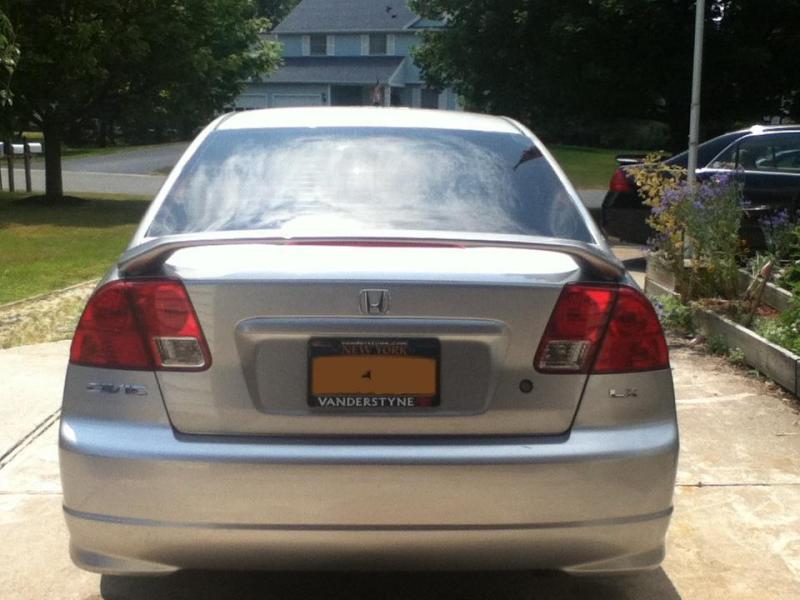
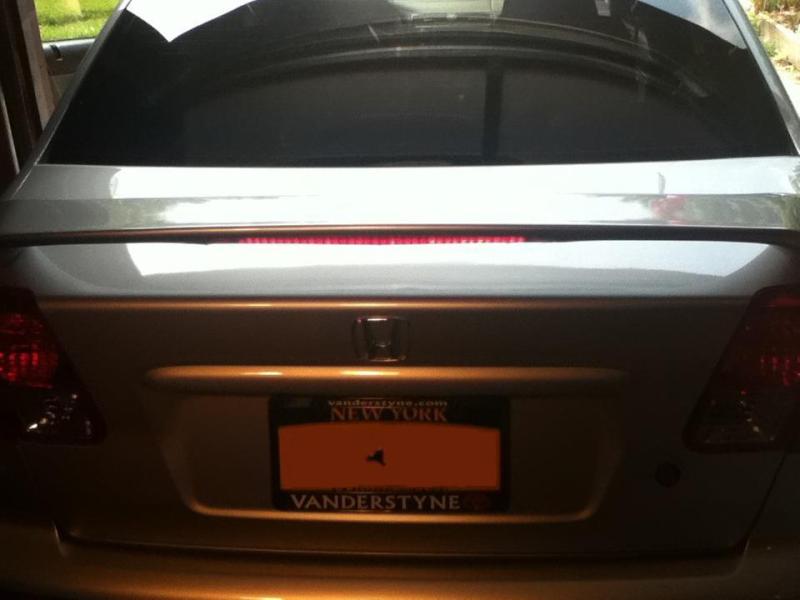
^The finished product. And the weather cleared up!
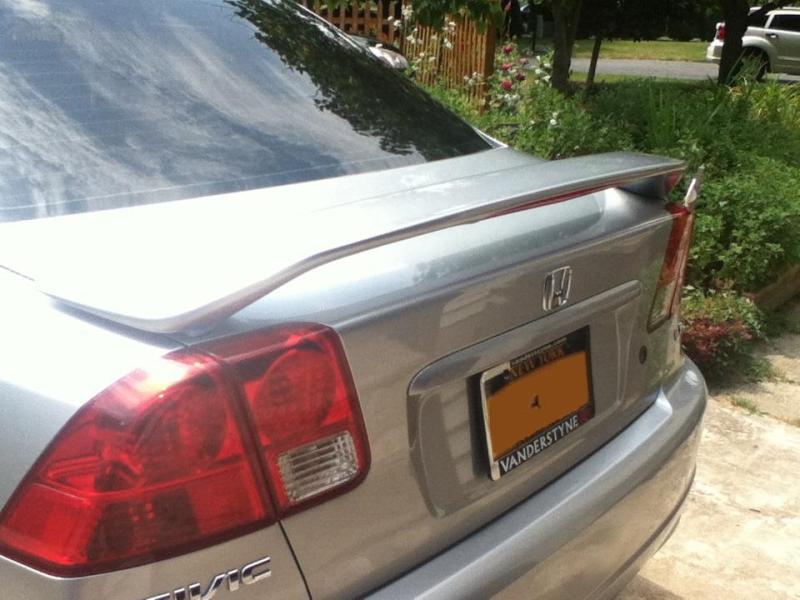
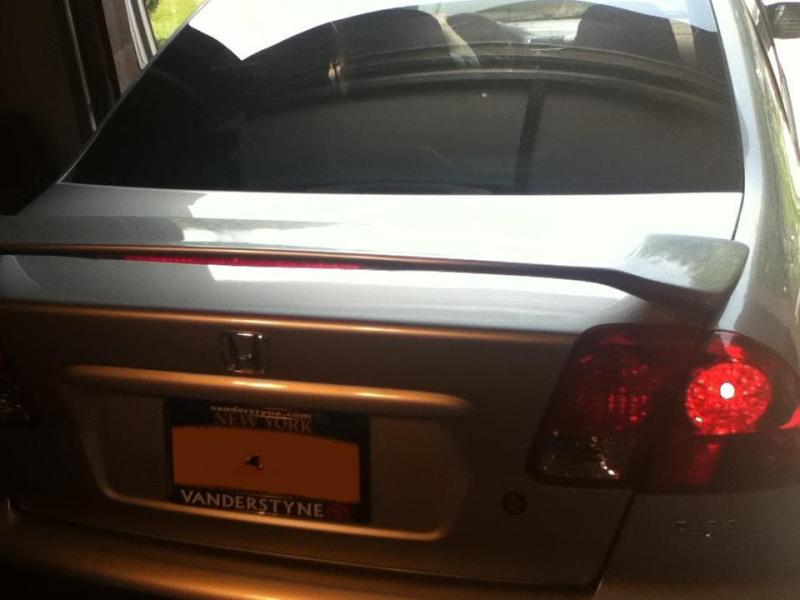
^I am pleased with the end product.
^Just starting out. My dad is center punching before he drills. We drilled the holes based on the marks on the inside of the trunk lid. It was thunder storming out so we worked from in my garage.
^Set of holes on the right. The smallest one is for the wiring harness, to connect the LED light to the brake lights wiring system.
^Set of holes on the left.
^So this is my dad drilling again... We tried a test fit of the spoiler on the original holes, and it didn't fit... The distance between the two sets of holes wasn't short enough. This was a factory spoiler, not a genuine Honda piece, so the holes did not end up matching the marks in the trunk... We made it work though.
^Enlarged holes on the right. We turned them into ovals. The screws for the spoiler will sit on the left side of the hole.
^Enlarged holes on the left. The screws will sit on the right sides of these oval holes. I coated all holes twice and let it dry for an hour and a half.
^Here you can see how to trunk has two layers of metal to it.
^My dad is splicing the wires to hook up the LED light.
^It worked!
^Finishing off with some wire tires. These weren't included with the spoiler. Luckily I had some in a tool kit in my trunk.
^We used crimping connectors.
^The finished product. And the weather cleared up!
^I am pleased with the end product.