


Reaper's restoration project (56k... take a break)


Thread Starter
|
Super Cereal Admin
Joined: Feb 2007
Posts: 7,081
From: Lexington, KY
 RE: Reaper's restoration project
thanks for the advice, addiction... and I asked my dad about the storage bays (he owns a construction company and has two storage bays rented out for his equipment)... apparently, you aren't allowed doing work on cars in the bays (I'd guess because the owner doesn't want oil, grease, and "extra" nuts/bolts/screws all over the place when the renter is done). But I think I know of a place to do the swap... I'm friends with a family that owns a farm in the middle of nowhere... they have one of those u-shaped steel barn-type things where one of them (the son) lives... but he only occupies half of it, and the rest is used as sort of a garage... I'm going to talk to them to see if I could borrow that space for a weekend.
Jesse - Don't worry, I have aftermarket wheels (the ones in my avi)... but it's winter here, and in PA that means a ton of snow, so the stock wheels are still on for another month or so until the snow starts melting a little... wet/dry tires don't do so well in snow lol
and jpnolan - they're 17's, but yeah.... they're sitting in my dad's workshop waiting until spring. I'll probably have them back on the car by mid-march at the latest. Unortunately, I have to order two new tires because they got f***ed up from me lowering without an alignment last summer... I'll probably keep the worn ones around and do a burnout 'till they blow after the engine swap (and yeah, I'll have a video )
)
But anyway, here's some updates. I'm fixing the body kit and selling it (trust me, brandon... you'l love what I'm doing to it), so here's my progress on that. I finished foam-filling (for the most part) the front bumper, and started doing the fiberglass repair, along with starting to shave some two of the scoops to give it a cleaner look.
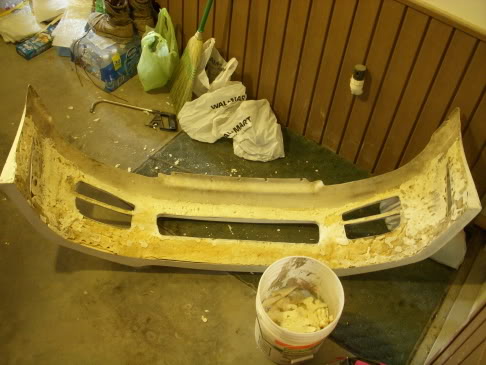
I finished filling the front bumper with expanding foam... it adds rigidity to the bumper, making a bit more solid than the flimsy 3/32" or so thick fiberglass the kit was originally made of. Filling the kit wasn't hard (spray the insulation, wait for it to expand and set up, lather, rinse, and repeat), but I'll tell you guys... getting it shaped right (basically flat) was a total pain in the ****. I normally wouldn't be this meticulous, but I want this to be done right (and show-worthy). I'll be fiberglassing over the back and painting it (well, primering anyway).
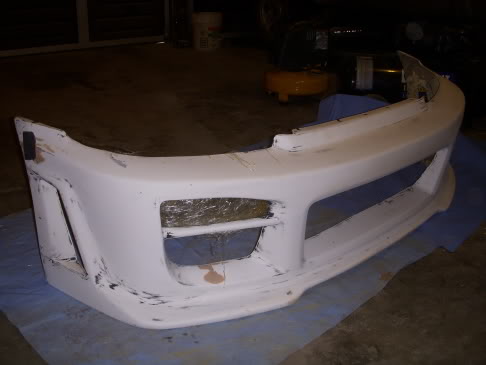
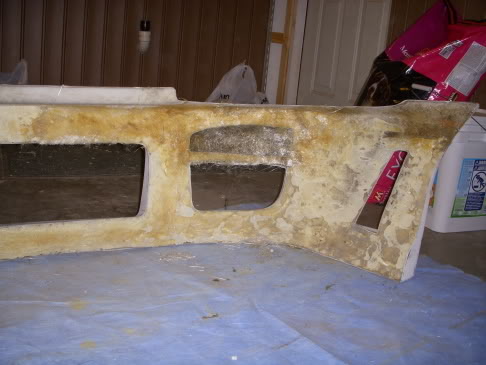
I got started on the fiberglass work... until I ran out of resin (I never mix enough lol)... I have another quart of it (which should be enough for the front bumper), but I didn't feel like opening it just yet... that's for tomorrow
Anyway, tomorrow I'm going to foam-fill the scoop I fiberglassed over and get it ready for fiberglass across the front of the scoop... also, I'll hopefully have a complete layer of fiberglass across the back of the bumper (I'm doing two layers of fiberglass and smoothing everything out with body filler before I primer it)... the way I figure it, I still need at least two more quarts of resin, two more cans of primer, and three more packs of fiberglass mat, as well as more cheap paint brushes... I'll be picking all that up tomorrow, friday, or saturday... whenever I get a chance to stop at the bank and take out more money lol
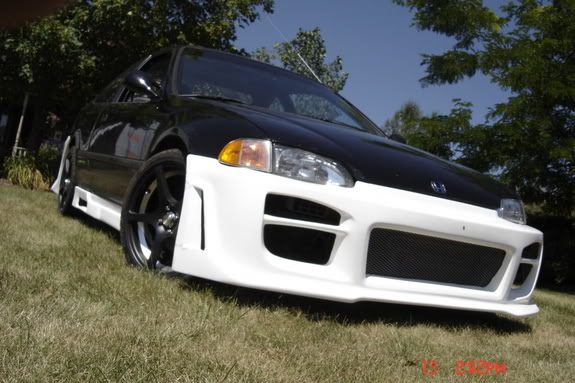
*edit: here's what the front bumper looked like before I started working on it:
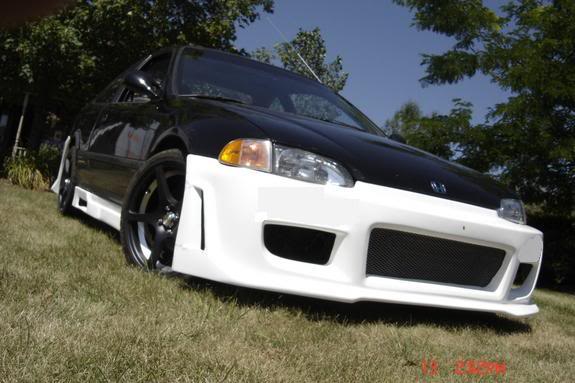
And here's what it'll look like when I'm done:
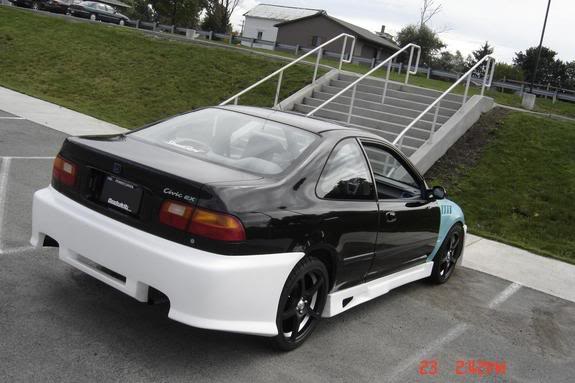
Same with the back bumper; here's how it was (dual exhaust outlets [:'(] ):
And here's a crude edit in ms paint of how it'll look:
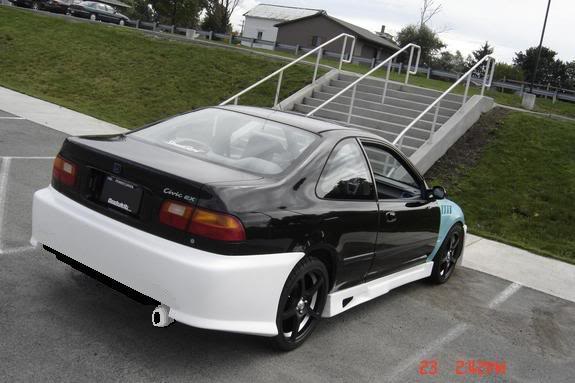
ms paint chops ftw!
Jesse - Don't worry, I have aftermarket wheels (the ones in my avi)... but it's winter here, and in PA that means a ton of snow, so the stock wheels are still on for another month or so until the snow starts melting a little... wet/dry tires don't do so well in snow lol
and jpnolan - they're 17's, but yeah.... they're sitting in my dad's workshop waiting until spring. I'll probably have them back on the car by mid-march at the latest. Unortunately, I have to order two new tires because they got f***ed up from me lowering without an alignment last summer... I'll probably keep the worn ones around and do a burnout 'till they blow after the engine swap (and yeah, I'll have a video
)But anyway, here's some updates. I'm fixing the body kit and selling it (trust me, brandon... you'l love what I'm doing to it), so here's my progress on that. I finished foam-filling (for the most part) the front bumper, and started doing the fiberglass repair, along with starting to shave some two of the scoops to give it a cleaner look.
I finished filling the front bumper with expanding foam... it adds rigidity to the bumper, making a bit more solid than the flimsy 3/32" or so thick fiberglass the kit was originally made of. Filling the kit wasn't hard (spray the insulation, wait for it to expand and set up, lather, rinse, and repeat), but I'll tell you guys... getting it shaped right (basically flat) was a total pain in the ****. I normally wouldn't be this meticulous, but I want this to be done right (and show-worthy). I'll be fiberglassing over the back and painting it (well, primering anyway).
I got started on the fiberglass work... until I ran out of resin (I never mix enough lol)... I have another quart of it (which should be enough for the front bumper), but I didn't feel like opening it just yet... that's for tomorrow
Anyway, tomorrow I'm going to foam-fill the scoop I fiberglassed over and get it ready for fiberglass across the front of the scoop... also, I'll hopefully have a complete layer of fiberglass across the back of the bumper (I'm doing two layers of fiberglass and smoothing everything out with body filler before I primer it)... the way I figure it, I still need at least two more quarts of resin, two more cans of primer, and three more packs of fiberglass mat, as well as more cheap paint brushes... I'll be picking all that up tomorrow, friday, or saturday... whenever I get a chance to stop at the bank and take out more money lol
*edit: here's what the front bumper looked like before I started working on it:
And here's what it'll look like when I'm done:
Same with the back bumper; here's how it was (dual exhaust outlets [:'(] ):
And here's a crude edit in ms paint of how it'll look:
ms paint chops ftw!

HCF Member
Joined: Aug 2007
Posts: 1,833
From: Miami, Florida
RE: Reaper's restoration project
man that looks great i say body kits are ok as long as you have them backed up with power people who have body kits and nothing but a littlefart can exhaust THATS a ricer but congrats on the car its great
Thread Starter
|
Super Cereal Admin
Joined: Feb 2007
Posts: 7,081
From: Lexington, KY
RE: Reaper's restoration project
^ thanks, man... I dont' know if you read, I'm actually selling the kit... I'm just doing fiberglass work on it for the person I'm selling it to. Actually, I'm killing four birds with one stone (that's gotta be a record): I'm getting the satisfaction of actually having finished what I started (It doesn't happen to me often lol) by modifying the body kit, I'm making money (actually, I guess I'm losing something along the lines of $200 when you think about it lol), I'm gaining storage space by getting rid of the body kit, and I'm getting free stock bumpers (I need both skirts and a new back bumper... and I'll have a front bumper to play around with).
Anyway, I didn't get a chance to get on the computer yesterday, so here's what went on yesterday:
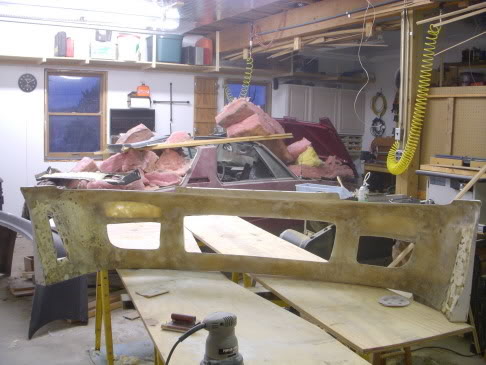
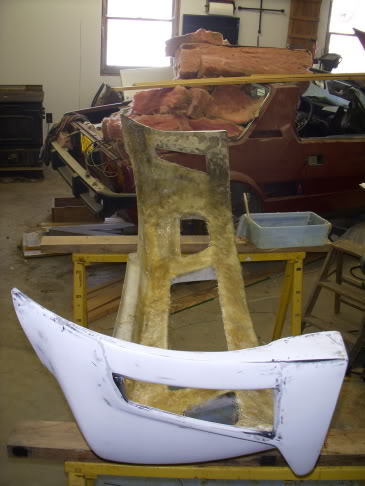
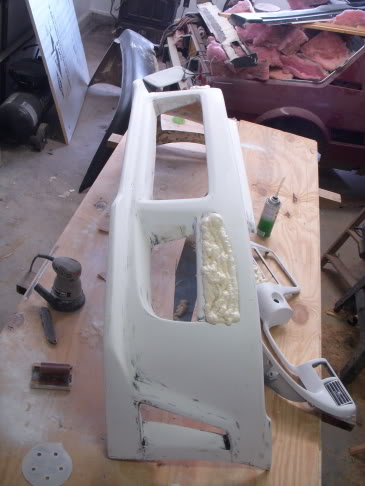
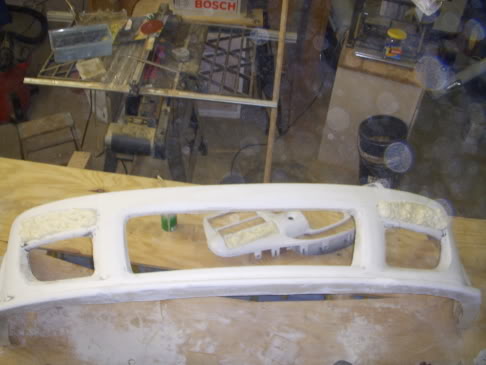
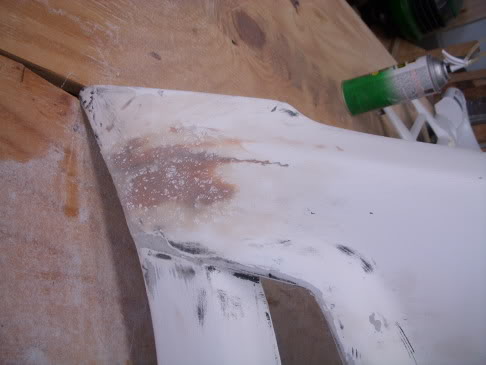
I got a good 85% of the back of the bumper fiberglassed, fixed the three cracks, and started foam-filling the scoops. I decided the back only needs one layer of fiberglass (especially since it's foam-filled), and I'm probably not bondo-ing the back of the bumper, mostly becuase I won't have time to do it (I have 7 days to finish the kit). But anyway, by tonight, the body kit should be 97% complete, meaning all I'll have to do tomorrow is primer it. Also, the side skirts will be done by tomorrow night, and primered by sunday. That'll just leave the back bumper for me to work on next week (and it's going to be a PITA to get the thing perfect).
Anyway, I didn't get a chance to get on the computer yesterday, so here's what went on yesterday:
I got a good 85% of the back of the bumper fiberglassed, fixed the three cracks, and started foam-filling the scoops. I decided the back only needs one layer of fiberglass (especially since it's foam-filled), and I'm probably not bondo-ing the back of the bumper, mostly becuase I won't have time to do it (I have 7 days to finish the kit). But anyway, by tonight, the body kit should be 97% complete, meaning all I'll have to do tomorrow is primer it. Also, the side skirts will be done by tomorrow night, and primered by sunday. That'll just leave the back bumper for me to work on next week (and it's going to be a PITA to get the thing perfect).

Thread Starter
|
Super Cereal Admin
Joined: Feb 2007
Posts: 7,081
From: Lexington, KY
RE: Reaper's restoration project
you recognized what it was? wow... that's amazing lol... me and my dad are in the process of restoring it... it's his old car
mid engine rwd ftmfw!
mid engine rwd ftmfw!
Thread Starter
|
Super Cereal Admin
Joined: Feb 2007
Posts: 7,081
From: Lexington, KY
RE: Reaper's restoration project
yeah... that'd be my dad... he was re-doing the insulation in the workshop and decided the fiat would make a nice bench to put all his stuff on lol
anyway, here's saturday's progress on the kit:
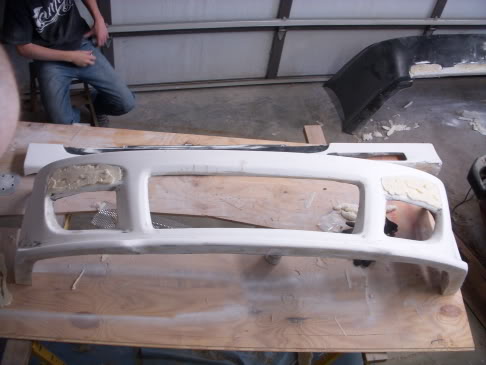
Trying to get the shape right for shaving the top scoops.... I want it to be as easy as possible when I go to fiberglass it.
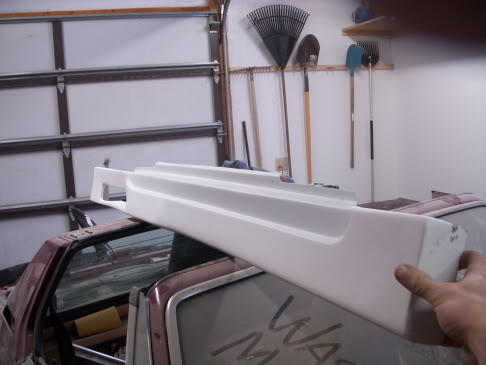
One skirt finished and primered... the other one just needs sanded down and primered.
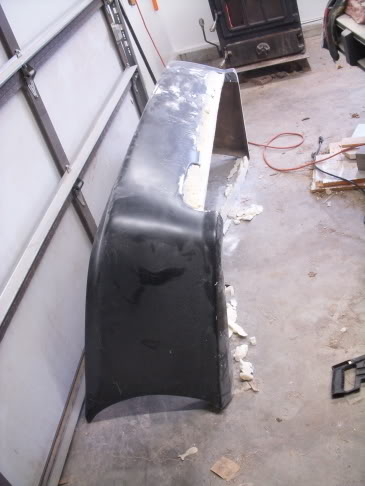
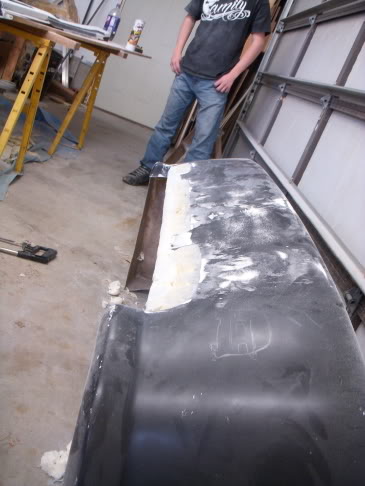
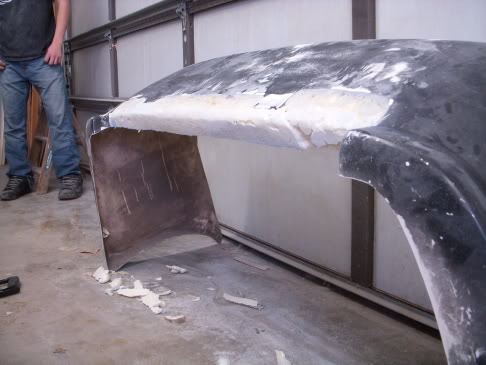
The back bumper's not perfect yet, but that'll be taken care of after I fiberglass it.
Hopefully I can get the front bumper fiberglassed (I just have the scoop to do yet), the left skirt done, and the rear bumper ready to fiberglass or fiberglassed today. I really want to get the kit finished in the next day or two so I don't have to stress about whether or not it'll be done by friday.
anyway, here's saturday's progress on the kit:
Trying to get the shape right for shaving the top scoops.... I want it to be as easy as possible when I go to fiberglass it.
One skirt finished and primered... the other one just needs sanded down and primered.
The back bumper's not perfect yet, but that'll be taken care of after I fiberglass it.
Hopefully I can get the front bumper fiberglassed (I just have the scoop to do yet), the left skirt done, and the rear bumper ready to fiberglass or fiberglassed today. I really want to get the kit finished in the next day or two so I don't have to stress about whether or not it'll be done by friday.
Thread Starter
|
Super Cereal Admin
Joined: Feb 2007
Posts: 7,081
From: Lexington, KY
RE: Reaper's restoration project
Today's progress:
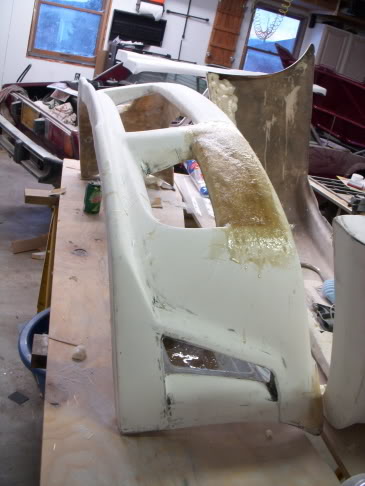
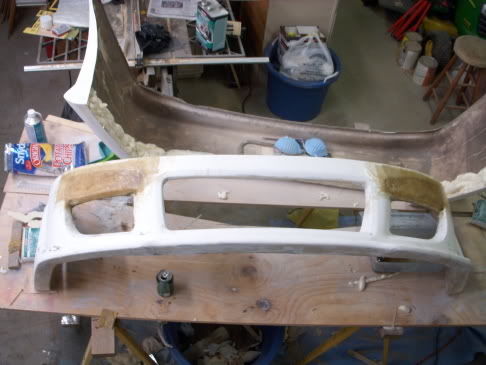
The front bumper has been fiberglassed... now all I need to do is sand, bondo, sand some more, sand again, and primer [8D]
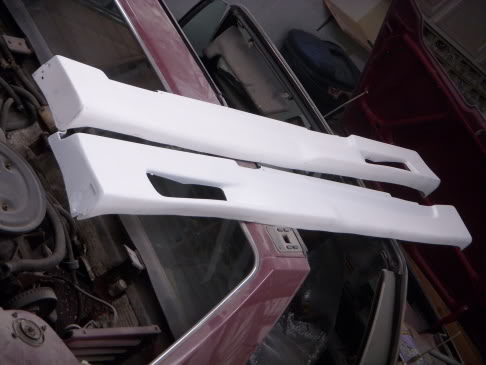
Both skirts are done (glad they're out of the way)
And here's why I need to get two new tires:
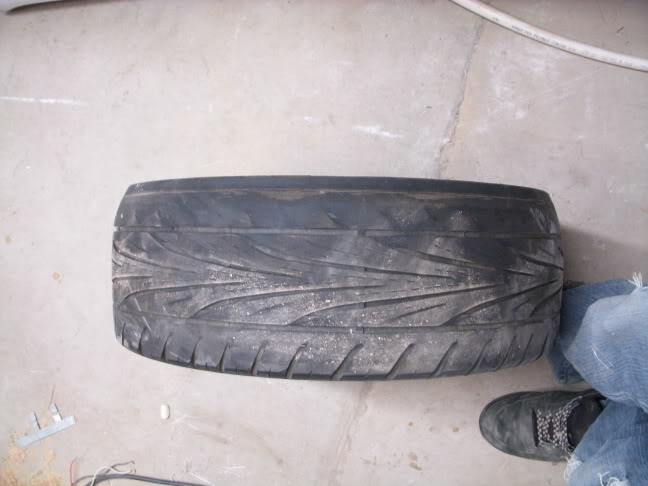
Don't see it? Look along the top edge. That's why you get an alignment
And since interest was shown, here's some pics of the fiat:
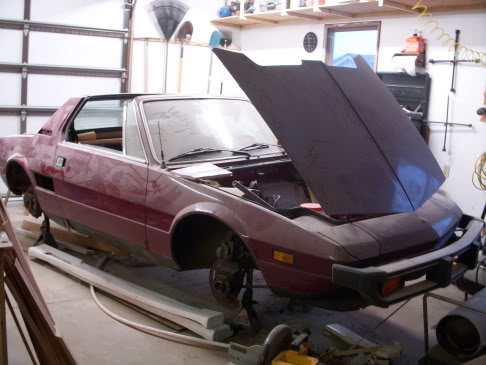
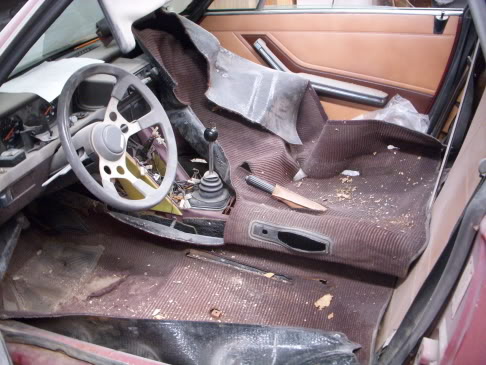
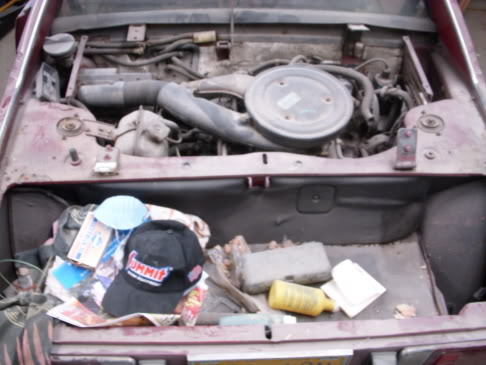
If anybody's wondering, I'm in the process of stripping the interior (the carpet needs replaced and the seats need repaired)... hopefully we'll be tearing the engine down in the next month.
The front bumper has been fiberglassed... now all I need to do is sand, bondo, sand some more, sand again, and primer [8D]
Both skirts are done (glad they're out of the way)
And here's why I need to get two new tires:
Don't see it? Look along the top edge. That's why you get an alignment
And since interest was shown, here's some pics of the fiat:
If anybody's wondering, I'm in the process of stripping the interior (the carpet needs replaced and the seats need repaired)... hopefully we'll be tearing the engine down in the next month.

