
croninc's ej8 build up thread


Thread Starter
|
HCF Member
Joined: Feb 2008
Posts: 2,059
From: San Leandro, CA
sure, why u plan on doing this to ur v6 lol
Last edited by croninc; May 19, 2009 at 05:14 PM.
Ok sounds good, Im actually making chicken wings right now so after they are done cooking ill give it a shot. Yeah it would actually look really good if there werent all those spots, if it does work ill post pics and probably re sand it tomorrow. O and wont the rubber on the bottom burn off? Im guesing no but just want to make sure.
Are you talking about the rubber valve cover gasket? If so, take that out before baking the VC. If you need a new one, it would be a good time to go and buy one... not too expensive.

Thread Starter
|
HCF Member
Joined: Feb 2008
Posts: 2,059
From: San Leandro, CA
Thread Starter
|
HCF Member
Joined: Feb 2008
Posts: 2,059
From: San Leandro, CA
Full throttle sounds nice I love it, maybe Ill get a clip of it in the car at full trottle
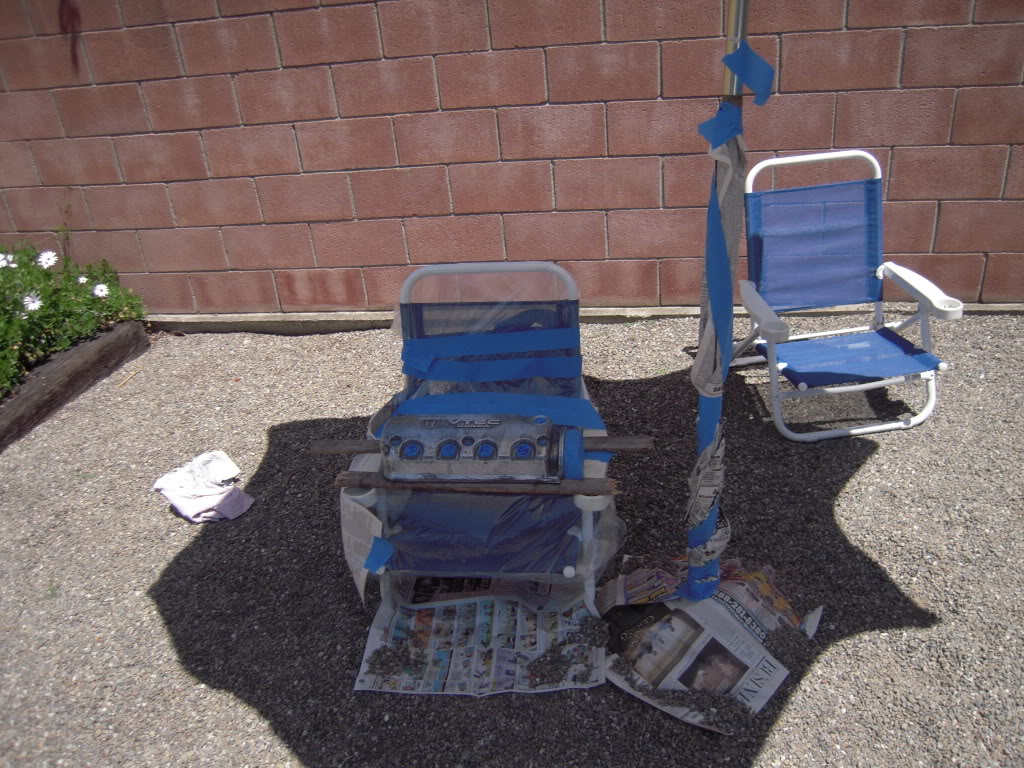
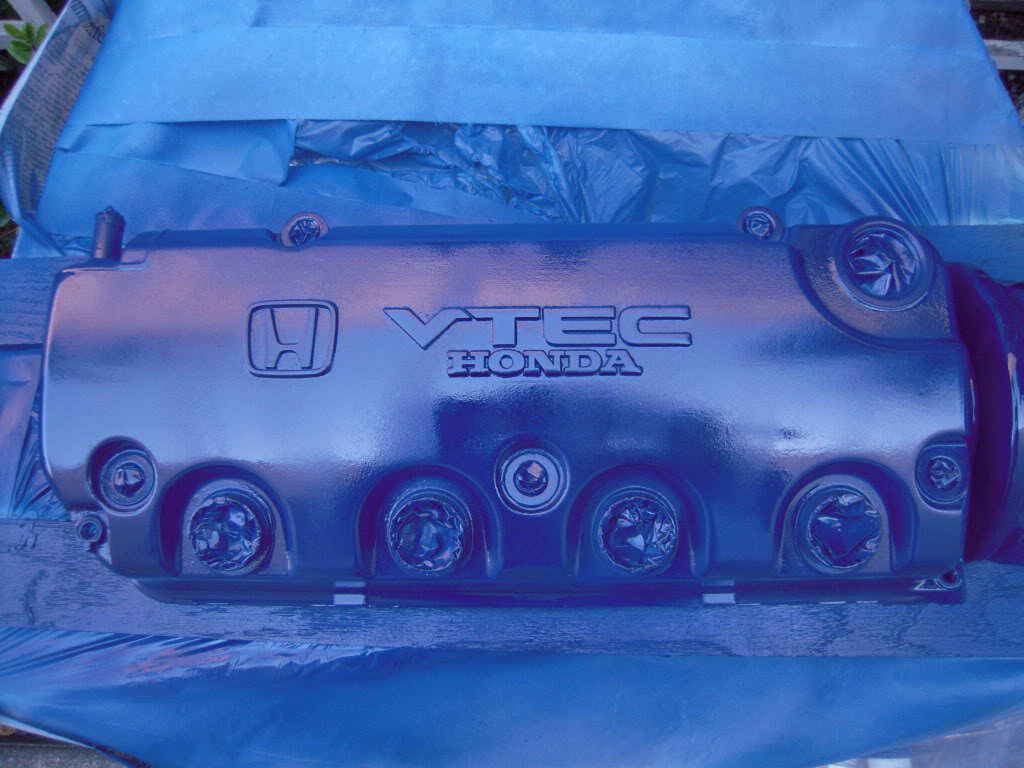
Anyways back to the VC. Got some work done today. Here are the progress pictures. I'm a little disappointed in how it came out. I messed up a little towards the end with the layers, you can kinda see lines but im hoping wet sanding it tomorrow will fix that and then a couple heavy clear coats will make it disappear.
Painting Station.
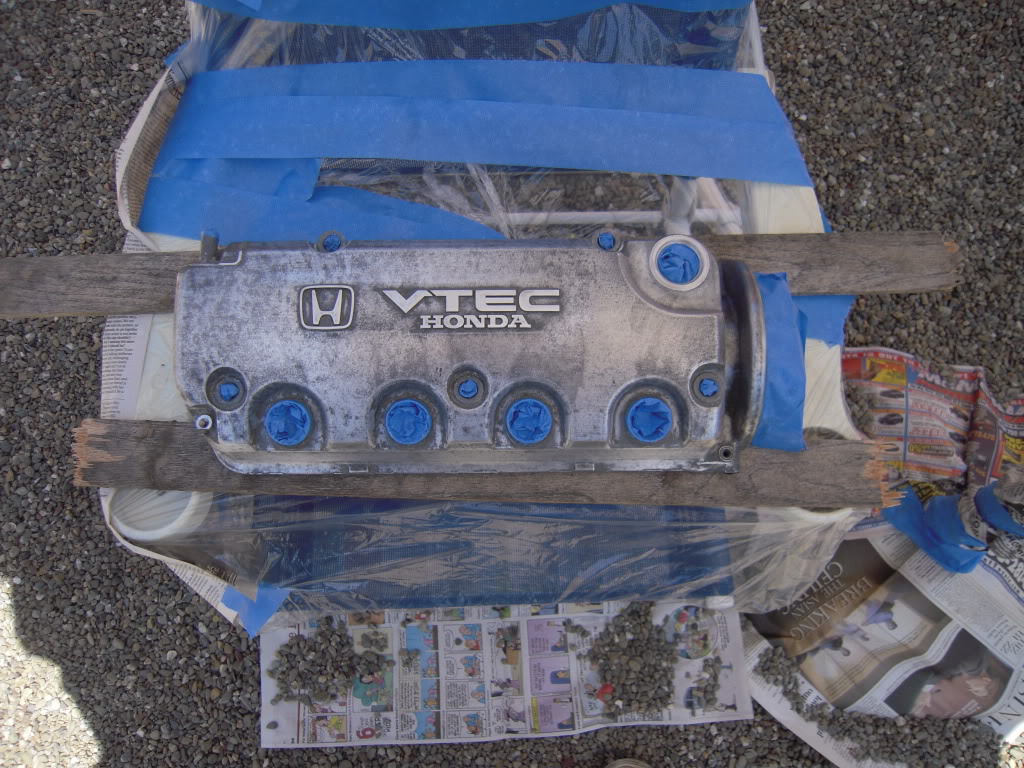
Two coats of primer.
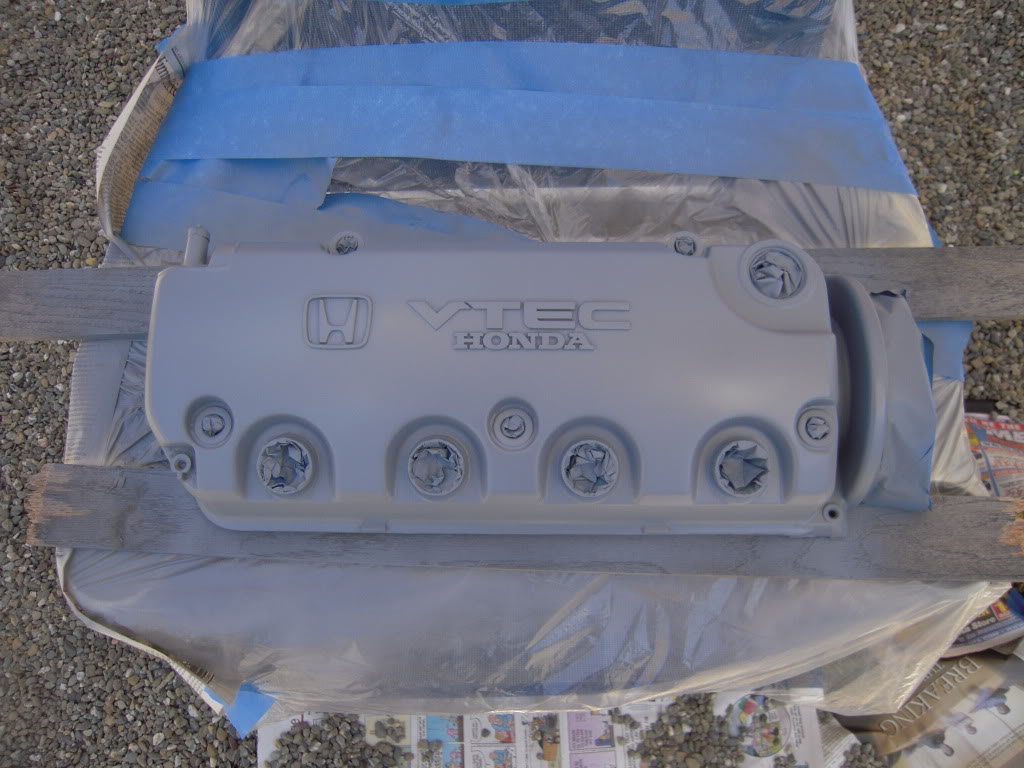
1st coat.
2nd coat.
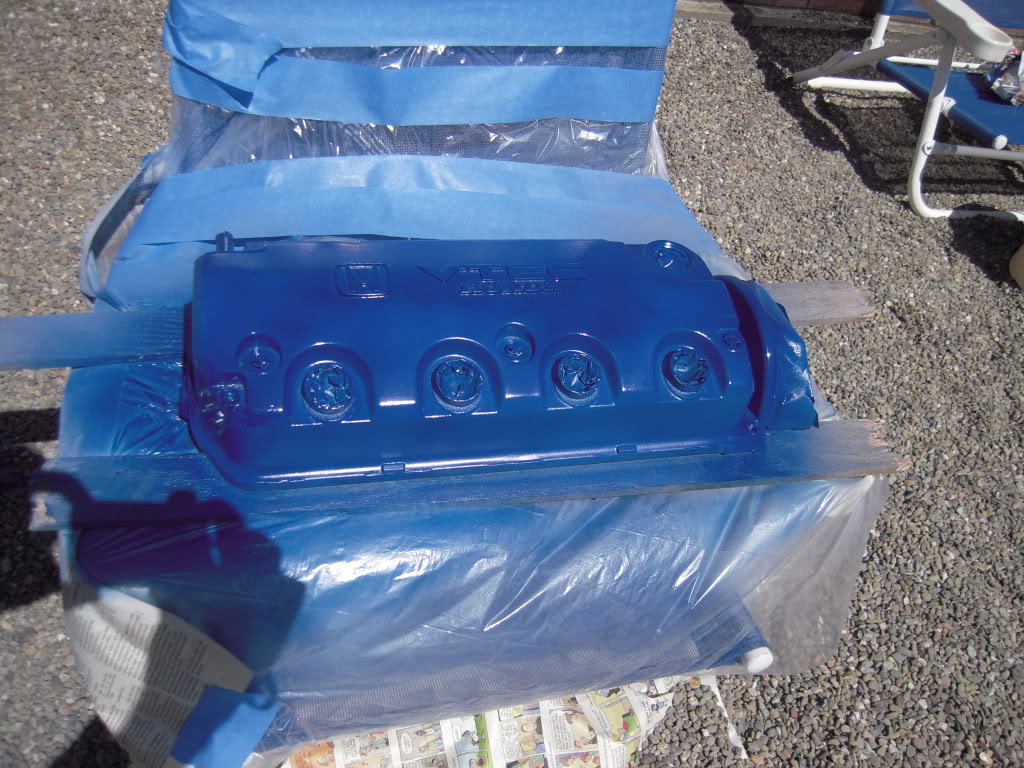
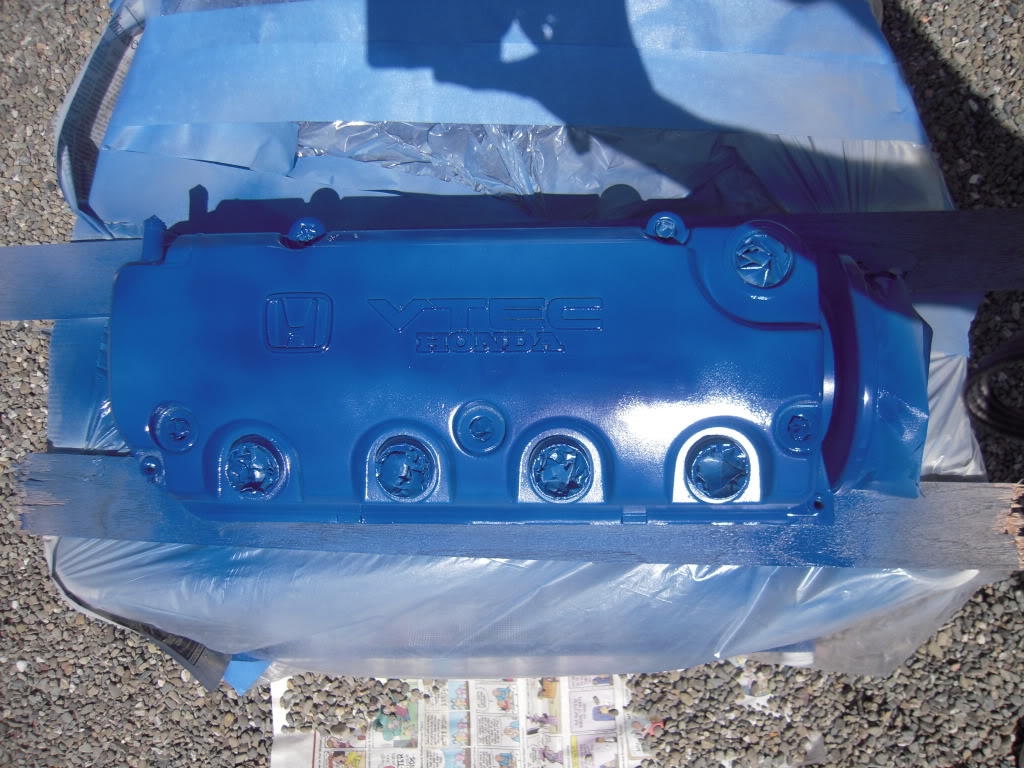
3rd and 4th coat.
Like a dumb@ss i decided to try and finish up the can and ended up screwing it up. I dont have a pic of that but Ill post one up tomorrow while im wet sanding. Anyways if anyone has any tips on fixing my layering problem i cause please speak up. I think if I wet sand and then do one more layer it will be fine. Let me know your thoughts.
Anyways back to the VC. Got some work done today. Here are the progress pictures. I'm a little disappointed in how it came out. I messed up a little towards the end with the layers, you can kinda see lines but im hoping wet sanding it tomorrow will fix that and then a couple heavy clear coats will make it disappear.
Painting Station.
Two coats of primer.
1st coat.
2nd coat.
3rd and 4th coat.
Like a dumb@ss i decided to try and finish up the can and ended up screwing it up. I dont have a pic of that but Ill post one up tomorrow while im wet sanding. Anyways if anyone has any tips on fixing my layering problem i cause please speak up. I think if I wet sand and then do one more layer it will be fine. Let me know your thoughts.
Thread Starter
|
HCF Member
Joined: Feb 2008
Posts: 2,059
From: San Leandro, CA
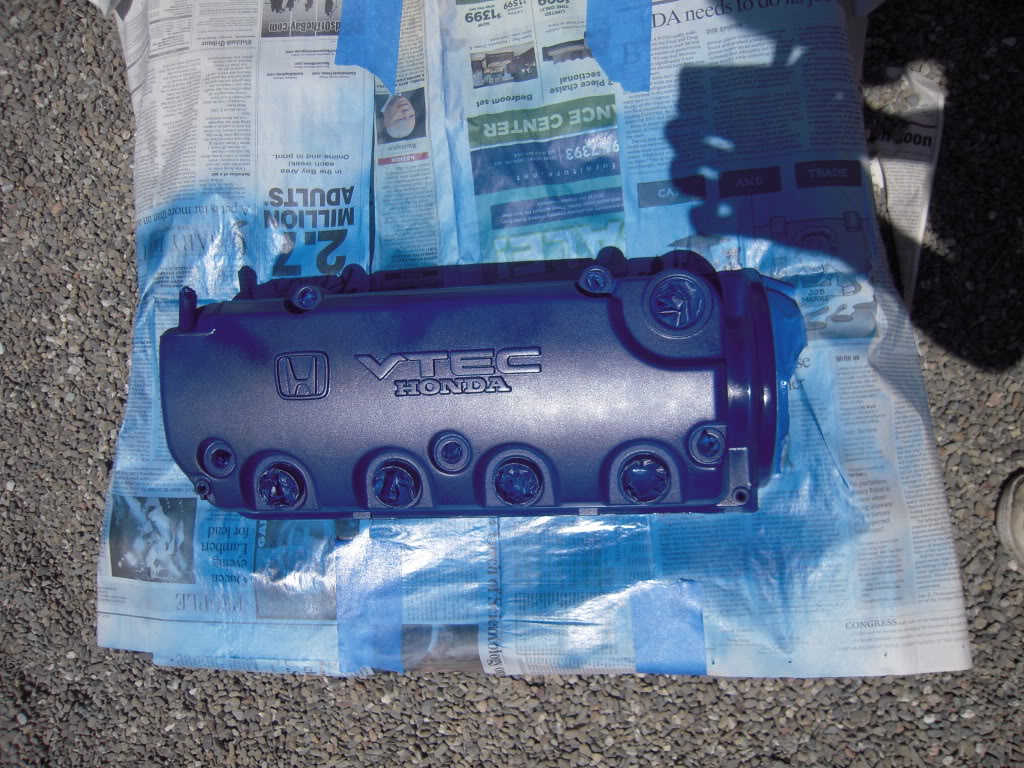
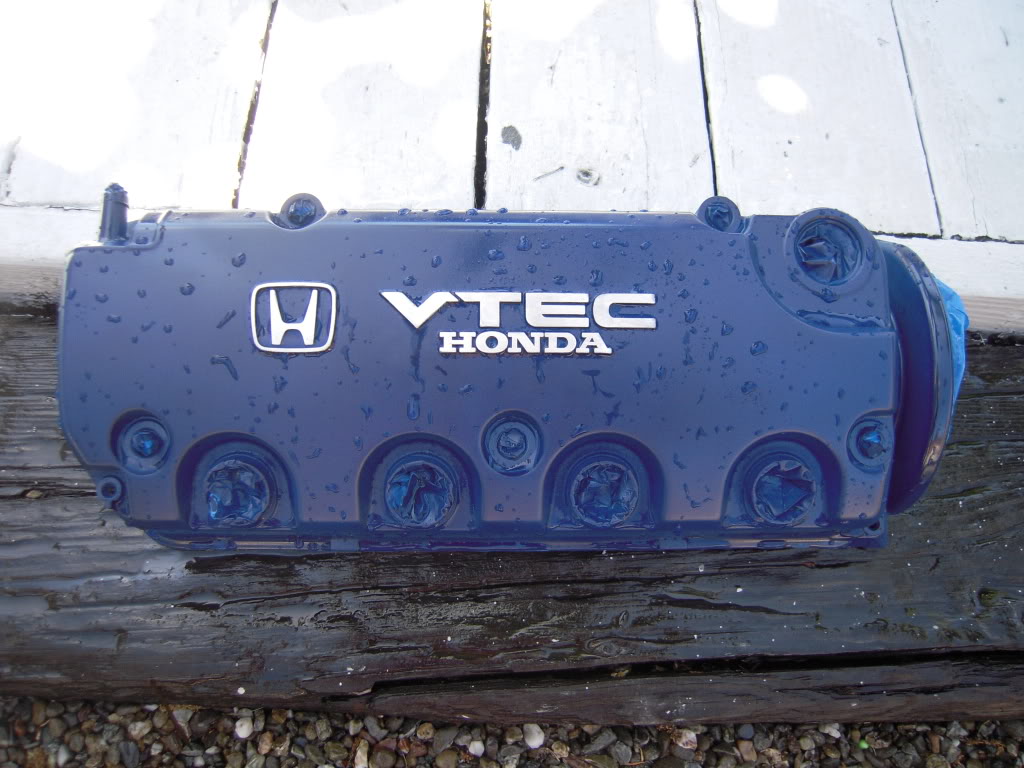
ok, so i wet sanded today and finally finished it. Here are some pictures:
First coat after wet sanding
After the second coat and after sanding down the lettering
Clear Coat
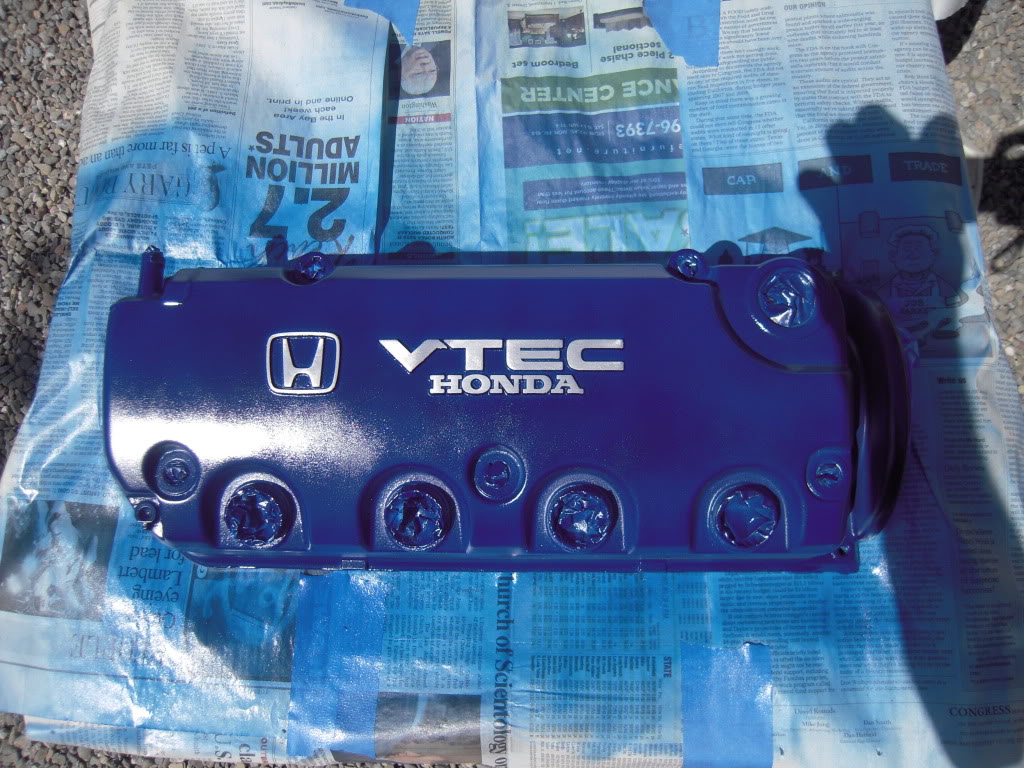
Finished product
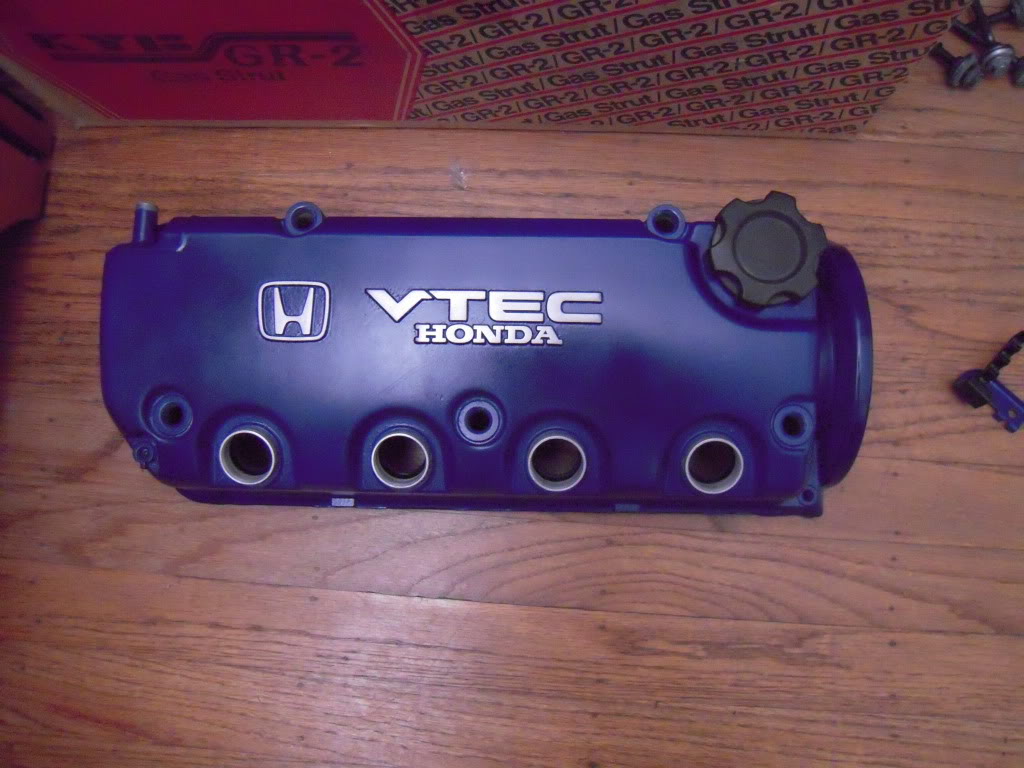
First coat after wet sanding
After the second coat and after sanding down the lettering
Clear Coat
Finished product