
weekend project completed


Thread Starter
|
HCF Member
Joined: Jul 2005
Posts: 42
Whats up people I finish the car over the week end i am just giving a project report. started sunday 9 in the morning didn't finish till about 4 in the afternoon. The process was time consuming and challenging changing out the front and rear cambers shocks and springs with just minnor tools and stuff. but it got done. lol, car drove horrible after i put everything back on it. mainly because i didnt have the car alighned as of yet. becasue it was sunday i got to the shop as they were clossing and gave the dude ten dollars so that he could just make the front driveable until i got it to tire kingdome in the morning.
side note: didn't get a chance to take alot of pics as i was working on the car wasn't really worried about it at the time. just trying to get the car off the jacks.
___things to think about. that i found out too late but couldn't really do anything about.___
1. when your choosing your front camber kits. if you don't want to go through the hassel of going to the shop and having them take out the ball joint (which you would have to do) out of your old ones. don't get the cheap ones. that they sell on ebay for $70 spend the extra 60 or so and get the skunk2 or omies or whatever. from my opinion though if your balljoints are in good condition then you will kinda save money and have a stronger product when its all put toghter. (the shop won't put your old joints on the new product mainly because its a liability for them) you can always try to bribe one of the people there.
2. get the compressors.... people say you don't need them. but you kinda do when the springs and shock unit is off the car. its like 30 or 40 dollars to rent. and you will get your money back.
all in all the skunk2 and tokico hp ride nicely on the coupe a little boncey but i ain't planing on running it or anything so it works alright for me. if you dont mind a ride thats a little boncy then the skunk2 works.
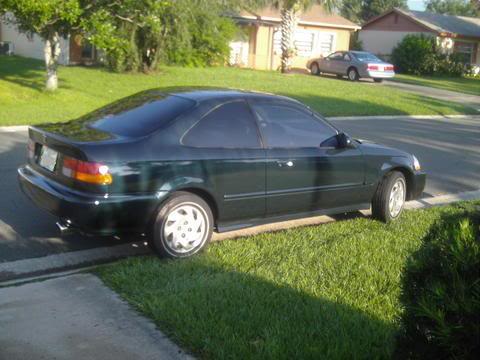
Picture before drop and rims

Picture after rims
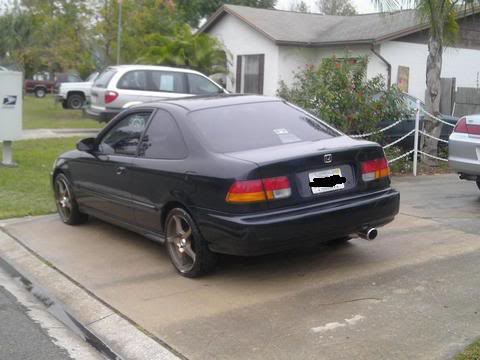
here is a pic of my coupe and my boys hatch right after we worked on my car.

I will get more pics after i get the car washed and waxed.
thanks again for all of your help and input.
question. how do you go about rolling your fender. the back tires tuching
side note: didn't get a chance to take alot of pics as i was working on the car wasn't really worried about it at the time. just trying to get the car off the jacks.
___things to think about. that i found out too late but couldn't really do anything about.___
1. when your choosing your front camber kits. if you don't want to go through the hassel of going to the shop and having them take out the ball joint (which you would have to do) out of your old ones. don't get the cheap ones. that they sell on ebay for $70 spend the extra 60 or so and get the skunk2 or omies or whatever. from my opinion though if your balljoints are in good condition then you will kinda save money and have a stronger product when its all put toghter. (the shop won't put your old joints on the new product mainly because its a liability for them) you can always try to bribe one of the people there.
2. get the compressors.... people say you don't need them. but you kinda do when the springs and shock unit is off the car. its like 30 or 40 dollars to rent. and you will get your money back.
all in all the skunk2 and tokico hp ride nicely on the coupe a little boncey but i ain't planing on running it or anything so it works alright for me. if you dont mind a ride thats a little boncy then the skunk2 works.
Picture before drop and rims
Picture after rims
here is a pic of my coupe and my boys hatch right after we worked on my car.
I will get more pics after i get the car washed and waxed.
thanks again for all of your help and input.
question. how do you go about rolling your fender. the back tires tuching


Thread Starter
|
HCF Member
Joined: Jul 2005
Posts: 42
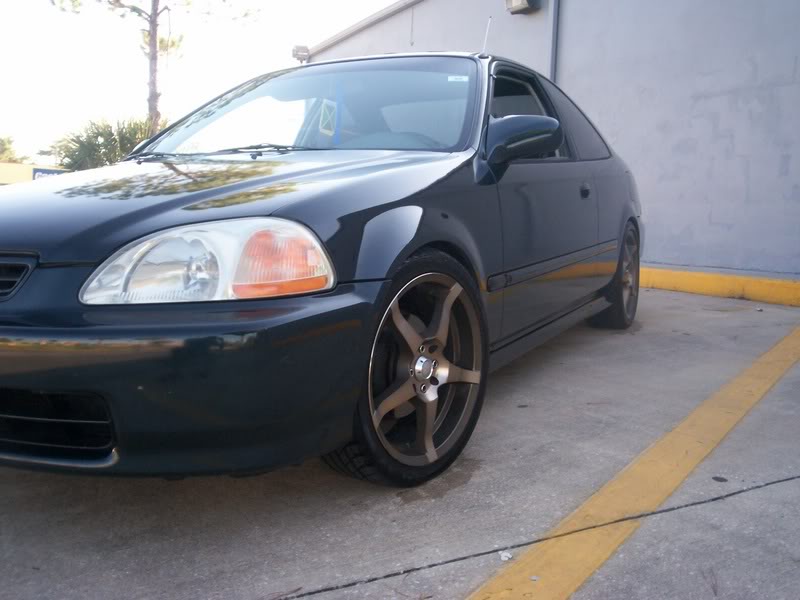
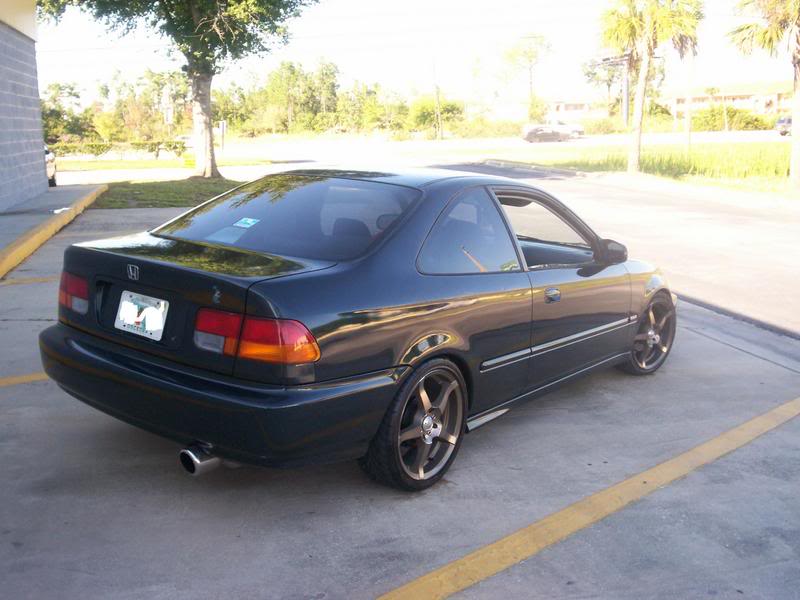
thanks man. i got two more pics. thanks man.
<a href="http://photobucket.com/" target="_blank"><img src="http://i101.photobucket.com/albums/m44/tigaman10/Civic008.jpg" border="0" alt="Photobucket - Video and Image Hosting"></a>
<a href="http://photobucket.com/" target="_blank"><img src="http://i101.photobucket.com/albums/m44/tigaman10/Civic005.jpg" border="0" alt="Photobucket - Video and Image Hosting"></a>
<a href="http://photobucket.com/" target="_blank"><img src="http://i101.photobucket.com/albums/m44/tigaman10/Civic010.jpg" border="0" alt="Photobucket - Video and Image Hosting"></a>


Thread Starter
|
HCF Member
Joined: Jul 2005
Posts: 42
I have a serious question for you guys. i when to the search screen and i could find anything. the rear tires are rubbing against the fender wall. does anyone know how to roll the fenders, and can they explain it to me. i think i understand but i am kinda hesitant on putting a hammer to my fender without knowing what i am doing exactly.

Senior Member
Joined: Nov 2005
Posts: 2,667
From:
to roll the fenders means you push the lip inside the fender or rear quarter panel up to give more clearance. you don't start bashing with a hammer you will damage your paint. i read this in a magazine before.
1. you heat up the lip a lttile bit with a torch (not enough to damage the paint or anything just to get it warm)
2. use a wooden baseball bat inbetween the tire and fender and push it down so it will bend the lip up. only do this a little bit you don't want to ruin your paint.
3. roll the bat around the tire to do the whole lip, and progressively bend the lip up a little more.
i am warning you that this is the do it yourself method and i would not try it on my car without expirance in doing this on more than my own car. i would try to practice on a junk car or something before i ever even get close to my own car with that.
also there is a fender rolling tool that bolts to the wheel hub, but its kind of expensive. eastwood makes it i believe. but even using this i would still practice on something, because if you screw up that is hard to fix, and quarter panels are hard to replace.
Thread Starter
|
HCF Member
Joined: Jul 2005
Posts: 42
Oh ok. i started doing it a little with a little hand held multi purpose clamper/knife/screwdriver thing. but it was too small to bend it up that much. i understand what your saying thanks man i know how to do it without heating it. the fender wall isn't that hard to bend at all so i will play with it a little more tomorrow. the thing is. its rubbing alot because i got two different type of tires in the back and in the front. the ones in the back are wider and sticks over the rim to protect it from scuffing. the ones in the front don't have that. so rolling is my only option right now. i don't want the wheels to get anyworse.