
Trunk Bars (92-95 Civic)


Thread Starter
|
Administrator
Joined: Oct 2004
Posts: 4,358
Well instead of buying some name brand trunk bars for like $150+ or Ebay ones I decided to make my own. The total cost was about $20 and took about 1-2 hours (including driving to the hardware store) to do. It really isn't difficult to do if you have the right tools and have a bit of a handy man inside of you.
Tools needed:
1) Set of sockets and wrench (17mm is the size for the stock bolts in the trunk)
2) PB Blaster or WD-40 to help loosen up the bolts
3) Filers
4) Tape measure
5) Pen/marker
6) Drill bits
7) Drill press or hand held drill
8) Zaw Saw/Dremel
9) Clamps
Materials Needed:
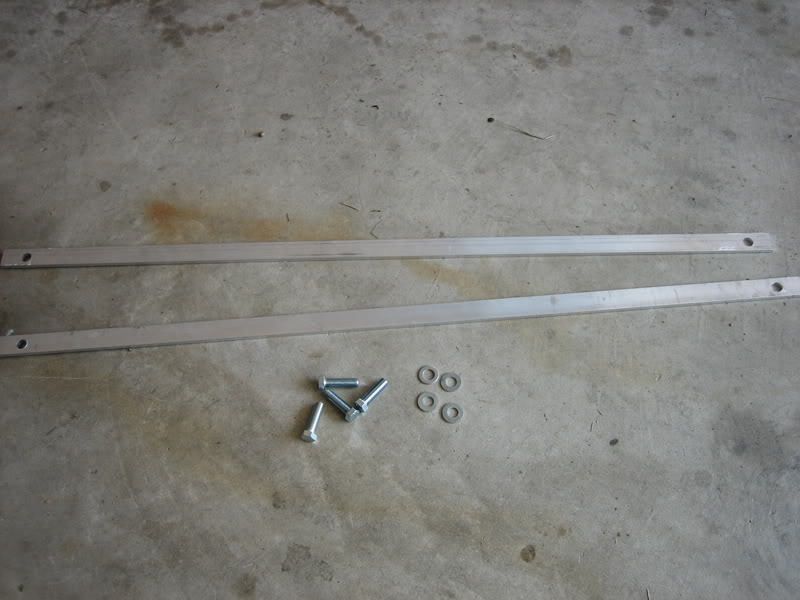
1) 1/4"x1"-8ft long aluminum-flat bar
2) 4 7/16"-20x 1-1/2 bolts
3) 4 7/16" flat washers
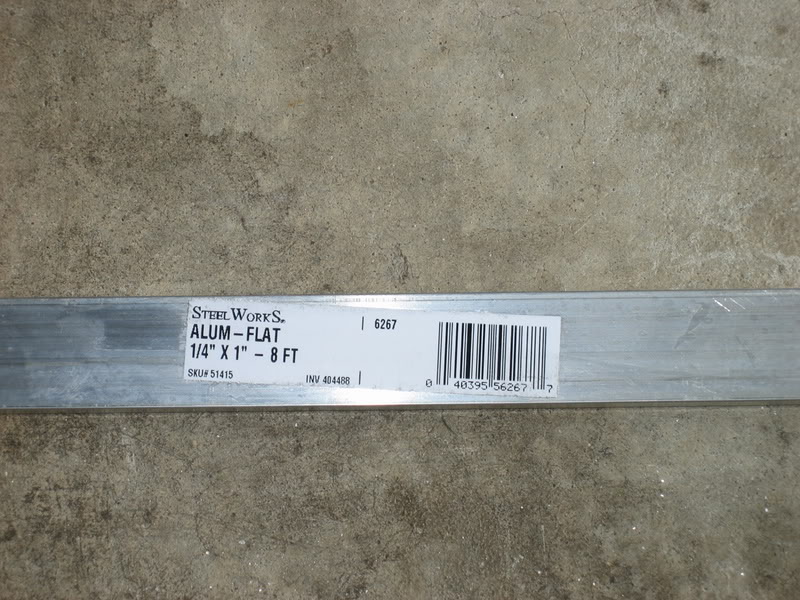
Alright here's the bar that you'll need to buy. It doesn't have to be exactly the same but it'll help if it's similar. This cost about $15 at the local hardware store. After doing this mod and thinking about it more, a thicker slab or maybe a pipe would be better just for strength. This aluminum is fairly flexible.
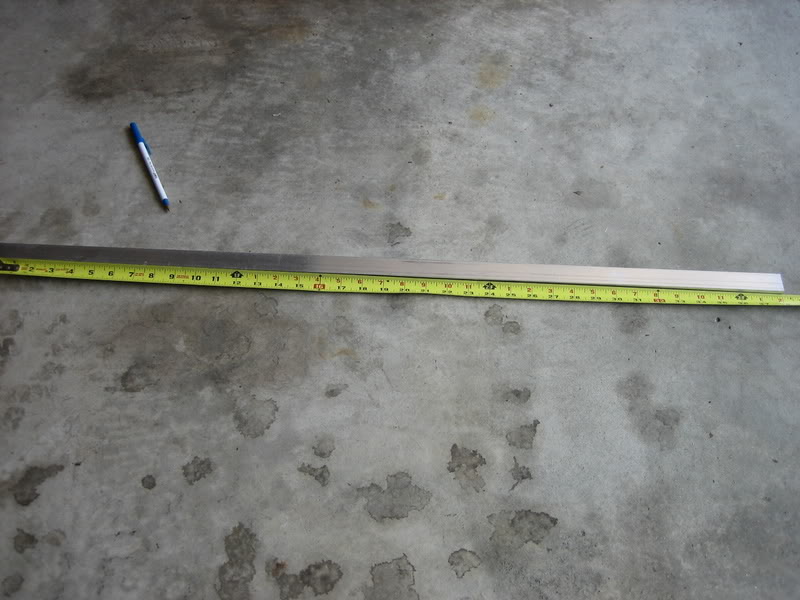
Measure the distance from the bolts in your trunk, for my car I measured about 38" apart. After measuring (always measure twice to be certain u cut it right) take the aluminum bar, measure and mark off the 38" with the pen/marker.
After everything is measured at least twice and you're sure it's the right distance, you're ready to cut. I used a Zaw Saw to cut the bar but I figure a Dremel will work too. It was very easy and fast to cut the bar with the zaw saw.
Lay the bar out on a table with the part that u marked to cut just off the side of the table. Use the clamps to hold the bar to the table so it doesn't move around when cutting. Cut at the line u marked, and do the same again for the second bar. When you're done cutting the bars, take the file and smooth out the edges, they'll probably be a bit jagged and can leave a nasty cut.
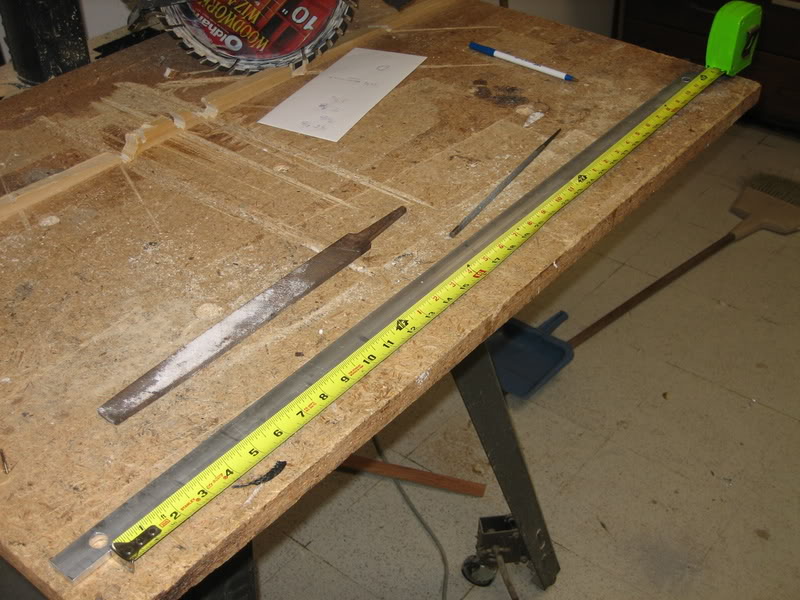
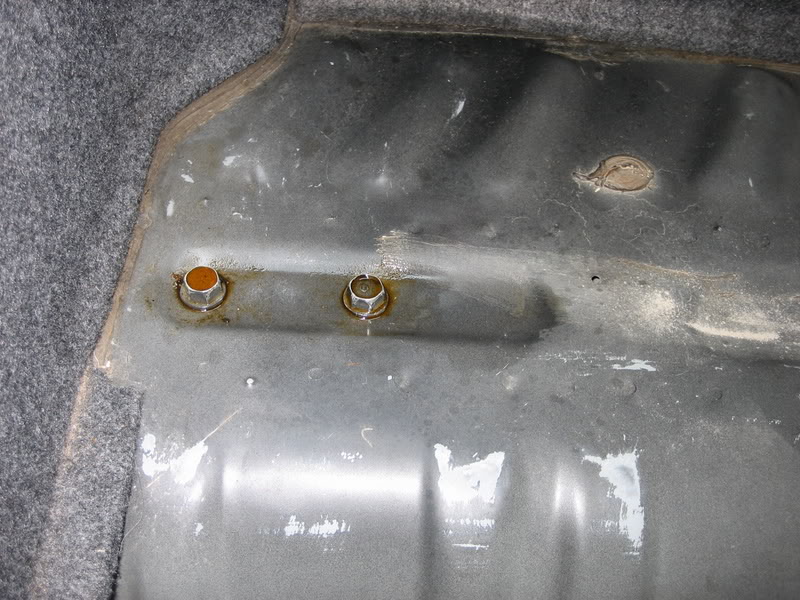
When you're done cutting the bars, go back to your car and measure the distance from the center of the bolts. You'll need to make sure it's perfect so you drill the holes in the right spot. Just measure the distance with the bar next to the bolts and mark it off.
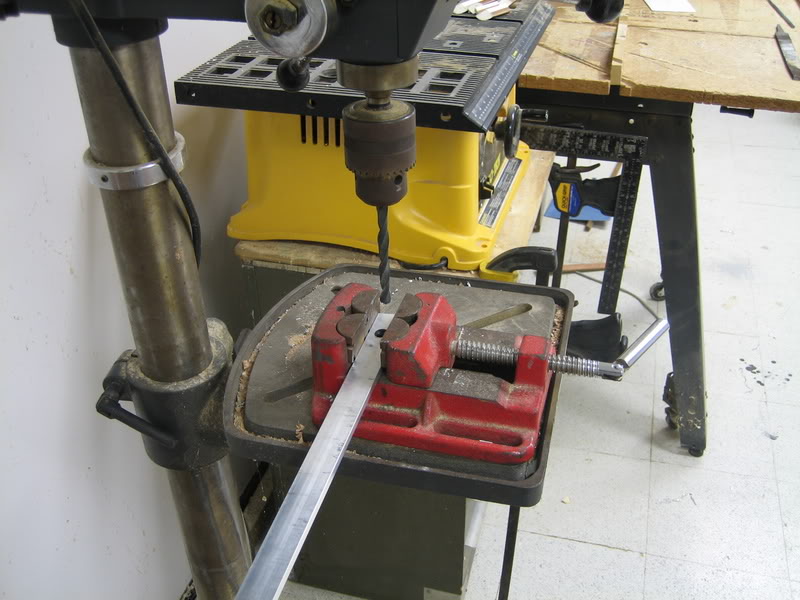
When you're sure the distance from the center of the bolts are perfect, you're ready to drill the holes. I have a drill press and used it which made it easy but a hand held drill will probably do fine. When I drilled the hole, I used a fairly small drill bit first and then went to a larger drill bit that was about the size of the bolt. I used a special clamp to hold the bar in place when drilling it as u can see in the picture.
When you done drilling the holes, use the file to smooth the holes out from the jagged edges. I had to use a rounded file (seen in the 3rd picture) to make the hole a little bit larger to fit the bolt through because I didn't have a drill bit that was the exact diameter of the bolt. Do the same process with the other bar.
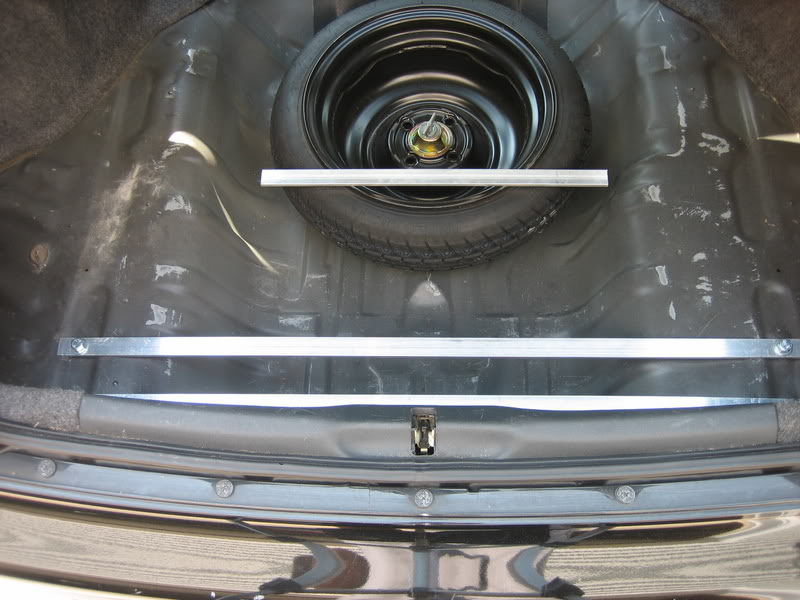
Once everything is measured, cut, drilled, and filed it'll look like this.
Now you're ready to put it on. PB Blast or WD-40 the bolts to help loosen them up. I used PB Blaster because I think it works a lot better than WD-40 but I'm sure WD-40 will be ok. After the PB or WD has set in, take the 17mm socket and start loosening up the bolts. The bolts shouldn't be THAT bad to get off, I had to use a breaker bar to get the bolts off but that was no big deal. Don't take any of the bolts off just loosen them up.
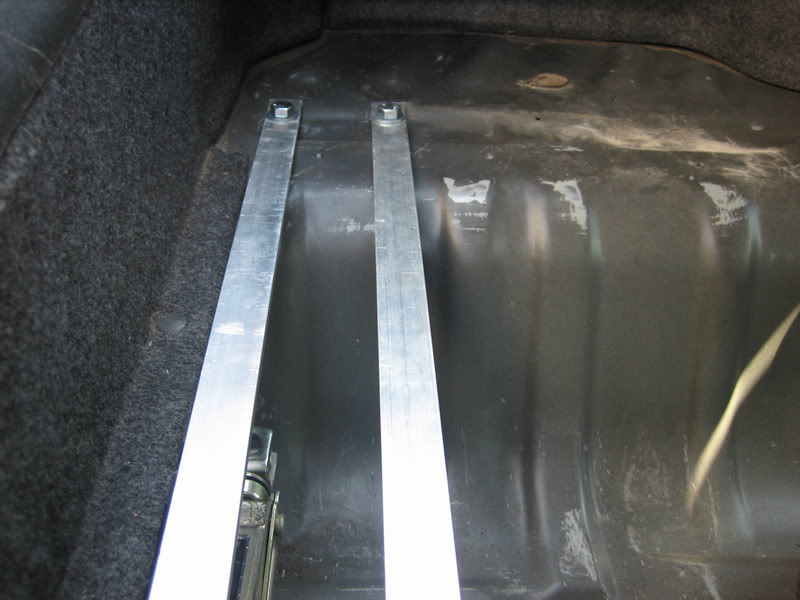
I suggest putting one bar in at a time. Just take one of the bolts from the left side off and take the opposite sides bolt off. Put the bar in there and match the holes up. Take the new 7/16"-20x 1-1/2 bolts, put the washers on them, and stick them in place and tighten the bar down. Once one of the bars is nice and tight in there, take the other bolts off and do the same thing.
Tighten everything down and you done!
This is what it'll look like when finished
Tools needed:
1) Set of sockets and wrench (17mm is the size for the stock bolts in the trunk)
2) PB Blaster or WD-40 to help loosen up the bolts
3) Filers
4) Tape measure
5) Pen/marker
6) Drill bits
7) Drill press or hand held drill
8) Zaw Saw/Dremel
9) Clamps
Materials Needed:
1) 1/4"x1"-8ft long aluminum-flat bar
2) 4 7/16"-20x 1-1/2 bolts
3) 4 7/16" flat washers
Alright here's the bar that you'll need to buy. It doesn't have to be exactly the same but it'll help if it's similar. This cost about $15 at the local hardware store. After doing this mod and thinking about it more, a thicker slab or maybe a pipe would be better just for strength. This aluminum is fairly flexible.
Measure the distance from the bolts in your trunk, for my car I measured about 38" apart. After measuring (always measure twice to be certain u cut it right) take the aluminum bar, measure and mark off the 38" with the pen/marker.
After everything is measured at least twice and you're sure it's the right distance, you're ready to cut. I used a Zaw Saw to cut the bar but I figure a Dremel will work too. It was very easy and fast to cut the bar with the zaw saw.
Lay the bar out on a table with the part that u marked to cut just off the side of the table. Use the clamps to hold the bar to the table so it doesn't move around when cutting. Cut at the line u marked, and do the same again for the second bar. When you're done cutting the bars, take the file and smooth out the edges, they'll probably be a bit jagged and can leave a nasty cut.
When you're done cutting the bars, go back to your car and measure the distance from the center of the bolts. You'll need to make sure it's perfect so you drill the holes in the right spot. Just measure the distance with the bar next to the bolts and mark it off.
When you're sure the distance from the center of the bolts are perfect, you're ready to drill the holes. I have a drill press and used it which made it easy but a hand held drill will probably do fine. When I drilled the hole, I used a fairly small drill bit first and then went to a larger drill bit that was about the size of the bolt. I used a special clamp to hold the bar in place when drilling it as u can see in the picture.
When you done drilling the holes, use the file to smooth the holes out from the jagged edges. I had to use a rounded file (seen in the 3rd picture) to make the hole a little bit larger to fit the bolt through because I didn't have a drill bit that was the exact diameter of the bolt. Do the same process with the other bar.
Once everything is measured, cut, drilled, and filed it'll look like this.
Now you're ready to put it on. PB Blast or WD-40 the bolts to help loosen them up. I used PB Blaster because I think it works a lot better than WD-40 but I'm sure WD-40 will be ok. After the PB or WD has set in, take the 17mm socket and start loosening up the bolts. The bolts shouldn't be THAT bad to get off, I had to use a breaker bar to get the bolts off but that was no big deal. Don't take any of the bolts off just loosen them up.
I suggest putting one bar in at a time. Just take one of the bolts from the left side off and take the opposite sides bolt off. Put the bar in there and match the holes up. Take the new 7/16"-20x 1-1/2 bolts, put the washers on them, and stick them in place and tighten the bar down. Once one of the bars is nice and tight in there, take the other bolts off and do the same thing.
Tighten everything down and you done!
This is what it'll look like when finished
Last edited by civicexracer; Feb 19, 2010 at 03:49 PM.

Thread
Thread Starter
Forum
Replies
Last Post
mybrokenblinker
Suspension, Brakes, Tires & Wheels
18
Mar 19, 2007 02:34 AM