
Addiction2bass truck project thread


Thread Starter
|
Recognized HCF Member
Joined: Jun 2006
Posts: 11,203
From: Brownsburg, IN 46112

Thread Starter
|
Recognized HCF Member
Joined: Jun 2006
Posts: 11,203
From: Brownsburg, IN 46112
well yesterday was a bad day... the first time in my life i broke down on the interstate!
i was driving down the road all fine no problems of any kind, no warning and then just BLAAAaaaaa truck lost all power and died and just coasted to a stop.
had to get brother to come bring my dads truck and trailer to get her home.
now im pretty sure i know whats wrong when i got home, fuel pump.. gotta be bad. it used to be loud as hell on first start up, now its just a tiny weezing sound... so im pretty sure the pumps the problem! so today ill be pulling the bed off my truck hopefully and try to get to the fuel pump and get it swapped out quickly. i hope this goes smoothly but i doubt it will... got fingers crossed all bed bolts come out easily enough! i dont like being vehicle less!
i was driving down the road all fine no problems of any kind, no warning and then just BLAAAaaaaa truck lost all power and died and just coasted to a stop.
had to get brother to come bring my dads truck and trailer to get her home.
now im pretty sure i know whats wrong when i got home, fuel pump.. gotta be bad. it used to be loud as hell on first start up, now its just a tiny weezing sound...
so im pretty sure the pumps the problem! so today ill be pulling the bed off my truck hopefully and try to get to the fuel pump and get it swapped out quickly. i hope this goes smoothly but i doubt it will... got fingers crossed all bed bolts come out easily enough! i dont like being vehicle less!
Thread Starter
|
Recognized HCF Member
Joined: Jun 2006
Posts: 11,203
From: Brownsburg, IN 46112
ok well didnt update, but i did fix the truck, it was infact the fuel pump that just went bad.
pulled the bed off and replaced the pump, drove on it afew days and then put the bed back on.
also got my tinted taillights finally BUT USPS decided to throw them i guess and chipped one of the lights i havent glued it back together yet BUT the guy that tinted them is giving me a good deal on another set which im cool with since i wanted matching tails for the trailer as well 
and today i just swapped the shocks out of my truck and trailer. so now old truck shocks on my trailer and new longer shocks on my truck. bounces way less now. i also had to replace a bolt on my shock extenders since the old bolt was pulling the washers thru the hole, so i replaced it with a hardened bolt and washers so hopefully it wont try and pull thru again.
but all and all its a great day.
new pump only cost me 111bucks with the original oem DELPHI pump and filter.
and the shocks and new trailer ball lock cost me 107bucks from summitracing. the ball lock is much better than the pin lock since a ball locks into the trailer tongue and pin locks across the front receiver so it cannot be pulled off and stolen. because with the 2 5/16 ball trailer people can just drop a 2inch ball in it and drive off with it still. with this new lock they cannt put anything there


video of trailer boucing now. way less bouncy so much better!

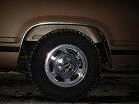
and my truck pics. old shocks are the dirty rusty ones, you can see they where to short and had very little travel from the shiny and rusty shaft.


someone replaced the pump at one time, i can tell by the sticker ontop of the pump as well as they stripped half of the one fuel line, luckely i was able to get on the bottom half of the line to remove it!
ive heard bad things of other brands of pumps and heard that they go out within a year or two and to pay the extra money for the oem delphi pumps.
and i think they reused the old filter that or they used some dirty @ss gas!!! the fuel pumps been loud since i bought the truck so i assume it was replaced.


and while the bed was off a went ahead and pressure washed it and sprayed it with rubber undercoating spray. used 3 cans, need afew more cans to do the bottom and inside rails all the way, but its much better than it was before.


gotta love my old lights i made it afew years ago with my old truck while i was painting it, 2x4 and some trailer lights, and 2 back seat floor mats screwed to the 2x4 for splash guards i had to trim the backing 2x4 up about 6inches since it was dragging the ground, and the rubber flaps still dragged but i just let em drag for those few days. it was legal just had to worry about breaking out rear glass when i did burn outs.LOL
o ya and you can do a wicked burn out with no bed on the truck.LMAO i had some fun and took me awhile to clean off the rubber off the back of my cab.


now im not sure what i wanna do next.lol kinda at stand still right now.....
only thing i wanna do now is wire my truck for electric brakes since while the bed was off i inspected the wiring and i do have it prewired for brakes, just have to tie the 2 wires up front under the hood for power and electric brake controler, and the rear plug. which i have one from a newer chevy truck to hardwire in which shouldnt be to hard. i may do that next day i have off. only thing i need to buy is the auto circuit breaker for the power wire. and id need to buy a trailer brake plug for my trailer since right now it just has the 4wire plug. should be very easy to swap out! it wont have brakes on my small trailer but i should be able to tow my dads trailers and his car dolly with electric brakes.
pulled the bed off and replaced the pump, drove on it afew days and then put the bed back on.
also got my tinted taillights finally BUT USPS decided to throw them i guess and chipped one of the lights
i havent glued it back together yet BUT the guy that tinted them is giving me a good deal on another set which im cool with since i wanted matching tails for the trailer as well and today i just swapped the shocks out of my truck and trailer. so now old truck shocks on my trailer and new longer shocks on my truck. bounces way less now. i also had to replace a bolt on my shock extenders since the old bolt was pulling the washers thru the hole, so i replaced it with a hardened bolt and washers so hopefully it wont try and pull thru again.
but all and all its a great day.
new pump only cost me 111bucks with the original oem DELPHI pump and filter.
and the shocks and new trailer ball lock cost me 107bucks from summitracing. the ball lock is much better than the pin lock since a ball locks into the trailer tongue and pin locks across the front receiver so it cannot be pulled off and stolen. because with the 2 5/16 ball trailer people can just drop a 2inch ball in it and drive off with it still. with this new lock they cannt put anything there
video of trailer boucing now. way less bouncy so much better!
and my truck pics. old shocks are the dirty rusty ones, you can see they where to short and had very little travel from the shiny and rusty shaft.
someone replaced the pump at one time, i can tell by the sticker ontop of the pump as well as they stripped half of the one fuel line, luckely i was able to get on the bottom half of the line to remove it!
ive heard bad things of other brands of pumps and heard that they go out within a year or two and to pay the extra money for the oem delphi pumps.
and i think they reused the old filter that or they used some dirty @ss gas!!! the fuel pumps been loud since i bought the truck so i assume it was replaced.
and while the bed was off a went ahead and pressure washed it and sprayed it with rubber undercoating spray. used 3 cans, need afew more cans to do the bottom and inside rails all the way, but its much better than it was before.
gotta love my old lights
i made it afew years ago with my old truck while i was painting it, 2x4 and some trailer lights, and 2 back seat floor mats screwed to the 2x4 for splash guards i had to trim the backing 2x4 up about 6inches since it was dragging the ground, and the rubber flaps still dragged but i just let em drag for those few days. it was legal just had to worry about breaking out rear glass when i did burn outs.LOLo ya and you can do a wicked burn out with no bed on the truck.LMAO i had some fun and took me awhile to clean off the rubber off the back of my cab.
now im not sure what i wanna do next.lol kinda at stand still right now.....
only thing i wanna do now is wire my truck for electric brakes since while the bed was off i inspected the wiring and i do have it prewired for brakes, just have to tie the 2 wires up front under the hood for power and electric brake controler, and the rear plug. which i have one from a newer chevy truck to hardwire in which shouldnt be to hard. i may do that next day i have off. only thing i need to buy is the auto circuit breaker for the power wire. and id need to buy a trailer brake plug for my trailer since right now it just has the 4wire plug. should be very easy to swap out! it wont have brakes on my small trailer but i should be able to tow my dads trailers and his car dolly with electric brakes.
Thread Starter
|
Recognized HCF Member
Joined: Jun 2006
Posts: 11,203
From: Brownsburg, IN 46112
well today i got alittle material.
i bought a toolbox afew weeks ago but it was WAY TO FREAKIN HUGE and cutting it down would have been to much of a PITA.... so i sold it and got my money back outta it.
and today i got a hood local for 25bucks. the rear corners are bent but im not really caring about it because i plan on building a 1off toolbox for my trailer now
going to cut it ruffly in half like so with the black line and use the front, and that will be the lid for my toolbox. not sure if i wanna use the rear section or not, might be nice to put it on the front face, but ill just have to wait till after i cut it and see if it will be posible or not to use! just gotta measure everything really good before i make a single cut! main thins is clear my front jacks handle, and then i will check the truck and trailer together to turn it really sharp to kinda jackknife it to see how wide it can be.

friday ill go back to steel shop and see what hes got that i can build outta for the sides and floor and such and hopefully i can get it cheap enough in material for it. not sure what gauge steel to use for it. want it to be strong enough to not bend easily but not overkill that will weigh down the tongue much more! maybe some thinner steel and some crossbracing maybe. i gotta think about it alittle more!
i figure some flat steel, and some square 1inch tubing for the corners. and maybe some flat 2-3inch wide strips for some bracing. and in the floor ill just cut a piece of 1/2 or 3/4inch plywood from the inside to help hold some weight.
then of course ill need a hood latch and ill run a cable somewhere on the truck to open the new toolbox that way i can keep the stock hood latch and be a smoother layout.
at least i got a start on the plan in my head! plans might tweek of course as the build starts depending on fitment!
i bought a toolbox afew weeks ago but it was WAY TO FREAKIN HUGE and cutting it down would have been to much of a PITA.... so i sold it and got my money back outta it.
and today i got a hood local for 25bucks. the rear corners are bent but im not really caring about it because i plan on building a 1off toolbox for my trailer now
going to cut it ruffly in half like so with the black line and use the front, and that will be the lid for my toolbox. not sure if i wanna use the rear section or not, might be nice to put it on the front face, but ill just have to wait till after i cut it and see if it will be posible or not to use! just gotta measure everything really good before i make a single cut! main thins is clear my front jacks handle, and then i will check the truck and trailer together to turn it really sharp to kinda jackknife it to see how wide it can be.
friday ill go back to steel shop and see what hes got that i can build outta for the sides and floor and such and hopefully i can get it cheap enough in material for it. not sure what gauge steel to use for it. want it to be strong enough to not bend easily but not overkill that will weigh down the tongue much more! maybe some thinner steel and some crossbracing maybe. i gotta think about it alittle more!
i figure some flat steel, and some square 1inch tubing for the corners. and maybe some flat 2-3inch wide strips for some bracing. and in the floor ill just cut a piece of 1/2 or 3/4inch plywood from the inside to help hold some weight.
then of course ill need a hood latch and ill run a cable somewhere on the truck to open the new toolbox that way i can keep the stock hood latch and be a smoother layout.
at least i got a start on the plan in my head! plans might tweek of course as the build starts depending on fitment!
Thread Starter
|
Recognized HCF Member
Joined: Jun 2006
Posts: 11,203
From: Brownsburg, IN 46112
well i got alittle work done to my custom toolbox im building, but not to much since its hot as hell out there! and welding fully clothed in the heat really REALLY BLOWS!!!! so ive taken a few days off. hopefully get the rest of the frame built friday since im off work. i just need about 6ft more of square tubing and also a piece of round tubing for the front center nose for a better curve. and then i just have to skin it and put hinges on the hood and a latch.
and i WAS going to make the hood open like stock hood does BUT since the backside will sit so close to the bed it wont work like that with the hinges i got. SO its a split decision if i wanna either suicide it by opening it from the rear going forwards or easiest just open it to one side all the way open and just use a gas shock to hold it open. thats the only way i can think to make it work best.
ok well enough talk this is briefly what i got so far... picture the rest finished for now
the front bow is the hardest to get just right! almost got one done then have to make one more and weld em together.
and ya it might look small but its as large as i can make it to clear my pivoting jack and handle, and larger and id be banging my hand on the box while jacking the trailer up and down.


and the center bow sticking up i thought i would try and flatten out BUT after further thinking about it i think it will look just fine with my soft tono cover, so im gonna leave it as is.


wish i had a tube bender... BUT a recip saw and welder just as good. cutting afew slices in it and then just bending it to the right arch and tack welding it back solid.
and yes im making the toolbox as mostly one piece right now... the fronts not welded just sitting on the frame. i gotta weld in a brace on the hood along inside outsides and then ill cut it off the top and put in the hinges and then make it look pretty inside to match.
tho i must say steel is not cheap
i got ruffly 200bucks in just steel so far. thats two sheets of 4x8 14gauge steel, decent thickness so shouldnt get banged up easilily... more money BUT better than thinner steel that would get banged up and look like poo later on! 90bucks a sheet sucks BUT it will be a one off custom piece so should look sick when im done!
and im also going to put trim pieces on the sides from the toolbox to the outter bed panels to smooth it off to look better as well.
so far so good. i only messed up the floor outter braces and welded them to far out. i thought i would leave them out to bolt to the trailers frame easier but after i looked at it i need to cut them off and move them back in so when i skin the box you wont see the bottom frame.
and i WAS going to make the hood open like stock hood does BUT since the backside will sit so close to the bed it wont work like that with the hinges i got. SO its a split decision if i wanna either suicide it by opening it from the rear going forwards or easiest just open it to one side all the way open and just use a gas shock to hold it open. thats the only way i can think to make it work best.
ok well enough talk this is briefly what i got so far... picture the rest finished for now
the front bow is the hardest to get just right! almost got one done then have to make one more and weld em together.
and ya it might look small but its as large as i can make it to clear my pivoting jack and handle, and larger and id be banging my hand on the box while jacking the trailer up and down.
and the center bow sticking up i thought i would try and flatten out BUT after further thinking about it i think it will look just fine with my soft tono cover, so im gonna leave it as is.
wish i had a tube bender... BUT a recip saw and welder just as good.
cutting afew slices in it and then just bending it to the right arch and tack welding it back solid.and yes im making the toolbox as mostly one piece right now... the fronts not welded just sitting on the frame. i gotta weld in a brace on the hood along inside outsides and then ill cut it off the top and put in the hinges and then make it look pretty inside to match.
tho i must say steel is not cheap
i got ruffly 200bucks in just steel so far. thats two sheets of 4x8 14gauge steel, decent thickness so shouldnt get banged up easilily... more money BUT better than thinner steel that would get banged up and look like poo later on! 90bucks a sheet sucks BUT it will be a one off custom piece so should look sick when im done!
and im also going to put trim pieces on the sides from the toolbox to the outter bed panels to smooth it off to look better as well.
so far so good. i only messed up the floor outter braces and welded them to far out. i thought i would leave them out to bolt to the trailers frame easier but after i looked at it i need to cut them off and move them back in so when i skin the box you wont see the bottom frame.

Thread Starter
|
Recognized HCF Member
Joined: Jun 2006
Posts: 11,203
From: Brownsburg, IN 46112
nope..... ive gone straight lazy... been cleaning up the house and yard and shop lately and also my main project has been fixing my impala. so my moneys gone towards fixing it up... which its almost ready to go back in the car. i just have to bolt the new flywheel on it and then get the starters mounting flange milled down so the starter is tighter on the flywheel... it was a problem thats been there since it was new. my dad had one filled down to fit perfectly when it was still in his suburban but after i had it in my impala for awhile the starter went out and i replaced it and turned the old one in for the core NOT KNOWING he shaved it down to fit perfectly... so WOOPS and ever since its been chewin thru starters from autozone at least once a year! and i just replaced the starter from its end cap actually busting off the housing... never had one break like that, but i slapped on another one since lifetime warrente... and I SWEAR after just testing it out a dozen times or so then the motor burned out of the starter after i filled it down perfectly.... so ya i was pissed! went to my alternator and starter guy and asked if he could build me up one nice and strong and he strongly suggested a gear reduction starter, and he actually had one on the shelf brand new so i bought it and he actually gave me 30bucks credit which is what i paid for the autozone starter about 10years ago.lol so that was cool as hell of him! it was a brand new one i jsut replaced so he was cool.
and its much smaller and lighter than the autozone starter and cranks it over with ease, but i wanted to replace the flywheel because it was bent before i ever try and file or just have it milled down precision from napa guy if he can do it! if he cannt ill slap it on the visbench and just start filling on it myself again.
but i just want my old baby back drivable so i can use it as a SECOND vehicle again for when my truck has problems or im just working on it.
and just for kicks the before and after shots


after a ton of degreasing and pressure washing the motor and engine bay.


new starter and a front bracket to hold it tighter i just made. just some simple flat steel and a visbench and plier, give it a twist and a bend and she fits great!!! and holds the starter tight! no more flexing up and down on the front corner which will put more constant pressure on the flywheel for better starting.

and heres a video of the bent flywheel it goes back and forth which cannt have been good on the starters.lol
so now i have a new flywheel i just have to chase the threads in the crank and then torque the bolts on the new flywheel down. after i get the starter filed and lined up perfect then im gonna slap it back in the old girl and give her hell once again good old old school muscle!
400cubic inch small block. that things got wicked torque!!!!
click for video.


MY OLD GIRL WILL LIVE AGAIN!!!!!!!! THIS YEAR FOR SURE.LOL
and its much smaller and lighter than the autozone starter and cranks it over with ease, but i wanted to replace the flywheel because it was bent before i ever try and file or just have it milled down precision from napa guy if he can do it! if he cannt ill slap it on the visbench and just start filling on it myself again.
but i just want my old baby back drivable so i can use it as a SECOND vehicle again for when my truck has problems or im just working on it.
and just for kicks the before and after shots
after a ton of degreasing and pressure washing the motor and engine bay.
new starter and a front bracket to hold it tighter i just made. just some simple flat steel and a visbench and plier, give it a twist and a bend and she fits great!!! and holds the starter tight! no more flexing up and down on the front corner which will put more constant pressure on the flywheel for better starting.
and heres a video of the bent flywheel
it goes back and forth which cannt have been good on the starters.lolso now i have a new flywheel i just have to chase the threads in the crank and then torque the bolts on the new flywheel down. after i get the starter filed and lined up perfect then im gonna slap it back in the old girl and give her hell once again
good old old school muscle!400cubic inch small block. that things got wicked torque!!!!
click for video.
MY OLD GIRL WILL LIVE AGAIN!!!!!!!! THIS YEAR FOR SURE.LOL


