
Tutorial: Wheel Chop Using Photoshop


Thread Starter
|
HCF Member
Joined: Oct 2007
Posts: 3,199
From: NorCal
Mods maybe this tutorial should be stickied.
There's many of you guys that ask for wheel chops and some of you guys might have Photoshop so here's a tutorial for doing wheel chops. There are many ways to chop wheels, this is my way that i use to do wheel chop. I am using Photoshop CS.
Remember: The better and higher the resolution the better the outcome will be. For best results find cars that are at the same resolution and as close to the same angle as possible. Also, for best results, DO NOT use the same wheels for the front and rear. Use the front wheels for the front wheels and the rear wheels for the rear wheels.
Find Donor Wheels Pictures. The sites that i like to looks for images are google, flickr, and bing
This is the car that i will be doing the chop on. I will try to be as detailed as possible.
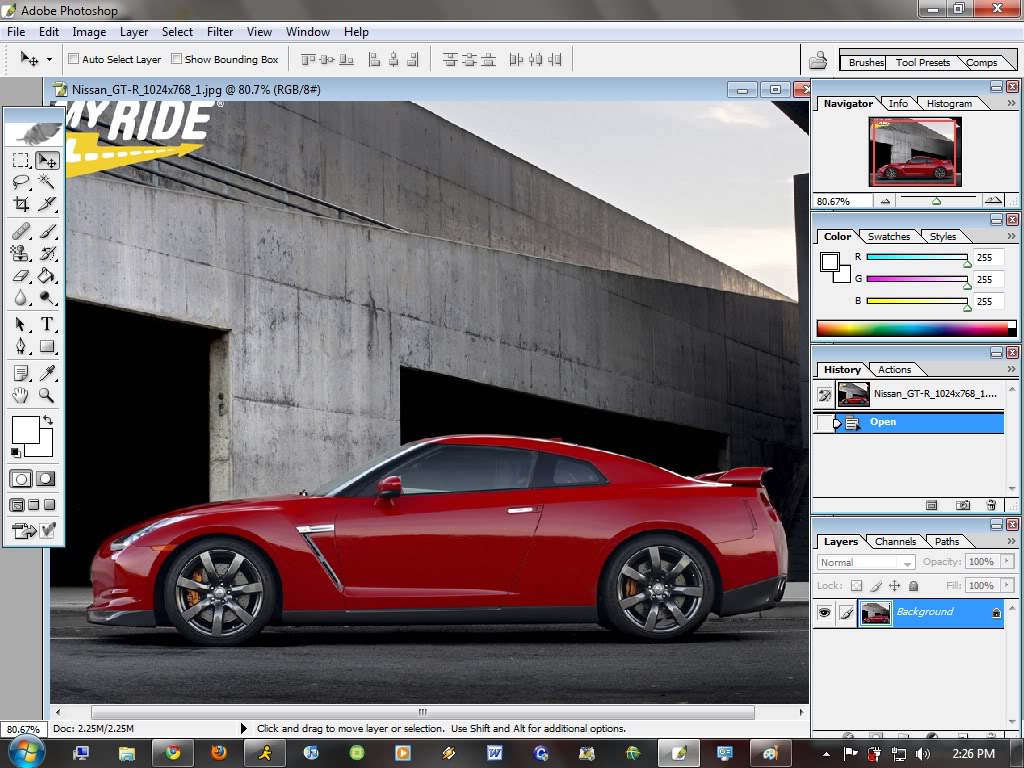
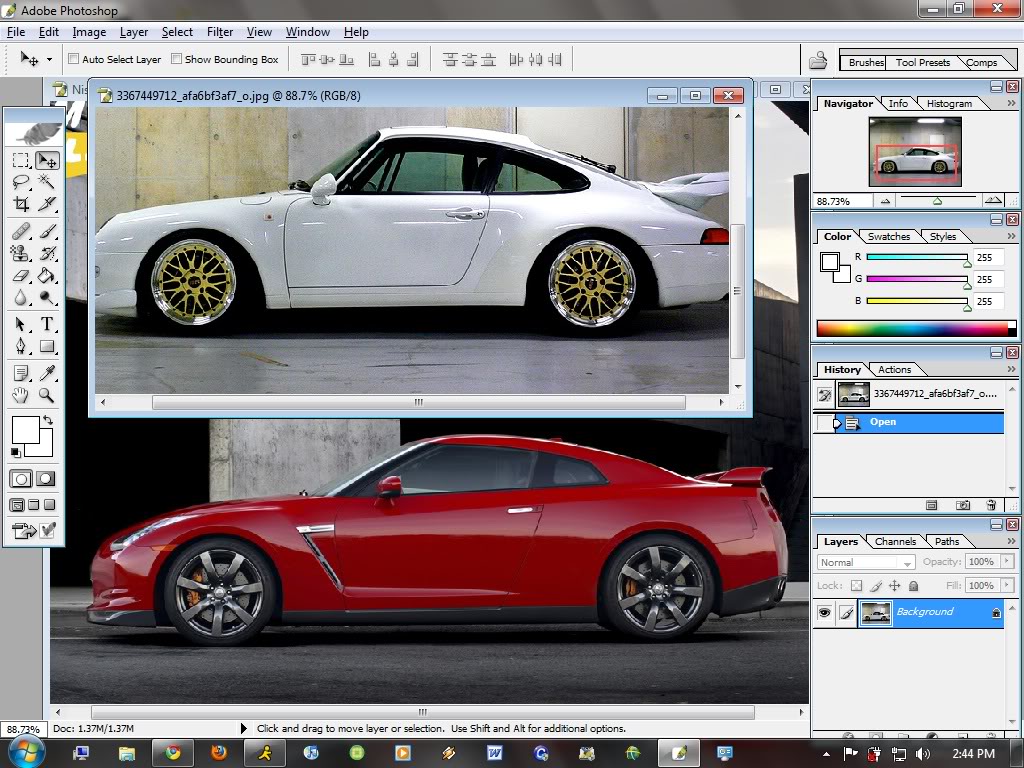
1) Open Up your car you want the wheel chop AND the donor wheels pictures opened on photoshop
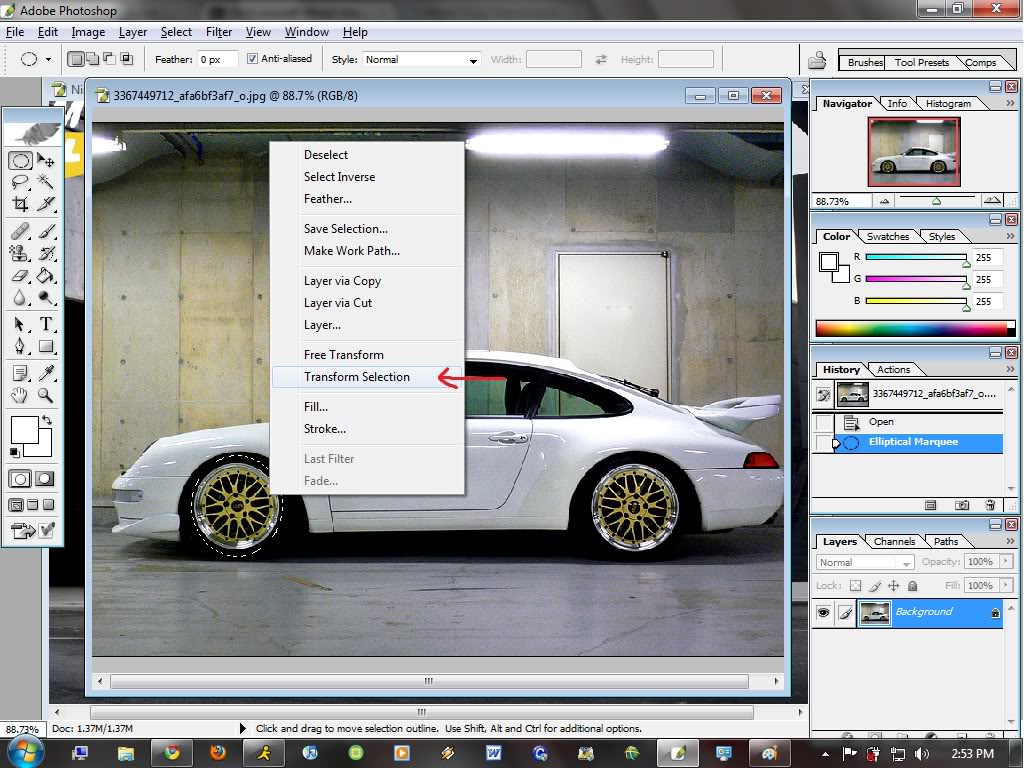
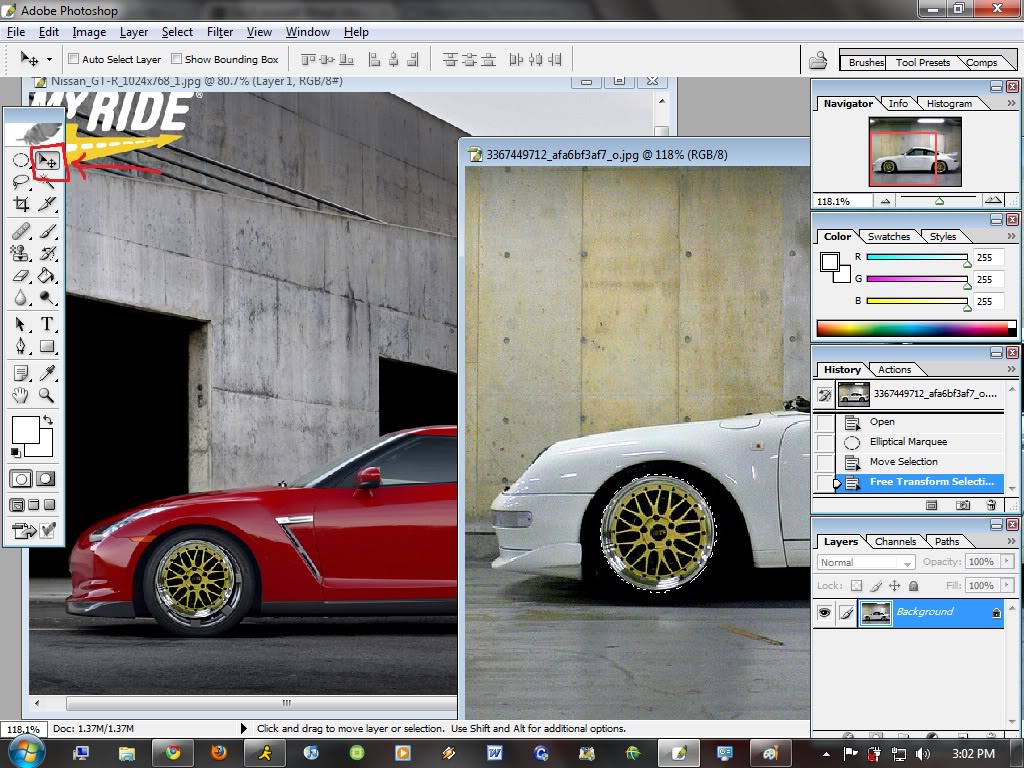
2) Select the "Elliptical Marquee Tool." You might need to right click the option and select it

3) Make a Circle. Right Click and Select "Transform Selection"
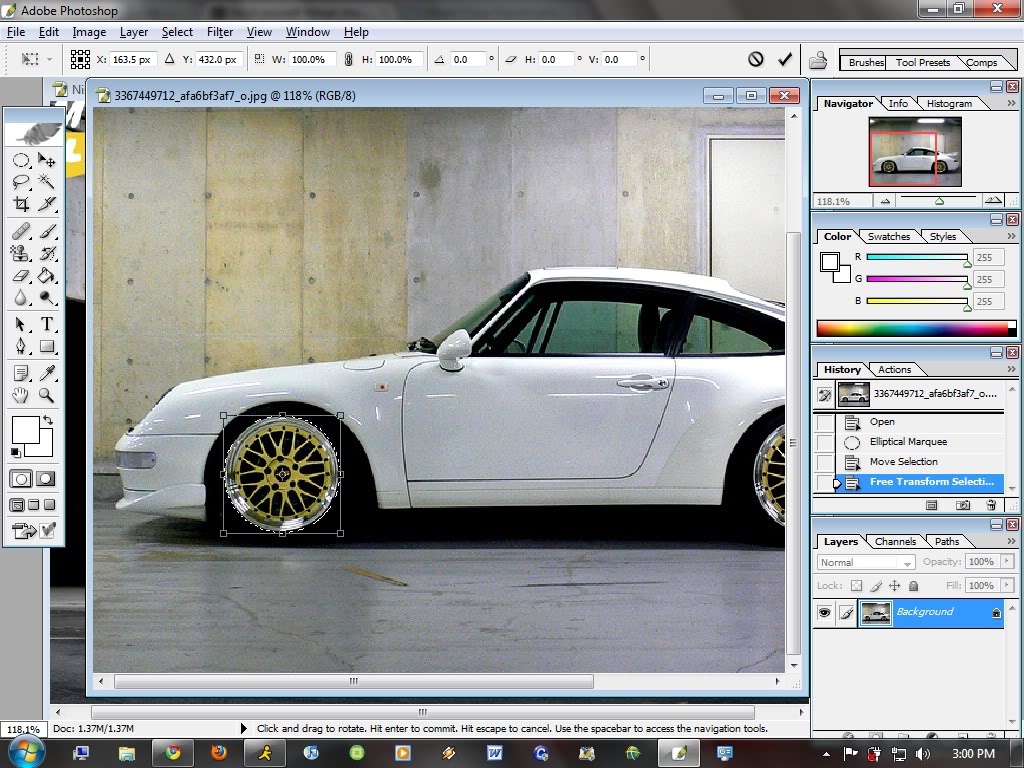
4) Drag the Corners and stretch it or rotate it so that the circle perfectly outlines the wheels. After you get that right, Press the "Enter" key
5) Select the "Move Tool" and drag the circled wheel onto the car that you want the wheels on.
6) Press "CTRL + T" to free transform the wheel that you've just dragged. Scale, Rotate, and or drag the wheels till they fit over the original wheels. Pretty much similar to step # 4. AND Press the "ENTER" key.
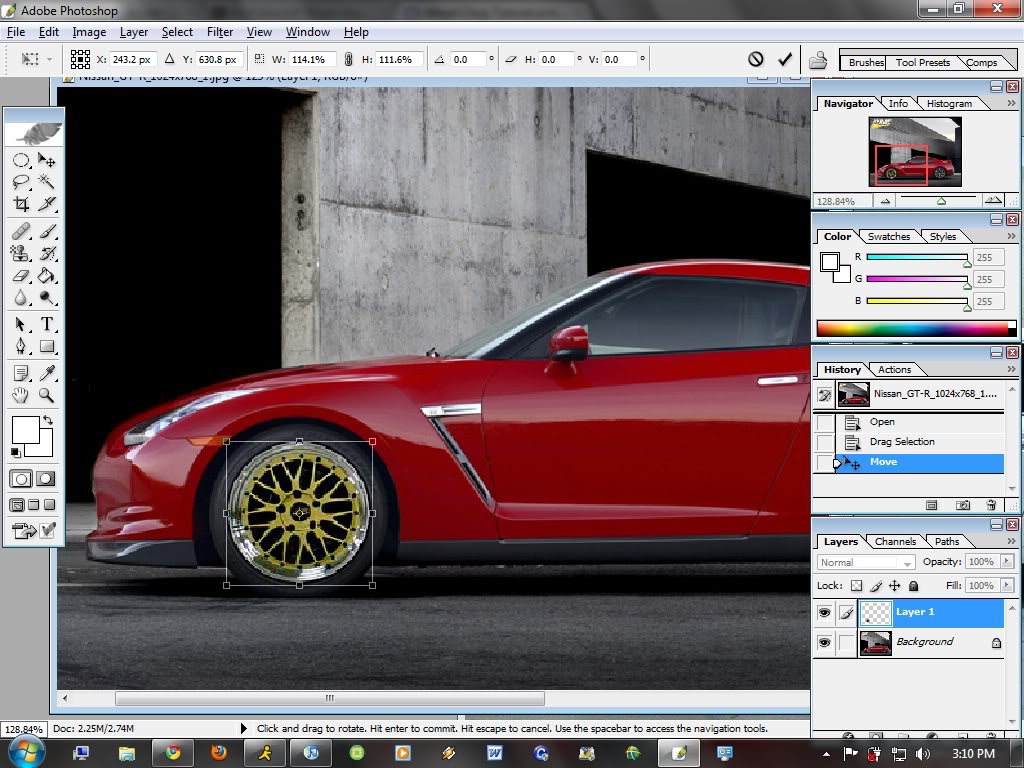
REPEAT STEPS 2-6 FOR THE REAR WHEELS
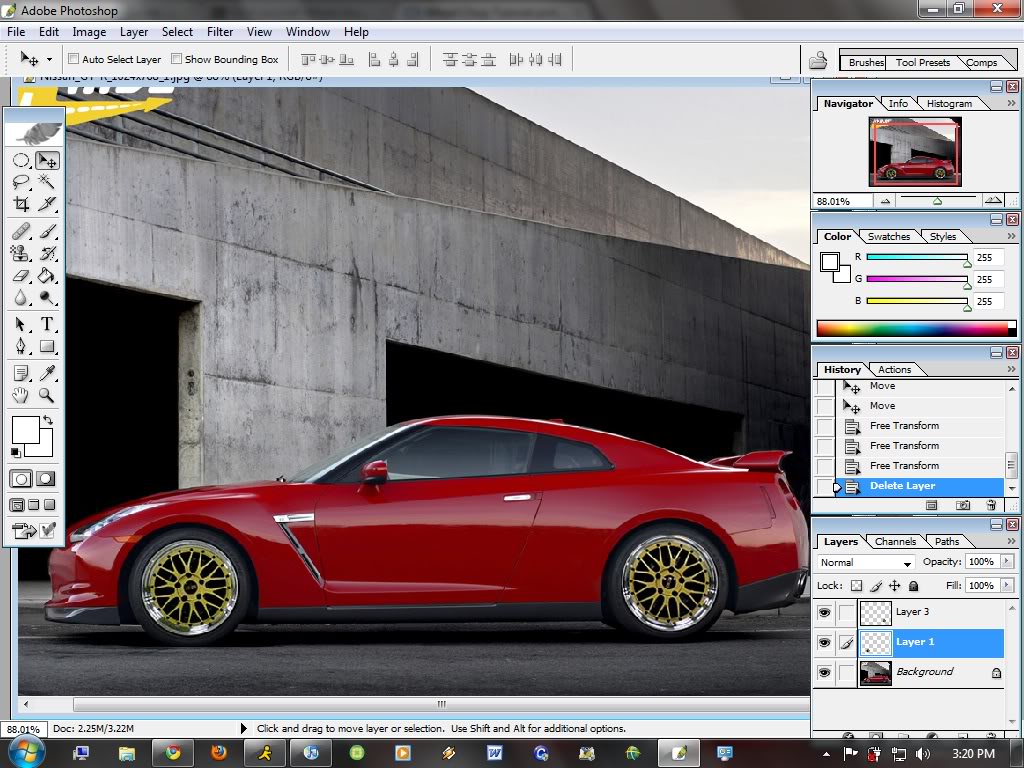
Here is what you will end up with
NOW... if you want to save the picture. Click "File" --- "Save As" . Rename It. and In format select in the drop down menu "JPEG" or whatever format you want to save it in. and click "Save" and click "OK"
And there you have it.

ENJOY this tutorial and good luck. Hope this helps many of you guys and if i get enough interest in this thread i will make a tutorial for lowering a car as well.
There's many of you guys that ask for wheel chops and some of you guys might have Photoshop so here's a tutorial for doing wheel chops. There are many ways to chop wheels, this is my way that i use to do wheel chop. I am using Photoshop CS.
Remember: The better and higher the resolution the better the outcome will be. For best results find cars that are at the same resolution and as close to the same angle as possible. Also, for best results, DO NOT use the same wheels for the front and rear. Use the front wheels for the front wheels and the rear wheels for the rear wheels.
Find Donor Wheels Pictures. The sites that i like to looks for images are google, flickr, and bing
This is the car that i will be doing the chop on. I will try to be as detailed as possible.
1) Open Up your car you want the wheel chop AND the donor wheels pictures opened on photoshop
2) Select the "Elliptical Marquee Tool." You might need to right click the option and select it
3) Make a Circle. Right Click and Select "Transform Selection"
4) Drag the Corners and stretch it or rotate it so that the circle perfectly outlines the wheels. After you get that right, Press the "Enter" key
5) Select the "Move Tool" and drag the circled wheel onto the car that you want the wheels on.
6) Press "CTRL + T" to free transform the wheel that you've just dragged. Scale, Rotate, and or drag the wheels till they fit over the original wheels. Pretty much similar to step # 4. AND Press the "ENTER" key.
REPEAT STEPS 2-6 FOR THE REAR WHEELS
Here is what you will end up with
NOW... if you want to save the picture. Click "File" --- "Save As" . Rename It. and In format select in the drop down menu "JPEG" or whatever format you want to save it in. and click "Save" and click "OK"
And there you have it.
ENJOY this tutorial and good luck. Hope this helps many of you guys and if i get enough interest in this thread i will make a tutorial for lowering a car as well.
Last edited by sfazngiants; Jan 24, 2010 at 02:41 PM.


Thread
Thread Starter
Forum
Replies
Last Post
Spoolin.Em
Suspension, Brakes, Tires & Wheels
2
Sep 22, 2011 05:18 PM