
Sidemarker Install (96-00 Civic)


Thread Starter
|
HCF Member
Joined: Oct 2007
Posts: 3,199
From: NorCal
This DIY was made and brought over from talkjdm.com and was written by Danny. Most pictures are taken from Danny and some were provided by me.
I used this DIY when I installed my sidemarkers and found it pretty helpful so i'm sharing it with you guys.
NOTE:
What i did different was that i took the template and taped it onto a piece of cardboard. Then I took a razor blade and cut the template out and test fitted the sidemarkers into the template and make sure its a tight fit before i use that template on my fenders.
I Use the same cardboard and taped it onto my fender and used a pencil to make the outline on the fender like so: I folded the template up to check on the pencil outline to make sure that it showed.
I used a dremel instead of a metal nibbler.
REMEMBER: Take you time, Measure very accurately measure 10 times if you need to. Once you made a cut on your finder and you messed up. Your fender is done. Be Patient, Take Your time. and lastly, take little cuts and be accurate. It's better to undercut than overcut.
Disclaimer:
I am not responsible from any damages inflicted while you attempt to follow this DIY.
EK Sidemarkers:
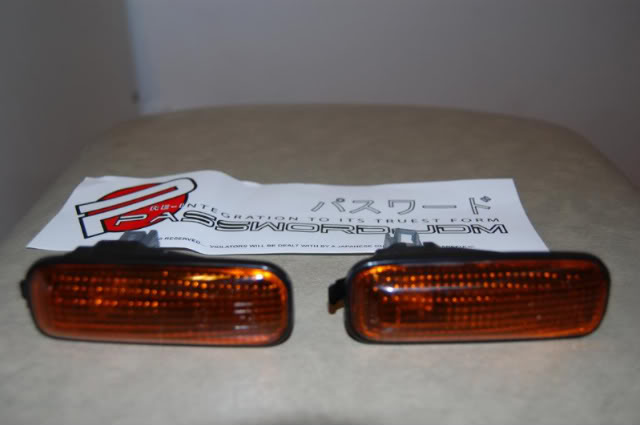
Sidemarkers Template/Diagram:
Note: A tip given was to to cut the holes smaller than the template for a tighter fit.
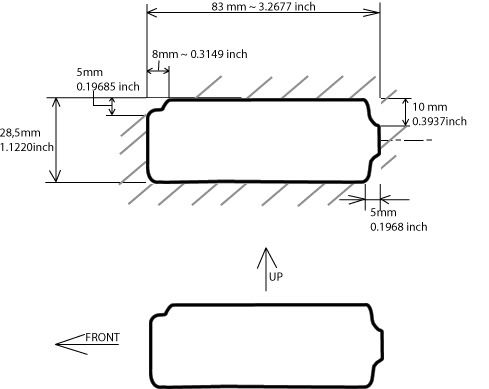
You Can Download and Print the template here
DIY Installation Process:
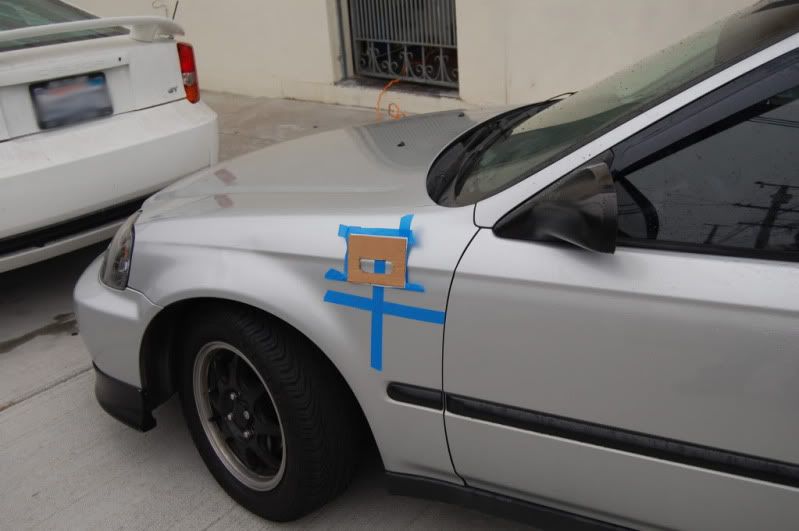
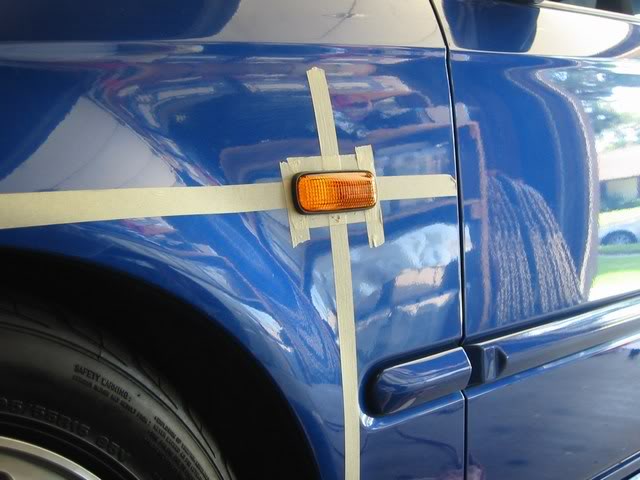
You can see in the following pic the placement on the fender using the above Diagram. It is 155mm from the molding's top to the bottom of the masking tape and 140mm from the edge of the door to the edge of the masking tape's intersection.
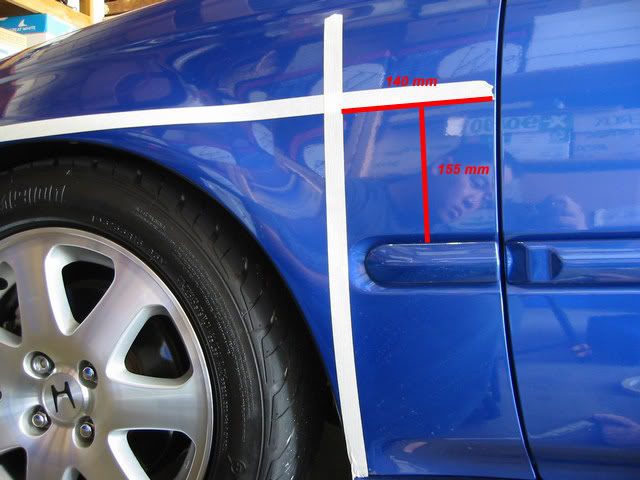
The center/intersection of the two tapes is marked with an "X" - this is where the center of the Sidemarker will go.
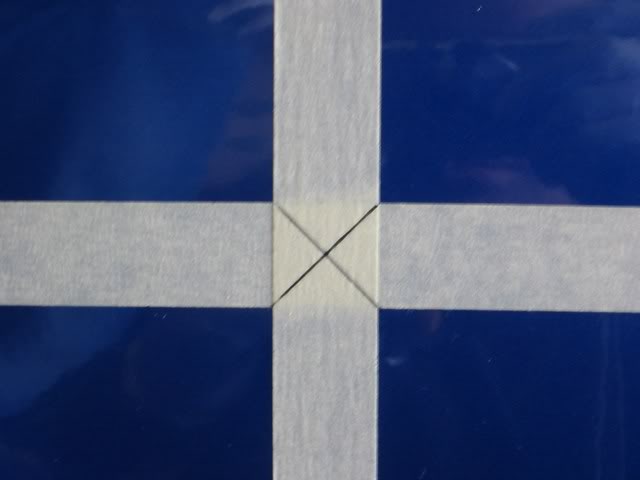
Find the center of the Template and line it up with the tape, so that they overlap eachother and then tape it down.
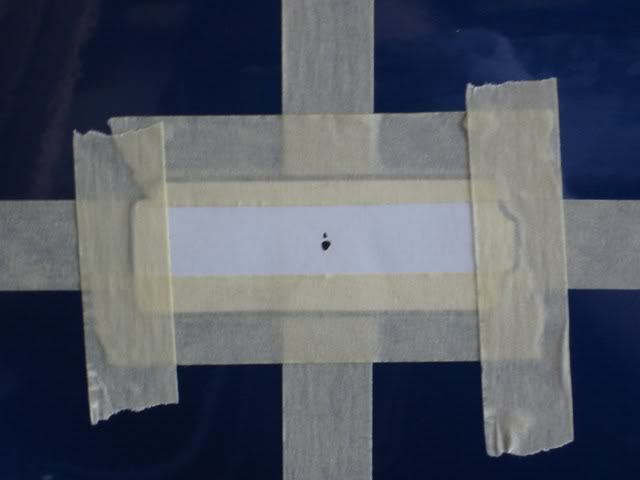
Use a drill to make a small hole in the center of the template, then use a Metal Knibbler to cut the entire sidemarker area out. Metal Knibbler can be bought from Radio Shack - Although using it may be more time consuming it works great for this DIY and its safer than using a dremel.
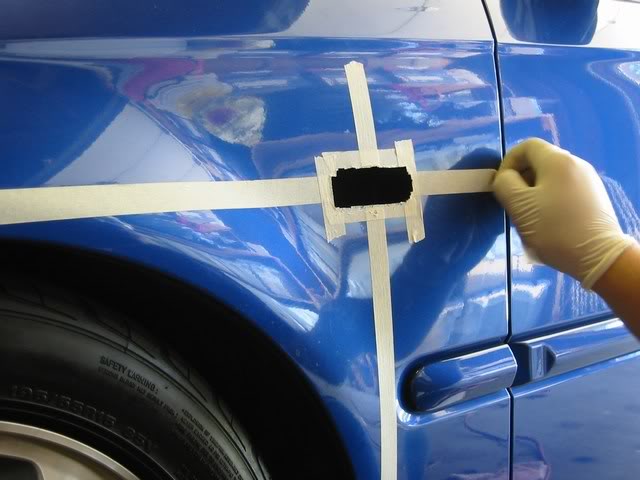
Begin cutting the Fender, a "T" works best to start, but not necessary.

After you've cut the entire Sidemarker area (following the diagram provided) it should look like this. Remember to add some touch-up paint to the bare metal to prevent rust. Simply mask around the hole and spray paint it (color does not matter as the sidemarker will cover it - I used black on my Hatch).
Begin wiring the Sidemarkers. Wiring can be bought from Radio Shack for a couple of bucks, make sure to get female connectors as well - I suggest you take one (1) of the Sidemarkers with you to Radio Shack to see which female connector size will fit best and if you need help picking out which wire to use just show them the sidemarker and ask. You have two options of how to wire your Sidemarkers: USDM or JDM. The difference between these is that on the USDM the Sidemarkers only blink when the turn signal is on, while on the JDM the Sidemarkers stay on and blink alternately with the turn signal. To gain access to the wires you need, simply pull back the fender liner and remove the parking light. There are three (3) wires going to the bulb, tap into the wires according to the style you want to use (USDM or JDM).
A wiring DIY diagram can be found here: https://www.hondacivicforum.com/foru...emarker+wiring and was written by our own Danomatic

USDM: Tap into the Green Wire (turn signal) and Black Wire (ground) wire.
JDM: Tap into Red Wire (parking light) and Green Wire (turn signal).
Put Sidemarkers in to test fit, make sure everything is good, if some notches are preventing the Sidemarker to go all the way in, then cut them off with the Metal Knibbler or Sand it down.
After you get a nice fit of the Sidemakers you can remove the masking tape and put them in, at this point you can do the optional step of adding Silicone or some type of sealer around the sidemarkers to prevent water from gaining access. After silicone is applied, wipe off excess that smeared onto the fender.
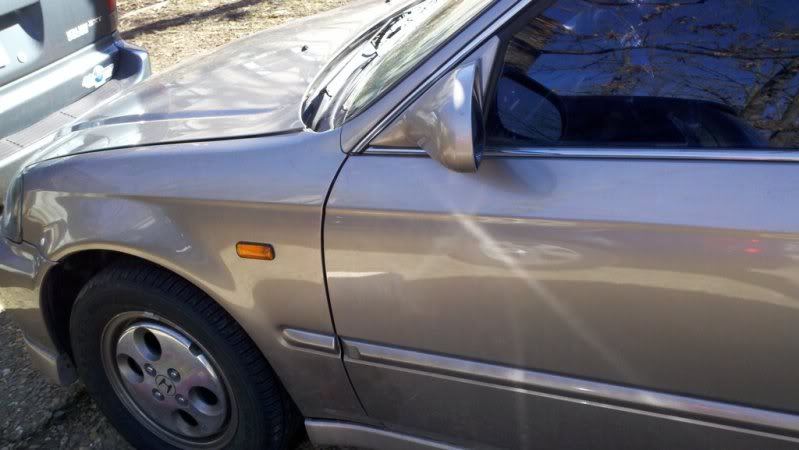
Picture of finished Product:
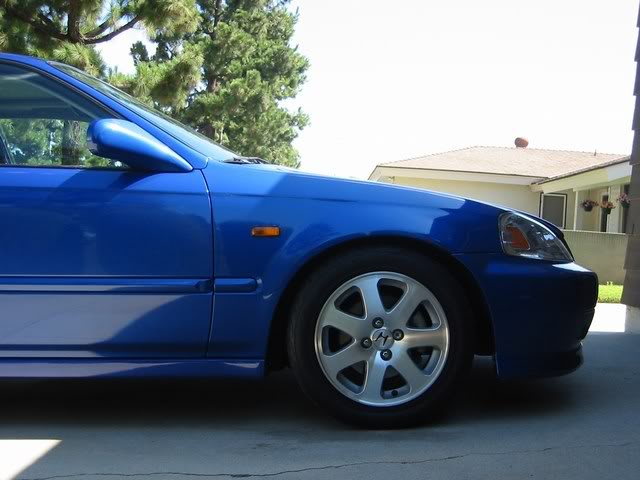
Here's pictures of my finished product:

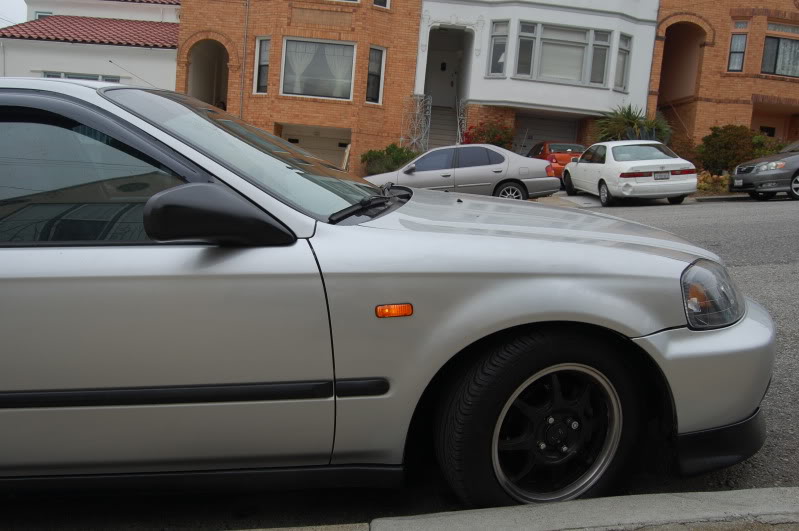
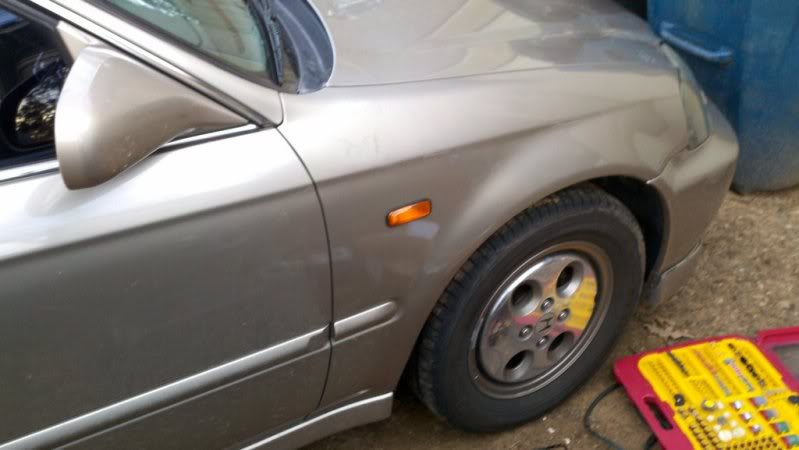
Here's another finished product from following this DIY:
I used this DIY when I installed my sidemarkers and found it pretty helpful so i'm sharing it with you guys.
NOTE:
What i did different was that i took the template and taped it onto a piece of cardboard. Then I took a razor blade and cut the template out and test fitted the sidemarkers into the template and make sure its a tight fit before i use that template on my fenders.
I Use the same cardboard and taped it onto my fender and used a pencil to make the outline on the fender like so: I folded the template up to check on the pencil outline to make sure that it showed.
I used a dremel instead of a metal nibbler.
REMEMBER: Take you time, Measure very accurately measure 10 times if you need to. Once you made a cut on your finder and you messed up. Your fender is done. Be Patient, Take Your time. and lastly, take little cuts and be accurate. It's better to undercut than overcut.
Disclaimer:
I am not responsible from any damages inflicted while you attempt to follow this DIY.
EK Sidemarkers:
Sidemarkers Template/Diagram:
Note: A tip given was to to cut the holes smaller than the template for a tighter fit.
You Can Download and Print the template here
DIY Installation Process:
You can see in the following pic the placement on the fender using the above Diagram. It is 155mm from the molding's top to the bottom of the masking tape and 140mm from the edge of the door to the edge of the masking tape's intersection.
The center/intersection of the two tapes is marked with an "X" - this is where the center of the Sidemarker will go.
Find the center of the Template and line it up with the tape, so that they overlap eachother and then tape it down.
Use a drill to make a small hole in the center of the template, then use a Metal Knibbler to cut the entire sidemarker area out. Metal Knibbler can be bought from Radio Shack - Although using it may be more time consuming it works great for this DIY and its safer than using a dremel.
Begin cutting the Fender, a "T" works best to start, but not necessary.
After you've cut the entire Sidemarker area (following the diagram provided) it should look like this. Remember to add some touch-up paint to the bare metal to prevent rust. Simply mask around the hole and spray paint it (color does not matter as the sidemarker will cover it - I used black on my Hatch).
Begin wiring the Sidemarkers. Wiring can be bought from Radio Shack for a couple of bucks, make sure to get female connectors as well - I suggest you take one (1) of the Sidemarkers with you to Radio Shack to see which female connector size will fit best and if you need help picking out which wire to use just show them the sidemarker and ask. You have two options of how to wire your Sidemarkers: USDM or JDM. The difference between these is that on the USDM the Sidemarkers only blink when the turn signal is on, while on the JDM the Sidemarkers stay on and blink alternately with the turn signal. To gain access to the wires you need, simply pull back the fender liner and remove the parking light. There are three (3) wires going to the bulb, tap into the wires according to the style you want to use (USDM or JDM).
A wiring DIY diagram can be found here: https://www.hondacivicforum.com/foru...emarker+wiring and was written by our own Danomatic
USDM: Tap into the Green Wire (turn signal) and Black Wire (ground) wire.
JDM: Tap into Red Wire (parking light) and Green Wire (turn signal).
Put Sidemarkers in to test fit, make sure everything is good, if some notches are preventing the Sidemarker to go all the way in, then cut them off with the Metal Knibbler or Sand it down.
After you get a nice fit of the Sidemakers you can remove the masking tape and put them in, at this point you can do the optional step of adding Silicone or some type of sealer around the sidemarkers to prevent water from gaining access. After silicone is applied, wipe off excess that smeared onto the fender.
Picture of finished Product:
Here's pictures of my finished product:
Here's another finished product from following this DIY:
Last edited by WellFedHobo; Jun 11, 2011 at 06:17 PM.

Thread
Thread Starter
Forum
Replies
Last Post