


I'm Taking the next step in HID's DONE...ish

Recognized HCF Member
Joined: Jun 2006
Posts: 11,203
From: Brownsburg, IN 46112
 RE: I'm Taking the next step in HID's
ya well id spend the money for the OEM ballast... cause like you said... they own all others! instant ON instant full brightness... hell ya id go for them! i hate that warm up time on mine! plus i never flash my headlights or anything because of that charging crap... i dont want any unessesary ON OFF.... cause if those ignitors go out... well they dont work 
keep us posted up with the retro......
keep us posted up with the retro......

Thread Starter
|
HCF Member
Joined: Nov 2005
Posts: 10,485
From: Cornwall, PEI.
RE: I'm Taking the next step in HID's
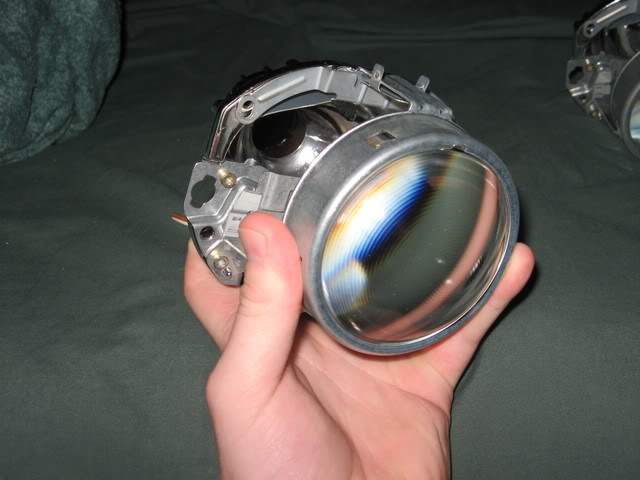
Well since it is a Bixenon it will be on all the time, only one bulb, it is the projector that is what makes it bixenon, so the bulb will always be on, i am just gonna get a connector for my current ballast and make a wiring harness for them so they recieve power right from the battery. so they charge up faster. then eventually once i have my visa and overdraft paid off i will get an OEM ballast
 , now i just need the bulbs connectors, and extra headlights and i can start this bitch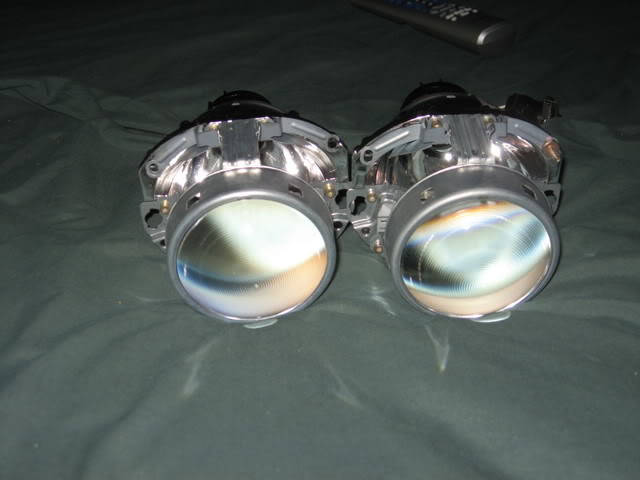
Recognized HCF Member
Joined: Jun 2006
Posts: 11,203
From: Brownsburg, IN 46112
RE: I'm Taking the next step in HID's
o just send em my way....LOL so how much you end up paying for those? i know ya said the ballasts where like 200bucks but how much for those projectors and bulbs?
Thread Starter
|
HCF Member
Joined: Nov 2005
Posts: 10,485
From: Cornwall, PEI.
RE: I'm Taking the next step in HID's*UPDATE*
Well i decided since i had the day off, and i had nothing to do, that i would begin the mounting, i picked up a spare headlight a few days ago,
I was unsure how i was going to do this as it seemed that i didn't have much room to work with
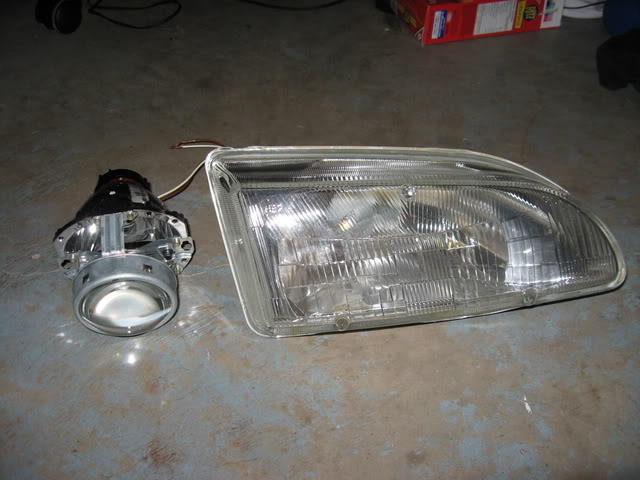
First preheat over to 200F, then place headlight in oven for 5 minutes. I turned the oven off before i put it in but it still worked, i didnt want to melt anything, it's best to place on a cooing sheet of some type.
Then i began mounting the headlight and seeing what i had to work with, The verdict.. ITS DOABLE!!!
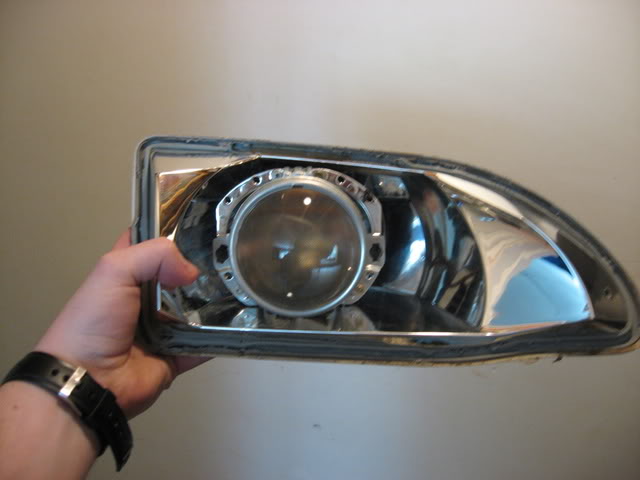
I cut off the back part of the headlight where the oem bulb mount and then test fitted,
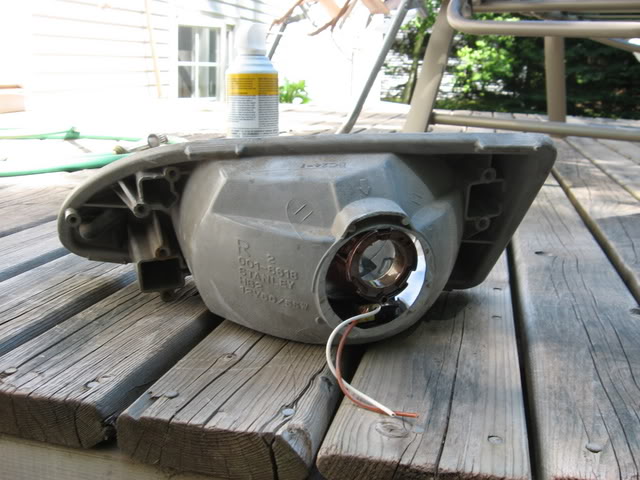
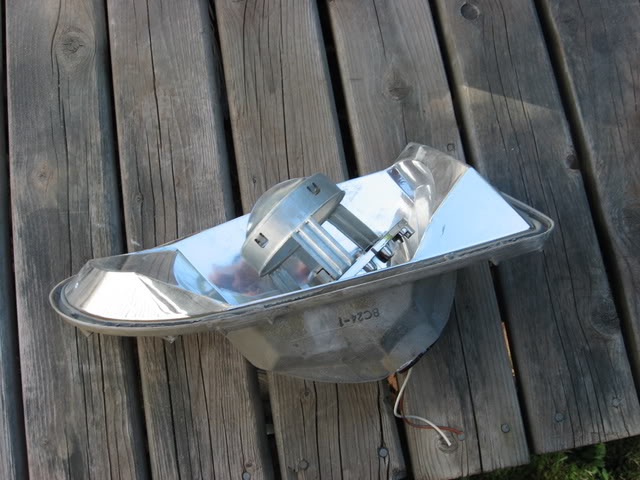
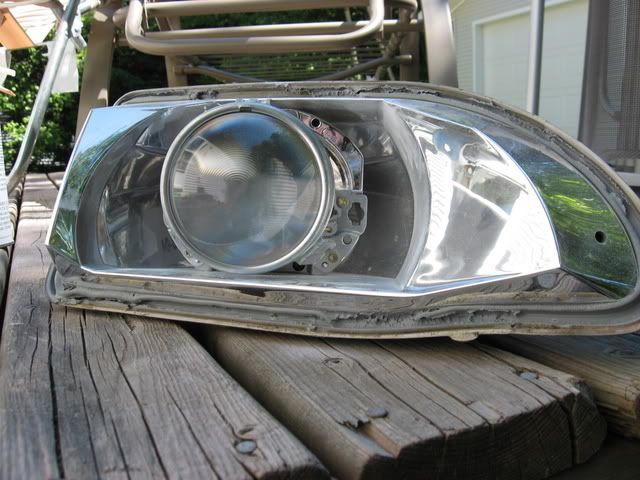
Then i began dremmling till it fit better and sat back further in the housing
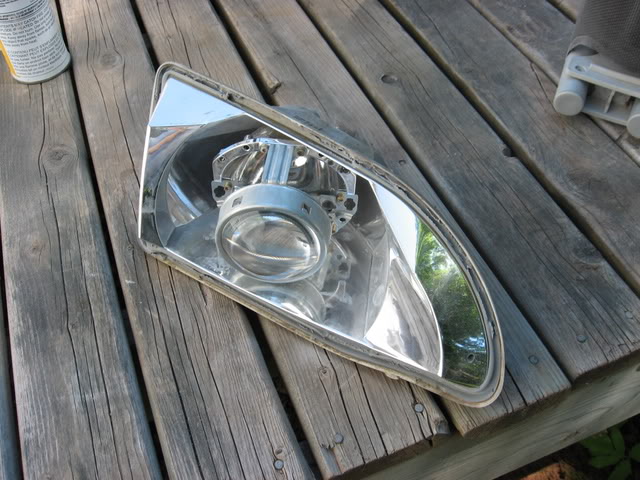
and this is what i have now(before permanent mounting)
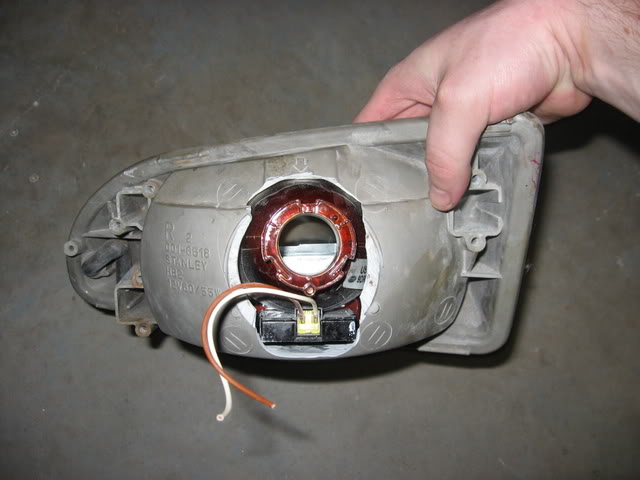
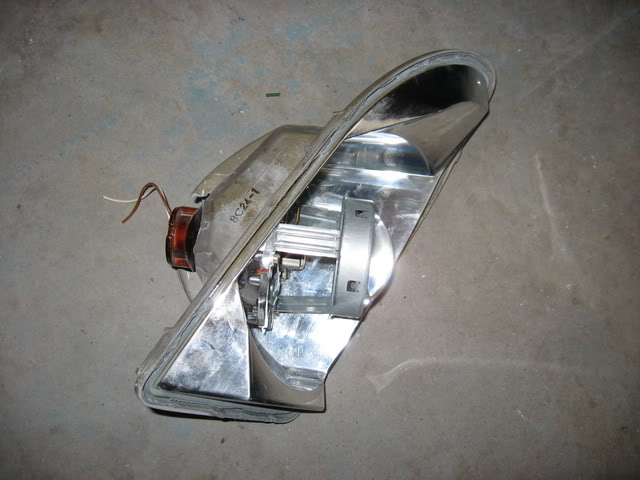
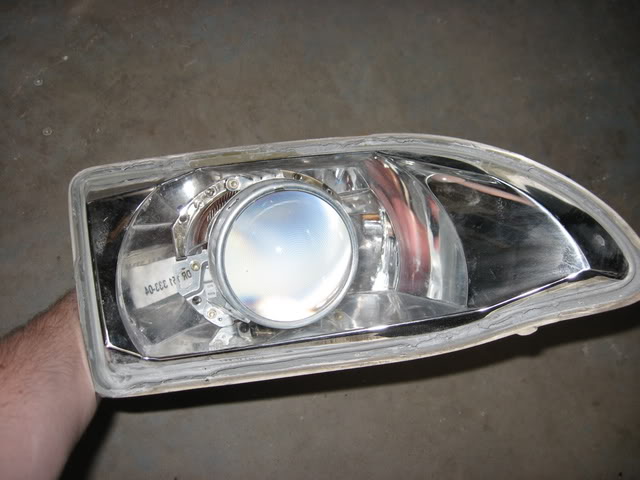
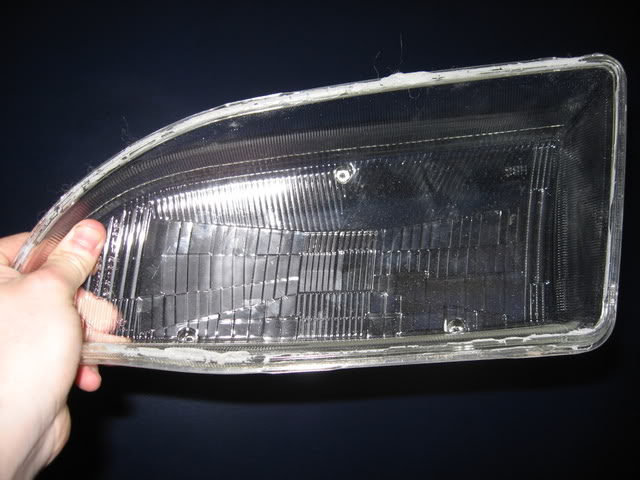
Now my only worry is the OEM headlight lens... it has more bumps and groves then my roads... but it is glass and sanding glass.. er... yeah... no one wants to breath that in...
I was unsure how i was going to do this as it seemed that i didn't have much room to work with
First preheat over to 200F, then place headlight in oven for 5 minutes. I turned the oven off before i put it in but it still worked, i didnt want to melt anything, it's best to place on a cooing sheet of some type.
Then i began mounting the headlight and seeing what i had to work with, The verdict.. ITS DOABLE!!!
I cut off the back part of the headlight where the oem bulb mount and then test fitted,
Then i began dremmling till it fit better and sat back further in the housing
and this is what i have now(before permanent mounting)
Now my only worry is the OEM headlight lens... it has more bumps and groves then my roads... but it is glass and sanding glass.. er... yeah... no one wants to breath that in...
Recognized HCF Member
Joined: Jun 2006
Posts: 11,203
From: Brownsburg, IN 46112
RE: I'm Taking the next step in HID's*UPDATE*
o ok....might i sugest some liquid plastic 
just use a heavy grit sandpaper to scratch up the inner headlight REALY GOOD and foil up the hid housing tightly wraped...
they got flexable stuff and hard stuff...
http://www.urethanesupply.com/Mercha...Store_Code=URE
http://www.urethanesupply.com/Mercha...Store_Code=URE
and a plastic cleaner and promotor
http://www.urethanesupply.com/Mercha...Store_Code=URE
http://www.urethanesupply.com/Mercha...Store_Code=URE
that stuff works great!!!! just sand the stock piece so it has a good surface to bond to..... then clean it and use the promoter then mix up the filler stuff and just apply... let dry and then sand.....
sands down just like bondo.... sticks beter than fiberglass and wont crack.... fiberglass is just to ruff and very hard to smooth a edge...
i used the flexable filler on my trucks dash and it turned out GREAT!!!!! id say slap that stuff around it..... smooth it out and paint it to match your cars paint color
tho if you could find the chrome ring that goes around the HIDs that would realy make them look sweet inside the headlights!
just use a heavy grit sandpaper to scratch up the inner headlight REALY GOOD and foil up the hid housing tightly wraped...
they got flexable stuff and hard stuff...
http://www.urethanesupply.com/Mercha...Store_Code=URE
http://www.urethanesupply.com/Mercha...Store_Code=URE
and a plastic cleaner and promotor
http://www.urethanesupply.com/Mercha...Store_Code=URE
http://www.urethanesupply.com/Mercha...Store_Code=URE
that stuff works great!!!! just sand the stock piece so it has a good surface to bond to..... then clean it and use the promoter then mix up the filler stuff and just apply... let dry and then sand.....
sands down just like bondo.... sticks beter than fiberglass and wont crack.... fiberglass is just to ruff and very hard to smooth a edge...
i used the flexable filler on my trucks dash and it turned out GREAT!!!!! id say slap that stuff around it..... smooth it out and paint it to match your cars paint color
tho if you could find the chrome ring that goes around the HIDs that would realy make them look sweet inside the headlights!