
My First Rebuild Y7/Z6


Thread Starter
|
HCF Member
Joined: Feb 2011
Posts: 68
From: Blahville, Arkansas
Sup Guys and Gals,
I'm pretty pumped up about this build and wanted to document it to the best of my abilities. If it wasn't for the net and all the info left behind by others I wouldn't have been able to do anything like this. So Thankz !
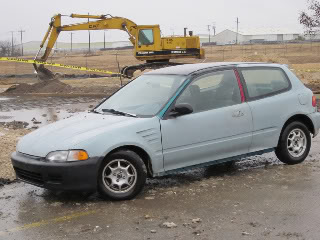
When I got this car (1995 VX) 3 years ago the only toolz I owned were made up of the bare home basics; a Hammer, couple screw drivers, vice grips, pliers, and 4 of those $5-$10 socket sets that everyone gets you for Christmas. I'm not a complete stranger to having to work on a car (poor folk do what that gotta do) but I never thought I'd attempt to rebuild an engine.
The reason for the build is mostly to get the engine(D15Z1) thats in my car now out. I want to rebuild the Z1 later. So why didn't I just do a quick swap with a used motor do ya ask, cause I can't stand the idea of putting someone else's POS motor in my car and just cross my fingers. Another thing is I was fed up and got sick of mechanics saying "Naw, I don't know nuttin bout dem dere Jap motors". So fine, SCREW THAT I say, I'll learn to do it myself!
The Goal is simple:
Build a reliable All Motor D-series with a lil bump in hp. This engine will be for a fun DD only and if it ever sees auto-x then cool. I just want to know I built it and it worked.
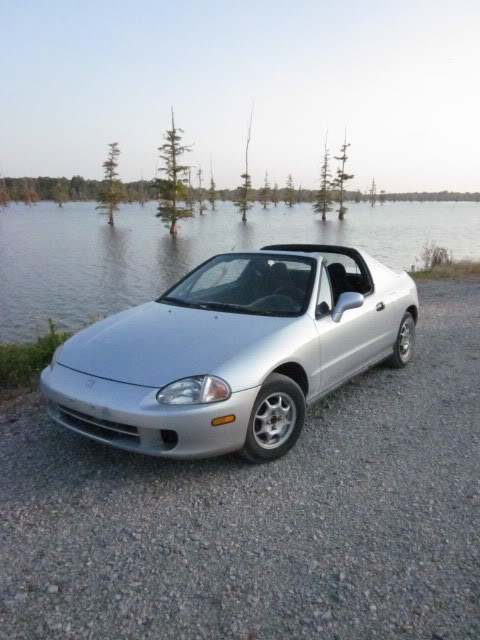
EDIT 7/26/2011: ^^^It's a nice story so I'll leave it unchanged (but things do change). A week ago today I bought a 1997 Del Sol S, D16Y7 w/ 138k miles, everything stock with A/C. Needing the extra cash I decided to sell the hatch, it was almost a hard decision. But the engine build goes on and will become apart of the new DD. The build continues.....
:::WARNING!!!::: User name Zen Chameleon is building his first ever engine, this said engine is not running yet. Asking user name Zen Chameleon for help could cause any or all, but not limited to:
headaches, frustration, blurred vision, dizziness, confusion, loss of sleep, constipation, diarrhea, projectile vomiting, bloody knuckels, unnecessary work and research, catastrophic engine failure, crying in front of your girlfriend, cronic ************, spontaneous combustion, suicidal thoughts, in some but rare cases could even lead you to achieving your goal or solving your issue.
If you have asked Zen Chameleon for technical advice and experienced any or all of these symptoms please seek professional help from somebody that has real world engine building knowledge and wisdom :::WARNING!!!:::
The "Accomplishment" List:
Head D16Z6:
Work done from Performance Porting:
Mild Port and Polish
3 angle valve job
SuperTech springs, new oem retainers
New oem cam and valve seals
Milled .003 for flatness
Hondata intake gasket
New extended intake studs
Freshly cleaned Z6 injectors
AEM cam gear
AEM fuel rail
B&M fuel pressure regulator
Marshal fuel pressure gauge
AEM CAI
NGK plug wires
D16Y7 block:
D16Z6 Crankshaft
Y/Z6, ARP head studs
ARP rod bolts
PG6 Pistons
P28 ECU socketed w/ Neptune RTP
98' EX Tranny
What's left:
Cam
Bearings
Gaskets&Seals
Oil pump
Water pump
Timing Belt
Machine work on Block= in progress
Wideband O2
Header
and most important Tuning
I think that's everything....if I missed something let me know please
Thankz for all the support
Performance Porting
Zealautowerks
A sneak peek of the '97 Del Sol, New DD/Project:
I'm pretty pumped up about this build and wanted to document it to the best of my abilities. If it wasn't for the net and all the info left behind by others I wouldn't have been able to do anything like this. So Thankz !
When I got this car (1995 VX) 3 years ago the only toolz I owned were made up of the bare home basics; a Hammer, couple screw drivers, vice grips, pliers, and 4 of those $5-$10 socket sets that everyone gets you for Christmas. I'm not a complete stranger to having to work on a car (poor folk do what that gotta do) but I never thought I'd attempt to rebuild an engine.
The reason for the build is mostly to get the engine(D15Z1) thats in my car now out. I want to rebuild the Z1 later. So why didn't I just do a quick swap with a used motor do ya ask, cause I can't stand the idea of putting someone else's POS motor in my car and just cross my fingers. Another thing is I was fed up and got sick of mechanics saying "Naw, I don't know nuttin bout dem dere Jap motors". So fine, SCREW THAT I say, I'll learn to do it myself!
The Goal is simple:
Build a reliable All Motor D-series with a lil bump in hp. This engine will be for a fun DD only and if it ever sees auto-x then cool. I just want to know I built it and it worked.
EDIT 7/26/2011: ^^^It's a nice story so I'll leave it unchanged (but things do change). A week ago today I bought a 1997 Del Sol S, D16Y7 w/ 138k miles, everything stock with A/C. Needing the extra cash I decided to sell the hatch, it was almost a hard decision. But the engine build goes on and will become apart of the new DD. The build continues.....
:::WARNING!!!::: User name Zen Chameleon is building his first ever engine, this said engine is not running yet. Asking user name Zen Chameleon for help could cause any or all, but not limited to:
headaches, frustration, blurred vision, dizziness, confusion, loss of sleep, constipation, diarrhea, projectile vomiting, bloody knuckels, unnecessary work and research, catastrophic engine failure, crying in front of your girlfriend, cronic ************, spontaneous combustion, suicidal thoughts, in some but rare cases could even lead you to achieving your goal or solving your issue.
If you have asked Zen Chameleon for technical advice and experienced any or all of these symptoms please seek professional help from somebody that has real world engine building knowledge and wisdom :::WARNING!!!:::
The "Accomplishment" List:
Head D16Z6:
Work done from Performance Porting:
Mild Port and Polish
3 angle valve job
SuperTech springs, new oem retainers
New oem cam and valve seals
Milled .003 for flatness
Hondata intake gasket
New extended intake studs
Freshly cleaned Z6 injectors
AEM cam gear
AEM fuel rail
B&M fuel pressure regulator
Marshal fuel pressure gauge
AEM CAI
NGK plug wires
D16Y7 block:
D16Z6 Crankshaft
Y/Z6, ARP head studs
ARP rod bolts
PG6 Pistons
P28 ECU socketed w/ Neptune RTP
98' EX Tranny
What's left:
Cam
Bearings
Gaskets&Seals
Oil pump
Water pump
Timing Belt
Machine work on Block= in progress
Wideband O2
Header
and most important Tuning
I think that's everything....if I missed something let me know please
Thankz for all the support
Performance Porting
Zealautowerks
A sneak peek of the '97 Del Sol, New DD/Project:
Last edited by Zen Chameleon; Aug 17, 2011 at 07:14 AM.
Thread Starter
|
HCF Member
Joined: Feb 2011
Posts: 68
From: Blahville, Arkansas
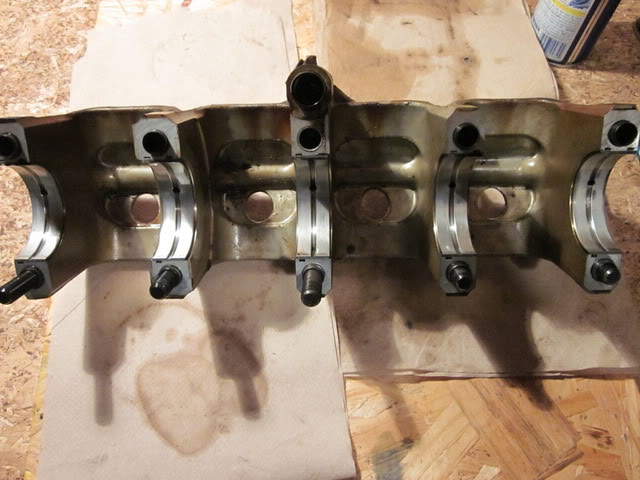
I snagged this D16Y7 from some random dude I ran into. He had yanked this motor out of a junkyard but it just sat around in his garage. I got the head still on the block and he tossed in some used axles, shift linkage, and some other junk. For the price of a pull it yourself short block I think I did alright.
This is the bottom end after pulling the head, crank pully and timing belt.
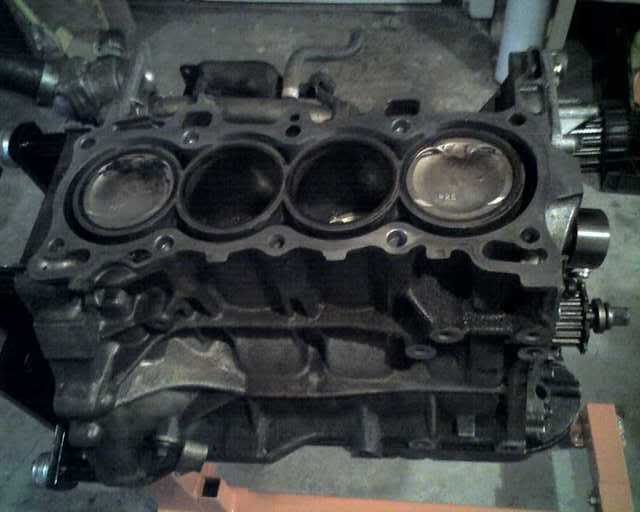
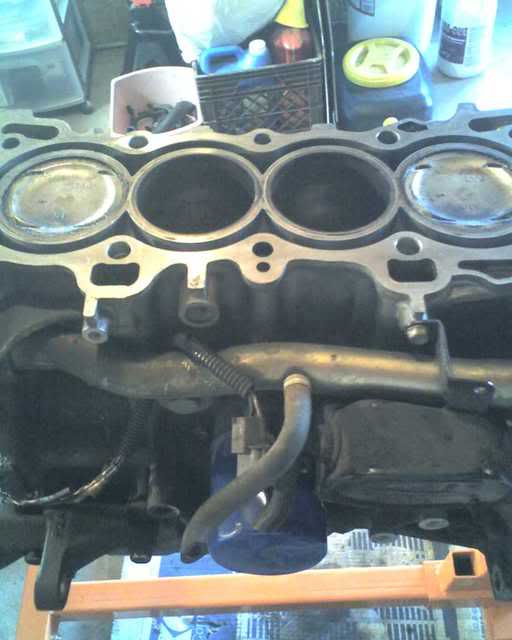

Sorry for the cell phone pix. I wish I would have waited to pull this apart so I could have done a full breakdown writeup but oh well.
This is the bottom end after pulling the head, crank pully and timing belt.
Sorry for the cell phone pix. I wish I would have waited to pull this apart so I could have done a full breakdown writeup but oh well.
Last edited by Zen Chameleon; Aug 17, 2011 at 07:16 AM.
Thread Starter
|
HCF Member
Joined: Feb 2011
Posts: 68
From: Blahville, Arkansas
After getting the engine mostly apart I knew I'd need a better work area so I built this bench:
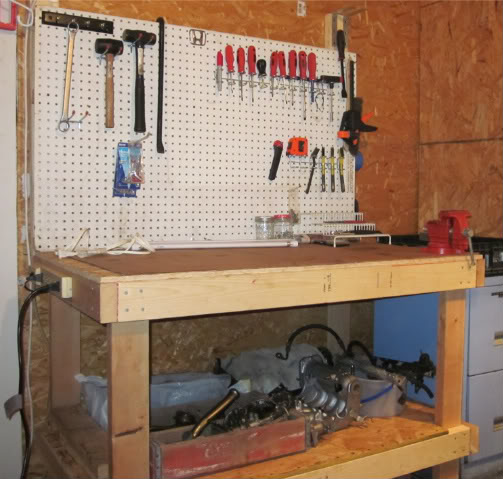
I still have to add the shelf and light and bolt that vise down.
I used this site as a template to make it easy My link
I then added the peg board/shelf and you can see my lil power supply on the side there. Most of the materials I had laying around, I had to pick up a few things.
I still have to add the shelf and light and bolt that vise down.
I used this site as a template to make it easy My link
I then added the peg board/shelf and you can see my lil power supply on the side there. Most of the materials I had laying around, I had to pick up a few things.
Last edited by Zen Chameleon; Aug 17, 2011 at 07:17 AM.
Thread Starter
|
HCF Member
Joined: Feb 2011
Posts: 68
From: Blahville, Arkansas
I picked this D16Z6 head up from the local Pick'N'Pull (3hours away) during their summer blow out 1/2 price sale. I couldn't pass it up knowing I plan to rebuild it anyway.
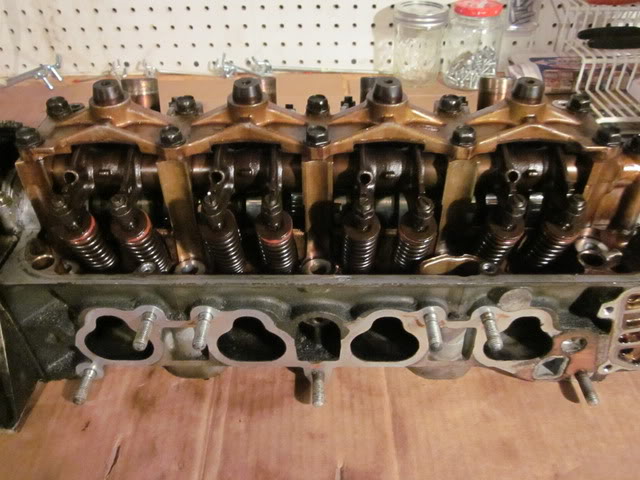
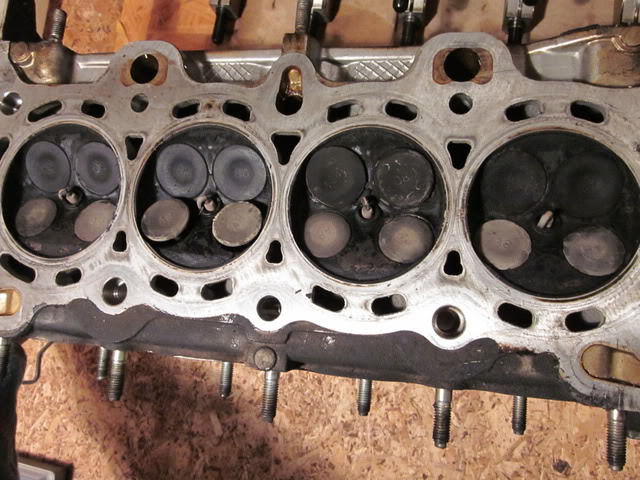
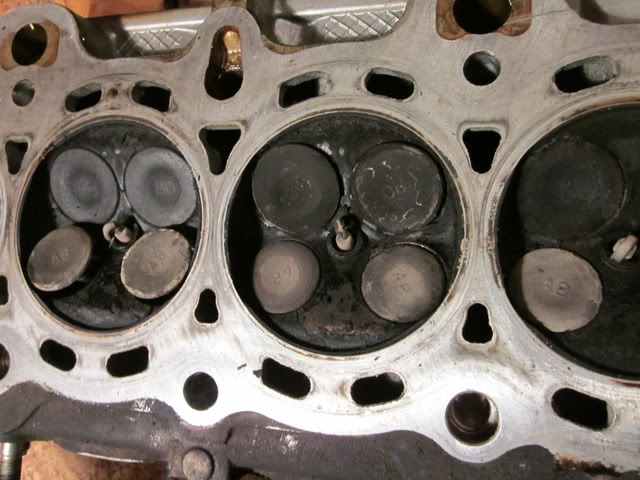
The valve cover had at least 3 coats of rattle can paint over top of it, Blue, Orange, and Black.
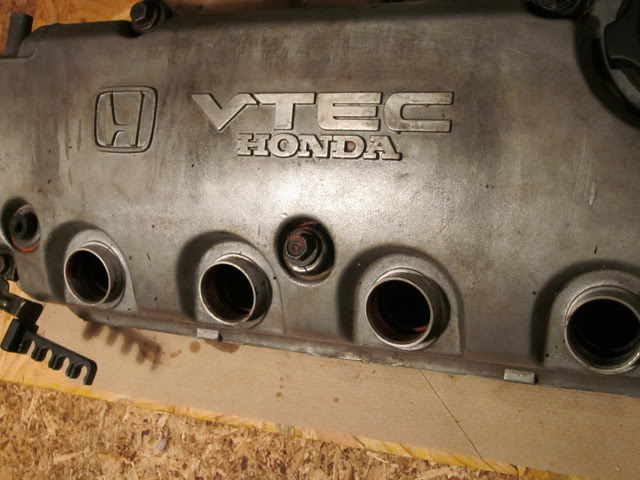
After hours of work it's almost clean. You can see the paint left on the "inside" of the plug holes.

It was obvious the PO had literally lifted the hood and covered everything in black spray paint.
Here is the Z6 intake manifold after lots of airplane stripper, degreaser, and brake cleaner.

If only you could have seen the before pics lol
The valve cover had at least 3 coats of rattle can paint over top of it, Blue, Orange, and Black.
After hours of work it's almost clean. You can see the paint left on the "inside" of the plug holes.
It was obvious the PO had literally lifted the hood and covered everything in black spray paint.
Here is the Z6 intake manifold after lots of airplane stripper, degreaser, and brake cleaner.
If only you could have seen the before pics lol
Last edited by Zen Chameleon; Aug 17, 2011 at 07:25 AM.
Thread Starter
|
HCF Member
Joined: Feb 2011
Posts: 68
From: Blahville, Arkansas
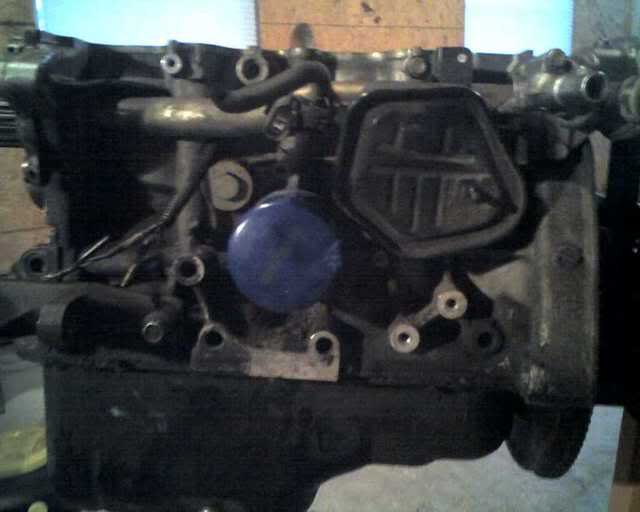
My favorite new tool takes some pretty decent pix I think.
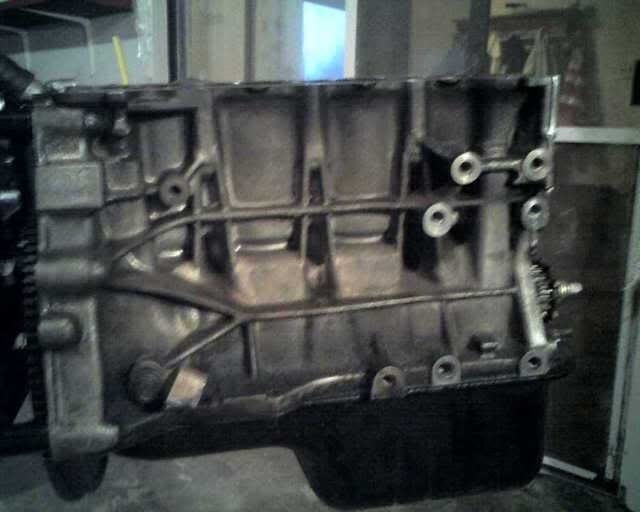
I got the block stripped down and everything "looks" to be in ok shape.
For some reason this camera makes things look cleaner than they really are, with that said I still have to clean up most everything seen here:
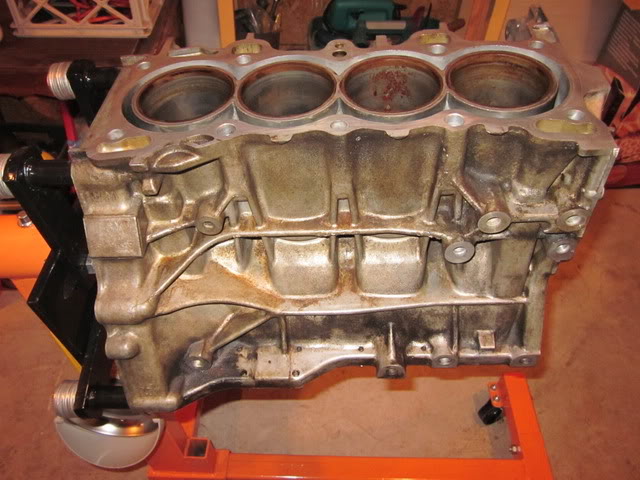
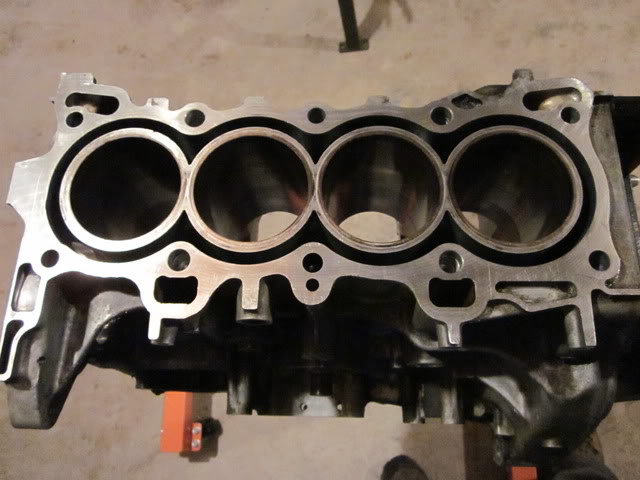
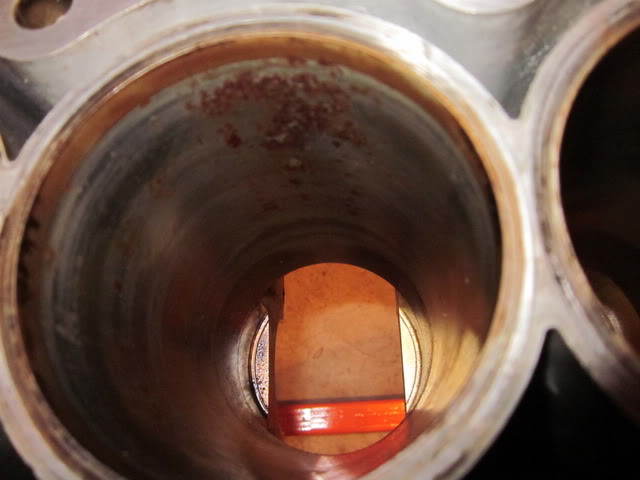
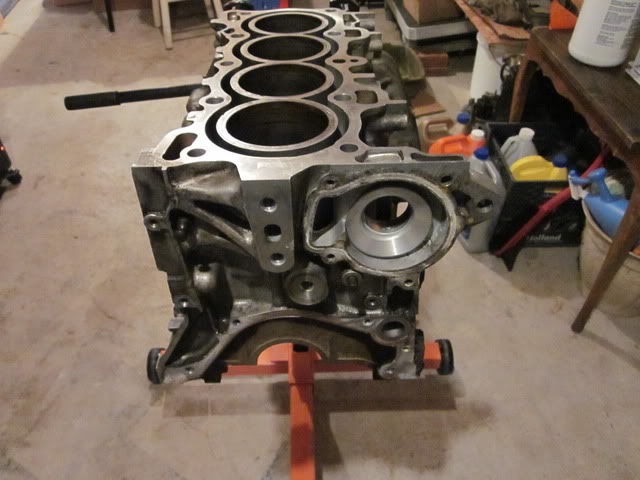
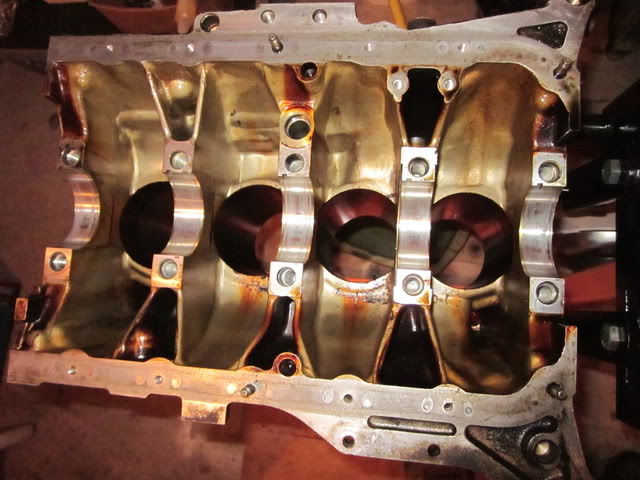
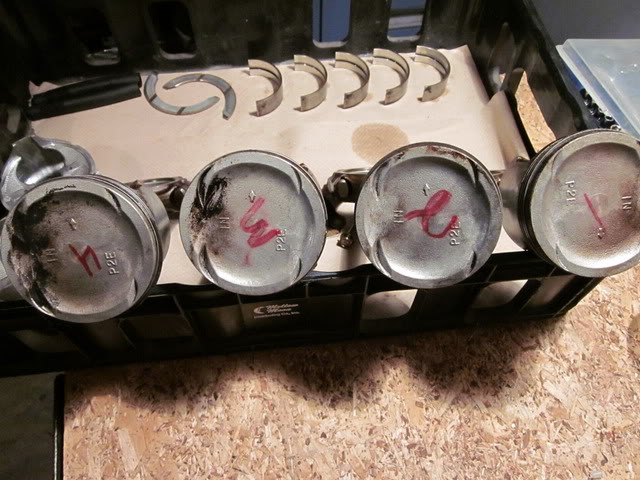
I got the block stripped down and everything "looks" to be in ok shape.
For some reason this camera makes things look cleaner than they really are, with that said I still have to clean up most everything seen here:
Last edited by Zen Chameleon; Aug 17, 2011 at 07:21 AM.
Thread Starter
|
HCF Member
Joined: Feb 2011
Posts: 68
From: Blahville, Arkansas
Not much of an update.
I picked up a Z6 dizzy and a Z6 crank. The dizzy I'll be able to test on my
D15Z1 which is a good thing. I'm saving up to get this block sent off next month...hitting that slow time in the build for awhile.


98' EX Tranny


I picked up a Z6 dizzy and a Z6 crank. The dizzy I'll be able to test on my
D15Z1 which is a good thing. I'm saving up to get this block sent off next month...hitting that slow time in the build for awhile.
98' EX Tranny
Last edited by Zen Chameleon; Aug 17, 2011 at 07:33 AM.
Thread Starter
|
HCF Member
Joined: Feb 2011
Posts: 68
From: Blahville, Arkansas
Instead of sending the block off this month I ran across a Great group buy with
Performance Porting over on OCO,
So when those slots get filled I'll be sending the head off to get it worked over real good
Performance Porting over on OCO,
So when those slots get filled I'll be sending the head off to get it worked over real good


Thread Starter
|
HCF Member
Joined: Feb 2011
Posts: 68
From: Blahville, Arkansas

Guess I'll update the first page with a pic of the ride that this engine will eventually go into. The poor hatchback is gonna have to wait till spring to see any TLC lol.