


Tightening Head Studs


Moderator
Joined: May 2007
Posts: 11,417
From: FL

 .
.kinda just made me go WTF?
lol


Thread Starter
|
HCF Member
Joined: May 2007
Posts: 677
It's pretty simple to do especially since you are just re-tightening them ... just removed the valve cover and tighten the bolts with a torque wrench. I don't remember but I think I tighten mine to 65 pound/ft ... 5 more pounds than what ARP suggested
Just remember to follow the tightening sequence
12 10 3 1 6 8 14
13 7 5 2 4 9 11
For the guys installing them for the first time...
Grease your bolts good with the ARP grease included, there is plenty of it so used a lot .
Hand tighten them first in the above order, use those little "L" things first to hand tighten the bolt all the way down and then hand tighten the nut.
Start torquing the bolts in increments.
For example torque all the bolts at 20 pounds/ft, then 40 pounds/ft and finally 65 pounds/ft.... all time following the bolt order (my cool diagram from above )
)
Drive the the car normally for about a week and re-tighten the bolts at 65 pounds/ft again and you're done.
Just remember to follow the tightening sequence
12 10 3 1 6 8 14
13 7 5 2 4 9 11
For the guys installing them for the first time...
Grease your bolts good with the ARP grease included, there is plenty of it so used a lot .
Hand tighten them first in the above order, use those little "L" things first to hand tighten the bolt all the way down and then hand tighten the nut.
Start torquing the bolts in increments.
For example torque all the bolts at 20 pounds/ft, then 40 pounds/ft and finally 65 pounds/ft.... all time following the bolt order (my cool diagram from above
)Drive the the car normally for about a week and re-tighten the bolts at 65 pounds/ft again and you're done.

HCF Member
Joined: May 2005
Posts: 1,240
From: Bay Area
You mean a 6 point socket vs a 12 point socket? If so, used the 6 point socket because they have a better grip. I had more bolts striped on me when using the 12 point.
I don't remember.. but unless the head bolts have those weird heads where they have many little sides, then use the 12 point.
I don't remember.. but unless the head bolts have those weird heads where they have many little sides, then use the 12 point.
Thread Starter
|
HCF Member
Joined: May 2007
Posts: 677
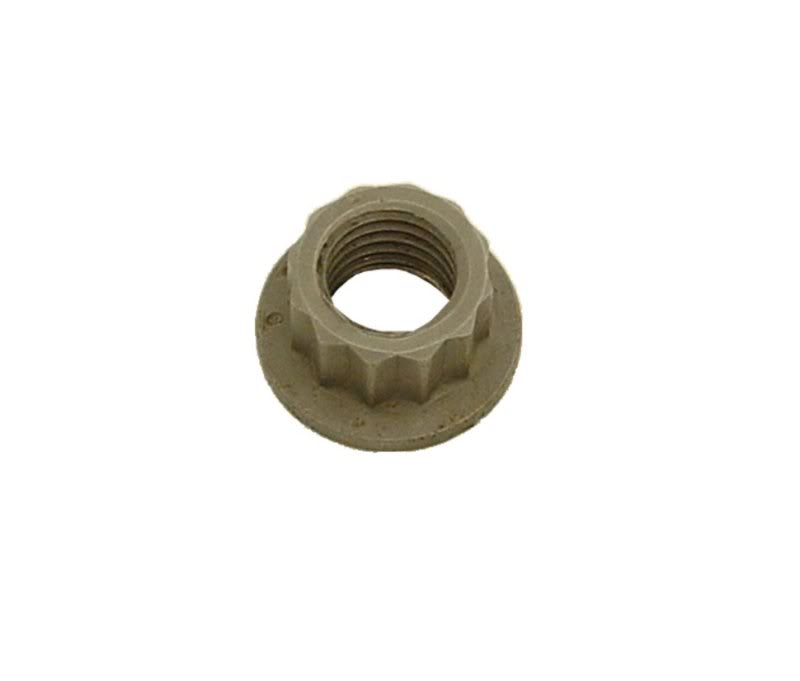
I found a website that told me they are 12 point nuts. I tried using a 13mm 6 point socket but it just slipped around the top of the head stud nut after i tried to torque it. 12mm is too small and so is 1/2", so im pretty sure its a 13mm, will the 12 point socket work?
Last edited by bcrichguitars; Apr 16, 2009 at 11:17 AM.
Thread Starter
|
HCF Member
Joined: May 2007
Posts: 677
Yes that is what it looks like and after going out and buying a 13mm 12 point socket thats too large, i found out its a 12mm. Kind of weird that the 12mm 6-point socket wont fit but a 12mm 12-point socket will fit.
EDIT: Just loosened and then re-torqued all the head studs to 60ft/lbs following the order in your diagram. I went to 30 and then 60. Also changed the valve cover gasket and sparkplug seals.
EDIT: Just loosened and then re-torqued all the head studs to 60ft/lbs following the order in your diagram. I went to 30 and then 60. Also changed the valve cover gasket and sparkplug seals.
Last edited by bcrichguitars; Apr 17, 2009 at 01:54 PM.

Thread
Thread Starter
Forum
Replies
Last Post
95lsvtec
Private 'Wanted' Classifieds
2
Feb 14, 2006 11:46 PM
