


Pioneer Headunit Blown Pico Fuse Fix


Thread Starter
|
HCF Member
Joined: Aug 2007
Posts: 201
From: Colorado Springs, CO
 Pioneer Headunit Blown Pico Fuse Fix
So, as much as I love Pioneer head units, they have a really, REALLY stupid problem. If you hot swap any RCA's (pull out or plug in an RCA to a preout while the unit is on) there's a very high chance that your units pico fuse will blow. As far as I can tell, all it does is *mostly* kill the ground to the preouts and give you a bunch of engine noise. I noticed at least one other person with this problem, so I decided to post this.
This is being done on a 2004 Pioneer DEH-P6600 that I got when I was 16 and didn't have any common sense. I screwed up the rear preout right when I got it assuming that rear probably meant sub. Like I said, 16 and no common sense. :P Anyhow, a couple weeks ago a door lock wire somehow wiggled loose behind the stereo, I went to fix it, stereo was on when I pulled it (wasn't paying attention, I was peeved at troubleshooting my power lock problem) and I messed up my front/rear preouts which are on the same fuse.
Imagine your subs humming at top volume with your engine, and anything that has electrical current. The subs are already going "boom boom boom boom boom" just from the engine noise, you lock the doors, "WHAM!" roll down the window "WHAM!" Turn on the wipers "WHAM!". Needless to say, I thought my stereo was shot.
I ordered a fancy new unit (Pioneer DEH-P510UB). But I was bored and stereoless waiting for it to arrive so I decided to research what could have gone wrong with my unit. One word: Pico fuses.
QUICK FIX
Here's the quick fix, I drove around with this for three days and it got rid of 80-85% of the engine noise. Soldering gets rid of all the engine noise, but this does help a LOT if you aren't comfortable soldering.
Supplies needed:
1. Some wire. About 3" completely stripped, and if you have a wired rear preout, about six inches of wire to run from the front/sub preouts to the rear preouts.
2. A screwdriver
3. Electrical tape is greatly prefered, but something to hold the rear preouts together.
Then, do this:
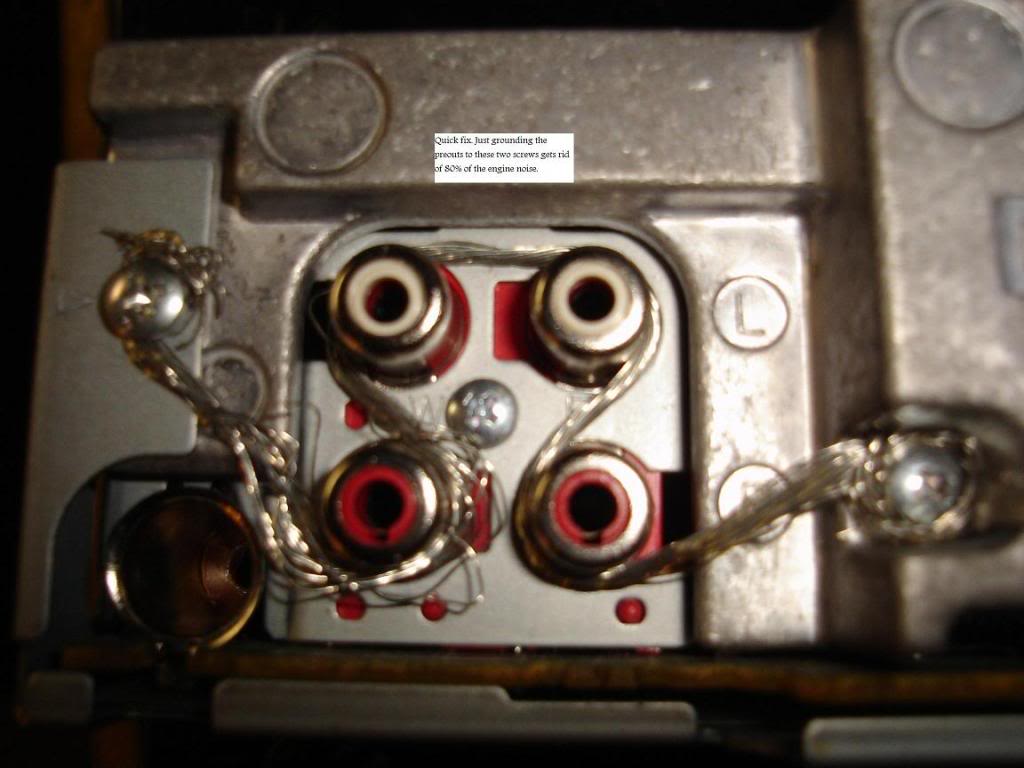
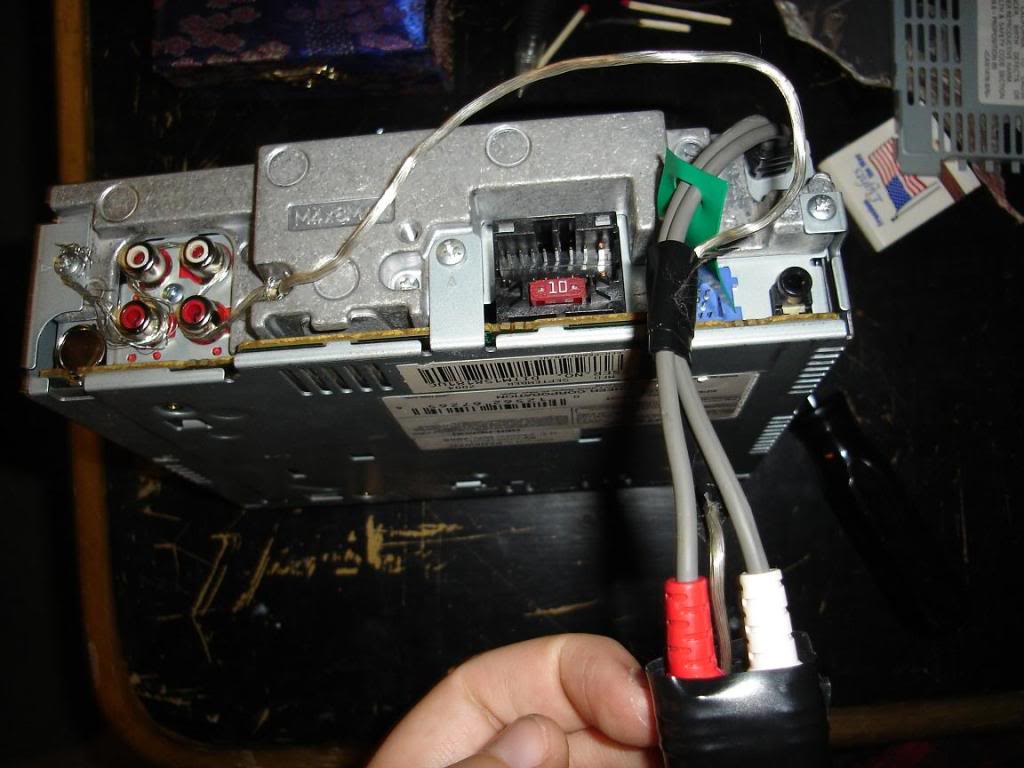
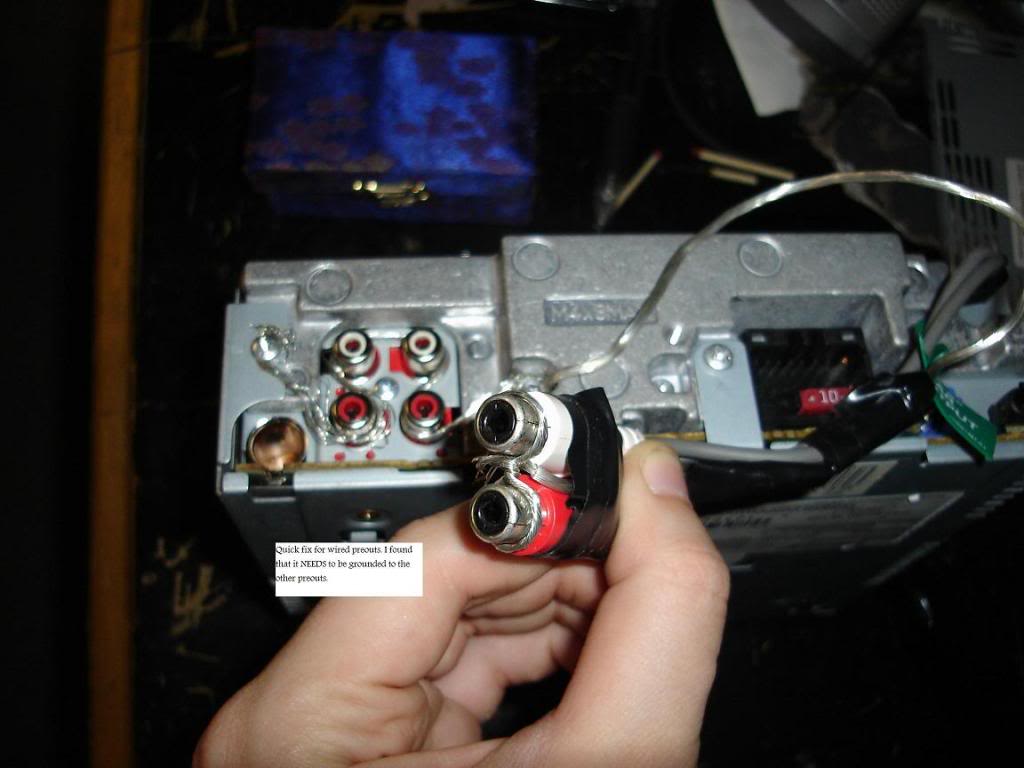
The pictures should be self explanatory, you are grounding the outside of the preouts with the unit's casing. I've found that the rear preout MUST be grounded to the same spot as the front/sub preouts.
---------------------------------------------------------------------------------------
A BETTER FIX
Soldering completely gets rid of the engine noise So, here's how to bypass the pico fuses via soldering, its really easy, but there is next to no information on replacing them besides "send it into Pioneer". This is going to vary from unit to unit, but it should be the same concept. Do this at your own risk, it worked for me, but make sure you understand what you are doing.
REQUIRED:
1. Decent sized Phillips screwdriver.
2. Flat head screwdriver
3. Needle nose pliers
4. Soldering iron + solder
5. Patience.
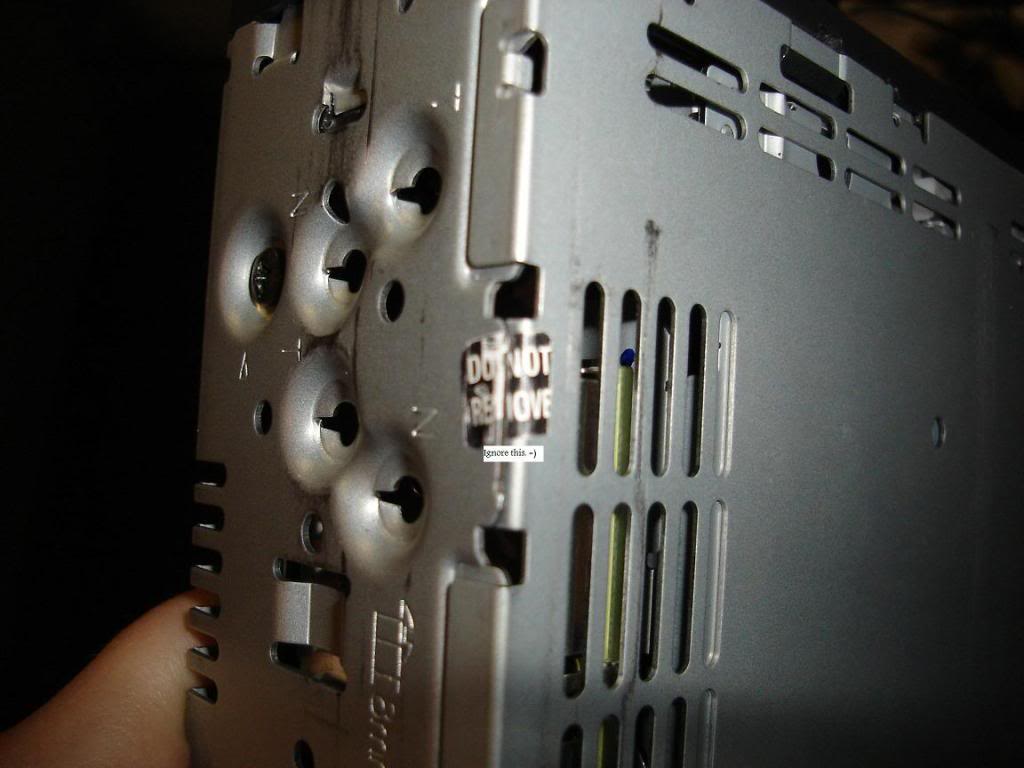
1. Start by taking off every single screw on the sides and back of the unit. The top of the unit's casing should pop off. Ignore the "DO NOT REMOVE" sticker.
2. Next is the CD drive. Its held in by four screws. Lift it up then disconnect the morlex connector.
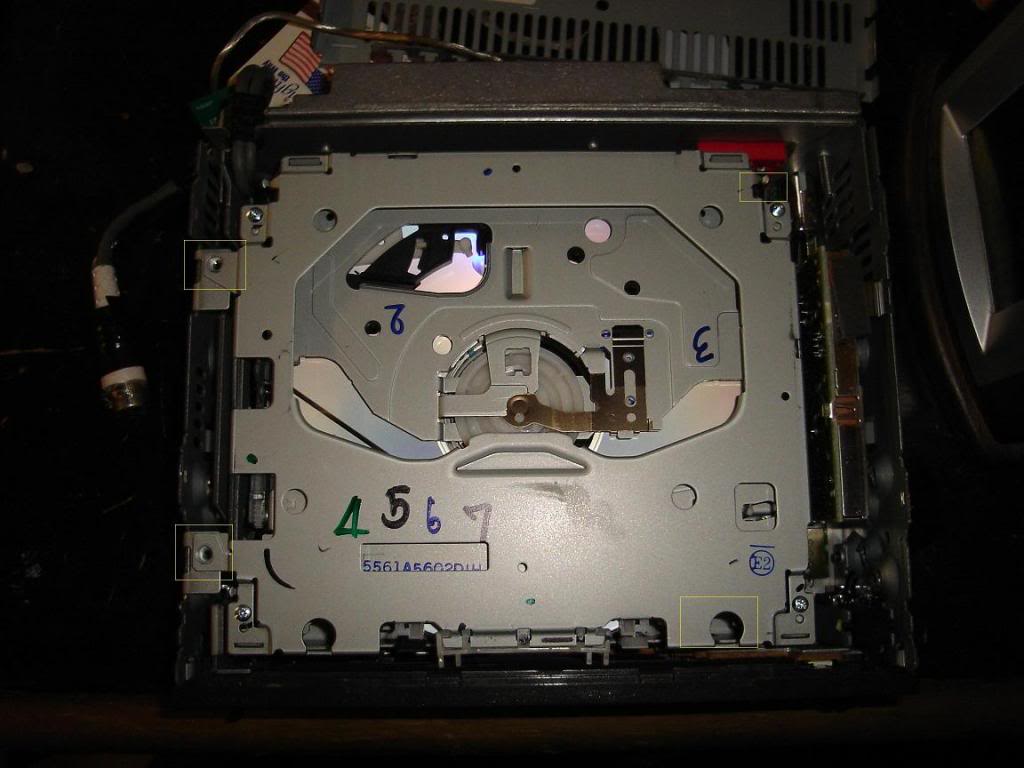
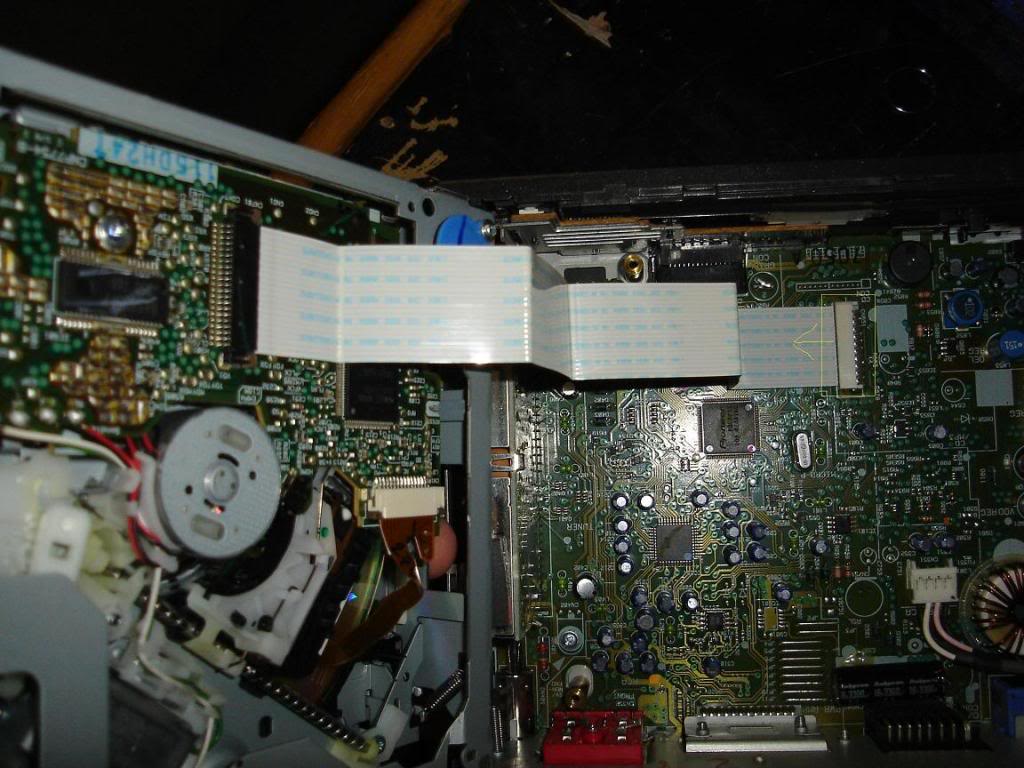
3. You should be able to get the rear heatsink out now. Get that out, then take off the front of the unit off. Assuming you got all the screws out in the beginning, all you have to do is use a flat head to push the clips in.
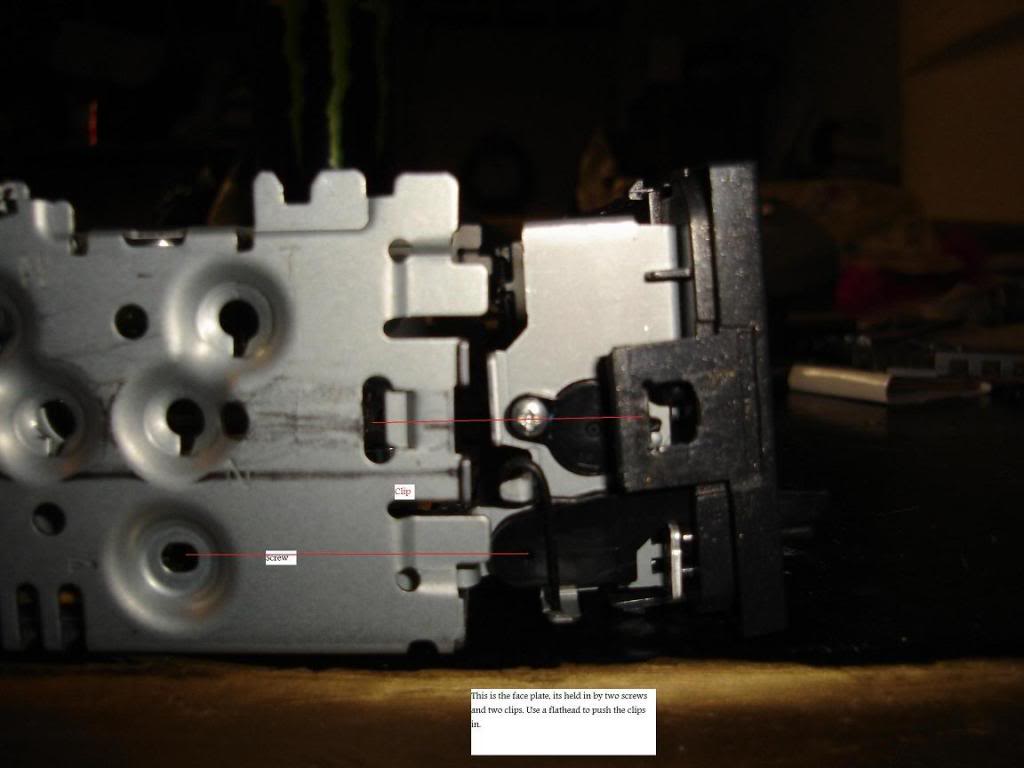
Then to get board out there is one screw, and a three tabs that you have to bend straight with needle nose pliers. Make sure those tabs are straight, its going to save a lot of frustration when putting it back in. Plug in your soldering iron now.
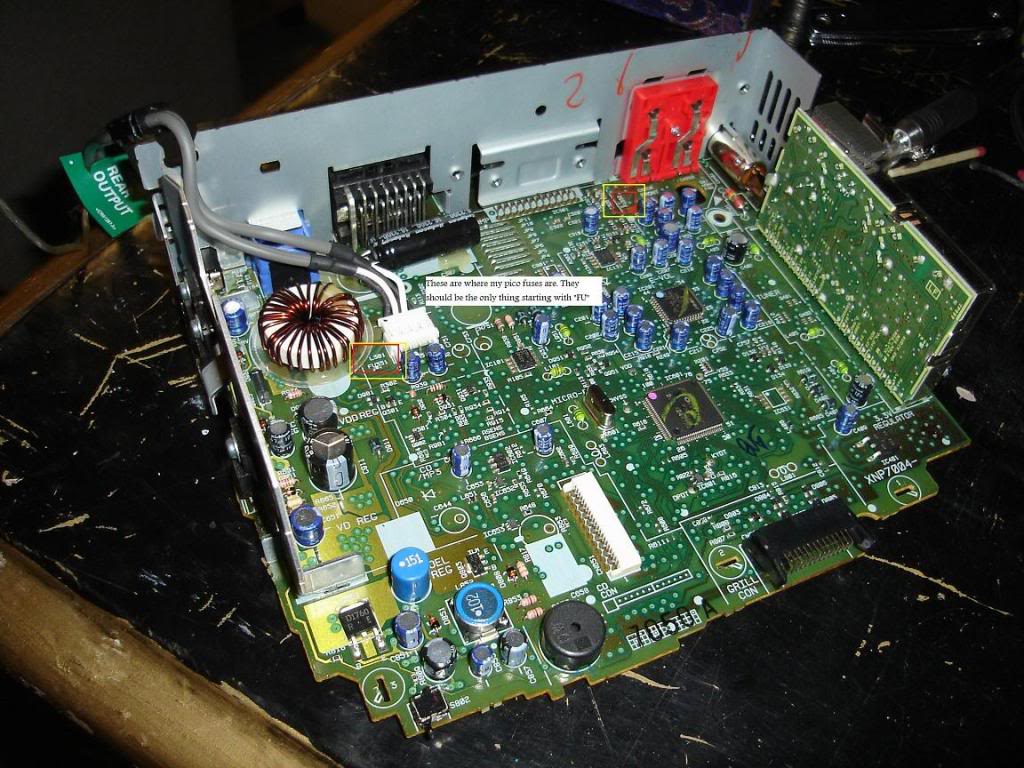
4. Circuit board should be as free as it can get by now. Time to find the fuses. They will be the only thing marked by "FUxxx" - the x's are numbers. The tiny fuse will also have a "P" on it, stands for Pico I assume. My unit has two fuses because the front and sub preouts are on one fuse, and the rear preout is on another.
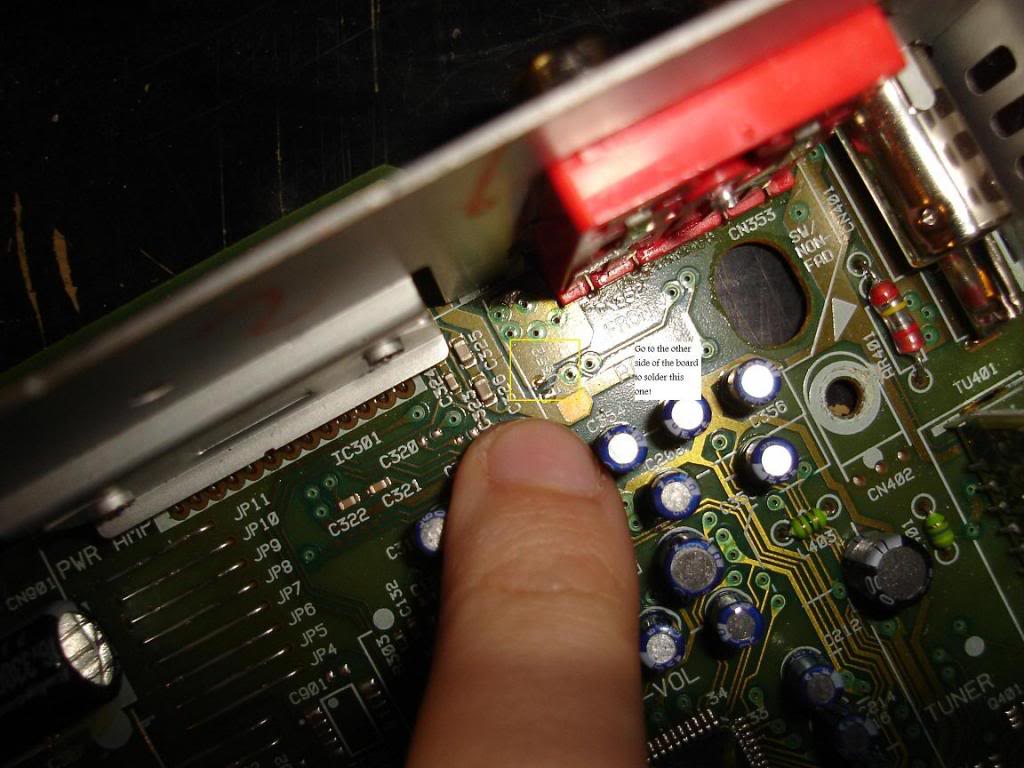
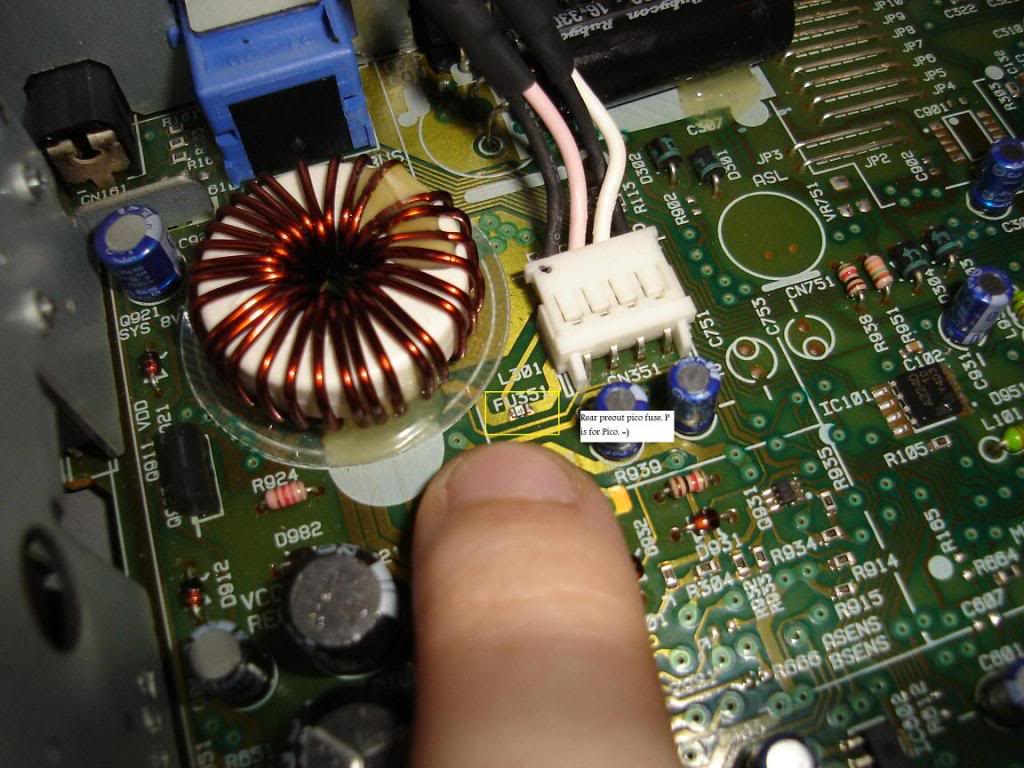
5. Now, don't be stupid like me and drink or eat anything like these while soldering. Makes me shaky as heck. I'm blaming these on my solder joints, they were nowhere near my normal par. :P

6. Figure out which side of the board is easier to solder on, it was easier to do the front/sub on the bottom of the board, and the rear on the top (okay, the rear was going to be a pita regardless). They are sooooo close together that it will only take a tiny bit of solder, so be really, really careful.
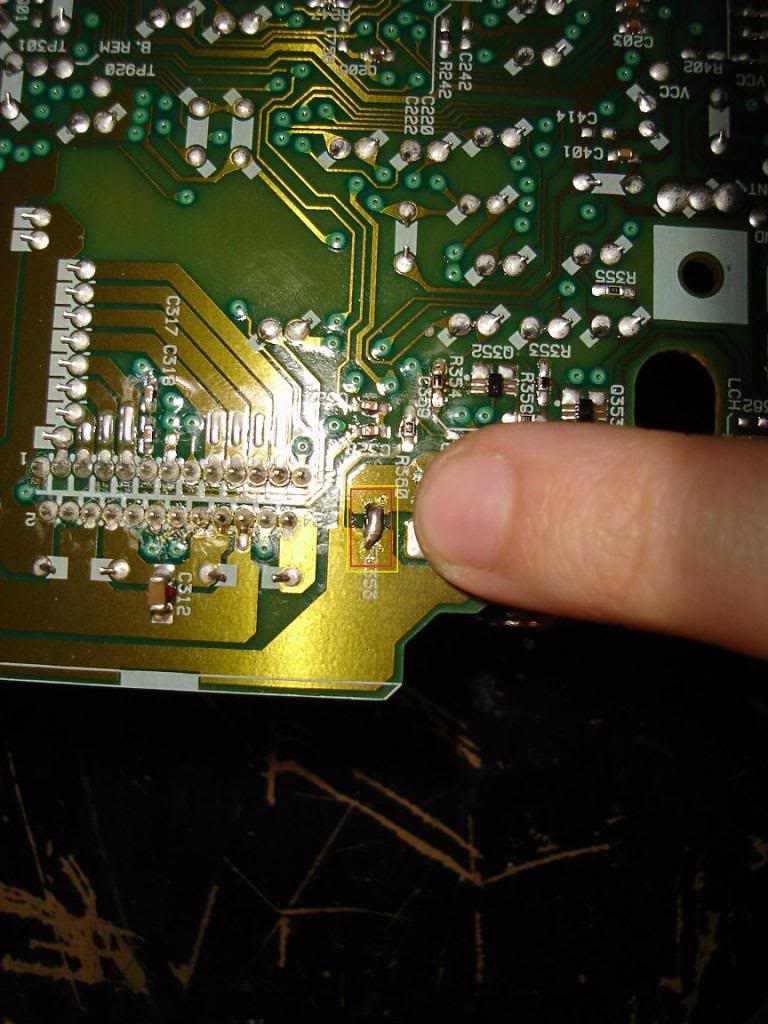
7. Thats pretty much it. Put everything back together and go test it out. Make sure you put the stupid heatsink back in first. There should be ZERO engine noise now. I've been driving around with this fix for five days - no engine noise.
This is being done on a 2004 Pioneer DEH-P6600 that I got when I was 16 and didn't have any common sense. I screwed up the rear preout right when I got it assuming that rear probably meant sub. Like I said, 16 and no common sense. :P Anyhow, a couple weeks ago a door lock wire somehow wiggled loose behind the stereo, I went to fix it, stereo was on when I pulled it (wasn't paying attention, I was peeved at troubleshooting my power lock problem) and I messed up my front/rear preouts which are on the same fuse.
Imagine your subs humming at top volume with your engine, and anything that has electrical current. The subs are already going "boom boom boom boom boom" just from the engine noise, you lock the doors, "WHAM!" roll down the window "WHAM!" Turn on the wipers "WHAM!". Needless to say, I thought my stereo was shot.
I ordered a fancy new unit (Pioneer DEH-P510UB). But I was bored and stereoless waiting for it to arrive so I decided to research what could have gone wrong with my unit. One word: Pico fuses.
QUICK FIX
Here's the quick fix, I drove around with this for three days and it got rid of 80-85% of the engine noise. Soldering gets rid of all the engine noise, but this does help a LOT if you aren't comfortable soldering.
Supplies needed:
1. Some wire. About 3" completely stripped, and if you have a wired rear preout, about six inches of wire to run from the front/sub preouts to the rear preouts.
2. A screwdriver
3. Electrical tape is greatly prefered, but something to hold the rear preouts together.
Then, do this:
The pictures should be self explanatory, you are grounding the outside of the preouts with the unit's casing. I've found that the rear preout MUST be grounded to the same spot as the front/sub preouts.
---------------------------------------------------------------------------------------
A BETTER FIX
Soldering completely gets rid of the engine noise So, here's how to bypass the pico fuses via soldering, its really easy, but there is next to no information on replacing them besides "send it into Pioneer". This is going to vary from unit to unit, but it should be the same concept. Do this at your own risk, it worked for me, but make sure you understand what you are doing.
REQUIRED:
1. Decent sized Phillips screwdriver.
2. Flat head screwdriver
3. Needle nose pliers
4. Soldering iron + solder
5. Patience.
1. Start by taking off every single screw on the sides and back of the unit. The top of the unit's casing should pop off. Ignore the "DO NOT REMOVE" sticker.
2. Next is the CD drive. Its held in by four screws. Lift it up then disconnect the morlex connector.
3. You should be able to get the rear heatsink out now. Get that out, then take off the front of the unit off. Assuming you got all the screws out in the beginning, all you have to do is use a flat head to push the clips in.
Then to get board out there is one screw, and a three tabs that you have to bend straight with needle nose pliers. Make sure those tabs are straight, its going to save a lot of frustration when putting it back in. Plug in your soldering iron now.
4. Circuit board should be as free as it can get by now. Time to find the fuses. They will be the only thing marked by "FUxxx" - the x's are numbers. The tiny fuse will also have a "P" on it, stands for Pico I assume. My unit has two fuses because the front and sub preouts are on one fuse, and the rear preout is on another.
5. Now, don't be stupid like me and drink or eat anything like these while soldering. Makes me shaky as heck. I'm blaming these on my solder joints, they were nowhere near my normal par. :P
6. Figure out which side of the board is easier to solder on, it was easier to do the front/sub on the bottom of the board, and the rear on the top (okay, the rear was going to be a pita regardless). They are sooooo close together that it will only take a tiny bit of solder, so be really, really careful.
7. Thats pretty much it. Put everything back together and go test it out. Make sure you put the stupid heatsink back in first. There should be ZERO engine noise now. I've been driving around with this fix for five days - no engine noise.

HCF Member
Joined: Jul 2007
Posts: 743
From: BX, NYC
Nice post man, i know this has to do with my post about the motor wine. I'm hoping i can eliminate my issue with just wires because i cant solder and will just end up having to buy a new head unit which is going to suck because i don't have spare case like that right now.
Thread Starter
|
HCF Member
Joined: Aug 2007
Posts: 201
From: Colorado Springs, CO
Yeah, you were one of the reasons I posted this. I also had extreme difficulty finding any information about fixing this problem when I was researching, and hcf always has a tendency of coming up on Google, so I figured I'd attempt to help other people.
From the few pictures I've seen of other Pioneer circuit boards, if all your preouts are on the back (aka no crappy wired one like mine has) it should be a decently isolated spot. The rear preout fuse was hell to solder, I bet you can see why though. :P
From the few pictures I've seen of other Pioneer circuit boards, if all your preouts are on the back (aka no crappy wired one like mine has) it should be a decently isolated spot. The rear preout fuse was hell to solder, I bet you can see why though. :P

Junior Member
Joined: Aug 2010
Posts: 2
dude thanks so much!!! omg i thought i was going to throw my pioneer deh p6600 2006 series away. i have alt whine and stuff just like you described through my rear pre outs and front ive tried using both. i dont see much in the subs but a lil. so the object is basically just to use solder as a permanent fuse? so i just want to connect the thetwo ends using solder and it should work after that. my fuses are a lil different but its the same thing right?
thanks so much once again, your the only one who posted something that will actually fix it and fix it right!
thanks so much once again, your the only one who posted something that will actually fix it and fix it right!


Thread
Thread Starter
Forum
Replies
Last Post


