
AEM Filter Cleaning


Thread Starter
|
Laced with Sarcasm
Joined: Mar 2005
Posts: 15,280
Big thanks to civicexracer for putting up another DIY
This is a pretty simple DIY. If you could install your AEM intake, then you shouldn't have a problem with this. AEM recommends doing this I believe every 30k miles or so under severe conditions. I've had my intake on for about a year and a half and through 2 winters, I probably didn't need to do this but I figured why the hell not. I'd say from start to finish along with setting up my camera for these pictures it took about an hour an a half, most of which is just waiting.
Materials needed:
-Ratchet
-10mm socket
-Soft bristle brush
-Sink or garden hose
-AEM filter cleaning kit
-Some time and patience
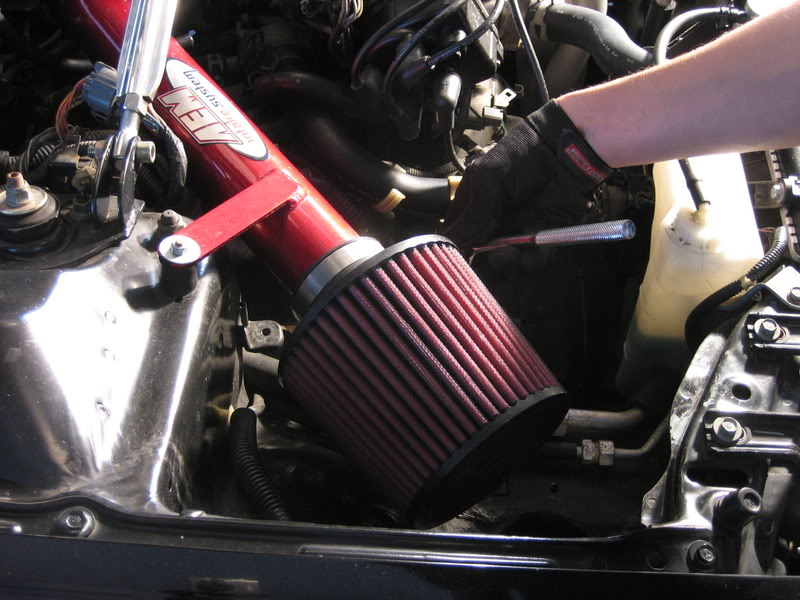
First start by taking off the filter. Use the 10mm socket and ratchet and loosen the clamp to the filter and remove the filter. You're going to have the filter off for quite some time so I suggest putting some tape or rag over the intake tube so nothing crawls in there or you somehow leave a tool or w/e in there.
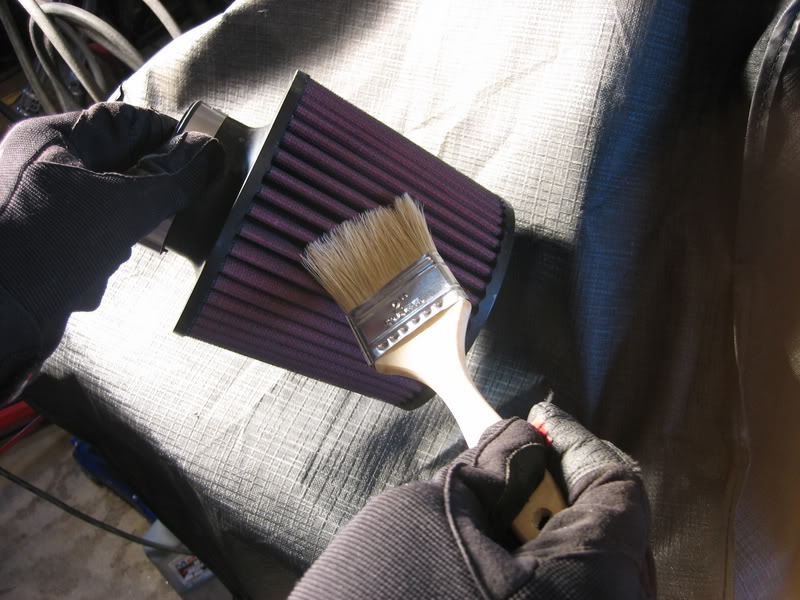
Next use the brush to clean off whatever loose dust, dirt, leaves, etc that may be on the filter. Be careful not to damage the filter.
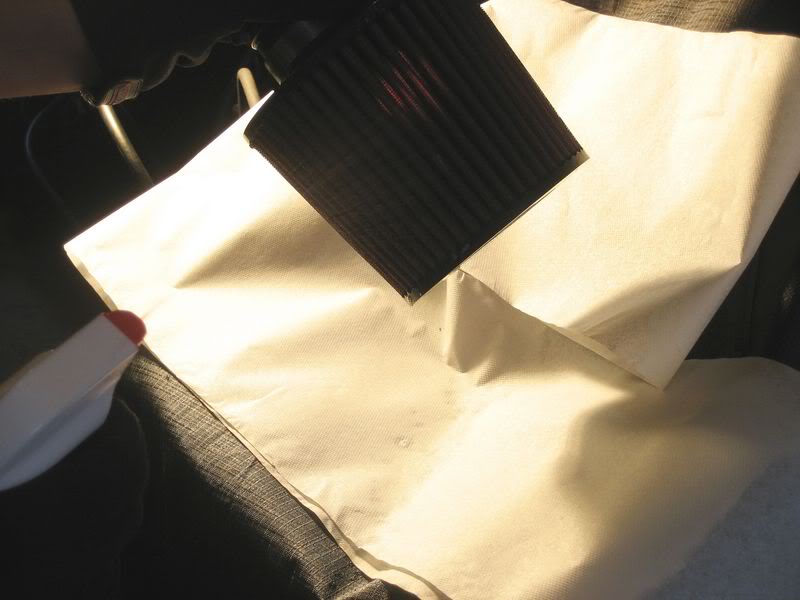
Then use the spray that the AEM cleaning kit provides. Spray the filter down pretty well. Once finished spaying, let it sit and dry. Do not dry using towels, heat lamps, microwave. it must air dry on its own, shouldn't take much more than 30mins or so.
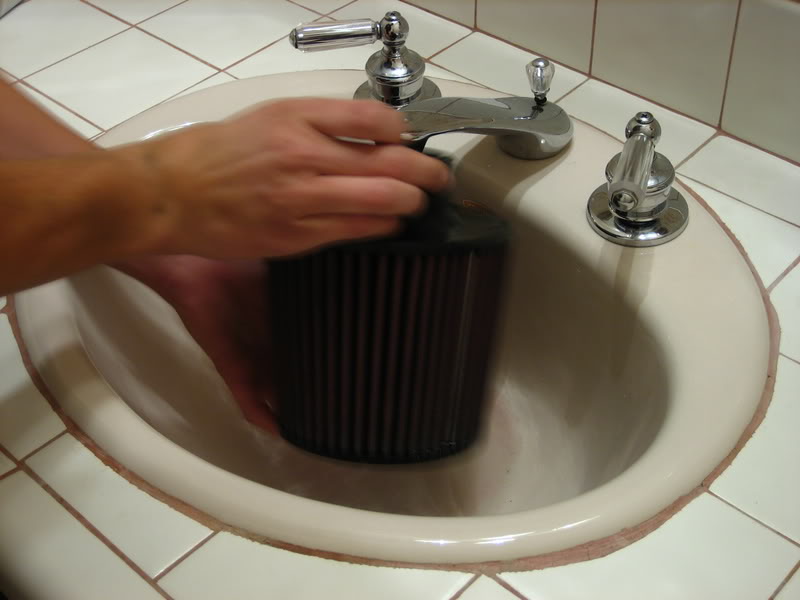
Once dried, rinse the filter under the sink or a garden hose from the inside. You want to rise from the inside so any dust or dirt particles don't become imbedded in the filter. Do not use any kind of pressurized adapters; just run the water through the filter straight from the hose or sink. Be careful not to tear the filter. When rinsing, you may notice a red dye color bleeding off of the filter, don't worry, it's just some of the oil that was still on the filter. Your fancy red filter will still be red later on. Once done rinsing, let it air dry again. This could take upwards of 30mins. Make sure it's completely dry inside and out before next step.
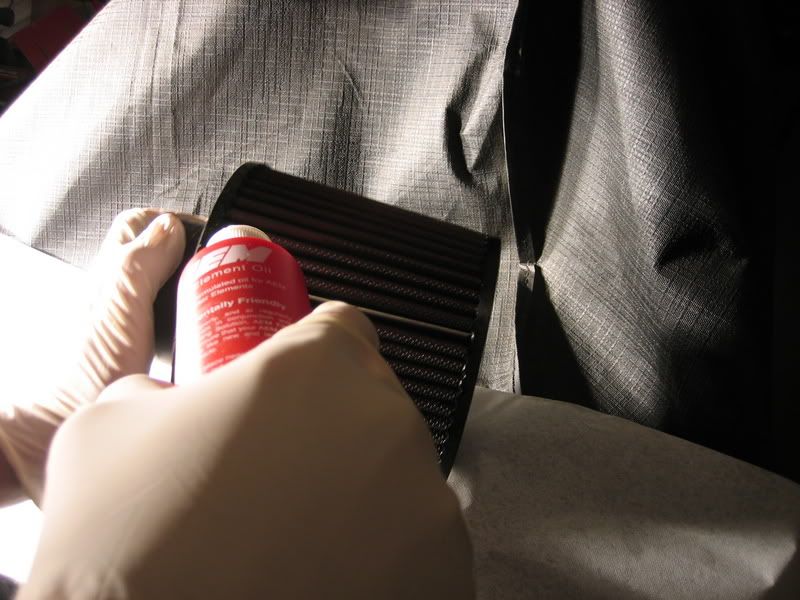
After filter has completely dried off, it's time to re-oil it. Use small amounts of the oil on each fin and in-between each fin. Remember what I said not worrying about the red dye? That's because the oil that AEM provides has a red dye to it. Take your time and make sure that you don't over do the oil. After oiling, let it sit for a few minutes. Once dry, check each fin to make sure there are no dry spots. If you find a dry spot just add a drop of oil to that spot.
Once everything is oiled up, check again for any tears in the filter then put it back on your car. That's it; real simple but just takes some time. If you have any questions feel free to PM me.
This is a pretty simple DIY. If you could install your AEM intake, then you shouldn't have a problem with this. AEM recommends doing this I believe every 30k miles or so under severe conditions. I've had my intake on for about a year and a half and through 2 winters, I probably didn't need to do this but I figured why the hell not. I'd say from start to finish along with setting up my camera for these pictures it took about an hour an a half, most of which is just waiting.
Materials needed:
-Ratchet
-10mm socket
-Soft bristle brush
-Sink or garden hose
-AEM filter cleaning kit
-Some time and patience
First start by taking off the filter. Use the 10mm socket and ratchet and loosen the clamp to the filter and remove the filter. You're going to have the filter off for quite some time so I suggest putting some tape or rag over the intake tube so nothing crawls in there or you somehow leave a tool or w/e in there.
Next use the brush to clean off whatever loose dust, dirt, leaves, etc that may be on the filter. Be careful not to damage the filter.
Then use the spray that the AEM cleaning kit provides. Spray the filter down pretty well. Once finished spaying, let it sit and dry. Do not dry using towels, heat lamps, microwave. it must air dry on its own, shouldn't take much more than 30mins or so.
Once dried, rinse the filter under the sink or a garden hose from the inside. You want to rise from the inside so any dust or dirt particles don't become imbedded in the filter. Do not use any kind of pressurized adapters; just run the water through the filter straight from the hose or sink. Be careful not to tear the filter. When rinsing, you may notice a red dye color bleeding off of the filter, don't worry, it's just some of the oil that was still on the filter. Your fancy red filter will still be red later on. Once done rinsing, let it air dry again. This could take upwards of 30mins. Make sure it's completely dry inside and out before next step.
After filter has completely dried off, it's time to re-oil it. Use small amounts of the oil on each fin and in-between each fin. Remember what I said not worrying about the red dye? That's because the oil that AEM provides has a red dye to it. Take your time and make sure that you don't over do the oil. After oiling, let it sit for a few minutes. Once dry, check each fin to make sure there are no dry spots. If you find a dry spot just add a drop of oil to that spot.
Once everything is oiled up, check again for any tears in the filter then put it back on your car. That's it; real simple but just takes some time. If you have any questions feel free to PM me.
Last edited by WellFedHobo; Jan 30, 2010 at 01:33 PM.

Thread
Thread Starter
Forum
Replies
Last Post