


Cvcrcr's project/fix-up thread (version 1.1)



^^ Wait, your car is an auto? I had no idea.
Quick update... took the head off, replaced the dowel pins and head gasket, moved a whole **** load of vacuum tubing/coolant hoses around and deleted P/S. The bay looks a lot nicer now and I am loving the feedback feel in the steering wheel when turning. I just have to get used to parallel parking and turning my car around in a tight spot without P/S. It'll come with time. I'll have pics tomorrow of how everything looks.
Bad News: the oil leak is still present. However, I still can justify having to buy a replacement HG since the head needed to come off to replace the dowel pins, remove P/S, and re-arrange most all hoses etc. It was a lot easier to move everything around with half the motor out of the bay.
Good News: My buddy and I were looking everything over since it was still leaking oil a little and realized it is my cam seal (it is a little wet and has some blackish type residue around it. Should be a fixed with $15 and about 2 hours of work. Hopefully, getting that done by the end of the week.
RC 440's have been ordered and are on their way now! Should be here early next week. All I have to do it clean up the injector clip wiring and I'll be good to go from then on (well, until my clutch goes out).
Quick update... took the head off, replaced the dowel pins and head gasket, moved a whole **** load of vacuum tubing/coolant hoses around and deleted P/S. The bay looks a lot nicer now and I am loving the feedback feel in the steering wheel when turning. I just have to get used to parallel parking and turning my car around in a tight spot without P/S. It'll come with time. I'll have pics tomorrow of how everything looks.
Bad News: the oil leak is still present. However, I still can justify having to buy a replacement HG since the head needed to come off to replace the dowel pins, remove P/S, and re-arrange most all hoses etc. It was a lot easier to move everything around with half the motor out of the bay.
Good News: My buddy and I were looking everything over since it was still leaking oil a little and realized it is my cam seal (it is a little wet and has some blackish type residue around it. Should be a fixed with $15 and about 2 hours of work. Hopefully, getting that done by the end of the week.
RC 440's have been ordered and are on their way now! Should be here early next week. All I have to do it clean up the injector clip wiring and I'll be good to go from then on (well, until my clutch goes out).
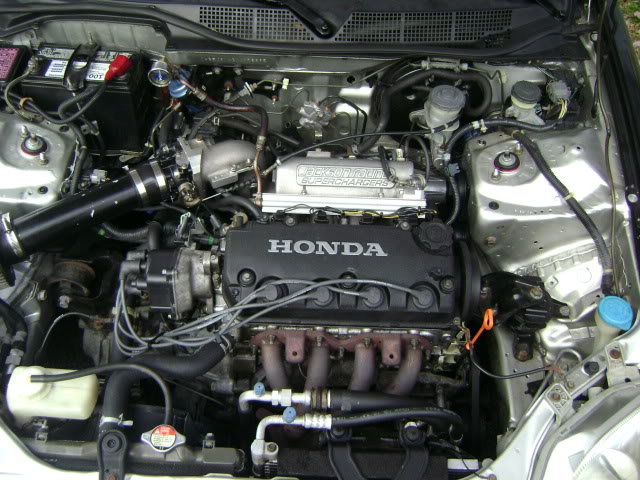

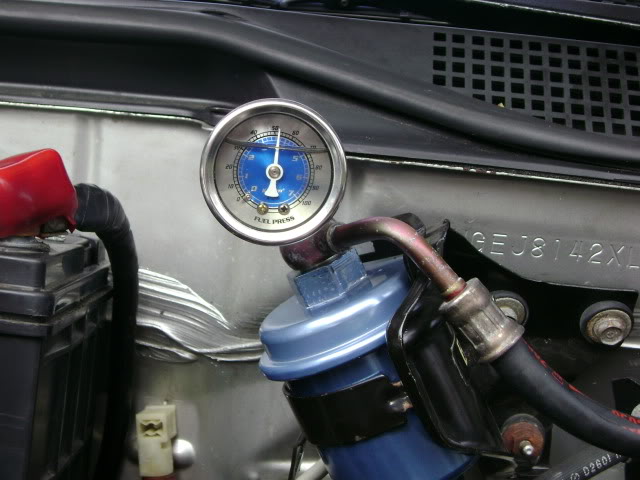

My newest addition: RC SL9-440's
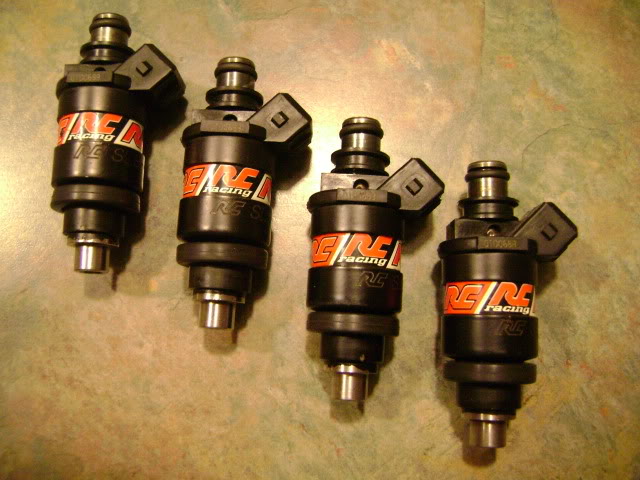
Should be installed tonight. I'll also end up shrink tubing all the wiring for the injectors tonight as well to make everything look better.
Does anyone know what will need to be done in order for these to run 100% in my car???? I am speaking of the tuning aspect. Anyone else have a s300 and tunes their car themselves? Do I just simply change the injector size in Hondata (Smanager) from 240 to 440 and then I'm done? I do know that these injectors do not require a resistor box as they are saturated (high impedance), and I already have the OBD1 injectors clips installed. I appreciate any input.
Should be installed tonight. I'll also end up shrink tubing all the wiring for the injectors tonight as well to make everything look better.
Does anyone know what will need to be done in order for these to run 100% in my car???? I am speaking of the tuning aspect. Anyone else have a s300 and tunes their car themselves? Do I just simply change the injector size in Hondata (Smanager) from 240 to 440 and then I'm done? I do know that these injectors do not require a resistor box as they are saturated (high impedance), and I already have the OBD1 injectors clips installed. I appreciate any input.
Quick update.... actually out with a buddy right now and in process of making a new tune for the 440's. Randomly found a free wi-fi connection and decided to update the thread.
Tuning in progress!!!
Tuning in progress!!!
Been busy the past couple days with a bunch of non-civic related stuff. Here are two updated pics of the engine bay at the moment. The injector wires have been heat shrinked, wrapped in electrical tape, and tucked away as best as possible. If anyone has a suggestion on how they could be hidden more so, or if they would look better if tucked in a different spot, post it up!
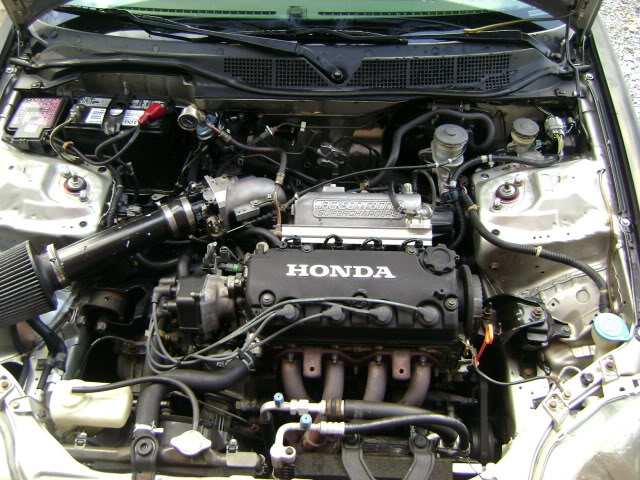
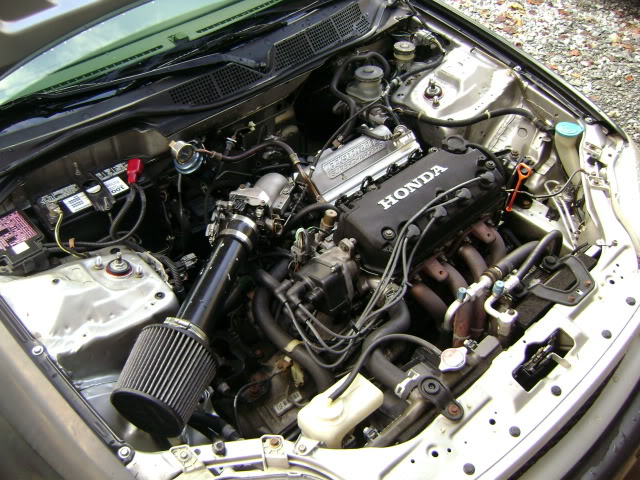
Next, tucking the two massive wire looms that are chillin' on my driver side strut tower wall.
Next, tucking the two massive wire looms that are chillin' on my driver side strut tower wall.
Updated pic:
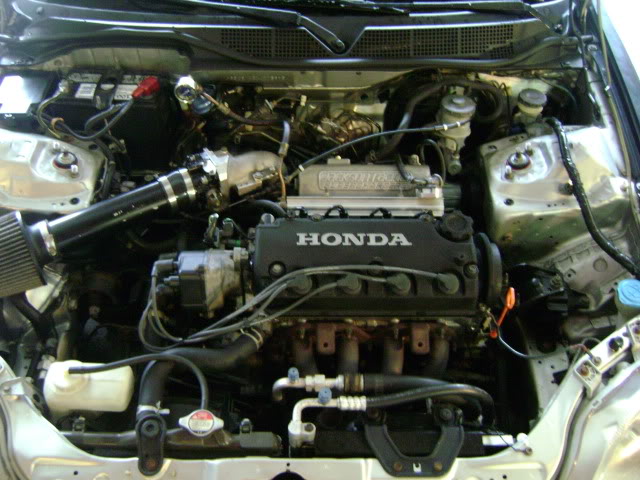
So far I have been able to tuck one of the big looms of wire on the driver side strut tower, and the driver headlight harness is hidden away out of sight. I'll figure out someway to hide it. Maybe it will be done tonight, but it is raining, so no promises. Once that is dealt with, I'll begin cleaning up the wires coming from the battery and the ground wires.
I also recently received and installed new climate control light bulbs. Believe it or not, this is the first time the CC lights work since I have owned the car (since March 2007). I can now see what setting the Climate control is on at night! haha
Along with the CC bulbs, I bought a new Cam seal. I need to place another order on hondapartsdeals.com for a Grommet to cover the hole in the firewall where the Cruise Control was pulled out, antenna block off (I found it on the website for $3), and a Cam Gear Key (which I JUST found out that it's made, I have been trying to figure out how to install my Skunk2 cam gear for quite some time now......all along, there was a key that I could order from Honda!)
No big deal, but last night, I spent 3 hours soldering and heat shrinking connections. A while ago (before the Hondata came around), I was using an Apex-i VAFC which was cut and spliced into the original ECU wiring harness. Once the VAFC was pulled out, the connections that were re-made were simply electrical taped together and kinda looked like ****. So, now that won't bother me any longer.
Oh yea, I'm working on something special for the intake set-up. Hopefully, everything will work out according to plan. Pics will be up once it is completed. Right now, I have only made a cardboard version of what I want to do. I'll be picking a sheet of aluminum at the local Home Depot within the next few days to construct my vision.
So far I have been able to tuck one of the big looms of wire on the driver side strut tower, and the driver headlight harness is hidden away out of sight. I'll figure out someway to hide it. Maybe it will be done tonight, but it is raining, so no promises. Once that is dealt with, I'll begin cleaning up the wires coming from the battery and the ground wires.
I also recently received and installed new climate control light bulbs. Believe it or not, this is the first time the CC lights work since I have owned the car (since March 2007). I can now see what setting the Climate control is on at night! haha
Along with the CC bulbs, I bought a new Cam seal. I need to place another order on hondapartsdeals.com for a Grommet to cover the hole in the firewall where the Cruise Control was pulled out, antenna block off (I found it on the website for $3), and a Cam Gear Key (which I JUST found out that it's made, I have been trying to figure out how to install my Skunk2 cam gear for quite some time now......all along, there was a key that I could order from Honda!)
No big deal, but last night, I spent 3 hours soldering and heat shrinking connections. A while ago (before the Hondata came around), I was using an Apex-i VAFC which was cut and spliced into the original ECU wiring harness. Once the VAFC was pulled out, the connections that were re-made were simply electrical taped together and kinda looked like ****. So, now that won't bother me any longer.
Oh yea, I'm working on something special for the intake set-up. Hopefully, everything will work out according to plan. Pics will be up once it is completed. Right now, I have only made a cardboard version of what I want to do. I'll be picking a sheet of aluminum at the local Home Depot within the next few days to construct my vision.
