
Hobo's 2000 LX daily driver


 It should look very clean

Aaaaaaand, here's Day 3. You're probably not interested in process pics because it's all about RESULTS! And results, I have.
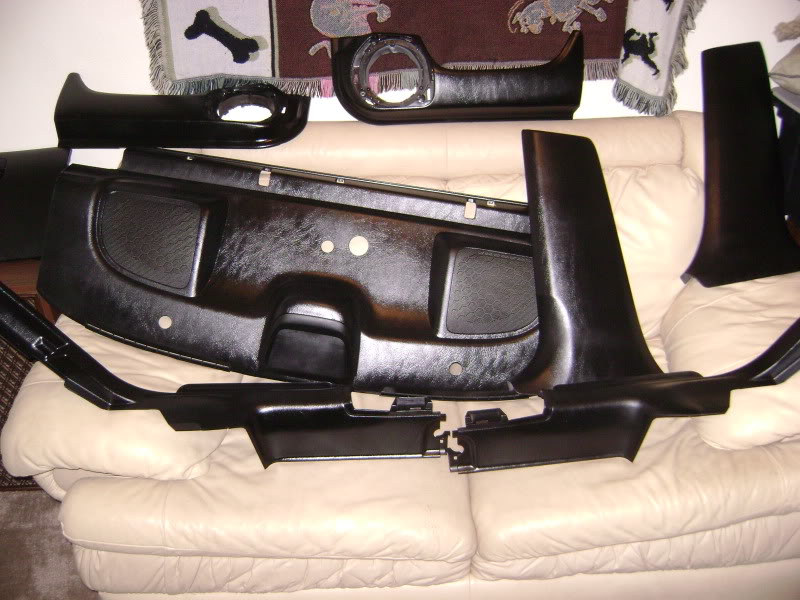
The car's interior is stripped all except for the carpet, headliner, A/B/C pillar upper covers, dash (cluster, bezel, center console), and driver's seat. Now would probably be a GREAT time to get my tint redone, actually. Hmph.
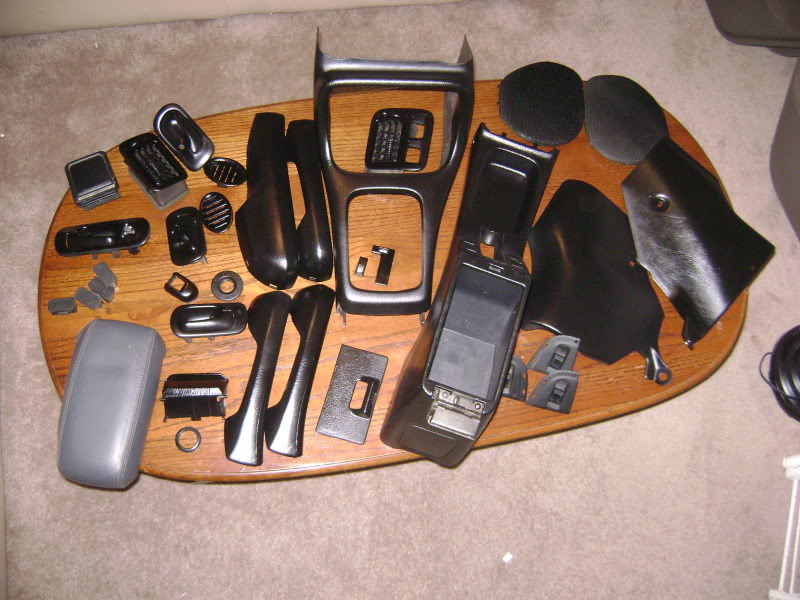
I've gone through 4 cans. I thought it would take more but I stretched my last can enough to do all the rest of the lower plastics. I never really realized just how dang many parts there are to a Civic interior.
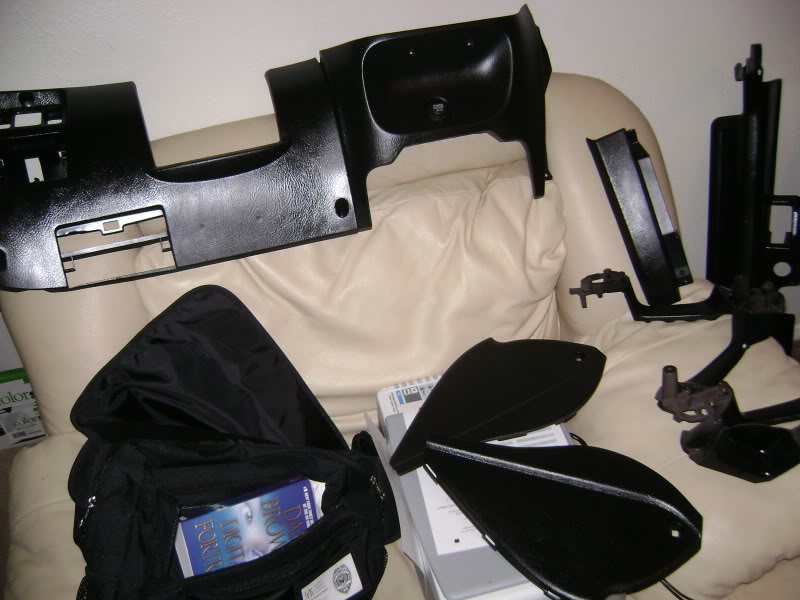
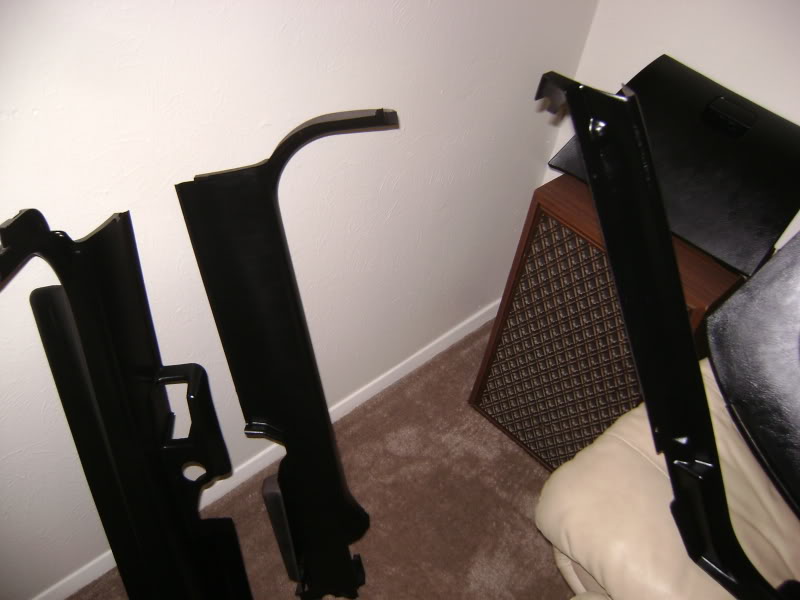

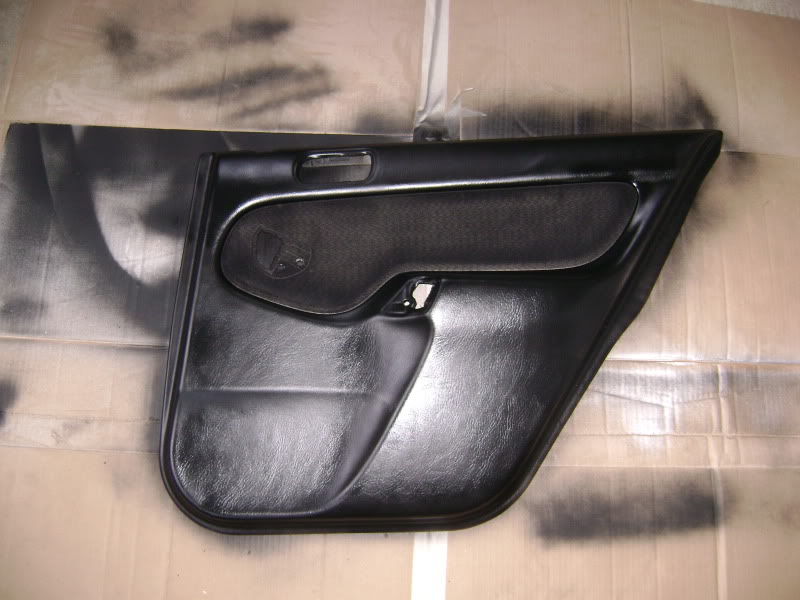
And the door panels are almost ready to dye. I still have to remove the metal thing on the top and the plastic thing that the lock thingy goes through.
The dash also has to come out soon. Anyone know if it's truly necessary to drop the steering column in order to pull the dash? Or can I like... go over the column?
The car's interior is stripped all except for the carpet, headliner, A/B/C pillar upper covers, dash (cluster, bezel, center console), and driver's seat. Now would probably be a GREAT time to get my tint redone, actually. Hmph.
I've gone through 4 cans. I thought it would take more but I stretched my last can enough to do all the rest of the lower plastics. I never really realized just how dang many parts there are to a Civic interior.
And the door panels are almost ready to dye. I still have to remove the metal thing on the top and the plastic thing that the lock thingy goes through.
The dash also has to come out soon. Anyone know if it's truly necessary to drop the steering column in order to pull the dash? Or can I like... go over the column?

Recognized HCF Member
Joined: Jun 2006
Posts: 11,203
From: Brownsburg, IN 46112
ya just drop it... with the drivers seat out it makes it alot easier but doesnt have to come out. you dont have to remove the whole colum, just take out the dash mount bolts and let it sit on the floor. you dont have to take it off linkage wise. just be sure to disconect all the wire plugs off it for the colum and such. suprisingly the dash isnt that hard to remove! i thought it was going to be a HUGE PITA, only thing that can make it a PITA is if you have any aftermarket wiring like for the radio, amplifier, alarm system that could be wound thru the dash bracing. that can be a PITA but doable still.
Well, I'm probably gonna pull the driver's seat today. With that out I can get the carpet up and start the cleaning process on it. I may make an attempt on the dash but I'll have to go to my parents house for that. I've been stretching the hell out of the "no automotive work of any kind on the premises" rule and I think that pulling a dashboard becomes REALLY obvious.
Think I can get away with pulling the dash, throwing it in the back, bolting the steering column back up, and driving back here to work on the dash? lol.
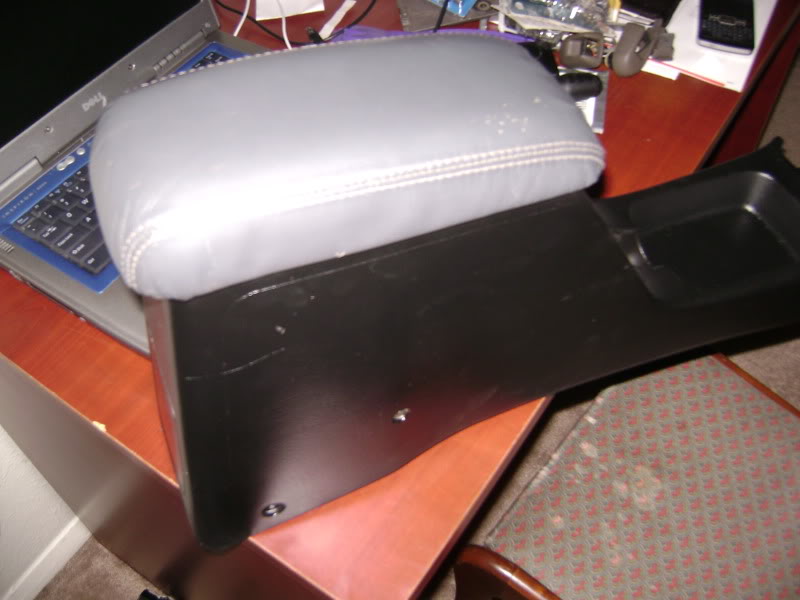
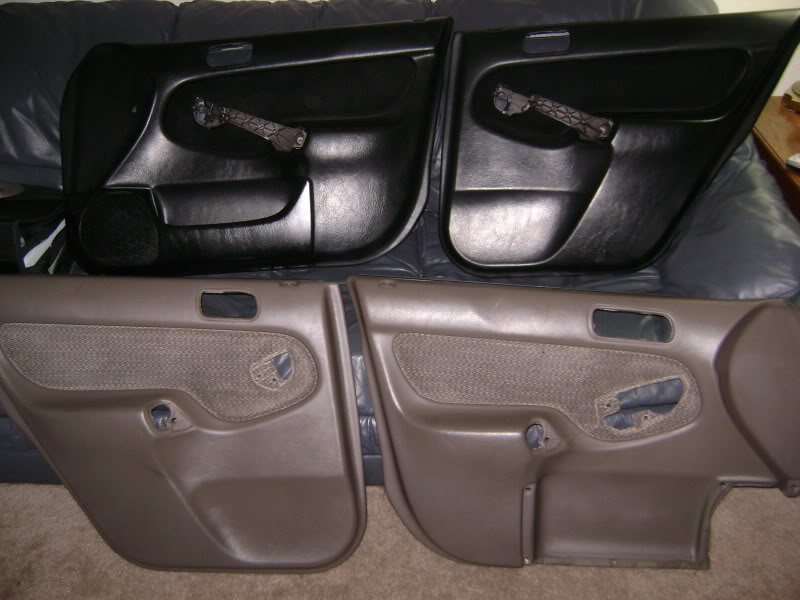
[edit] and I'm SERIOUSLY considering leaving the leather seats grey for now. ZOMG its a crap ton of work to strip even one piece of the leather stuff to dye it. And since I have 11 separate pieces to work on... (armrest, headrest x2, seat back x2, seat pan x2, rear seat bolsters x2, rear seat bottom, rear seat back).... and since that's a LOT of work... yeah, for now I think I'll leave it looking like a stock Integra interior.
Think I can get away with pulling the dash, throwing it in the back, bolting the steering column back up, and driving back here to work on the dash? lol.
[edit] and I'm SERIOUSLY considering leaving the leather seats grey for now. ZOMG its a crap ton of work to strip even one piece of the leather stuff to dye it. And since I have 11 separate pieces to work on... (armrest, headrest x2, seat back x2, seat pan x2, rear seat bolsters x2, rear seat bottom, rear seat back).... and since that's a LOT of work... yeah, for now I think I'll leave it looking like a stock Integra interior.
Last edited by WellFedHobo; Jun 30, 2009 at 09:12 AM.
Argh, ruined both passenger side door panels. That duplicolor vinyl and fabric stuff is bull****. It doesn't spray as evenly as a rattle can of paint so I had to work harder and respray two times to get it on evenly. But on some areas where it was just a little thicker, there's a cloudy effect on the panel. So, it looks like complete poop. UGH!
Which means I need to go scout out the local junk yards and see if I can find some panels.
This depresses me.
Which means I need to go scout out the local junk yards and see if I can find some panels.
This depresses me.


June 2010 ROTM
Joined: Oct 2006
Posts: 3,284
From: Milwaukee, WI
It's looking real good otherwise!!
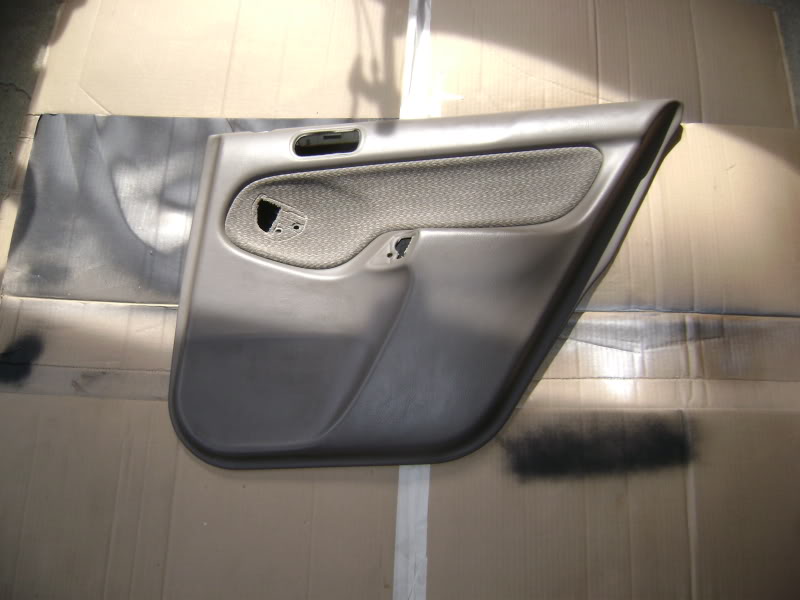
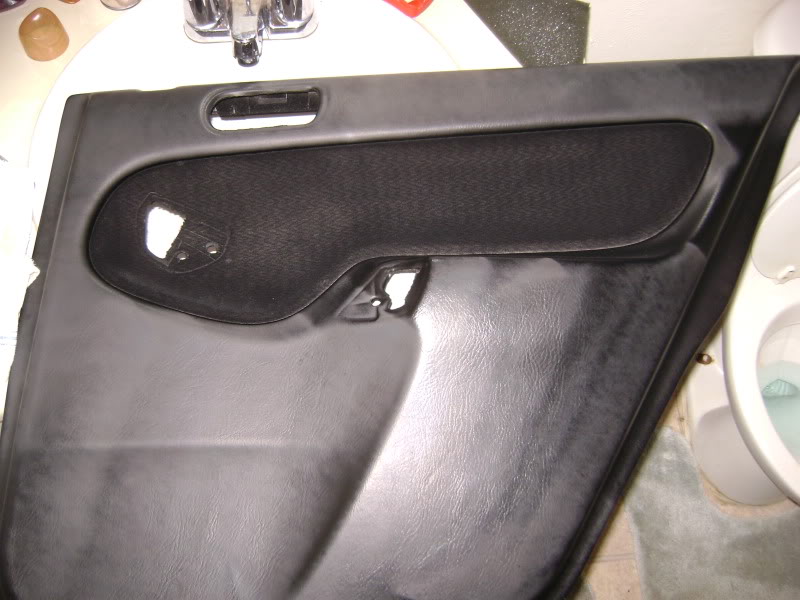
But, as it turns out... the panels aren't ruined after all. In a fit of despair, I took a scotchbrite pad and started scrubbing to get the stuff off and, to my surprise, the stuff wouldn't come off. BUT, the pad started to buff the funky haze back to a black shine! There were a couple of spots that I'll have to touch up tomorrow, but the stuff will actually work! I'm relieved. Here are some more pictures.
I finished re-covering the armrest. It is rough around the edges underneath but above it looks pretty much factory. (big JDM OEM scratch on the side, caught the flash...)
Prepped for dye...
A very stinky and wet first coat of dye
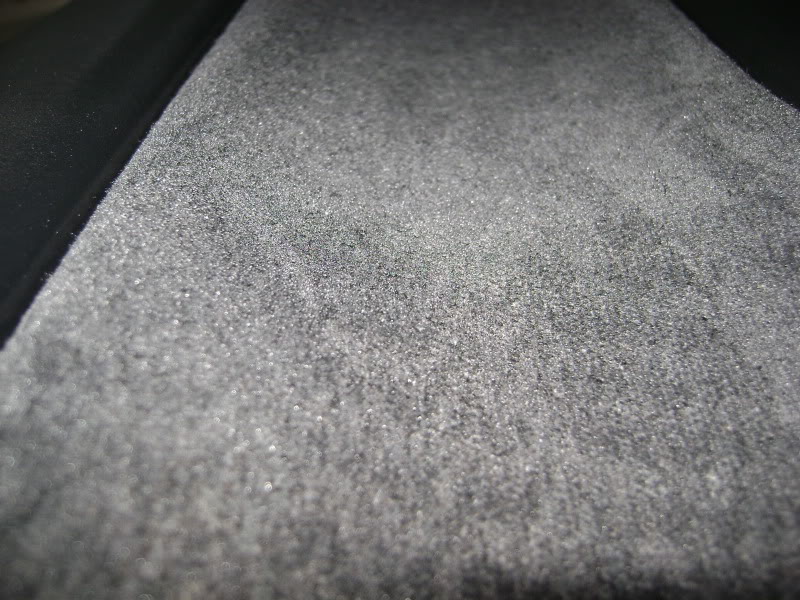
The fabric is holding the dye okay... you can still see the pattern in the fabric.
At this point, I did the passenger door and the passenger rear at the same time, touching up and adding as I needed. And here's where the problems began. As the stuff got thicker, it started to haze up and look like complete splotchy poo. I called them ruined and walked away. Later I came back with a scotchbrite scrubbing pad and started trying to remove the stuff. Instead, it polished the haze away...
Before:
Right side buffed a little...

Viola'! Back to Black! (flash fails though)
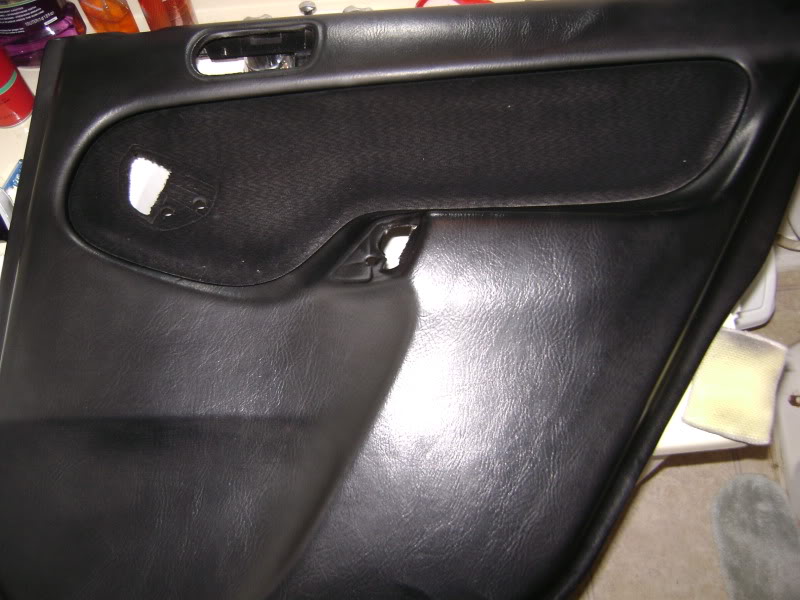
On to the passenger door... (you can really tell where I saw that the dye was sucking and I just said **** it and sprayed whatever, lol)
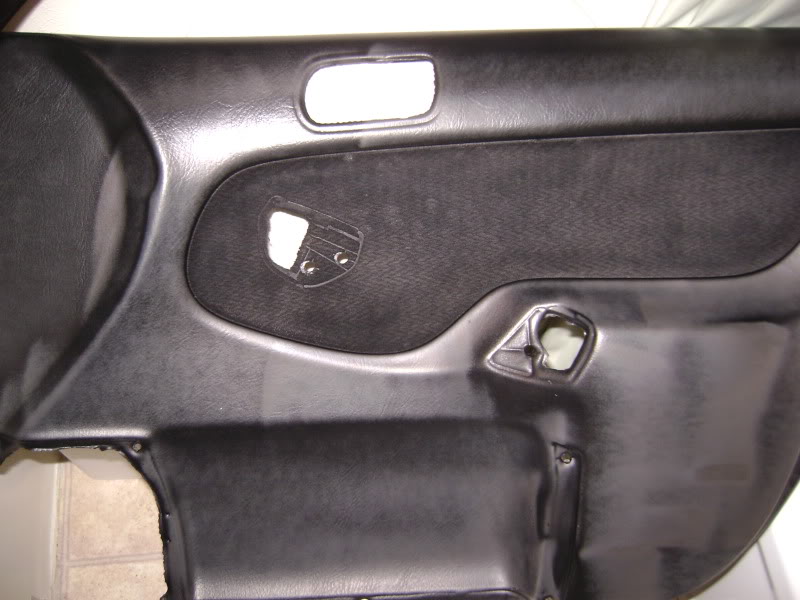
BOOM!

Flash = �ber1337 pwnage, but you get the picture.
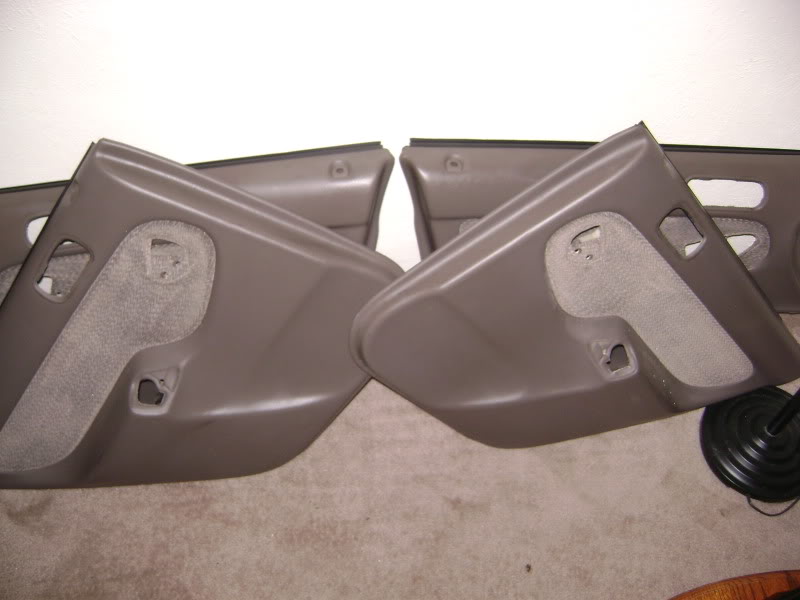
Halfway there on the door panels... 95% on all the plastics... still have to dye the carpet... and then the dash...
and if only the smell would go away faster. UGH! That stuff STINKS!!!!!!
Last edited by WellFedHobo; Jun 30, 2009 at 09:59 PM.