


Turtlegrip 1997 Civic DX


Thread Starter
|
HCF Member
Joined: Mar 2011
Posts: 485
From: Los Angeles

haha thanks!
Started off today with the steering wheel:
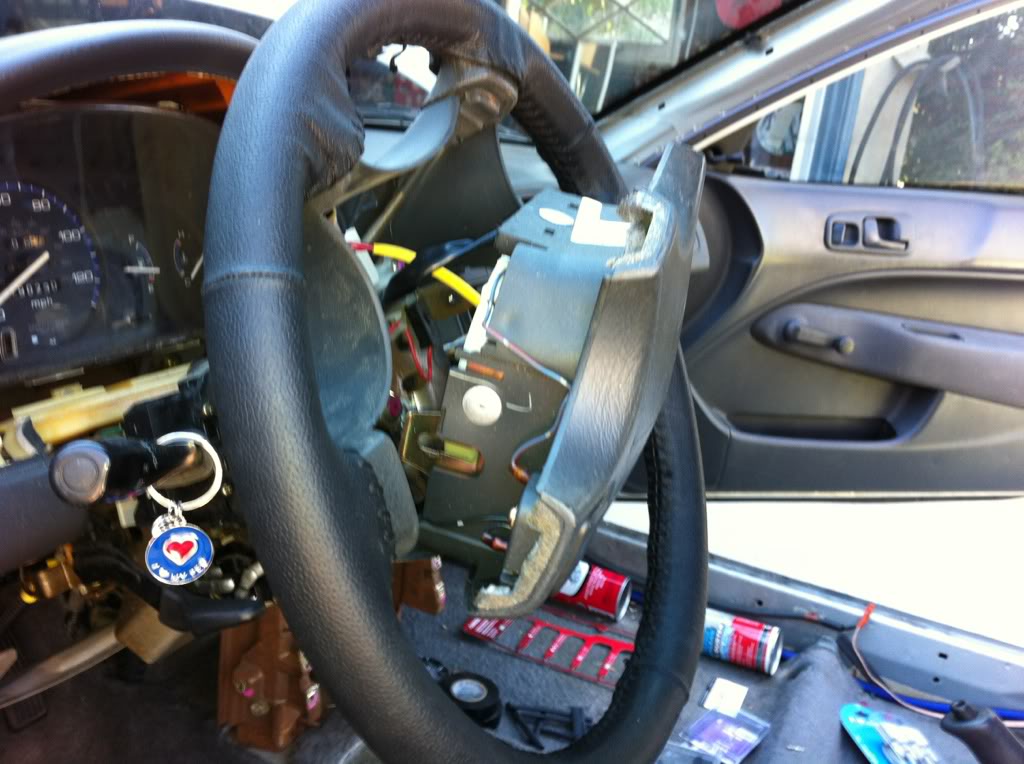
Airbag out:
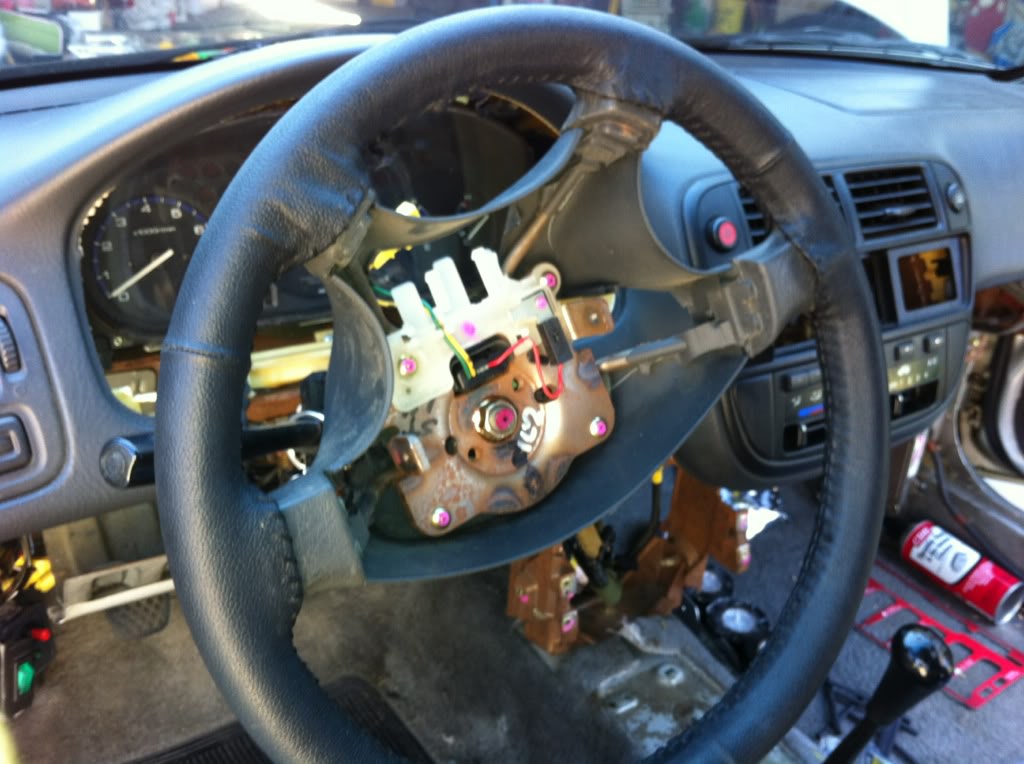
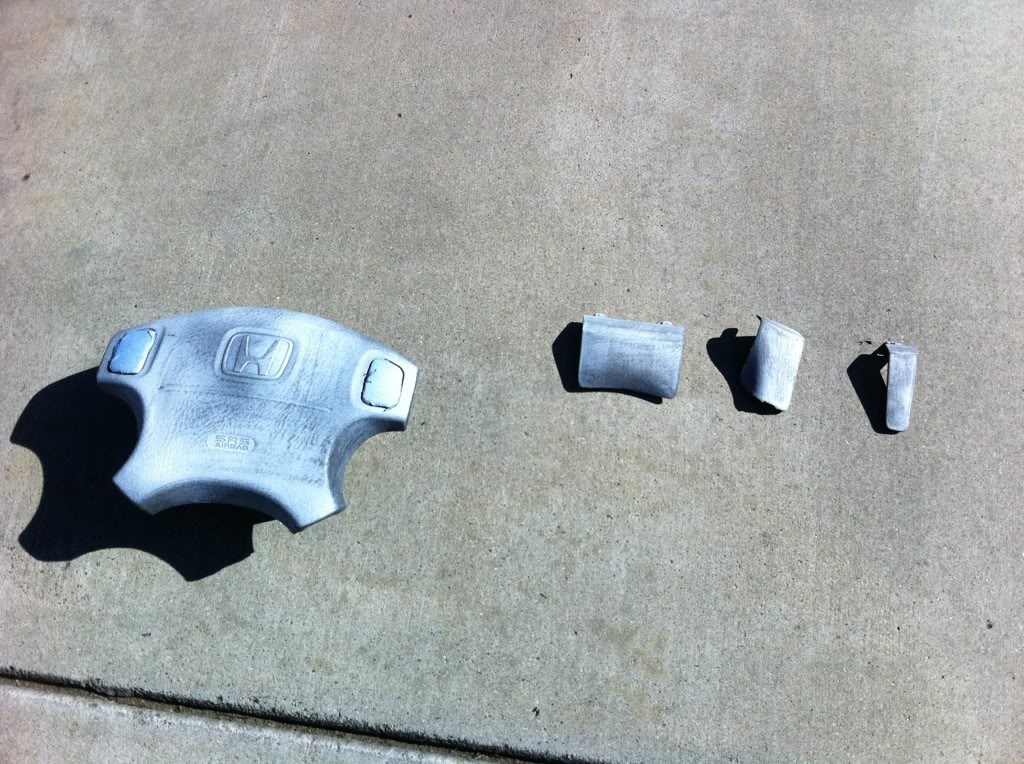
Painted right away:
Steering wheel popped right off!
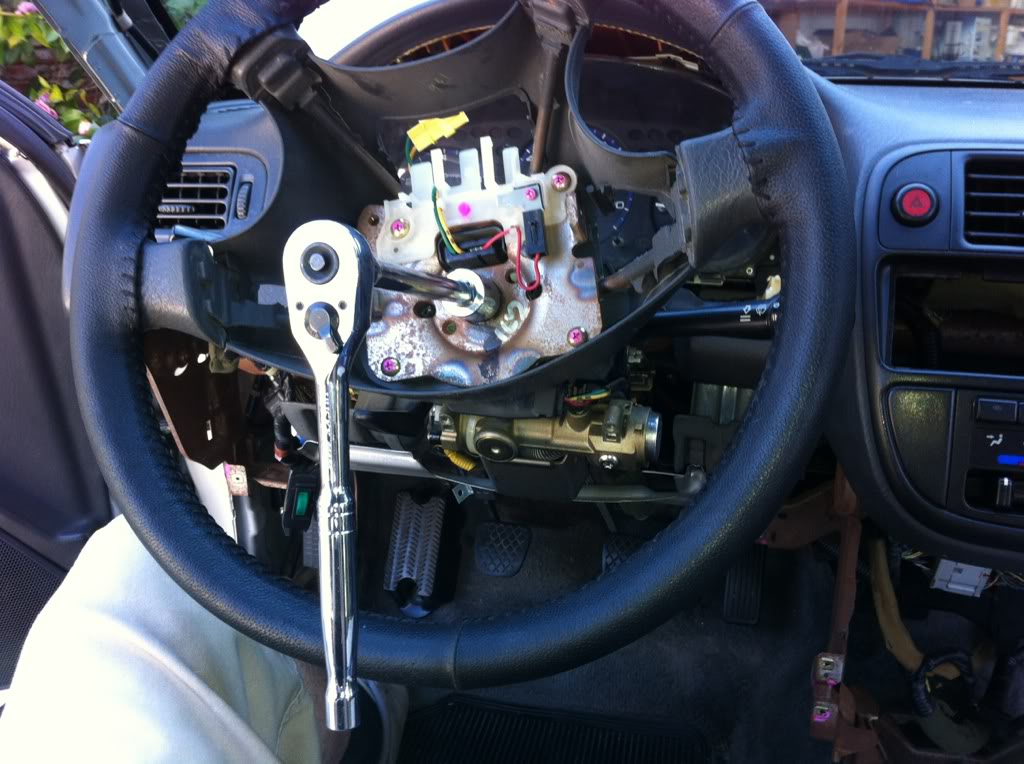
I have a future problem tho, this little red wire popped out with the wheel and i have NO IDEA where it was from....... first is the wire from the back of the steering wheel and then is a pick of the area where is goes....... Need to figure this out haha...
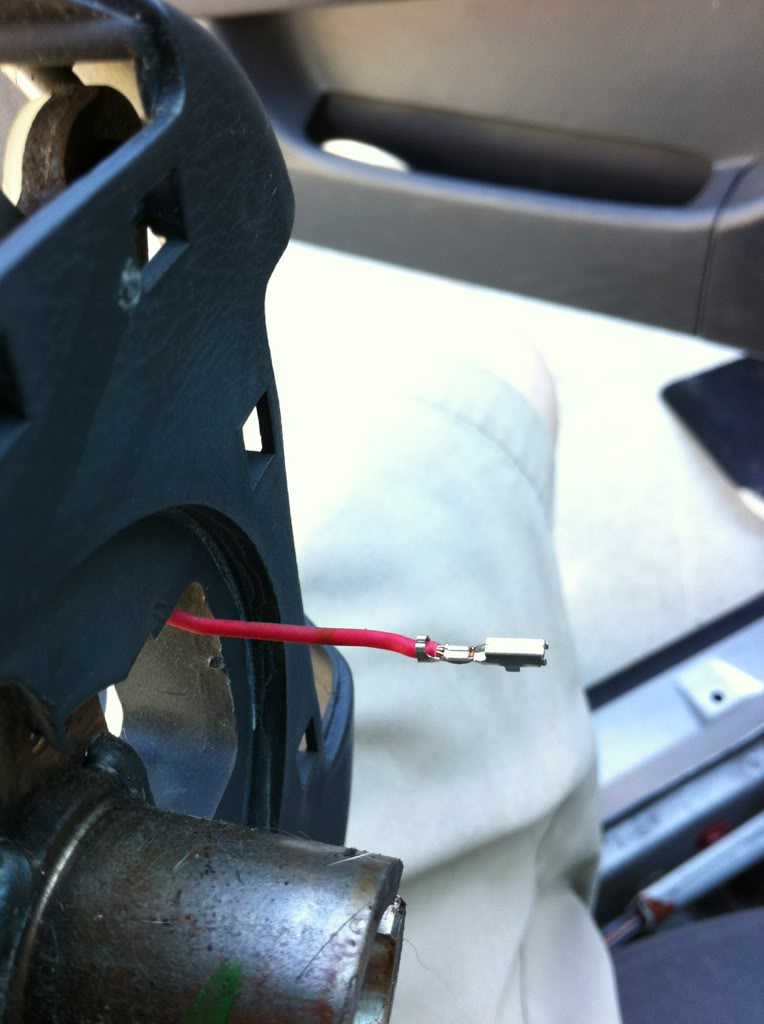
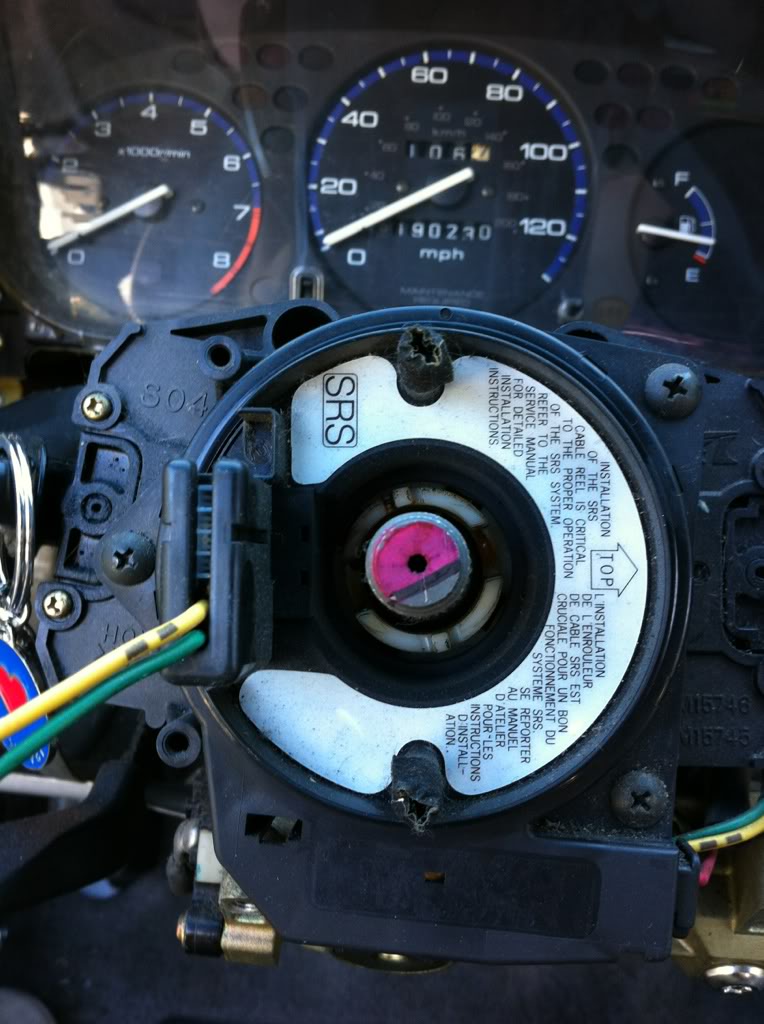
Next i took out the fuse box:
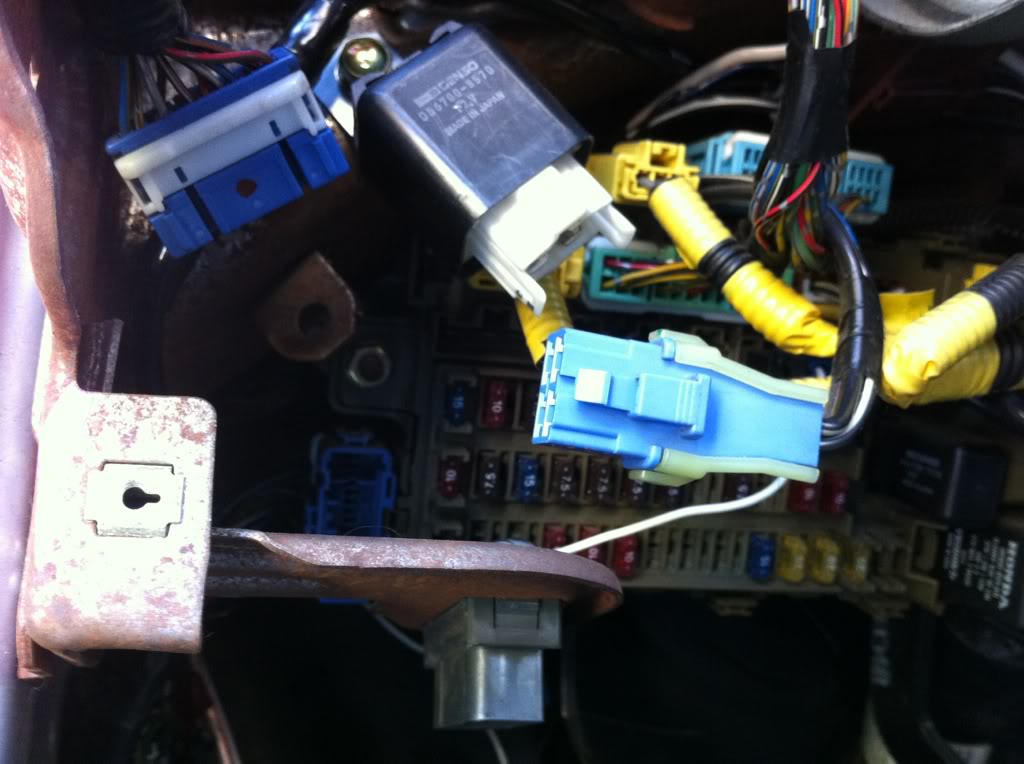
Then here were those kinda hidden bolts for the dash, behind the fuse box kind of...
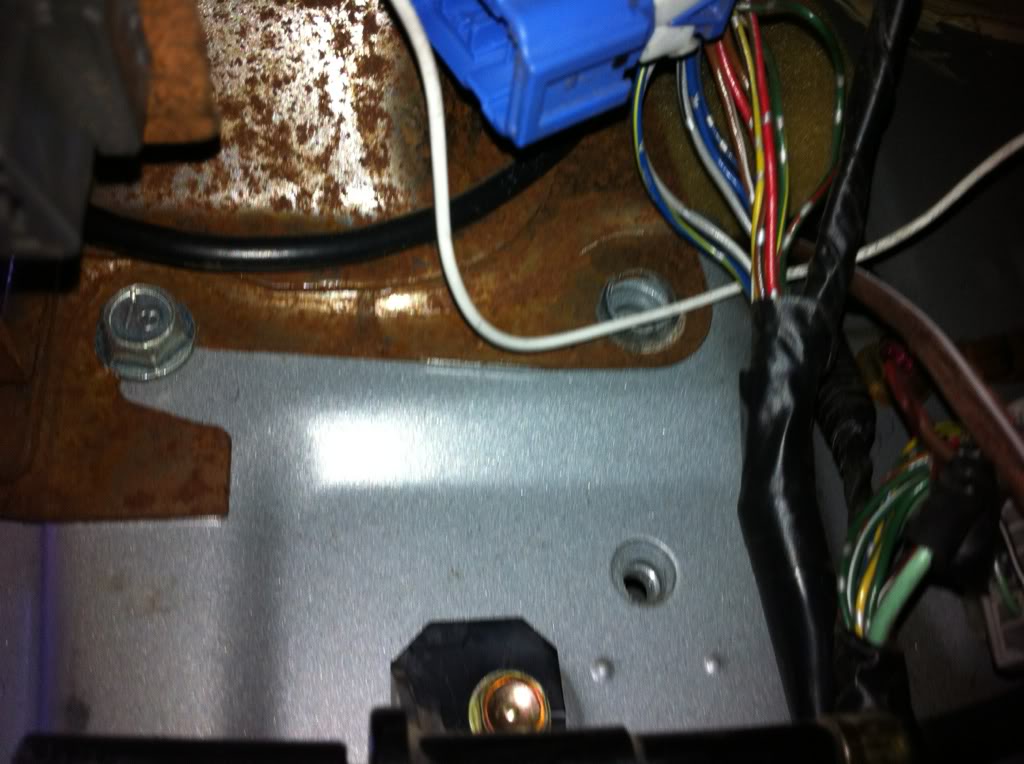
About to come out!
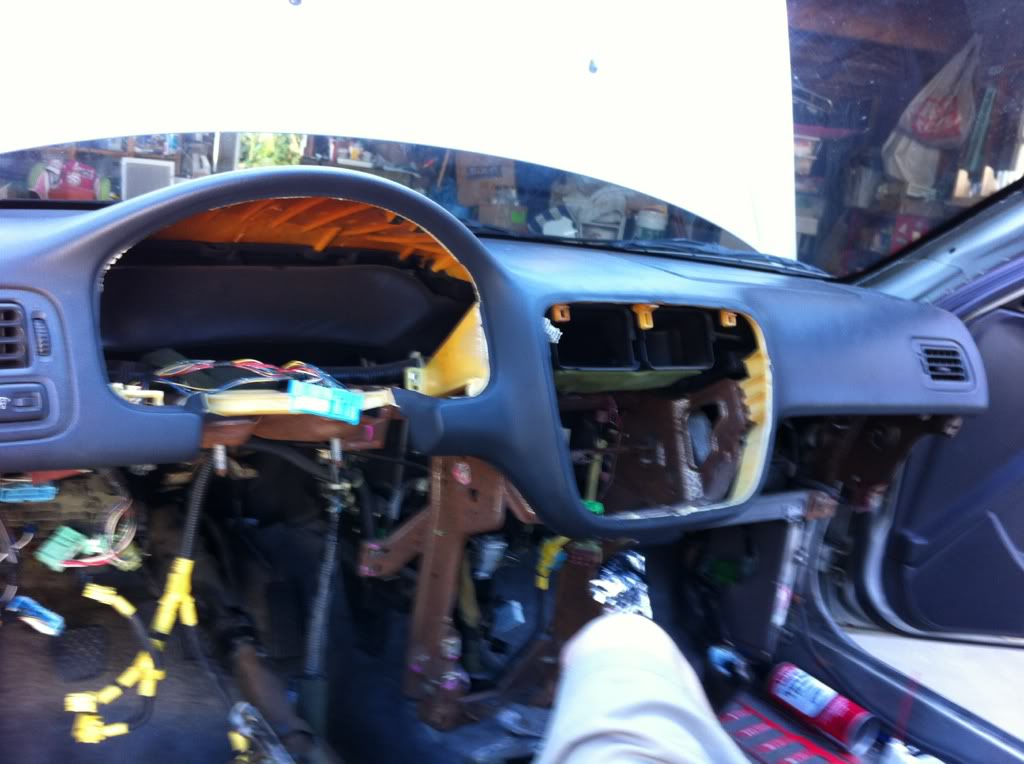
OUT!
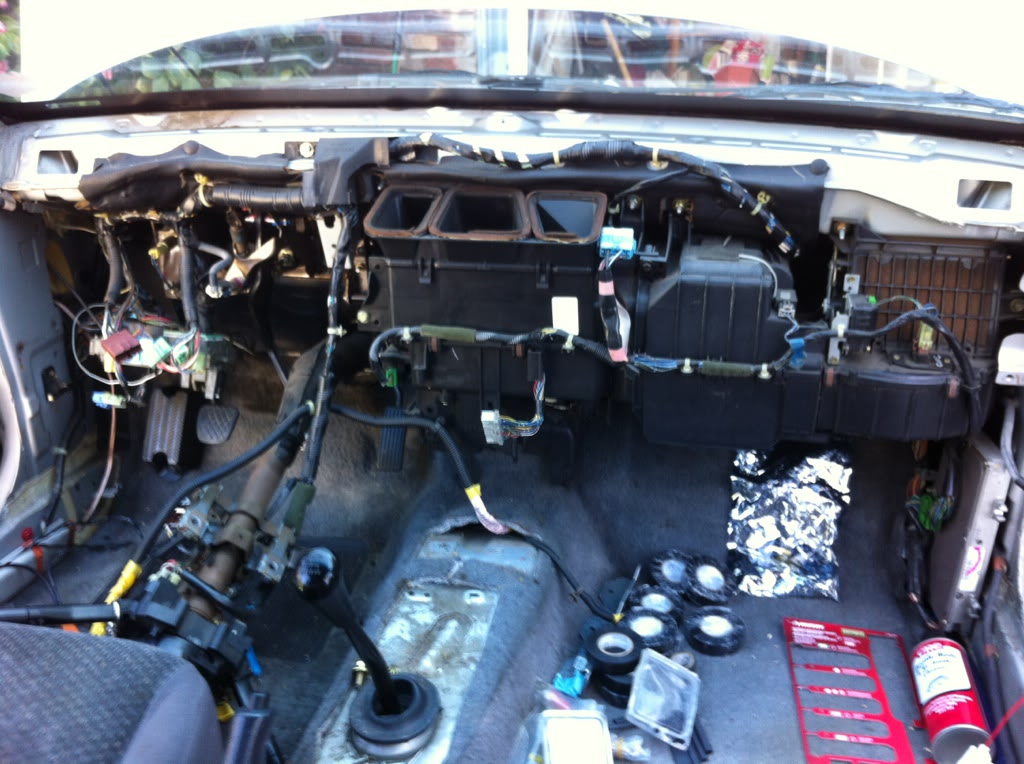
Took out the other airbag:
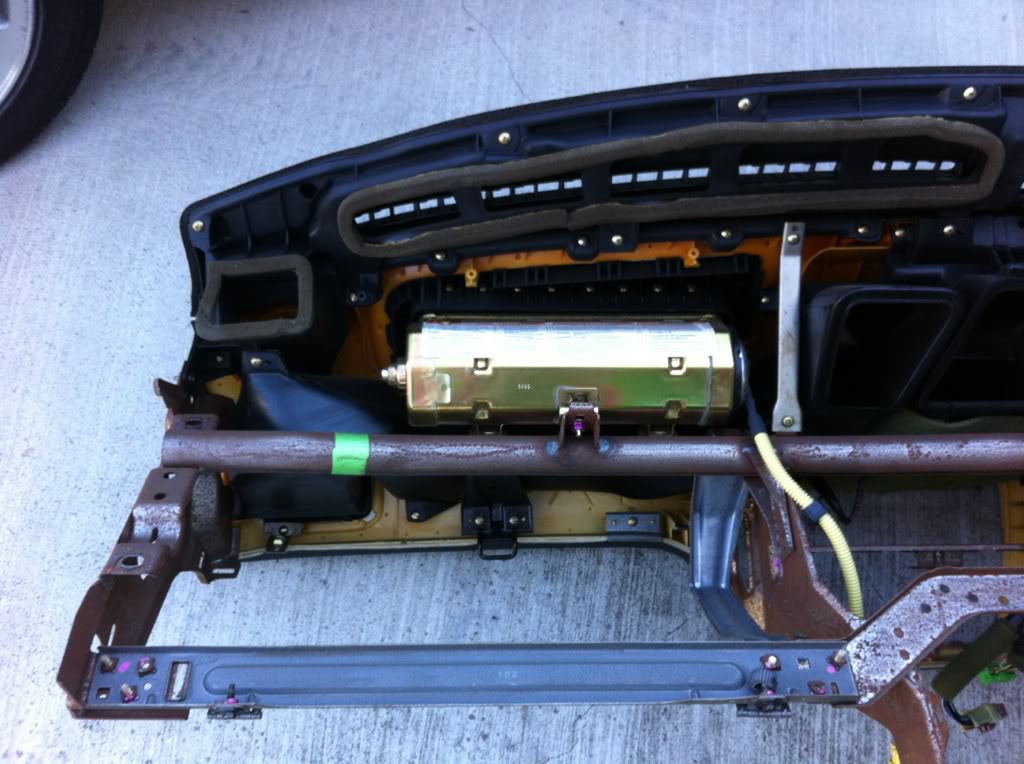
And back to painting for a minute, doing less coating on these parts, since they shouldnt really be touched or played with anyway, and I want them back in the car...
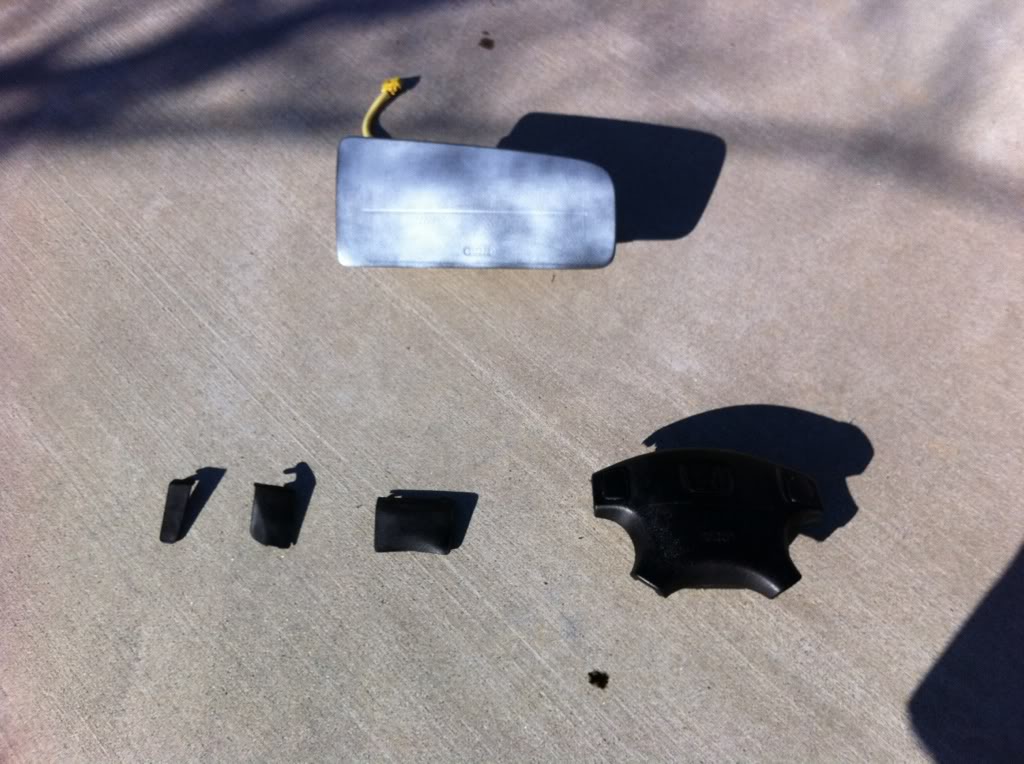
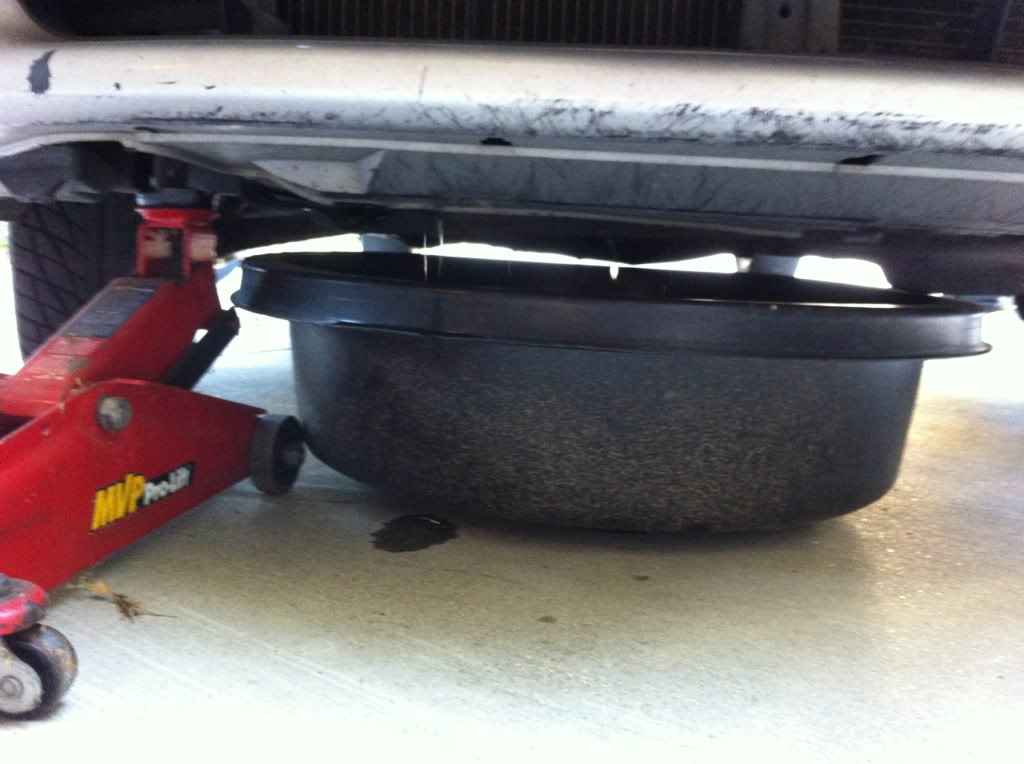
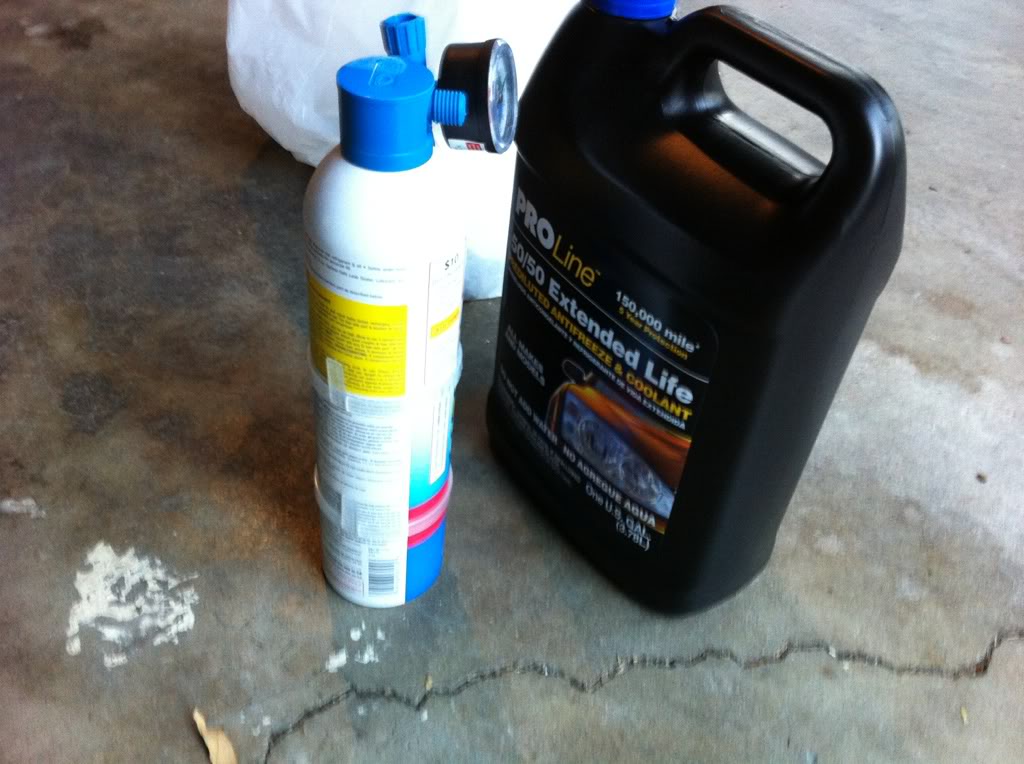
Next I drained the coolant, so I can buy more...
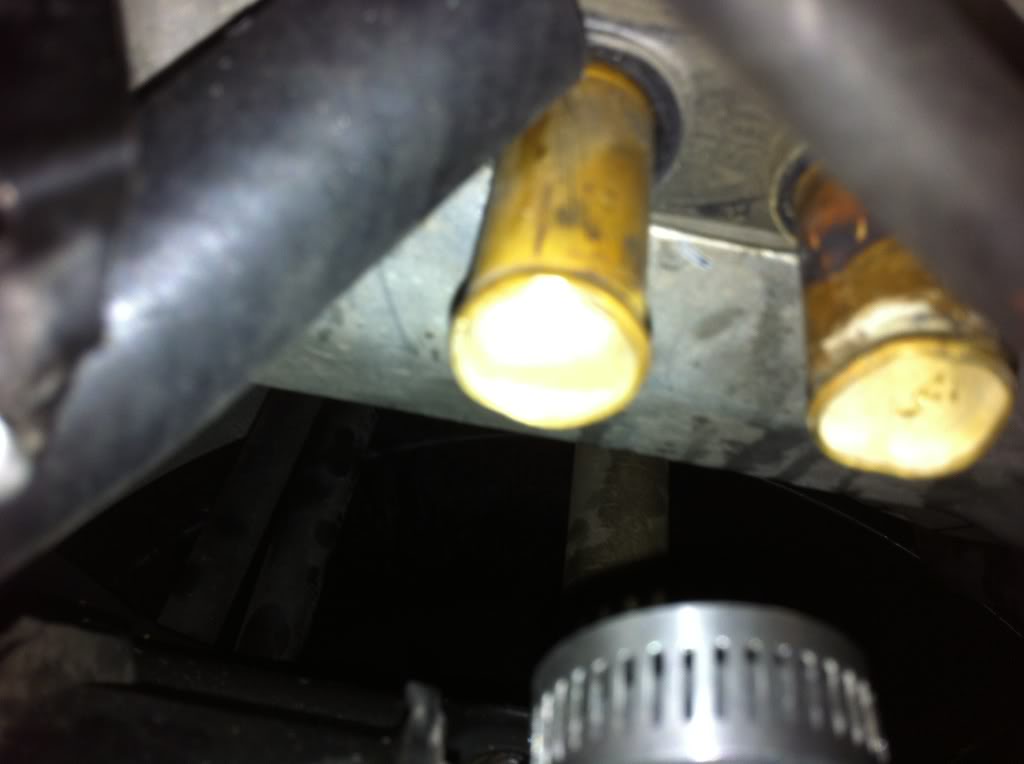
Now to take a look in the engine bay:
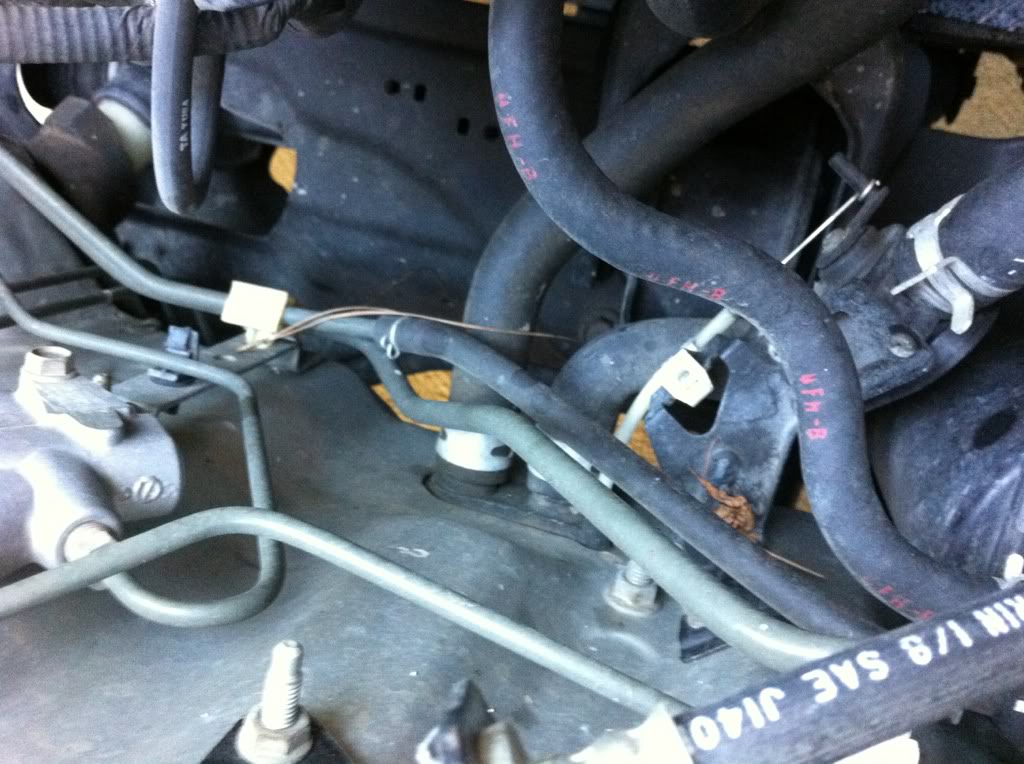
There they are!
Also drained the AC, the guide said I could just let them vent out...
1) It got all over me and made a cloud that I did not want to breathe for a bout 20 minutes.
2) Nearly froze my hand, or so it felt like.
3) Cannot be good for the environment, but i dont know how much it cost to have someone professionally drain your system.
Here is a little video of what happens...
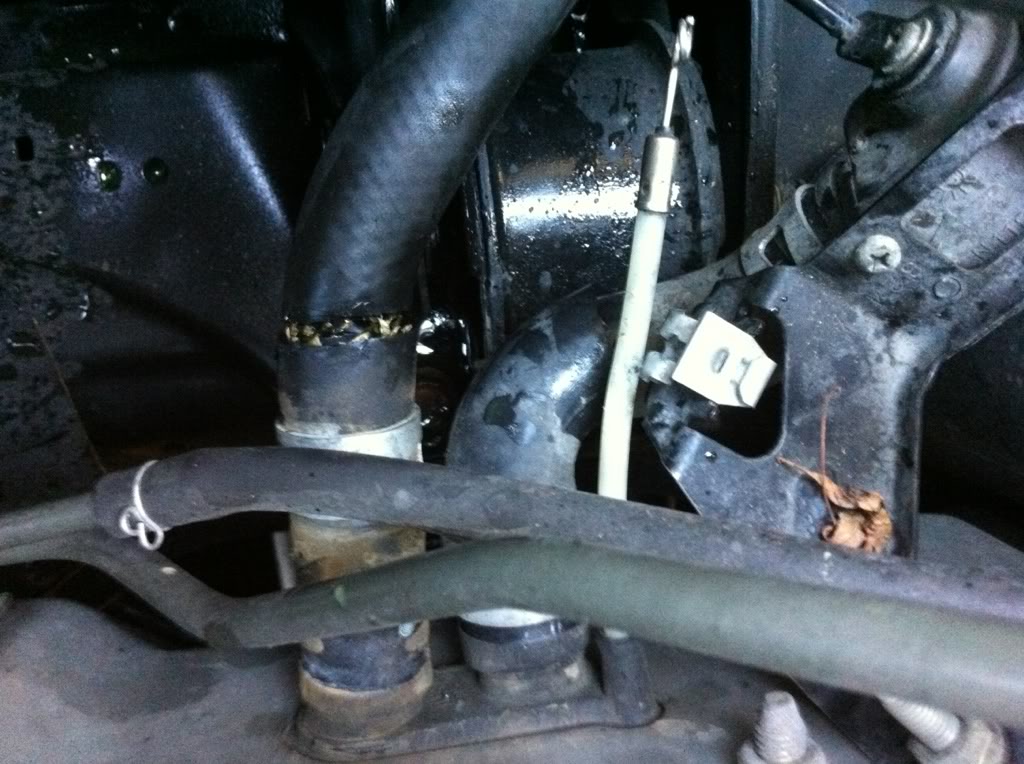
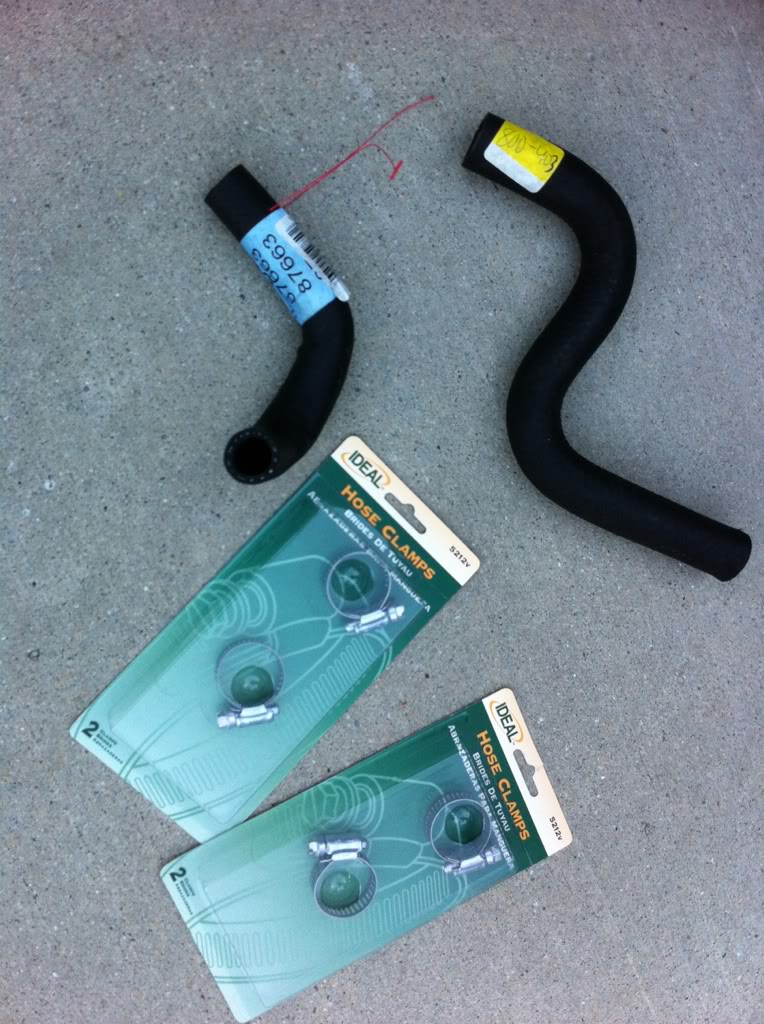
Took a razor blade to the hoses, not gonna waste time trying to get them off, cut right out and went to buy new ones...
Got the new core in, here is a view from the engine bay:
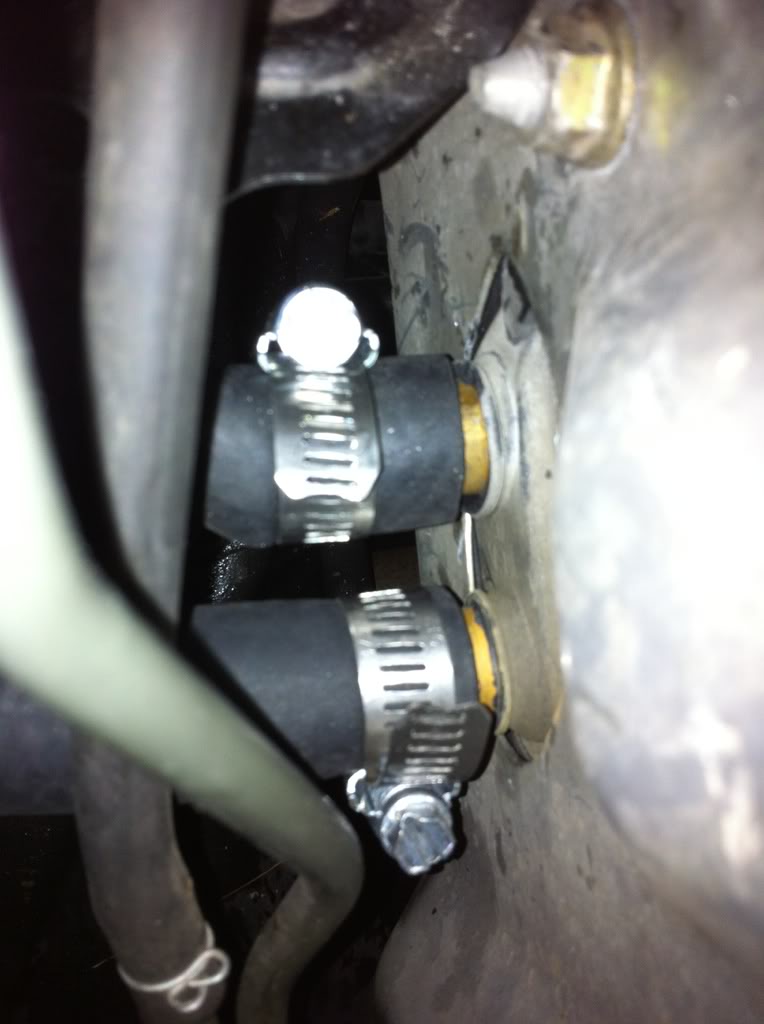
Got the new hoses on:
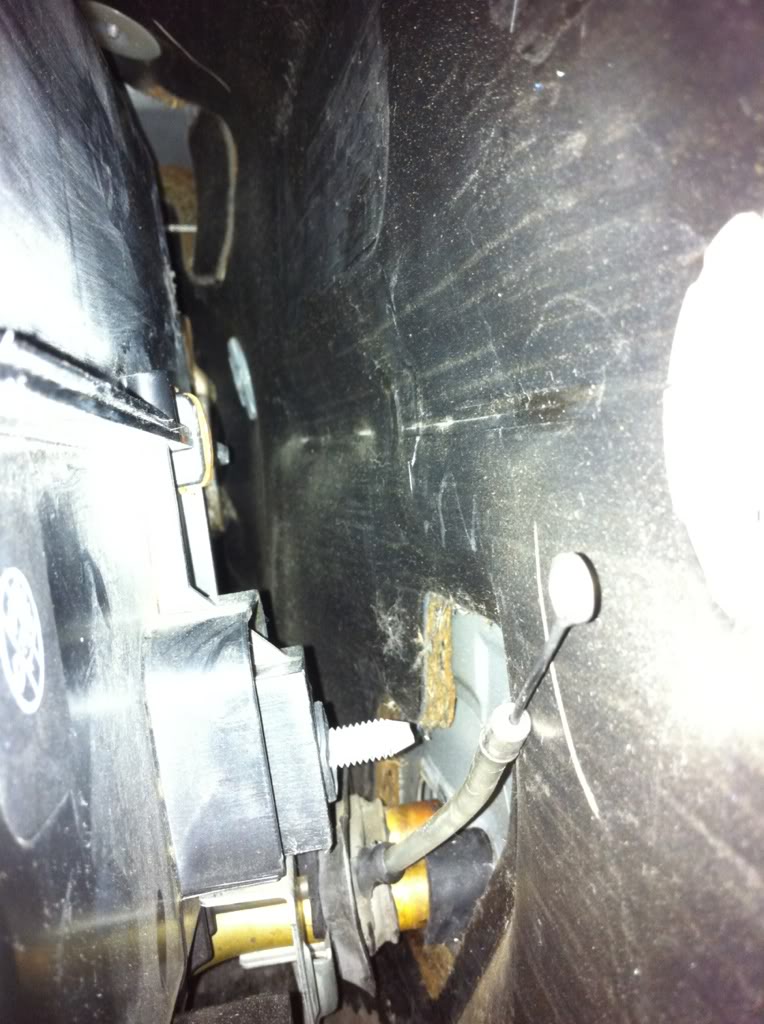
If you are more intuitive than me, then you already noticed something missing...
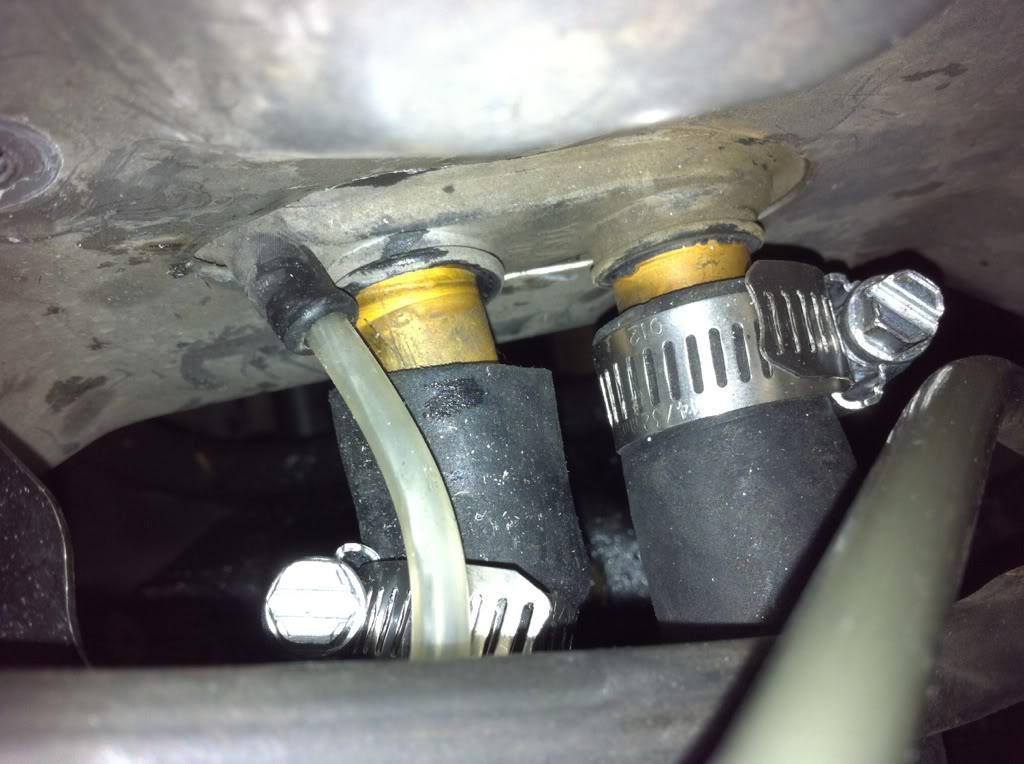
I seriously do not even wanna talk about these hoses, and how insanely difficult they are to work with without apart half your engine, here is the best I could get them on the second time, it is on really tight despite the way it looks, I might redo it tomorrow, probably definitely not, I never want to see these again... After spending 4 hours taking it off, on, off, on....
Taking a break now to eat and what not, I also lost a nut for the heater core mount to the firewall... Ill have to get a new one.... Ill probably start putting the new dash all together tonight, maybe get back in the car... I have extra wire harness connectors with nothing to connect to, the ones that do connect dont reach anything they are supposed to, so I have some work to do. Will keep updating...
Started off today with the steering wheel:
Airbag out:
Painted right away:
Steering wheel popped right off!
I have a future problem tho, this little red wire popped out with the wheel and i have NO IDEA where it was from....... first is the wire from the back of the steering wheel and then is a pick of the area where is goes....... Need to figure this out haha...
Next i took out the fuse box:
Then here were those kinda hidden bolts for the dash, behind the fuse box kind of...
About to come out!
OUT!
Took out the other airbag:
And back to painting for a minute, doing less coating on these parts, since they shouldnt really be touched or played with anyway, and I want them back in the car...
Next I drained the coolant, so I can buy more...
Now to take a look in the engine bay:
There they are!
Also drained the AC, the guide said I could just let them vent out...
1) It got all over me and made a cloud that I did not want to breathe for a bout 20 minutes.
2) Nearly froze my hand, or so it felt like.
3) Cannot be good for the environment, but i dont know how much it cost to have someone professionally drain your system.
Here is a little video of what happens...
Took a razor blade to the hoses, not gonna waste time trying to get them off, cut right out and went to buy new ones...
Got the new core in, here is a view from the engine bay:
Got the new hoses on:
If you are more intuitive than me, then you already noticed something missing...
I seriously do not even wanna talk about these hoses, and how insanely difficult they are to work with without apart half your engine, here is the best I could get them on the second time, it is on really tight despite the way it looks, I might redo it tomorrow, probably definitely not, I never want to see these again... After spending 4 hours taking it off, on, off, on....
Taking a break now to eat and what not, I also lost a nut for the heater core mount to the firewall... Ill have to get a new one.... Ill probably start putting the new dash all together tonight, maybe get back in the car... I have extra wire harness connectors with nothing to connect to, the ones that do connect dont reach anything they are supposed to, so I have some work to do. Will keep updating...
Last edited by Turtlegrip; Feb 24, 2012 at 08:46 PM.
Thread Starter
|
HCF Member
Joined: Mar 2011
Posts: 485
From: Los Angeles
passanger door speaker re-wire
here is a quick walk through for how I re wired the door speakers, quick simple, not a lot of photos, but if i do it again in the daylight on someone elses car that I am not just trying to get running, ill take more photos.
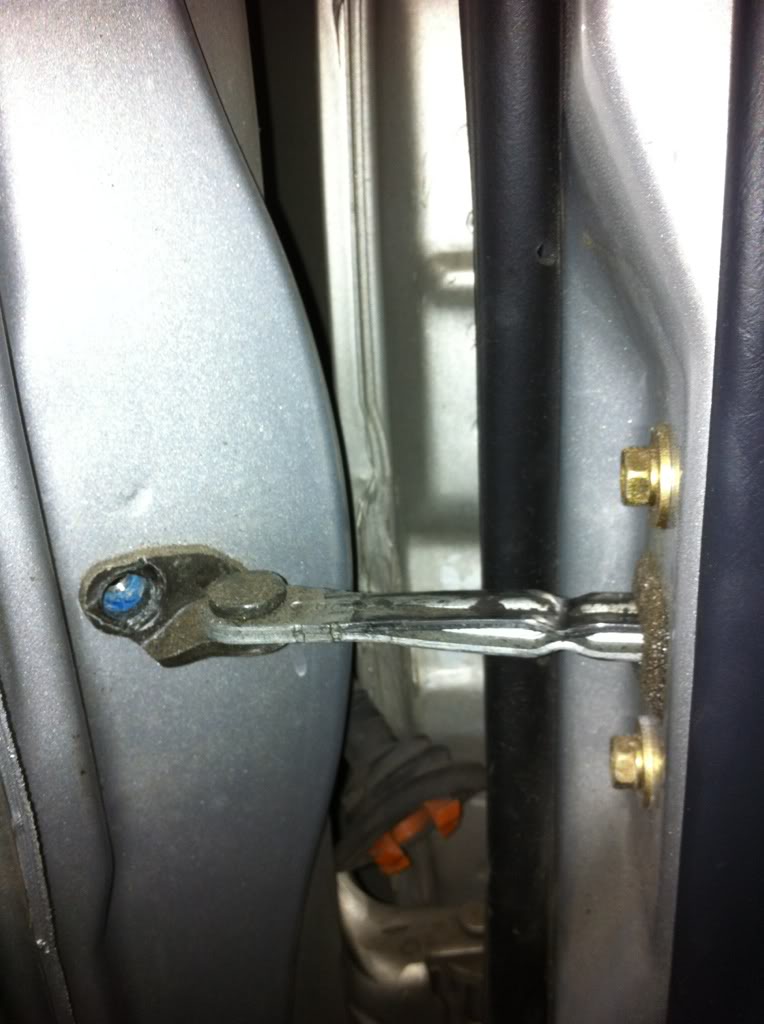
First, you might be able to skip this but it helped me, take off the bolt that limits the door form opening, take off the bolt that holds the door to the frame, not the ones on the door itself.
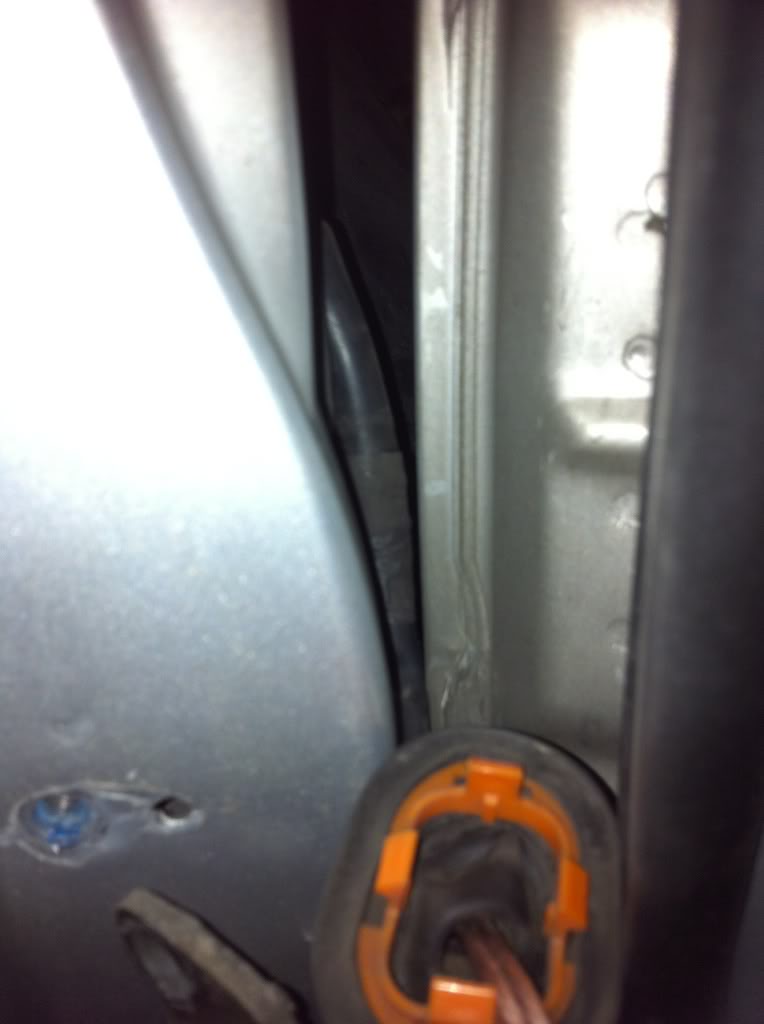
Now you should be able to easily see the rubber hose going from the car to the door, you can pop this off, I used long needle nose pliers but what ever floats you boat.
it is held on to the door by that orange bracket, the part that sticks to the car is just lipped rubber to seal on, nice and easy... (if you have accessories like power mirror/windows, you are gonna have to take off the whole door to do this right probably)
Now you should be able to just run the new speaker wire through this rubber hose, if there are other wires in there you might wanna use a metal cable to pull the speaker wire through, but i have no other cables going to my doors. Once you run the wire through, put the orange bracket back on the end that clips to the door and pop that in. Then you can push the other end back on the frame of the car, I found the easiest way to do this was to push it all into the door as if I pushed it way too far, then slowly pop it out without letting the lips that makes it stick pop back out.
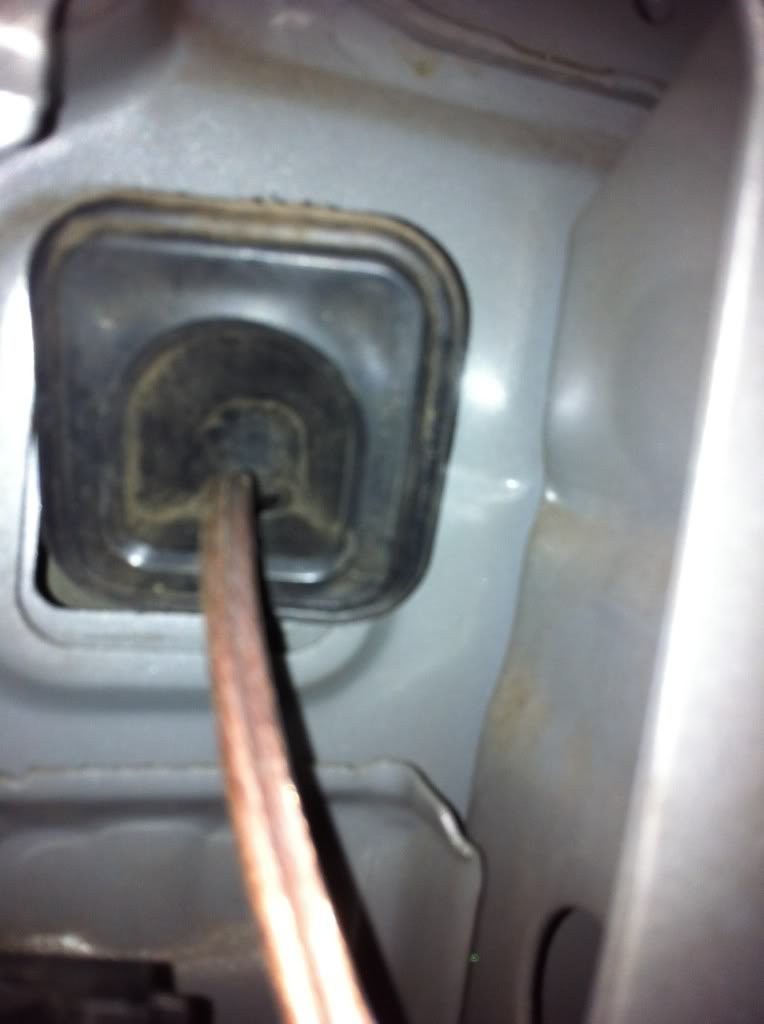
note that i had the whole dash and heater unit out while doing this, so room will be a lot tighter. But once that is sealed nice and tight and the wire is already through, you are done.
It really is easy.
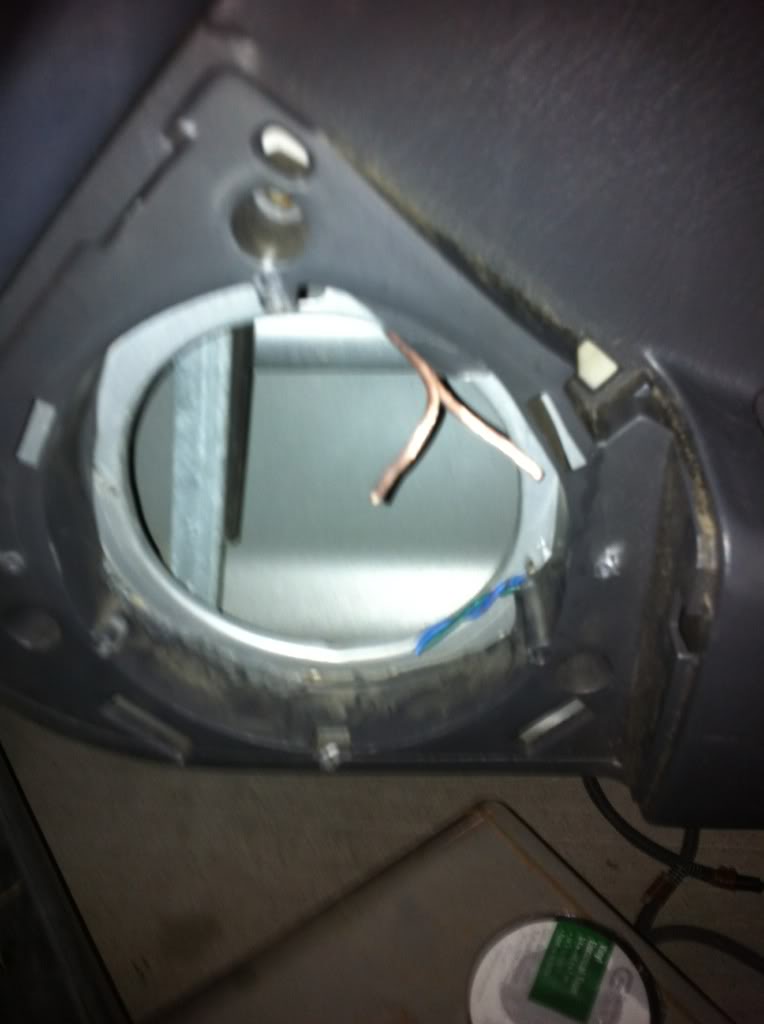
First, you might be able to skip this but it helped me, take off the bolt that limits the door form opening, take off the bolt that holds the door to the frame, not the ones on the door itself.
Now you should be able to easily see the rubber hose going from the car to the door, you can pop this off, I used long needle nose pliers but what ever floats you boat.
it is held on to the door by that orange bracket, the part that sticks to the car is just lipped rubber to seal on, nice and easy... (if you have accessories like power mirror/windows, you are gonna have to take off the whole door to do this right probably)
Now you should be able to just run the new speaker wire through this rubber hose, if there are other wires in there you might wanna use a metal cable to pull the speaker wire through, but i have no other cables going to my doors. Once you run the wire through, put the orange bracket back on the end that clips to the door and pop that in. Then you can push the other end back on the frame of the car, I found the easiest way to do this was to push it all into the door as if I pushed it way too far, then slowly pop it out without letting the lips that makes it stick pop back out.
note that i had the whole dash and heater unit out while doing this, so room will be a lot tighter. But once that is sealed nice and tight and the wire is already through, you are done.
It really is easy.
Thread Starter
|
HCF Member
Joined: Mar 2011
Posts: 485
From: Los Angeles
After doing the door wire, I moved back to the engine bay and got the hoses on there much better, note I say better and not perfect.... i hate those hoses...
Then I tossed the heat blower back in...
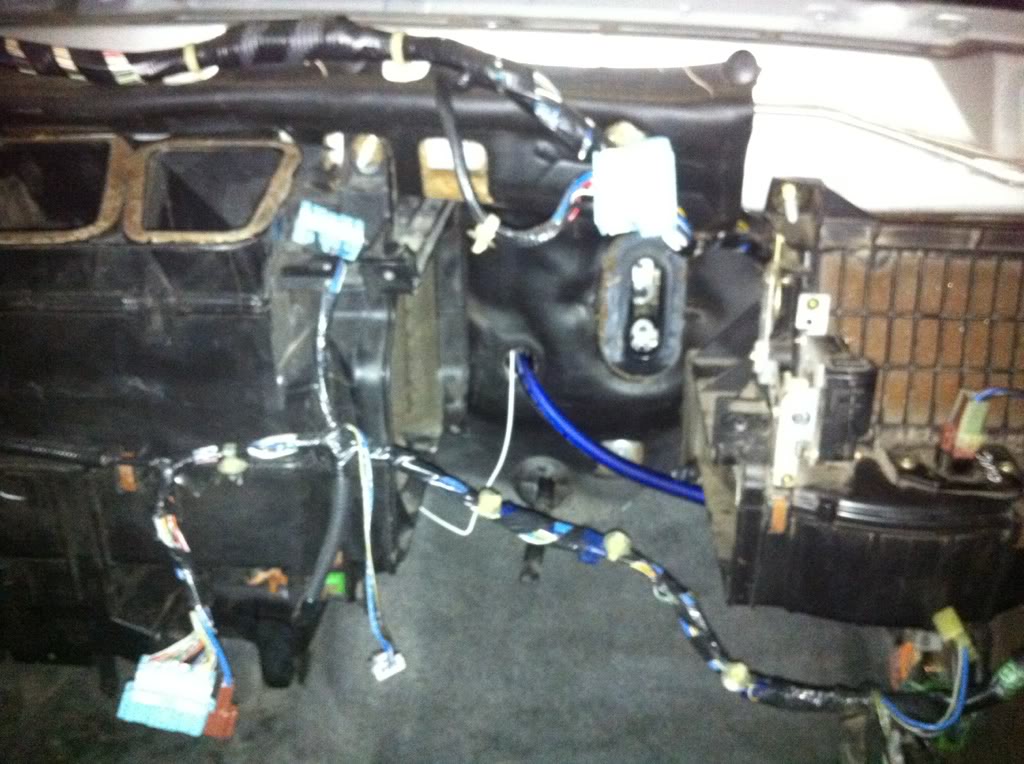
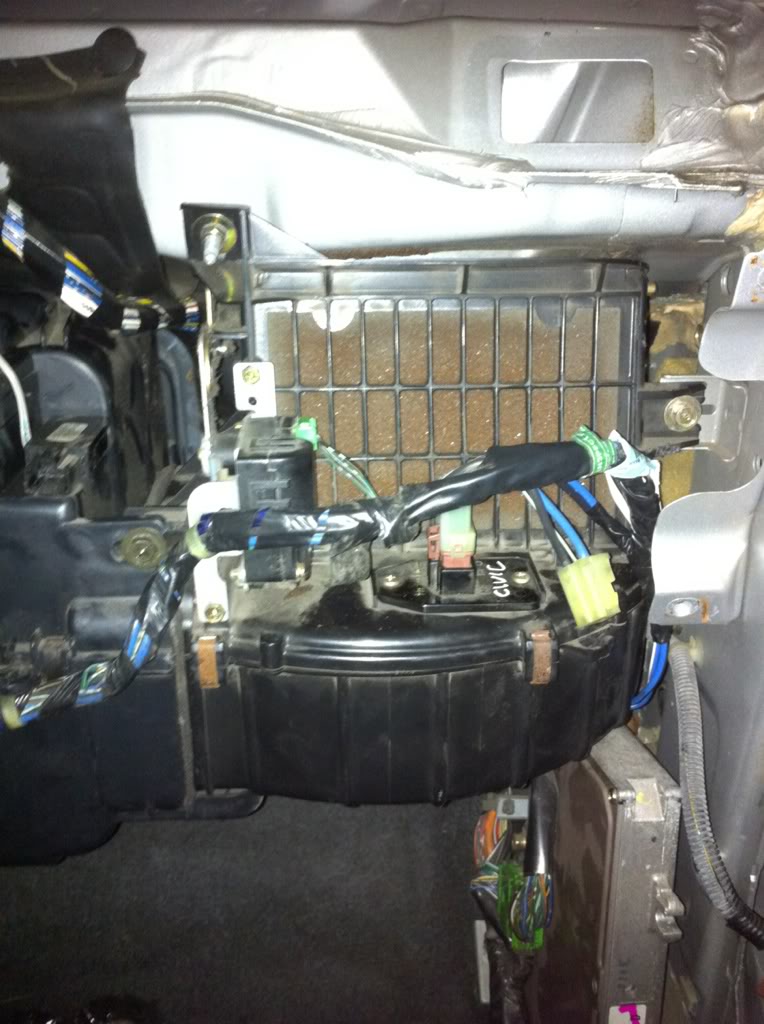
I ended up with a cable that plugged into the heats back and two on the front, but on the new harness the wire that plugged into the front was the wrong plug, and the one that did fit had a relay on it, so I took the relay off and plugged it in, but now i have this other 3 prong plug that has nothing to plug into....
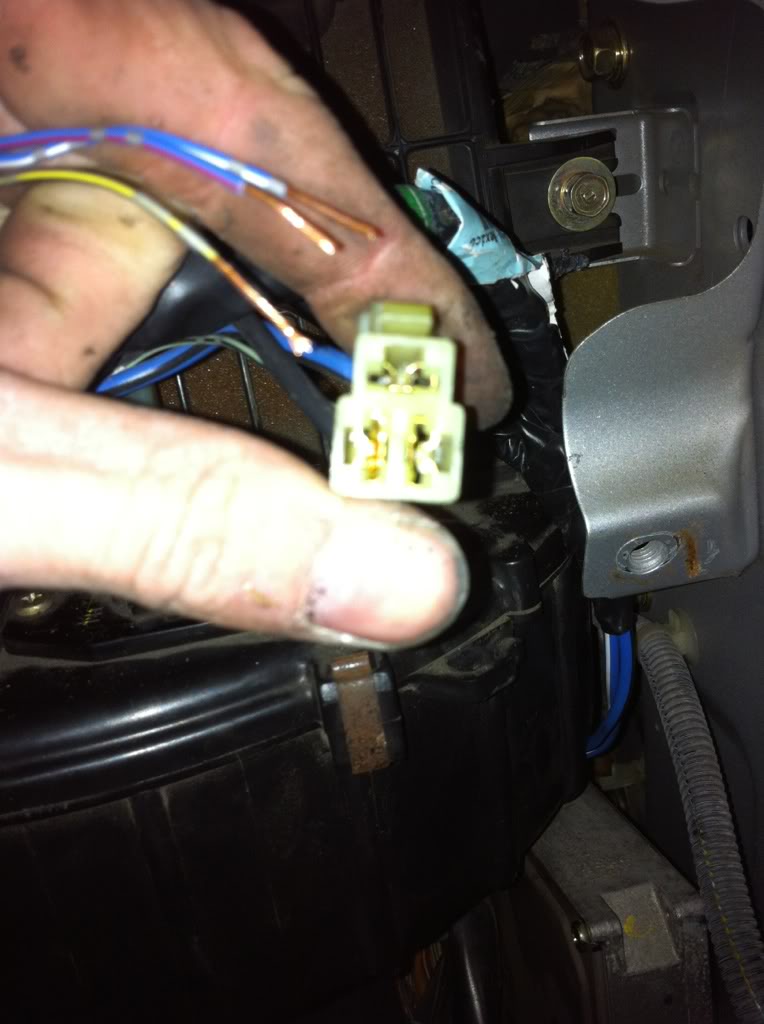
I had to make the AC wire longer, like all the walk throughs said...
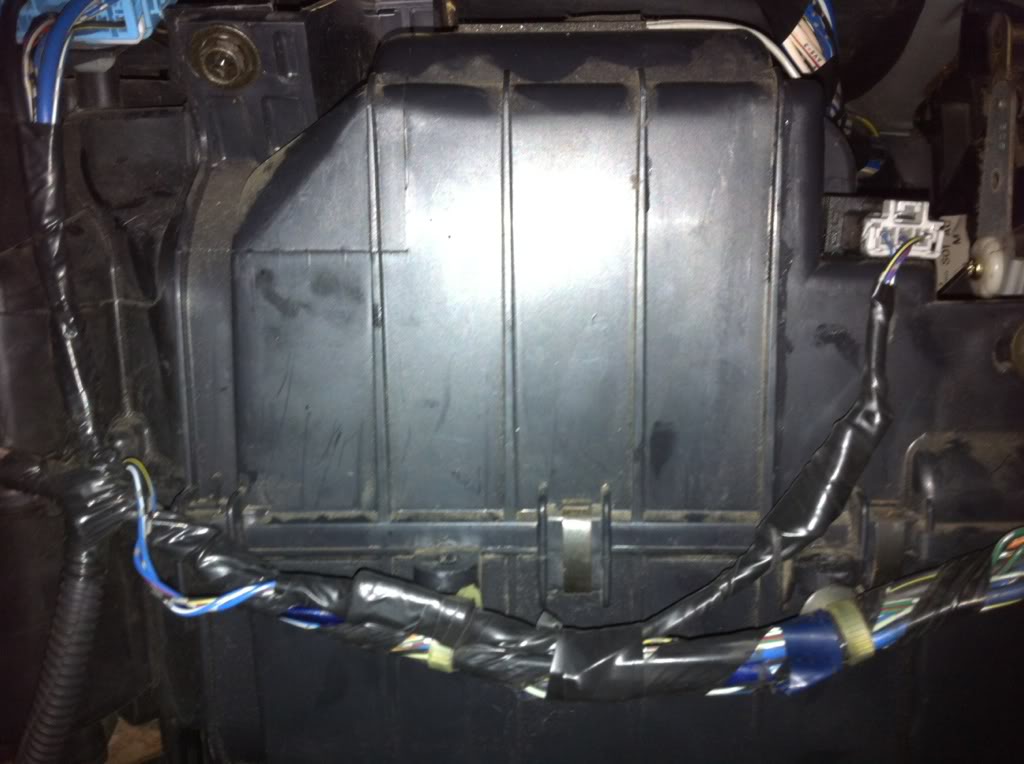
The heater unit is all in perfect (close enough) besides that one spare plug (driving me crazy) but since I have no way to really test it, we will have to see what happens.......
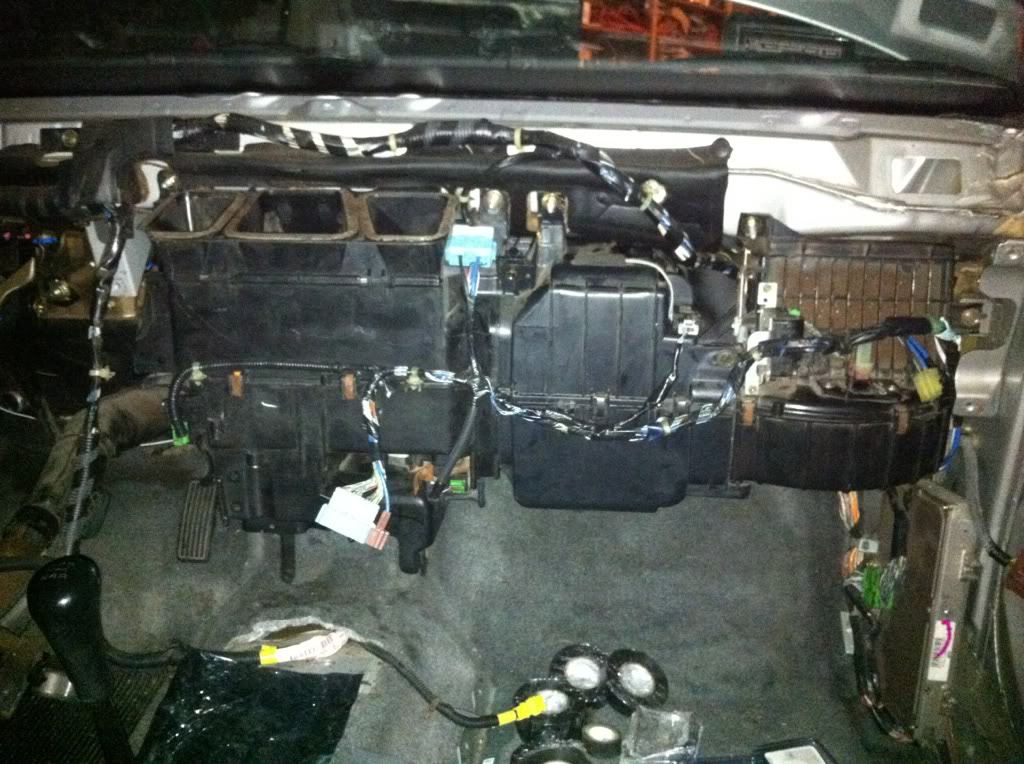
So i wrapped up the engine bay, AC is back in, battery is back in, O2 sensors are back in, just that 1 bolt for the heater core that goes through the firewall missing, ill try to find it tomorrow or buy a new one. Will also refill coolant and recharge AC system tomorrow when i can start the car.
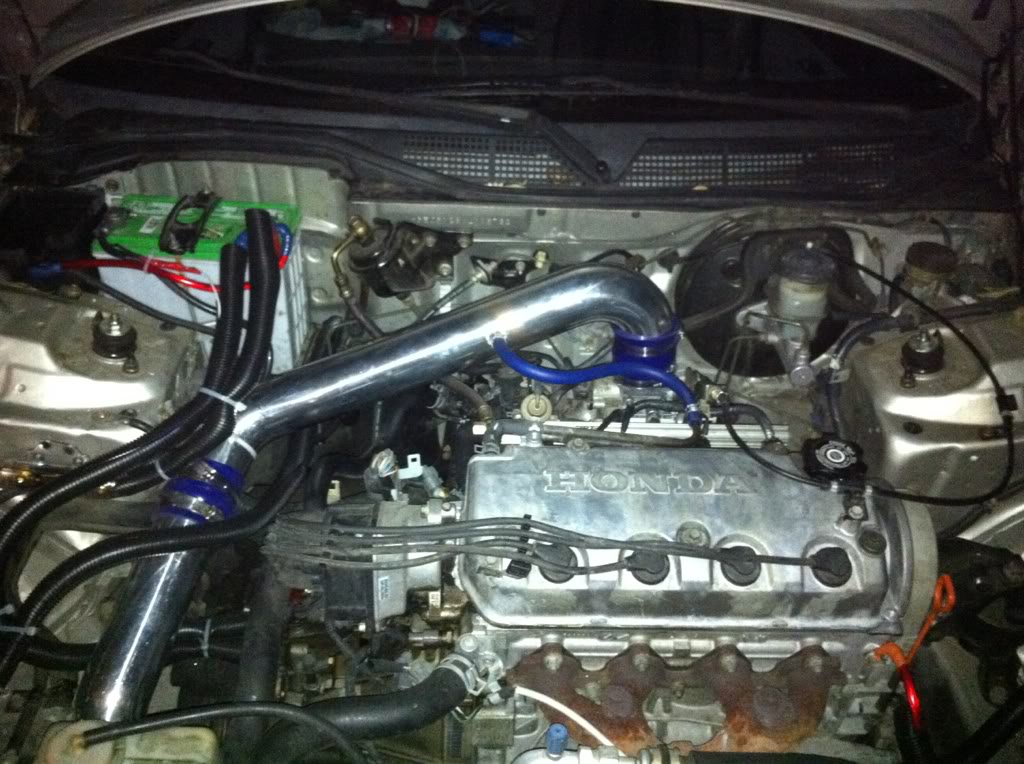
Working on new dash now, putting in vent, gluing climate control down, finishing painting the airbags (hairdryer time) then I will throw the dash in, probably tomorrow so i can do some homework tonight. All the lose plugs are intimidating, i just hope i can find where to plug everything in haha and i dont end up with a bunch of loose wires... Ill make kill switch when everything is together, more worried about having the fuel pump kill anyway.
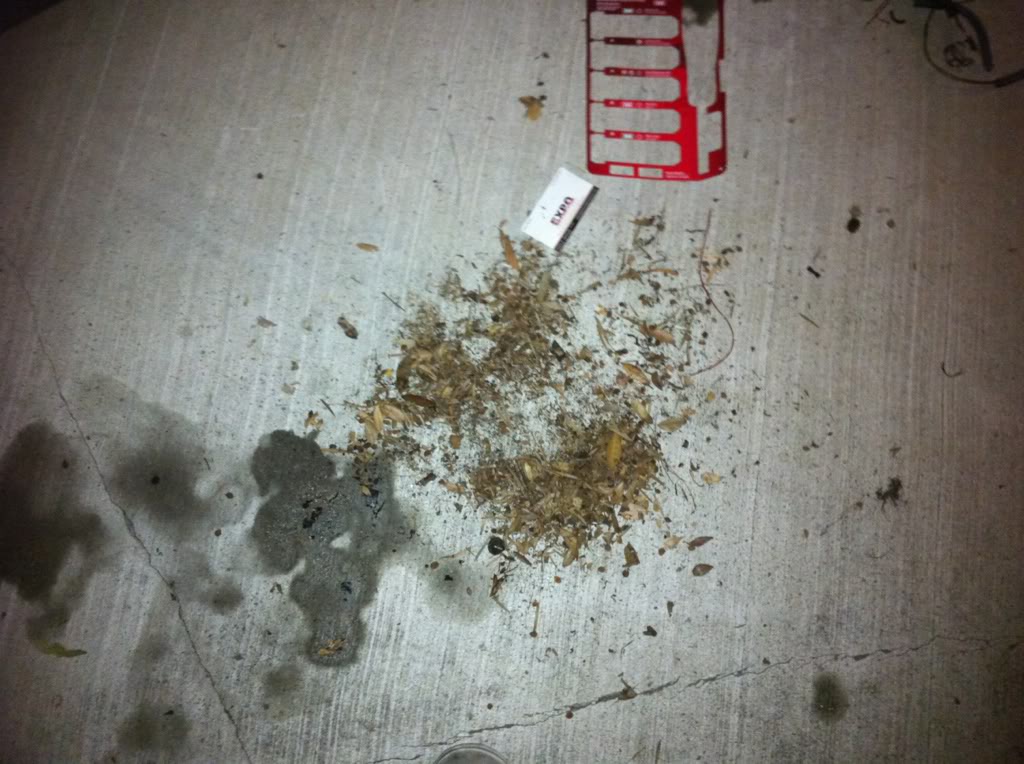
Here is some of the stuff i got out of my heater blower, no wonder it was so loud....
Then I tossed the heat blower back in...
I ended up with a cable that plugged into the heats back and two on the front, but on the new harness the wire that plugged into the front was the wrong plug, and the one that did fit had a relay on it, so I took the relay off and plugged it in, but now i have this other 3 prong plug that has nothing to plug into....
I had to make the AC wire longer, like all the walk throughs said...
The heater unit is all in perfect (close enough) besides that one spare plug (driving me crazy) but since I have no way to really test it, we will have to see what happens.......
So i wrapped up the engine bay, AC is back in, battery is back in, O2 sensors are back in, just that 1 bolt for the heater core that goes through the firewall missing, ill try to find it tomorrow or buy a new one. Will also refill coolant and recharge AC system tomorrow when i can start the car.
Working on new dash now, putting in vent, gluing climate control down, finishing painting the airbags (hairdryer time) then I will throw the dash in, probably tomorrow so i can do some homework tonight. All the lose plugs are intimidating, i just hope i can find where to plug everything in haha and i dont end up with a bunch of loose wires... Ill make kill switch when everything is together, more worried about having the fuel pump kill anyway.
Here is some of the stuff i got out of my heater blower, no wonder it was so loud....

Thread Starter
|
HCF Member
Joined: Mar 2011
Posts: 485
From: Los Angeles
today i got some work done!
well last night i finished the dash, i used my vents cause they were black while the new dash was grey trim... i put a cruise control in even though i dont have it lol
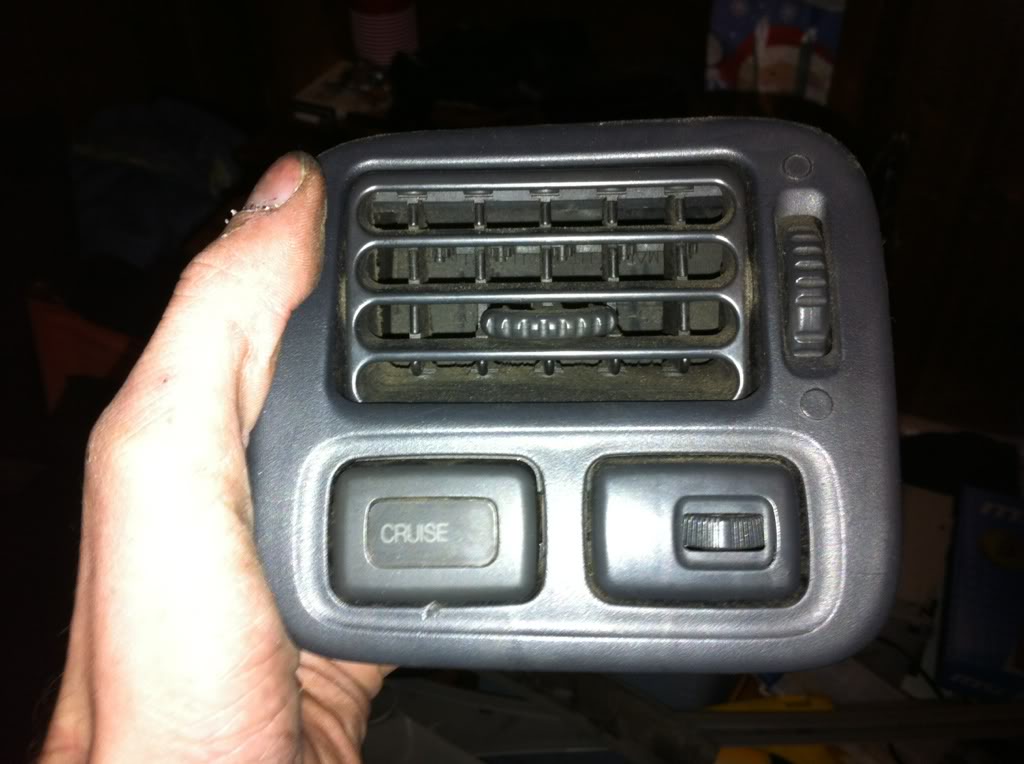
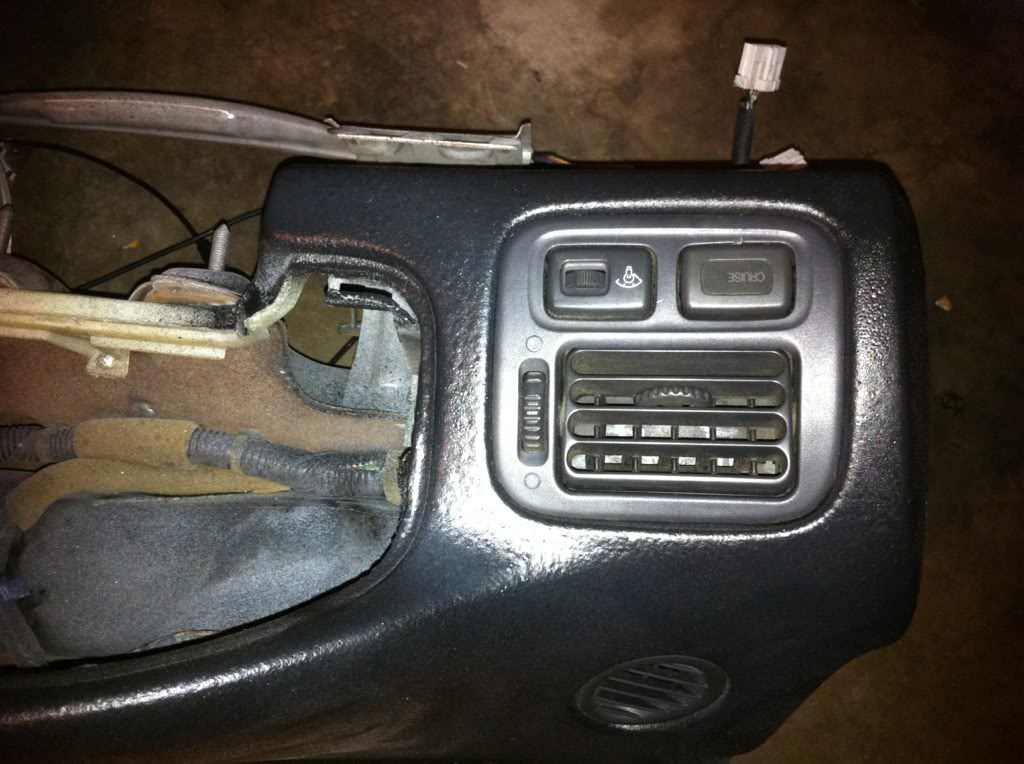
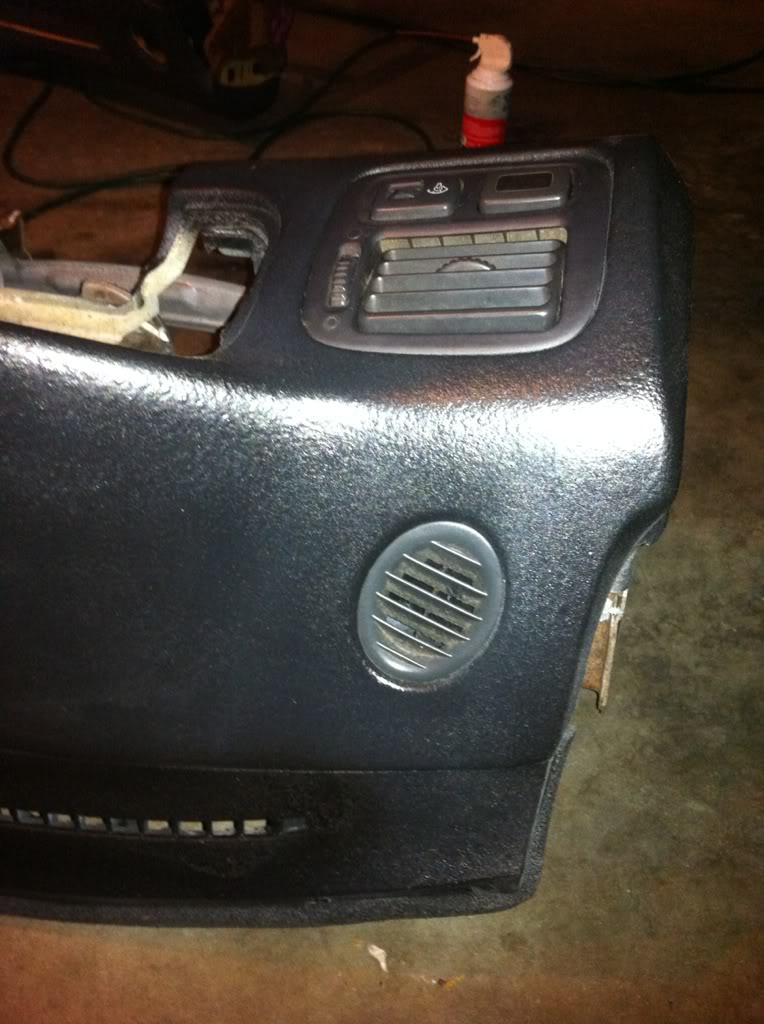
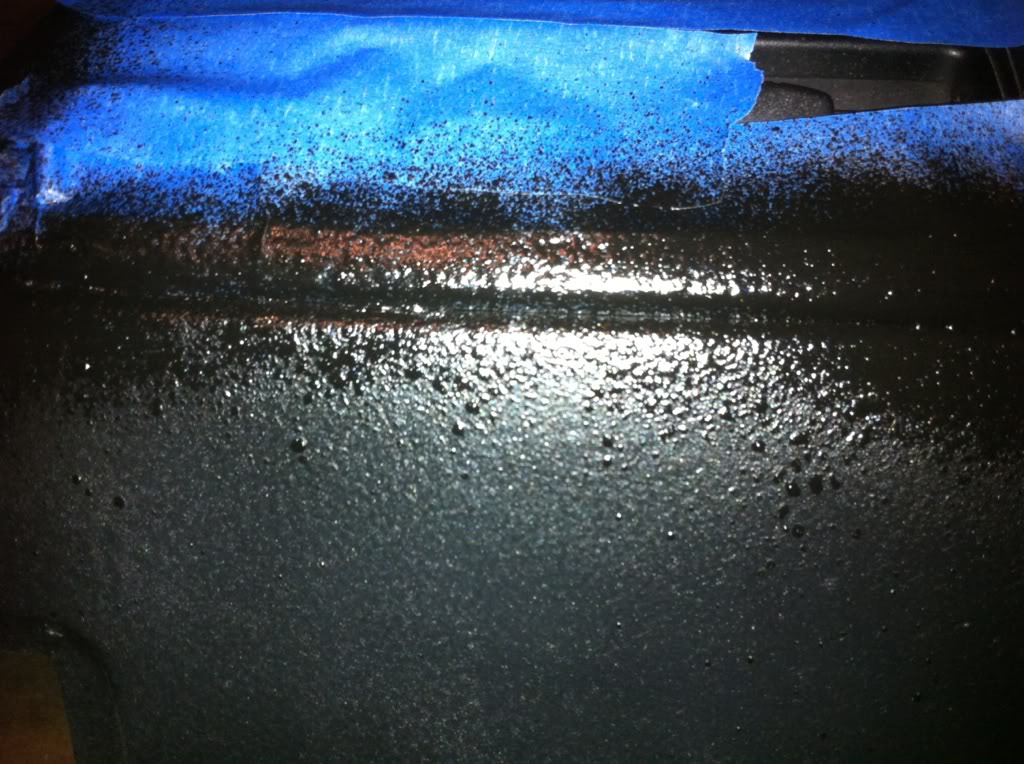
glued the climate control on and used a little touch up paint around the sides...
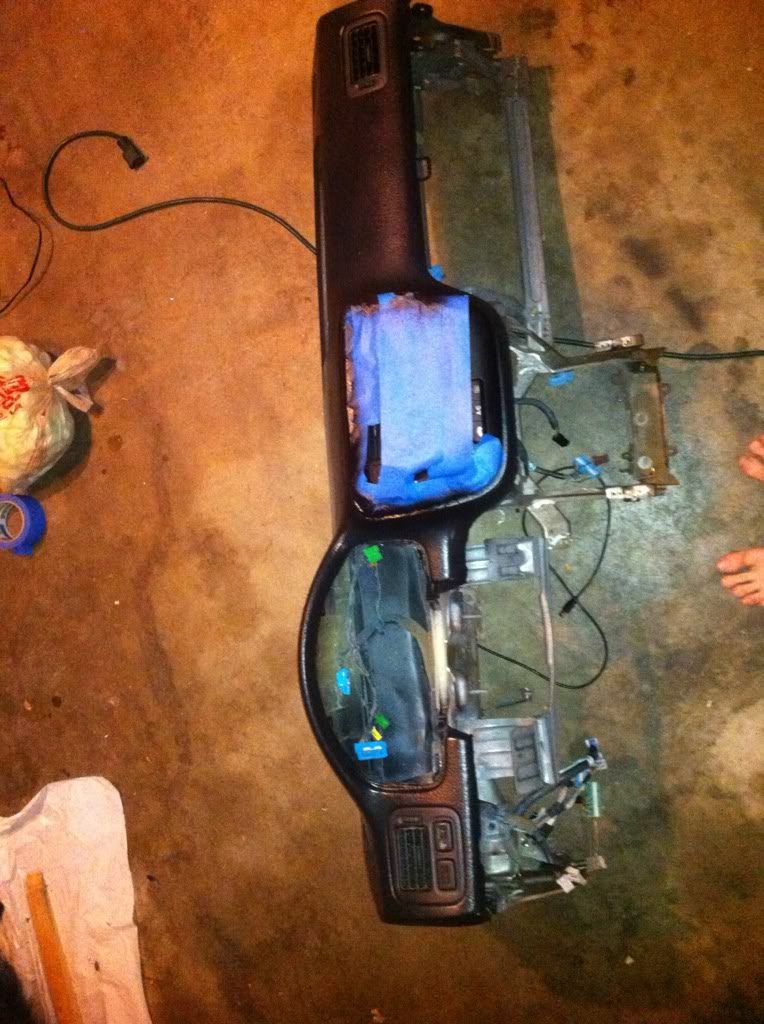
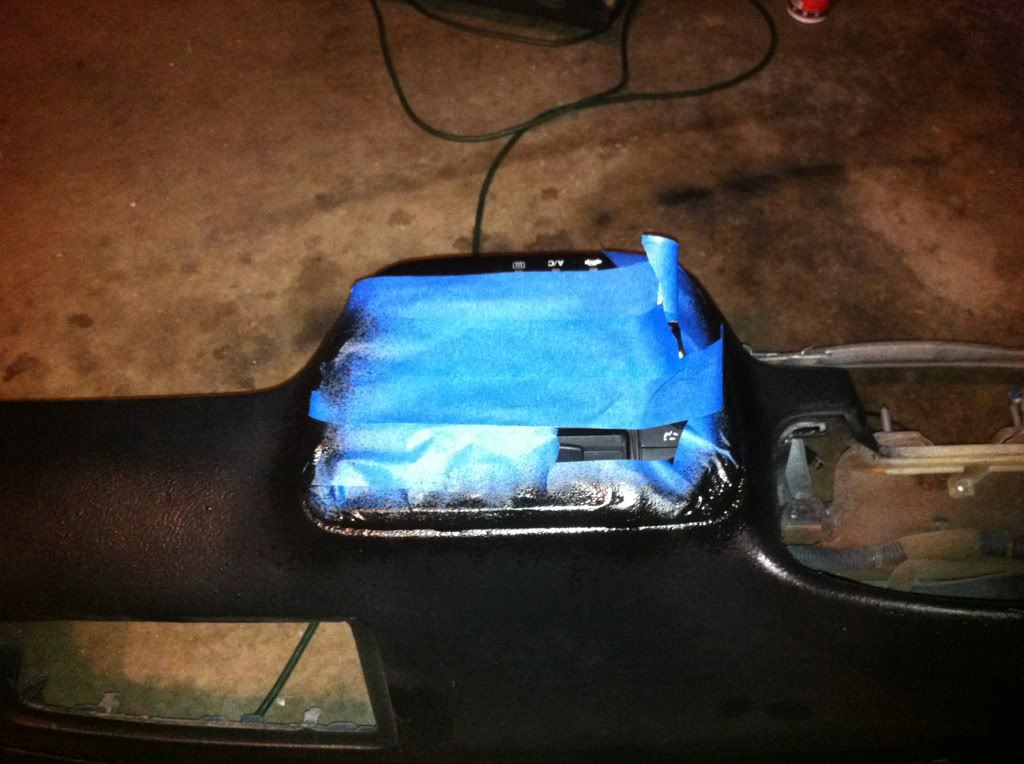
still wet
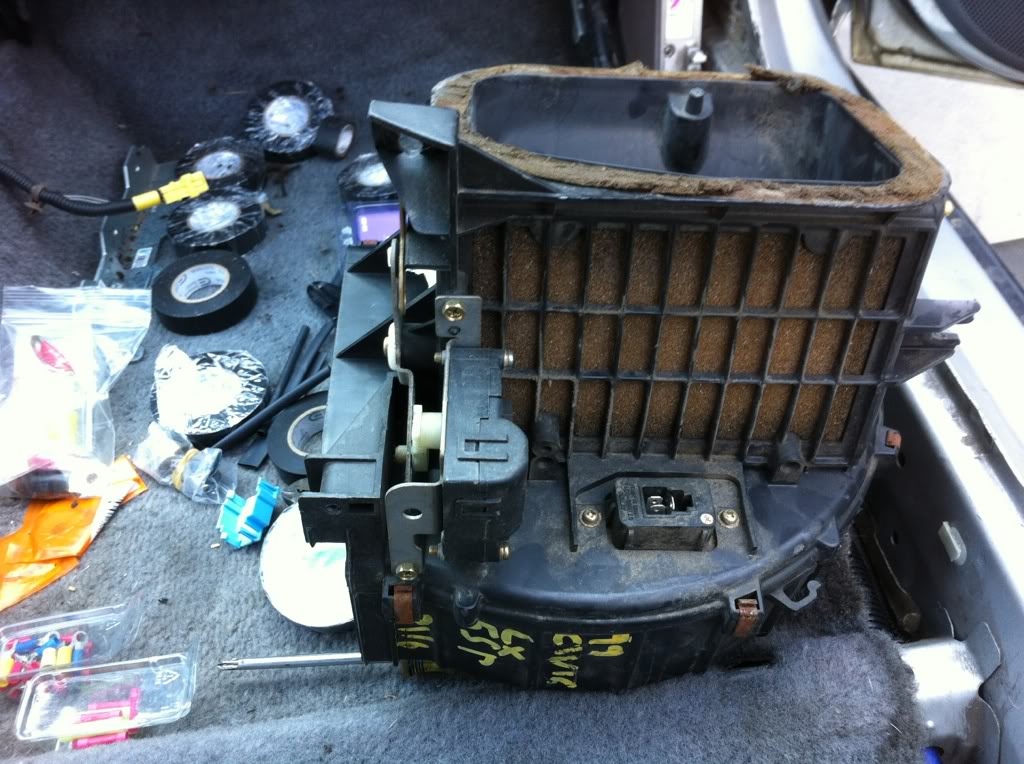
had to go buy a heater blower......... and take out my AC and heater blower and then replace again, was not too bad, thank god i did not have to take those heater core hoses off again, i dont know what i would have done........
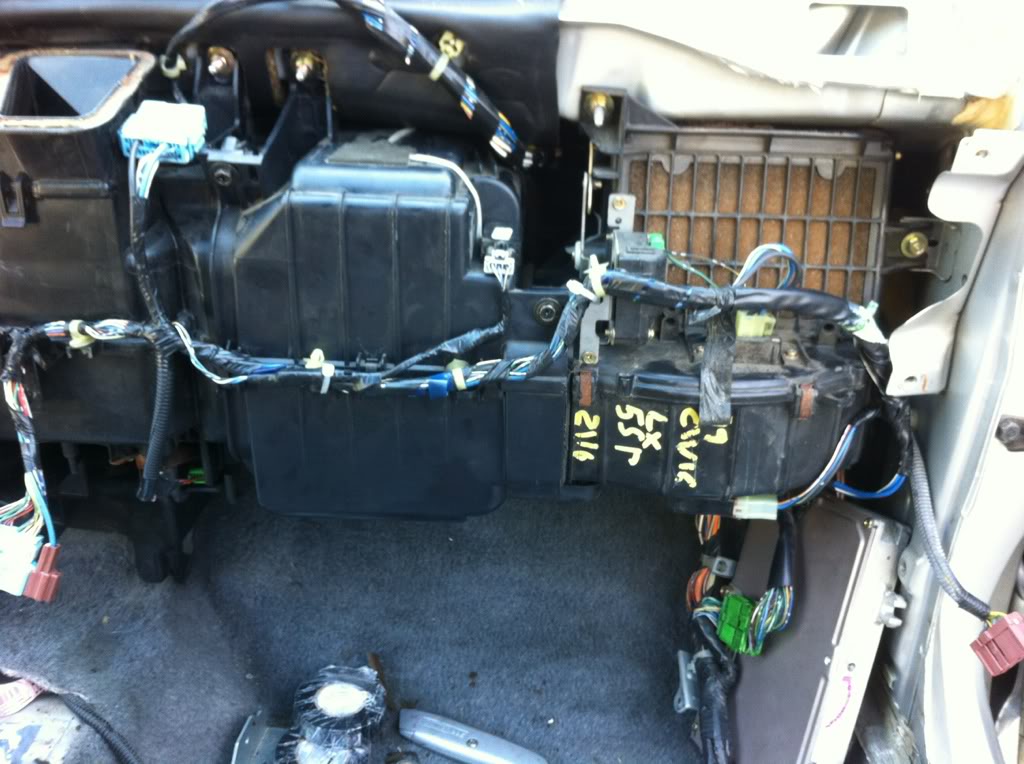
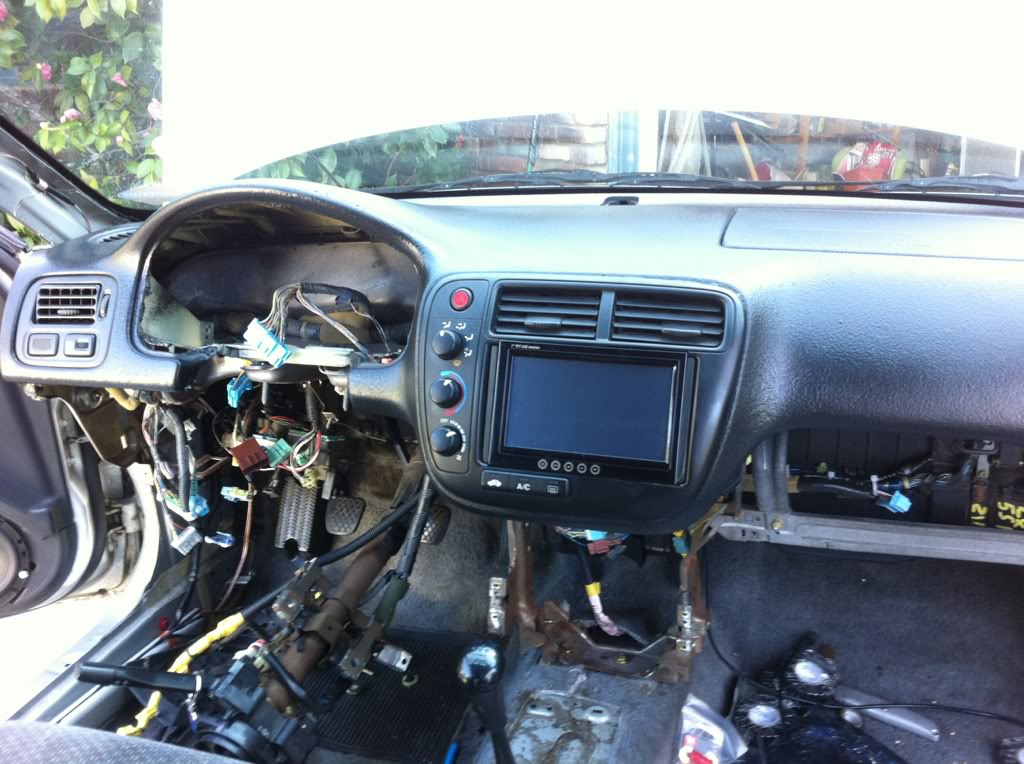
clicked the dash in, i have 1 screw i didnt find the stop for -_- oh well.... ill just hold onto it for now:
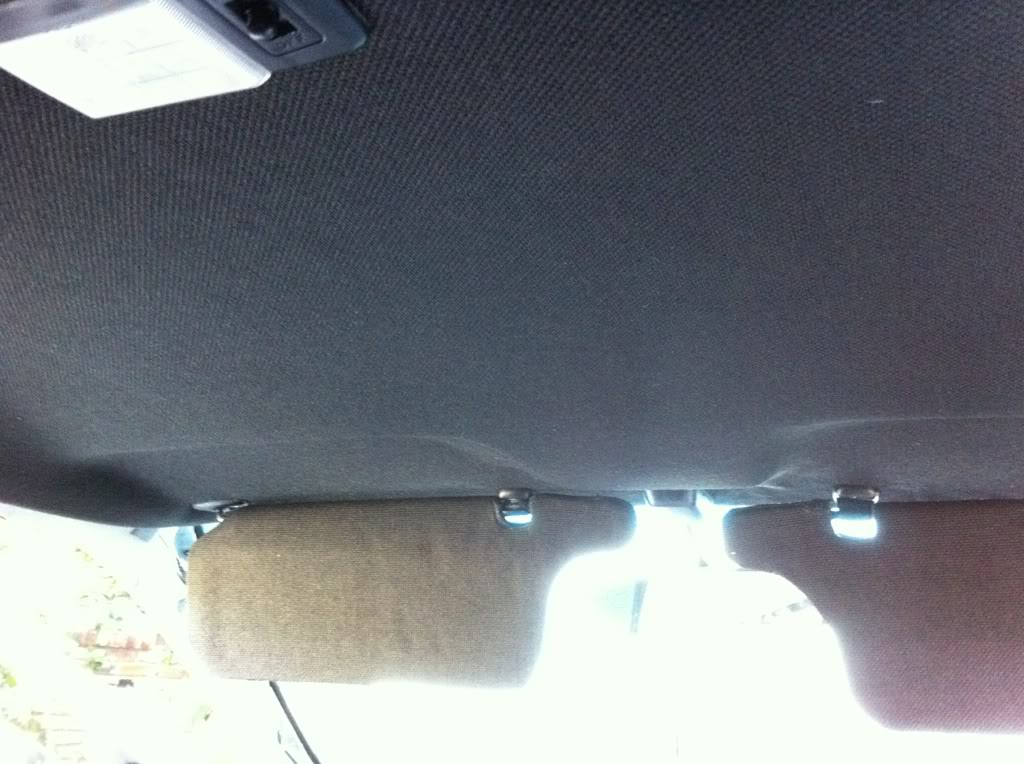
then i put the roof and its trim on, snapped the new passenger visor clip already hahaha, but mine just popped on no problem, passenger side was crazy hard... now my dome light door option does not work...
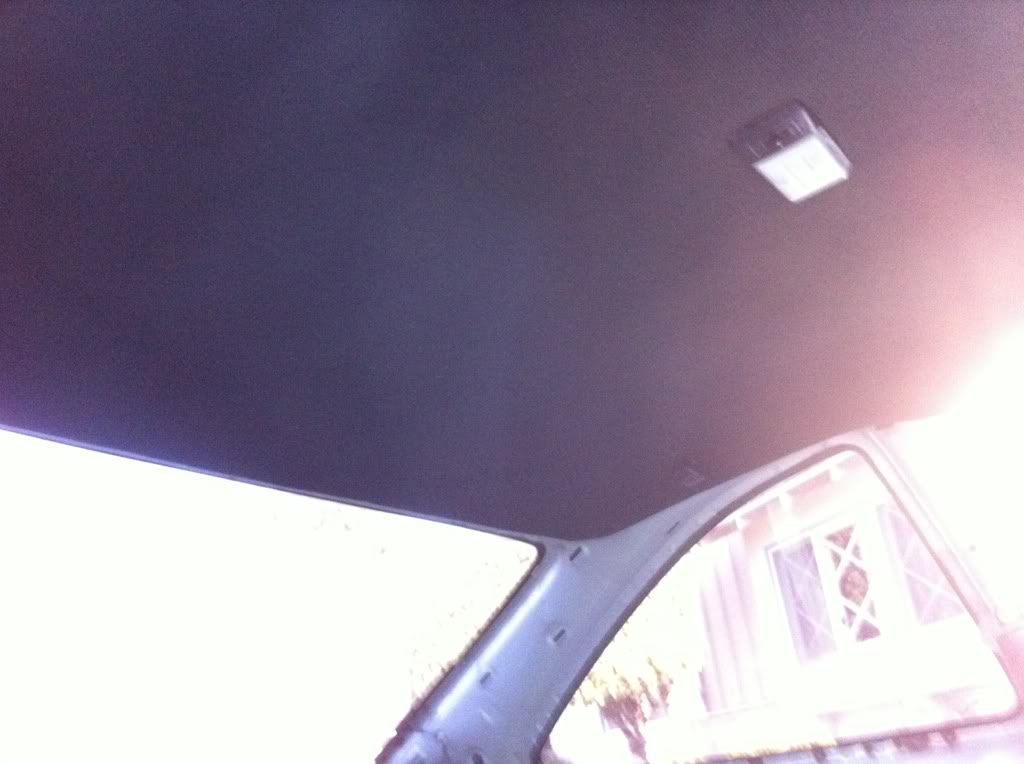
at this point i started up the car and tried the climate control...
here is a short video
all the rest of the trim is easy for the most part, stuffing wires has made it a little harder... but its coming out fine...
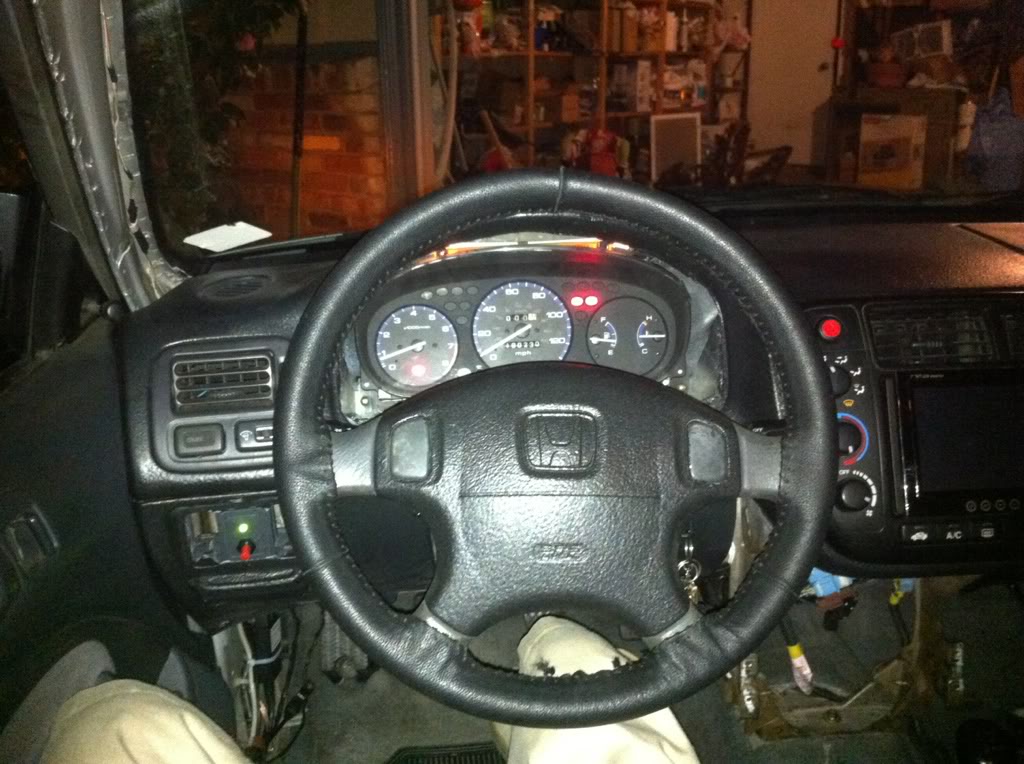
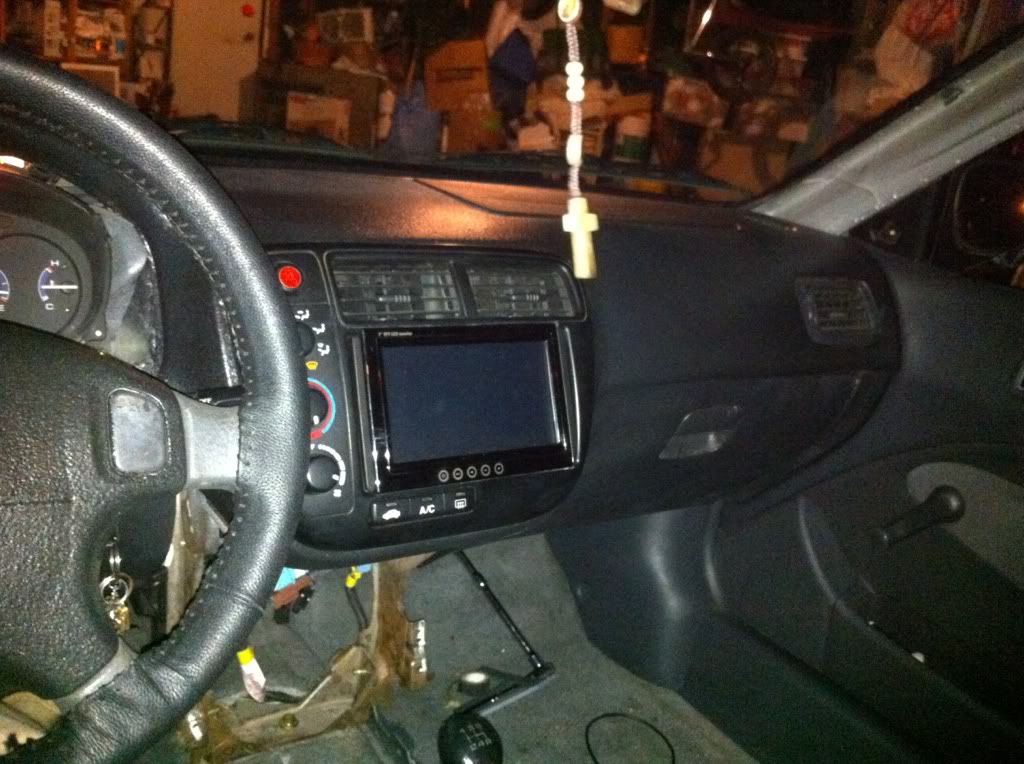
computer is all hooked up and working great, seems to need power sometimes, i hope the capacitors will help, i know i think i should get a high output alternator but i am pretty broke right now hahah (i have some stuff for sale though!)
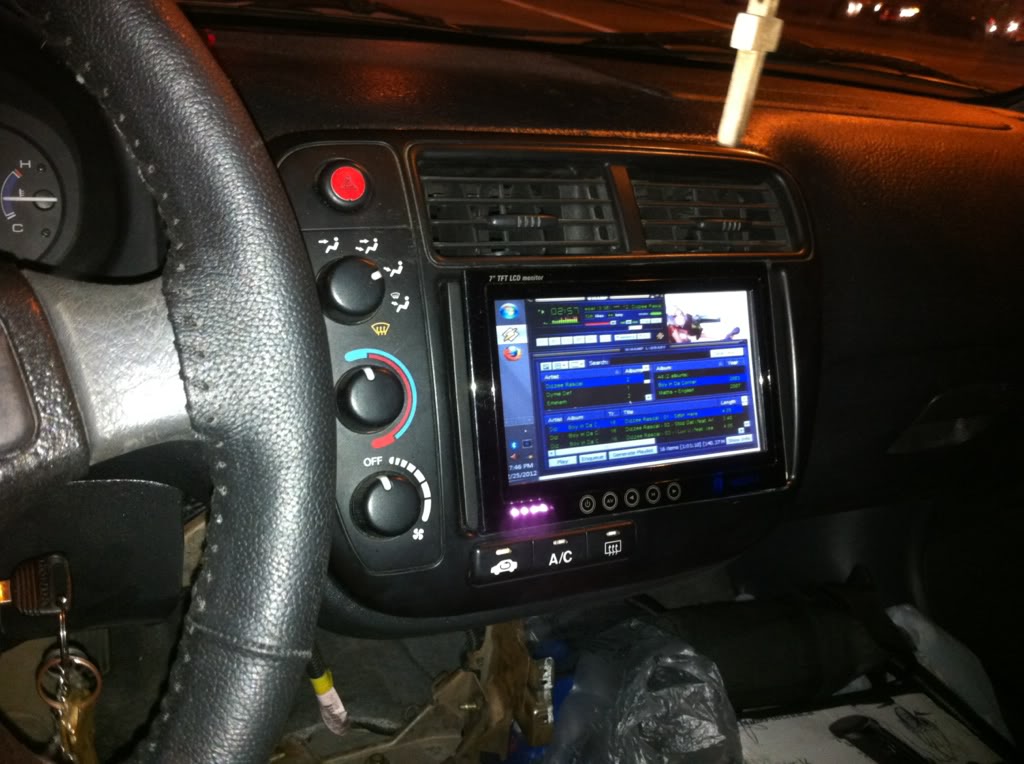
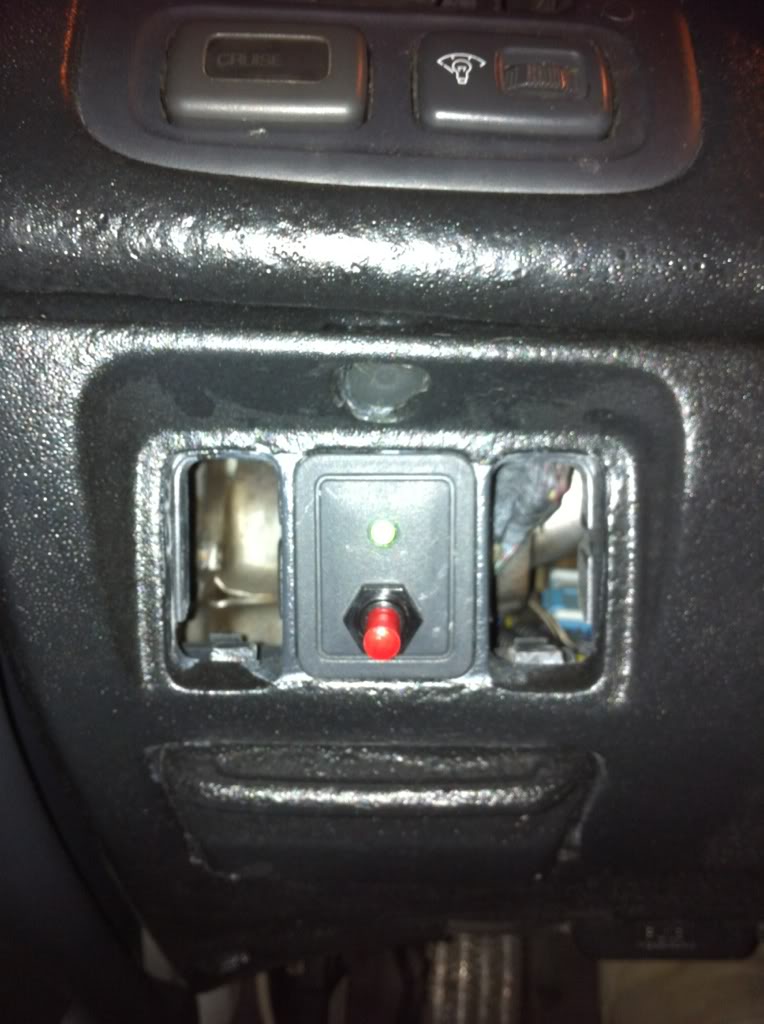
one switch in, remaking the amp switch, i might make the other one for the inverter...
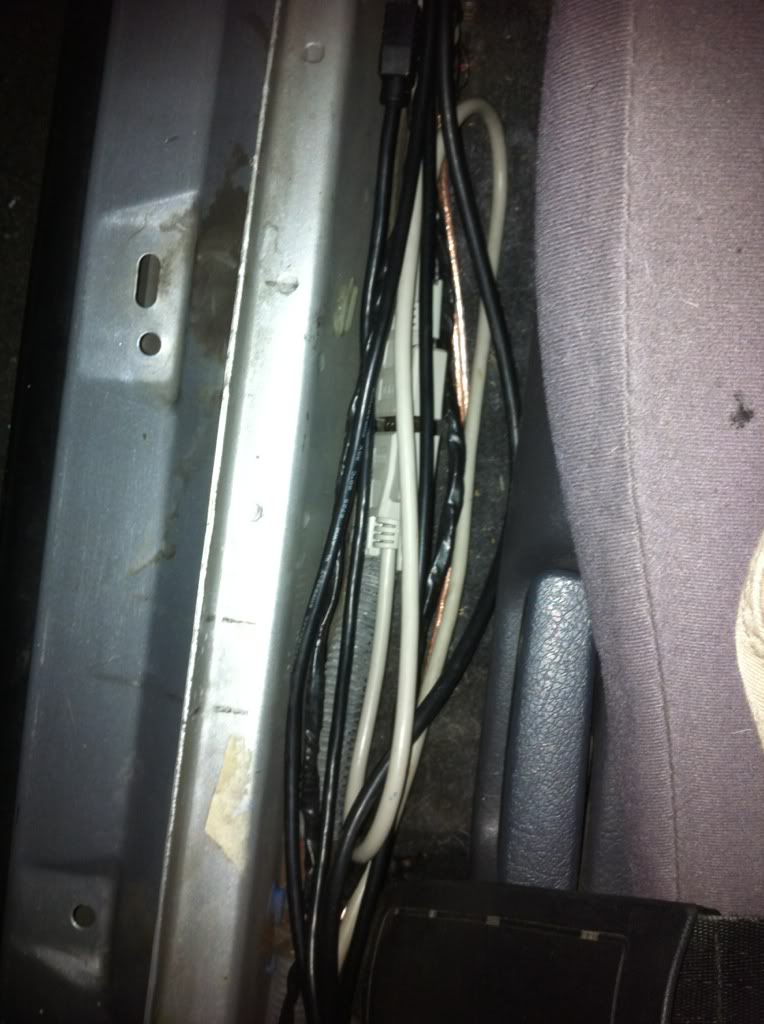
lots of wires...
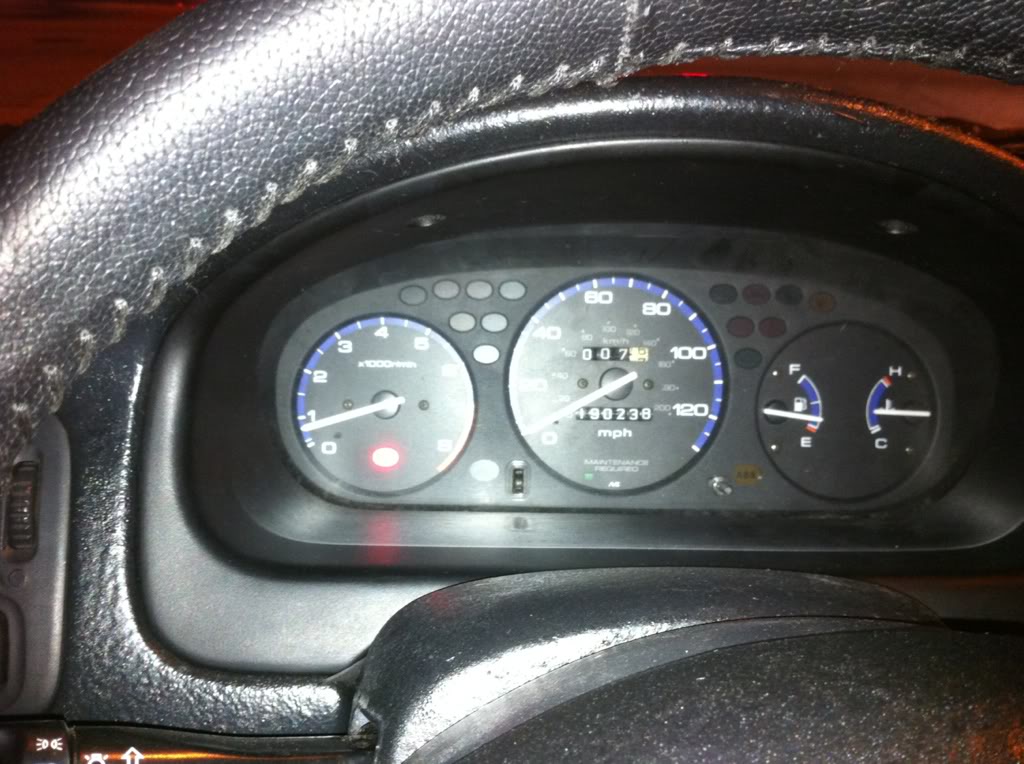
something rattles somewhere, in the dash by driver side so ill have to find that... dome light does not work on door option... need to make ignition kill switch... clean up wiring a little more and tape up connection points... put in the rest of the trim (i didnt paint the doors, rear panels, back panel (i will glue foam or fabric on this to stop rattling))... seats need to go in, ill finish trunk and rear seats next week... srs light stays on, so i need to look into that...
i am stoked on today though ahhahaha i love the electronic controls, and the screen is awesome, i just need to calibrate it right... not too hard of a swap, the paint and random other parts made me end up spending more money that i planned but all in all it was not too bad considering i replaced a lot of things at the same time... i still want del sol seats, and if i have enough paint i will still paint the rear panels but the doors will wait, my driver door has the wrong window regulator on the door so it has broken parts of the door from the tight fit, so that needs all to be replaced before i do anything with it...

Heh, I had a sunroof button for awhile. But it's an LX with no sunroof.
I looked into adding cruise control and it's crazy. There's the module itself, a different wiring harness, the switch, hooking up the pedal, getting a vacuum source... There are 7y intake manifolds with a little nipple on it for cruise control vacuum, and there are some that don't have it. It all seemed like it wasn't worth it.
I looked into adding cruise control and it's crazy. There's the module itself, a different wiring harness, the switch, hooking up the pedal, getting a vacuum source... There are 7y intake manifolds with a little nipple on it for cruise control vacuum, and there are some that don't have it. It all seemed like it wasn't worth it.
Thread Starter
|
HCF Member
Joined: Mar 2011
Posts: 485
From: Los Angeles
wonderful news!
oil is randomly low, engine over heating, coolant line under the distributor is spraying coolant everywhere and coolant is leaking.
Although it isnt the actually line i replaced when replacing the heater core, it is a line in series with the one i replaced, so I fear maybe i made it too tight or too loose and in turn messed up this other line. or maybe i just didnt bleed the coolant enough. Either way i am just gonna work on the kill switches and put back the rest of the interior trim today and tomorrow and then take the car to my mechanic on monday unless i can find an easy fix for the problem.
I almost just want to replace the distributor and its seals then replace the line that is leaking, but seeing as I am broke right now and my mechanic will let me charge any work to an account ill probably just go that route...
oil is randomly low, engine over heating, coolant line under the distributor is spraying coolant everywhere and coolant is leaking.
Although it isnt the actually line i replaced when replacing the heater core, it is a line in series with the one i replaced, so I fear maybe i made it too tight or too loose and in turn messed up this other line. or maybe i just didnt bleed the coolant enough. Either way i am just gonna work on the kill switches and put back the rest of the interior trim today and tomorrow and then take the car to my mechanic on monday unless i can find an easy fix for the problem.
I almost just want to replace the distributor and its seals then replace the line that is leaking, but seeing as I am broke right now and my mechanic will let me charge any work to an account ill probably just go that route...
Thread Starter
|
HCF Member
Joined: Mar 2011
Posts: 485
From: Los Angeles
Overheating was a busted hose from heater core to engine, the only one I didnt replace (only one you dont have to take off). I just cut and shortened it and really bleed the coolant. No more problems! For now...
So in the mean time Ill just keep on keeping on.
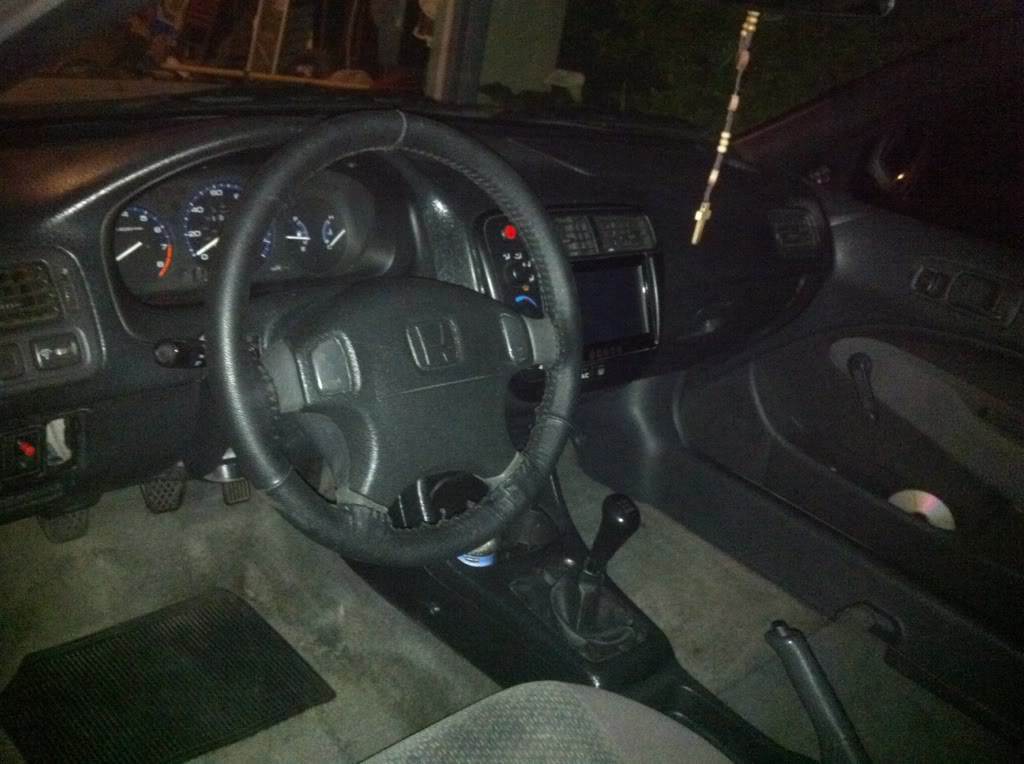
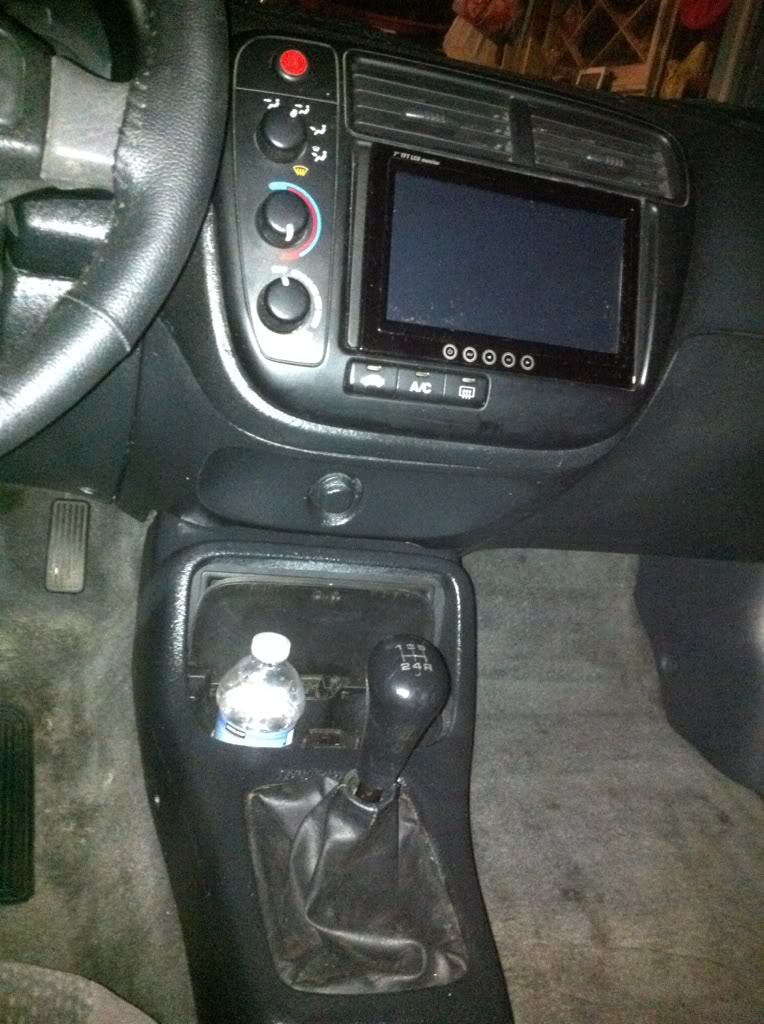
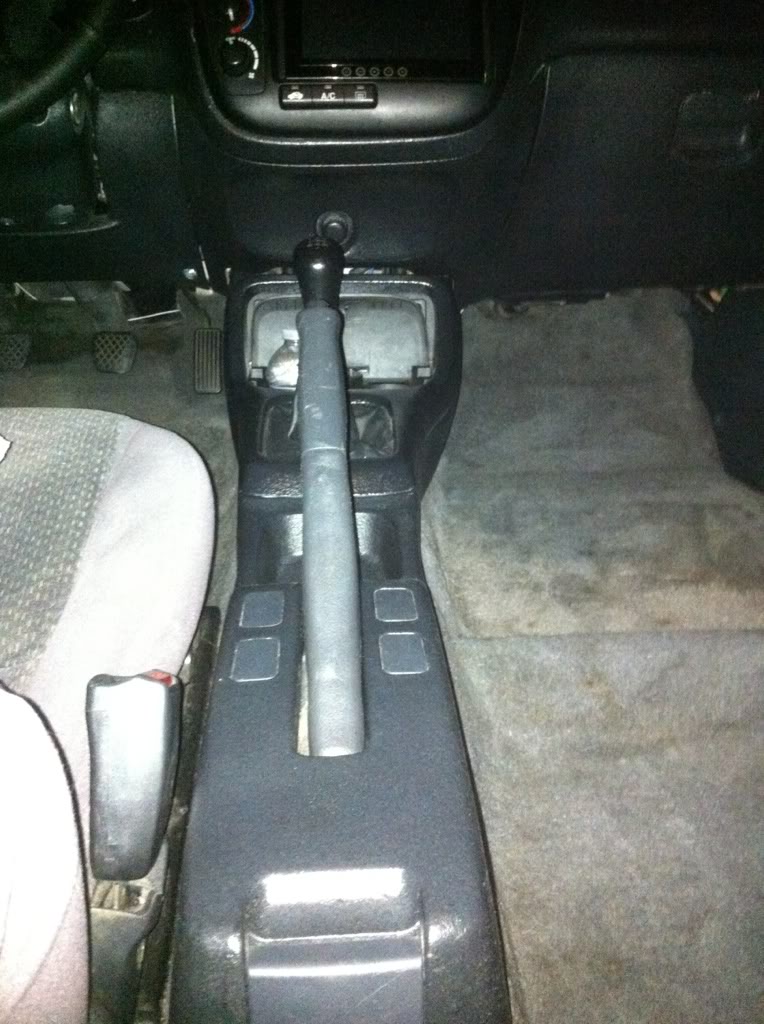
Finished putting together the front interior, except the passenger seat (im growing attached to not having it for the room haha). Wires are hard to fit so a few things bulge a little, but hardly noticeable. here are some pics of the inside.
overall:
cup holders/e-brake/climate control:
front driver area/a-pillar/cluster:
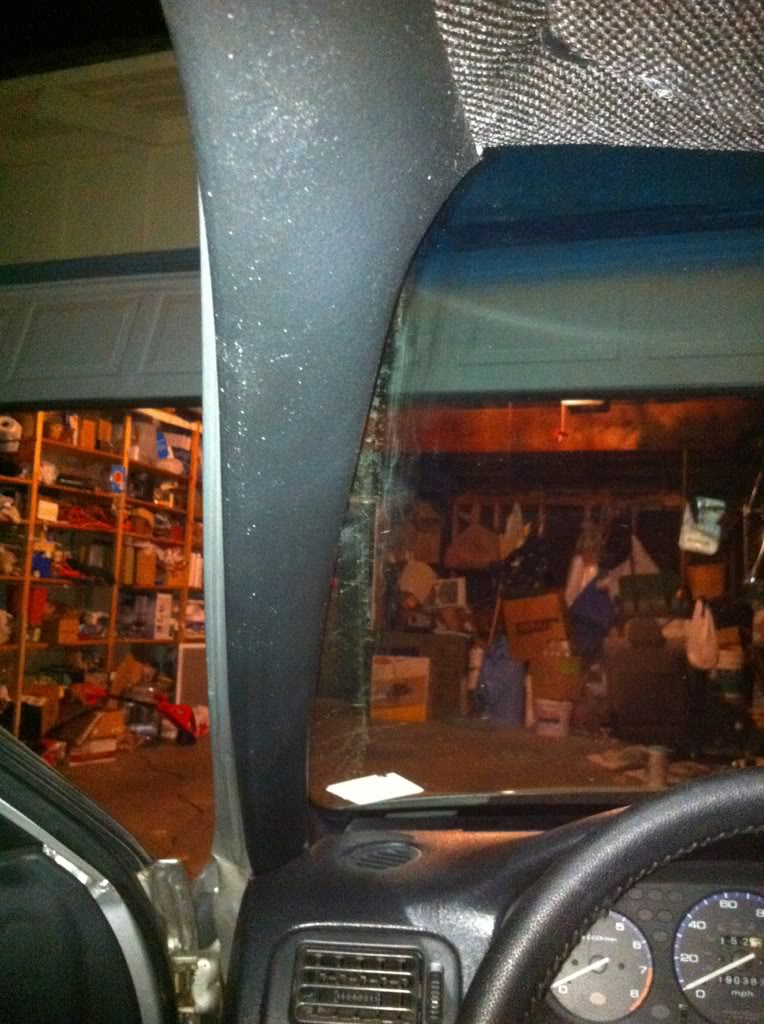
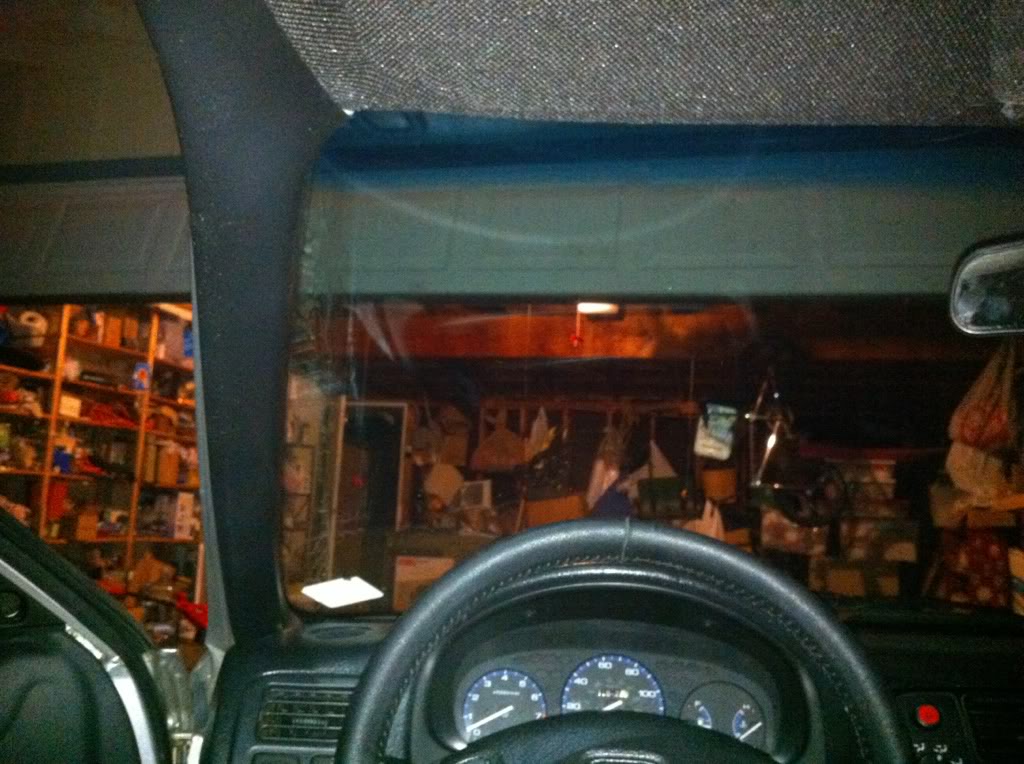
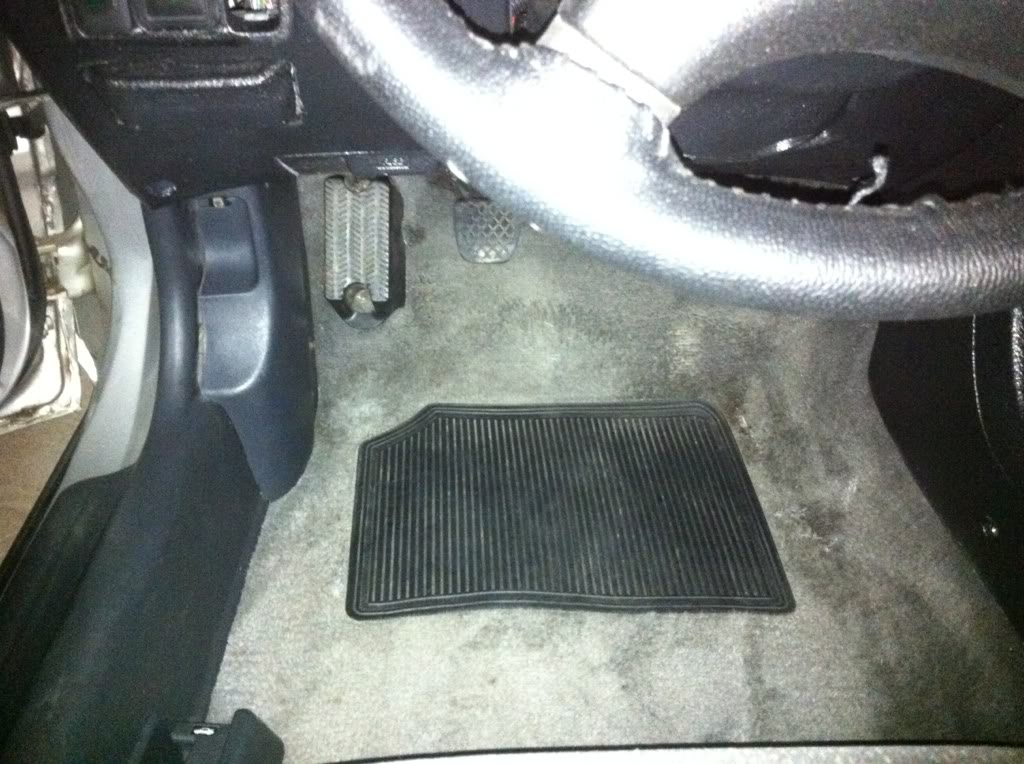
driver side floor (i have new black floor mats that will go in very last/returned the dash cover, was not impressed by it):
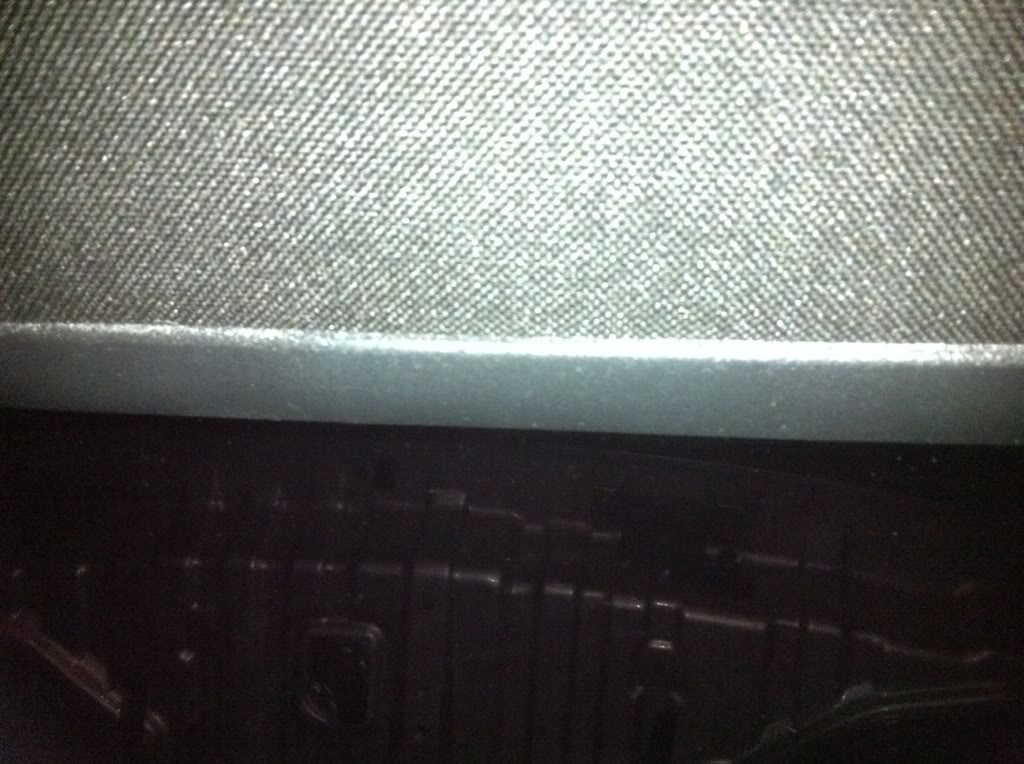
rear roof liner (covers headliner-rear window):
Happy with the inside now, started using Centrafuse for display on pc (awesome program, a little pricey but oh well). All i need to do is wire a switch for the inverter power, get a couple more usb splitters, there is one empty usb under the dash that i will split and make 2 empty usb ports on the switch ports on the e-brake. Also need to split a usb at the actual PC for the bluetooth/wifi accessories. Possibly wire a AUX 3.5mm jack for plugging in mp3 players and what not. added a valet switch type thing, was going to do a kill switch but i changed it up, there is a kind of low key spring button in the front diver area, that button needs to be held down to complete the ignition circuit, maybe ill make it a key switch or something one day, but that with the fuel pump kill switch that actually needs a key, I think ill be a bit safer for now, until I wire up a real alarm/gps tracking. Other than all that I will just finish up the rear seats tomorrow, looks like ill be leaving the trunk a mess for now, since i have a few new ideas of how to tidy it up, which will require me to wait till I have money, but everything is functional so im not bothered leaving it a mess for now. Just want the interior to be complete when i take the car to the mechanic. horn is working fine now, looking like i just need to reset the SRS light which i have a feeling my mechanic can handle for me so i wont have to.
So in the mean time Ill just keep on keeping on.
Finished putting together the front interior, except the passenger seat (im growing attached to not having it for the room haha). Wires are hard to fit so a few things bulge a little, but hardly noticeable. here are some pics of the inside.
overall:
cup holders/e-brake/climate control:
front driver area/a-pillar/cluster:
driver side floor (i have new black floor mats that will go in very last/returned the dash cover, was not impressed by it):
rear roof liner (covers headliner-rear window):
Happy with the inside now, started using Centrafuse for display on pc (awesome program, a little pricey but oh well). All i need to do is wire a switch for the inverter power, get a couple more usb splitters, there is one empty usb under the dash that i will split and make 2 empty usb ports on the switch ports on the e-brake. Also need to split a usb at the actual PC for the bluetooth/wifi accessories. Possibly wire a AUX 3.5mm jack for plugging in mp3 players and what not. added a valet switch type thing, was going to do a kill switch but i changed it up, there is a kind of low key spring button in the front diver area, that button needs to be held down to complete the ignition circuit, maybe ill make it a key switch or something one day, but that with the fuel pump kill switch that actually needs a key, I think ill be a bit safer for now, until I wire up a real alarm/gps tracking. Other than all that I will just finish up the rear seats tomorrow, looks like ill be leaving the trunk a mess for now, since i have a few new ideas of how to tidy it up, which will require me to wait till I have money, but everything is functional so im not bothered leaving it a mess for now. Just want the interior to be complete when i take the car to the mechanic. horn is working fine now, looking like i just need to reset the SRS light which i have a feeling my mechanic can handle for me so i wont have to.
Last edited by Turtlegrip; Mar 7, 2012 at 05:08 PM.
Thread Starter
|
HCF Member
Joined: Mar 2011
Posts: 485
From: Los Angeles
edit: forgot to mention that car is running great since i fixed the busted hose causing overheating, except i still need to drive with headlights on or the engine bogs down, not stalling status but it is noticeable, specific noticeable when taking off from a stop since there is lag in take off. Looks/feels like my front left shock is blown, i have been told i drive a little bit aggressive but damn... oh well, that will have to do until i get coil overs, i can get some used ones from junk yard for like 50$ a whole set, they dont know miles on them so they sell them cheap (only until i can afford the real deal...)
So as the interior/pc project come to an end, I have started wondering what I will do with my time. And I decided that instead of looking at an engine swap, I think ill do a mini me and some tuning on my engine (d16y7). I still have a lot of research to do, but i am thinking a light bore, new pistons/rods, IM, fuel system, sri, exhaust conversion, ect. This is estimated to take probably about 6 months to a year, but i am pretty positive this is what i want to do. Then after all this i will throw in a turbo haha, ah the future...
Anyway, I have changed my first post to reflect the new plans. This is mainly to learn more about engines, and to make mine run like it did one day long ago. Ill start out by getting a full inspection of my engine soon to see what will need to be done to other various parts. If this all goes well I will probably definitely turbo is next year.
Outside of the number crunching I have a few concerns:
ODB1 vs ODB2, with my car PC i would imagine there are some programs out there that can make ODB2 viable...
Y8 vs Z6, I am leaning to Y8 because from what I understand it handles boost nicely and it is ODB2...
I will update as I start making lists of what I plan on getting. Also just about wrapped up on the current project, I will post a detailed video once I am completely done.
So as the interior/pc project come to an end, I have started wondering what I will do with my time. And I decided that instead of looking at an engine swap, I think ill do a mini me and some tuning on my engine (d16y7). I still have a lot of research to do, but i am thinking a light bore, new pistons/rods, IM, fuel system, sri, exhaust conversion, ect. This is estimated to take probably about 6 months to a year, but i am pretty positive this is what i want to do. Then after all this i will throw in a turbo haha, ah the future...
Anyway, I have changed my first post to reflect the new plans. This is mainly to learn more about engines, and to make mine run like it did one day long ago. Ill start out by getting a full inspection of my engine soon to see what will need to be done to other various parts. If this all goes well I will probably definitely turbo is next year.
Outside of the number crunching I have a few concerns:
ODB1 vs ODB2, with my car PC i would imagine there are some programs out there that can make ODB2 viable...
Y8 vs Z6, I am leaning to Y8 because from what I understand it handles boost nicely and it is ODB2...
I will update as I start making lists of what I plan on getting. Also just about wrapped up on the current project, I will post a detailed video once I am completely done.
Last edited by Turtlegrip; Mar 7, 2012 at 05:05 PM.
Thread Starter
|
HCF Member
Joined: Mar 2011
Posts: 485
From: Los Angeles
So I figured I would do a few updates.
I have been putting together lists of possible parts, and I have found some really great build threads that I will probably end up following as closely as I can since there are records of them working. But in the mean time there are quite a few things I need to take care of before I can seriously think about rebuilding my engine.
First of all I got a compression and leak down test. Everything came out pretty much as close to perfect as a car this old could be. So that is off my shoulders and I started looking at everything else.
Brakes squealing like a motha so I swapped them out and it turns out the rear drums are bad. So I am pretty sure I am just gonna swap them out for discs from the front of a gsr, and get front gsr brakes at the same time if possible. I hope driving with squealing drums will not be too bad for a while, I am almost certain they are no longer round, so I would rather upgrade than swap out the whole drum for another ****ty drum.
The random overheating may have been finally solved. A CEL FINALLY!! hahaha irony... Anyway it was p0118 (ECT sensor), so i replaced the ECT sensor, thermostat, fan switch (also did the fuel filter while in there). And the car is not overheating anymore, so far, but with those swapped and new tubing in engine bay and new water pump/radiator I cannot imagine having more problems (knock on wood), unless the heater core I got is bad or something. Running all water so I need to swap it out for coolant soon, assuming I do not run into more problems (sick of draining out relatively expensive coolant.
The engine still starts like crap... Turns a few times and then starts at ~100 RPM, you cannot even tell the car is running until I hit gas, otherwise the car dies... But after I hit the gas it runs amazing... Gonna swap out the spark plugs and wiring soon and hope it is not the distributor. I am not 100% but I think my y7 distributor will work on a y8.. If so I have no problem replacing it, but I will see what happens. The crap start is kind of embarrassing with the rest of the inside looking nice... Someone asked me if I would trade all the inside for a nice engine, I said yes for a B16B...
Another issue I have is my badly crack exhaust, I refuse to sit and idle and I have the air recycle always on in the car. So this is the first thing I will replace granted no immediate problems happen with the car. Looking at a Megan 4-1 (i know it is cheap, but seems to be decent for the price, I could go through 3 of these and still be more worth it than buying a very nice header) then a high flow cata, and a RSR ExMag (i really like the sound and want one that will last). Looking forward to getting that in at the start of summer, then the head and various parts will start being purchased at the end of summer.
Outside of those issues the car is running like a champ. School is getting a little more intense as the semester tolls on. I am so broke it is not even funny... And I have been owning everyone on n64 smash bro in my car!
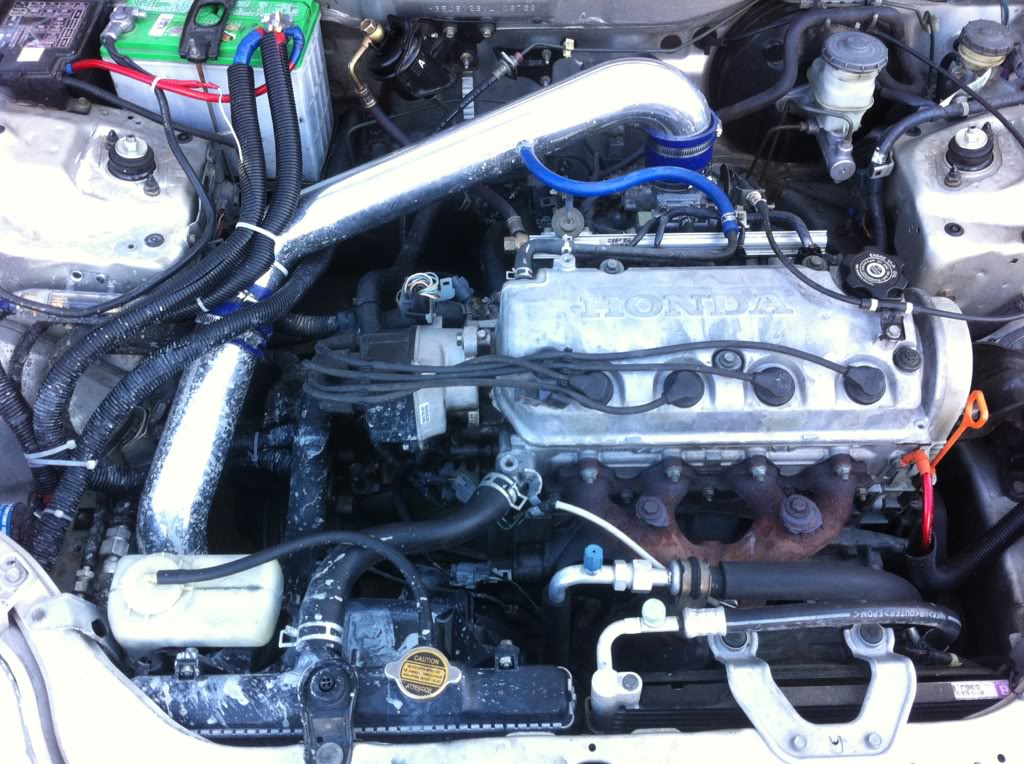
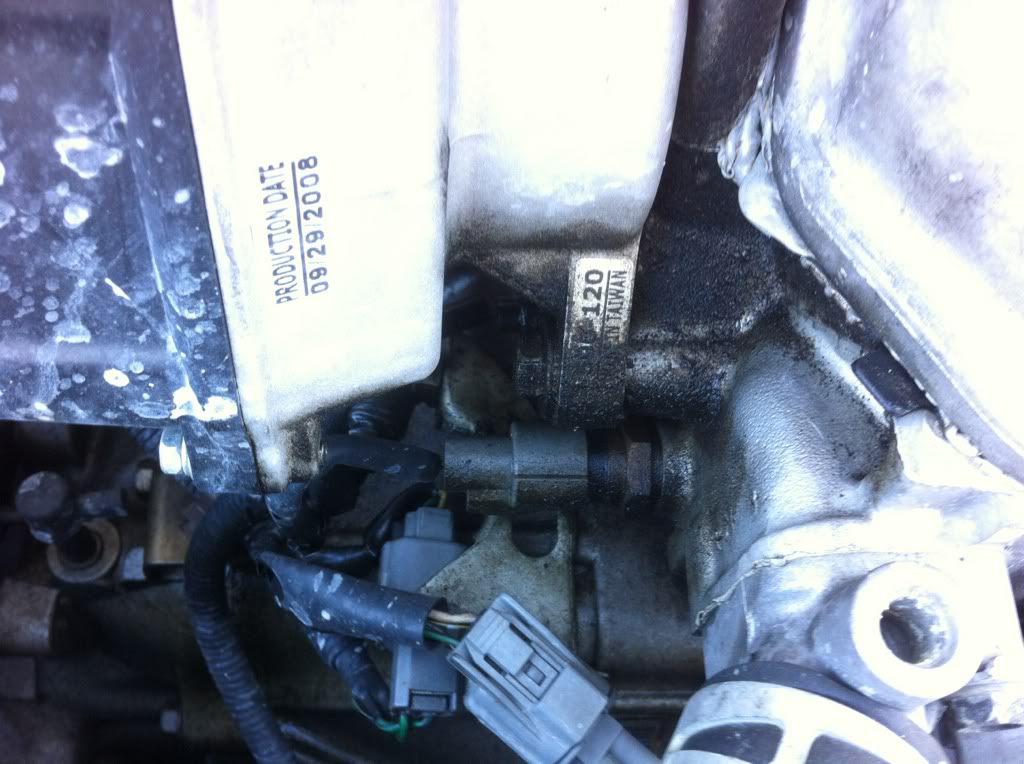
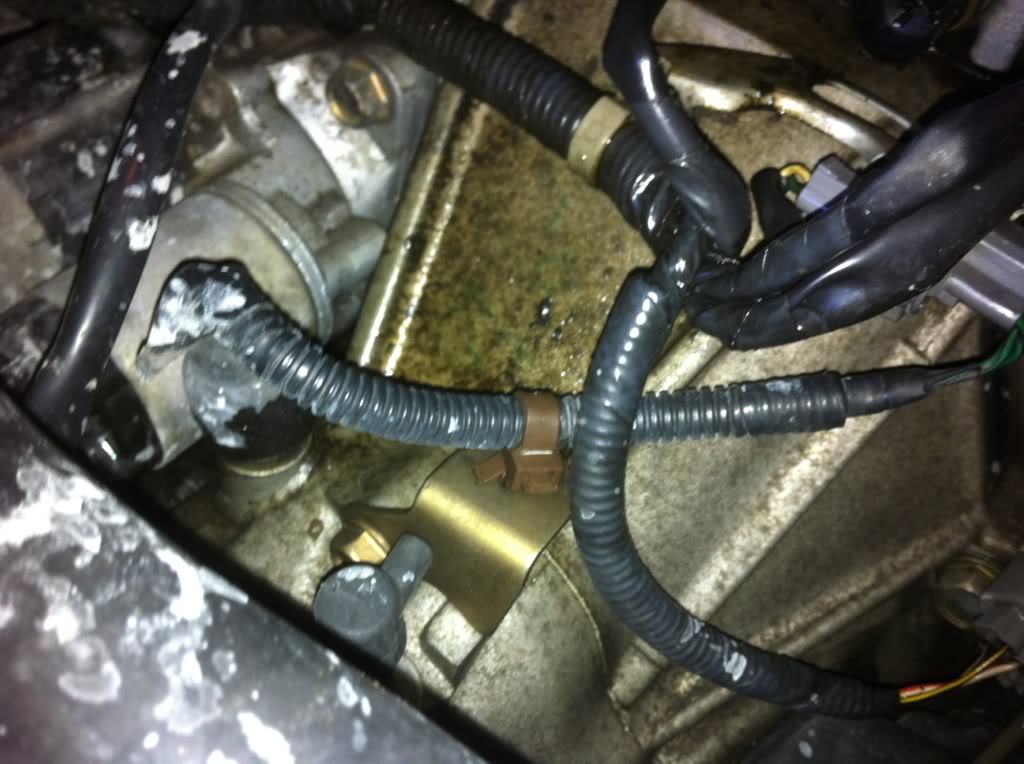
Update is just for all the sensors being swapped. And to remind me of future updates and the order I have planned and what not. Here are some engine bay pics, I degrease it and I think that is what might have blown a few sensors, and then the radiator resinous overflowed and made everything nasty again!
I have been putting together lists of possible parts, and I have found some really great build threads that I will probably end up following as closely as I can since there are records of them working. But in the mean time there are quite a few things I need to take care of before I can seriously think about rebuilding my engine.
First of all I got a compression and leak down test. Everything came out pretty much as close to perfect as a car this old could be. So that is off my shoulders and I started looking at everything else.
Brakes squealing like a motha so I swapped them out and it turns out the rear drums are bad. So I am pretty sure I am just gonna swap them out for discs from the front of a gsr, and get front gsr brakes at the same time if possible. I hope driving with squealing drums will not be too bad for a while, I am almost certain they are no longer round, so I would rather upgrade than swap out the whole drum for another ****ty drum.
The random overheating may have been finally solved. A CEL FINALLY!! hahaha irony... Anyway it was p0118 (ECT sensor), so i replaced the ECT sensor, thermostat, fan switch (also did the fuel filter while in there). And the car is not overheating anymore, so far, but with those swapped and new tubing in engine bay and new water pump/radiator I cannot imagine having more problems (knock on wood), unless the heater core I got is bad or something. Running all water so I need to swap it out for coolant soon, assuming I do not run into more problems (sick of draining out relatively expensive coolant.
The engine still starts like crap... Turns a few times and then starts at ~100 RPM, you cannot even tell the car is running until I hit gas, otherwise the car dies... But after I hit the gas it runs amazing... Gonna swap out the spark plugs and wiring soon and hope it is not the distributor. I am not 100% but I think my y7 distributor will work on a y8.. If so I have no problem replacing it, but I will see what happens. The crap start is kind of embarrassing with the rest of the inside looking nice... Someone asked me if I would trade all the inside for a nice engine, I said yes for a B16B...
Another issue I have is my badly crack exhaust, I refuse to sit and idle and I have the air recycle always on in the car. So this is the first thing I will replace granted no immediate problems happen with the car. Looking at a Megan 4-1 (i know it is cheap, but seems to be decent for the price, I could go through 3 of these and still be more worth it than buying a very nice header) then a high flow cata, and a RSR ExMag (i really like the sound and want one that will last). Looking forward to getting that in at the start of summer, then the head and various parts will start being purchased at the end of summer.
Outside of those issues the car is running like a champ. School is getting a little more intense as the semester tolls on. I am so broke it is not even funny... And I have been owning everyone on n64 smash bro in my car!
Update is just for all the sensors being swapped. And to remind me of future updates and the order I have planned and what not. Here are some engine bay pics, I degrease it and I think that is what might have blown a few sensors, and then the radiator resinous overflowed and made everything nasty again!